Quick Summary
Use your nailer for crown molding by setting it to the correct power, using the right nails, and setting the depth just right for a seamless finish. This guide details the simple steps for effortlessly attaching crown molding with a nailer, ensuring a professional look with less struggle.
Ever stared at a roll of crown molding, thinking, “How on earth do I attach this perfectly without a million nail holes and a lopsided finish?” You’re not alone! Crown molding can look impressive, but getting it up neatly can feel like a huge challenge for DIYers. The good news is, with the right nailer and a few simple techniques, you can achieve that pro-level look without the headache. We’re going to walk through a super straightforward method that makes installing crown molding feel surprisingly effortless. Get ready to nail it!
Table of Contents
Why a Nailer is Your Best Friend for Crown Molding
When it comes to crown molding, precision and speed are key. While manual methods exist (and let’s be honest, they’re tough!), a nailer dramatically speeds up the process and provides a cleaner, more secure result. Think about it: instead of hammering each nail by hand, which can lead to bent nails, damaged molding, and a sore thumb, a nailer drives them in with consistent force. This means fewer mistakes, less rework, and a finish that looks like it was done by a seasoned pro.
The primary reason a nailer is so effective for crown molding is its ability to drive nails quickly and consistently. This is crucial for a few reasons:
- Speed: You can install sections of molding much faster than with a hammer.
- Consistency: Each nail is driven with controlled force, leading to fewer bent nails and less damage to the molding.
- Reduced Effort: It significantly reduces the physical strain compared to hammering.
- Clean Finish: With proper depth setting, nails can be sunk just below the surface, ready for putty or caulk for a seamless look.
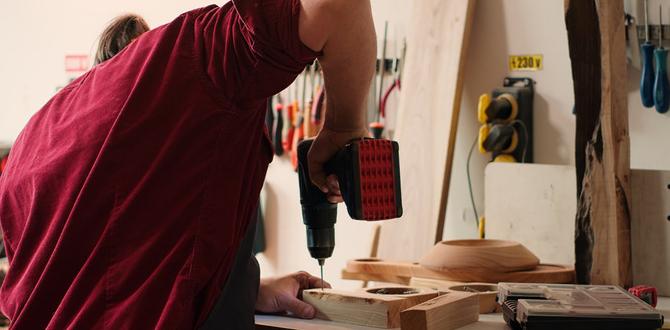
Choosing the right nailer is the first step to success. For crown molding, a brad nailer or a finish nailer is generally your best bet. Brad nailers usually fire smaller gauge nails (18-gauge is common), which are great for delicate trim work like crown molding because they leave a smaller hole. Finish nailers (15 or 16-gauge) are a bit more robust and can handle slightly heavier trim if needed, but they still provide a cleaner finish than framing nailers.
Choosing the Right Nailer for Crown Molding
If you’re new to nailers, the options can seem overwhelming. For crown molding, we’re focusing on two main types: brad nailers and finish nailers. Both are excellent choices, but they have slight differences that might make one a better fit for your project or preference.
1. Brad Nailer (18-Gauge)
This is often the go-to for crown molding. An 18-gauge nailer drives thin nails (about 1/16 inch thick). These nails are small enough that they’re less likely to split thinner pieces of molding, and the resulting hole is very easy to conceal with wood putty or caulk. For most standard crown molding applications, an 18-gauge brad nailer is a perfect fit.
2. Finish Nailer (15 or 16-Gauge)
A finish nailer drives slightly thicker nails (15-gauge or 16-gauge). These offer a bit more holding power, which can be beneficial if your crown molding is heavier or if you’re working with particularly dense wood. The nail holes are still relatively small and easy to fill, but they are slightly more noticeable than those from an 18-gauge brad nailer. If you already have a finish nailer, it will work perfectly well for crown molding.
Consider these factors when making your choice:
- Nail Size: Thinner nails (18-gauge) = smaller holes, less splitting. Thicker nails (15-16 gauge) = more holding power.
- Power Source:
- Pneumatic: Requires an air compressor. Generally powerful and reliable, but you have a hose to manage.
- Cordless (Battery-Powered): Offers great portability and no hoses. Can be heavier and more expensive upfront.
- Electric (Corded): No compressor needed, no batteries to charge. You’re tethered by a cord.
- Ergonomics: How does it feel in your hand? Is it too heavy? Can you aim it easily?
For beginners, an 18-gauge cordless brad nailer often strikes a great balance between ease of use, portability, and a clean finish. Check out resources like Popular Mechanics’ guide to nail guns for more in-depth comparisons.
Essential Tools and Materials
Before you start, gather everything you need. Having all your supplies ready makes the process smooth and efficient. Here’s what you’ll want:
Tools:
- Nail Gun: Your chosen brad or finish nailer (18-gauge brad nailer recommended for most).
- Nailer Air Hose and Compressor (if pneumatic): Ensure the compressor is rated for the nailer’s PSI.
- Miter Saw: Essential for precise angled cuts. A power miter saw is highly recommended for accuracy.
- Tape Measure: For accurate measurements, obviously!
- Pencil: For marking cuts.
- Safety Glasses: Non-negotiable for eye protection.
- Hearing Protection: Nail guns can be loud.
- Stud Finder: To locate wall studs for secure fastening.
- Level: To ensure your molding is straight.
- Caulk Gun and Paintable Caulk: For filling gaps and nail holes and for finishing.
- Wood Putty or Filler: To fill nail holes.
- Sandpaper (medium and fine grit): For smoothing filler.
- Hammer and Nail Set (optional, but good to have): For any nails that don’t drive in perfectly.
Materials:
- Crown Molding: Measure your room and add about 10-15% extra for cuts and mistakes.
- Nails: Ensure they are the correct gauge and length for your nailer and molding thickness. For typical 1/2-inch to 5/8-inch thick crown molding, 1-1/2 inch to 2-inch nails are usually appropriate.
- Wood Glue (optional but recommended): For reinforcing joints, especially mitered corners.
Having high-quality materials, especially the molding itself, makes a big difference. If you’re unsure about the best type of molding for your space, consult resources like Lowe’s guides for advice on material selection.
Mastering the Nail Placement Strategy
This is where the magic happens for an effortless and professional finish. The key to using a nailer effectively for crown molding isn’t just about firing nails; it’s about placing them strategically so they hold the molding securely without being obvious.
The goal is to nail into the solid backing of the wall, which is typically the ceiling joists and wall studs. When you install crown molding, it has two main points of contact: the wall and the ceiling. You need to drive nails through the molding and into these structural elements.
Nailing into the Ceiling
Most modern crown molding has a profile that allows for a relatively straight shot into the ceiling joists. You’ll want to aim your nailer at an angle, usually around 20-30 degrees, directly into the ceiling. This angle helps the nail penetrate the molding securely and then bite into the wood joist behind the drywall. You’ll want to locate the joists first using a stud finder.
Nailing into the Wall
Similarly, when you reach a wall stud, you’ll angle your nailer to drive nails through the molding and into the stud. Again, a roughly 20-30 degree angle is often ideal. You can use your stud finder along the wall where the top of the molding will sit.
Why an angle? Angling the nails provides better holding power. If you nail straight on, especially into drywall without hitting a stud, the nail won’t be very secure. Also, with crown molding, the angle helps you hit solid wood (the joist or stud) more consistently than trying to nail straight on.
Nail Spacing
Don’t go overboard with nails. They are there for structural support and to prevent the molding from sagging or pulling away. A good rule of thumb is to place nails about 16-20 inches apart. You’ll want to ensure you are nailing into a stud or joist with each nail whenever possible. Pay extra attention to where you have seams between molding pieces; place a nail on either side of the seam to keep it snug.
Nail Depth Setting
This is CRITICAL for an effortless finish. You want the nail head to be just slightly below the surface of the molding. This creates a small dimple that is easily filled with wood putty or caulk, allowing you to create a smooth, seamless surface. Most nailers have an adjustable depth setting. Experiment on a scrap piece of molding before you start on the wall. You’re looking for that sweet spot where the nail is sunk but not so deep that it blows through the wood ply or creates a huge blowout.
If a nail doesn’t seat correctly, don’t just leave it! Grab a hammer and nail set to gently tap the nail head below the surface. This prevents paint or caulk from cracking later.
| Nailer Type | Typical Gauge | Nail Length (for crown) | Best For | Nail Head Size |
| :—————– | :———— | :———————- | :——————————————— | :————- |
| Brad Nailer | 18-Gauge | 1-1/2″ to 2″ | Most crown molding, delicate trim | Smallest |
| Finish Nailer | 16-Gauge | 1-1/2″ to 2″ | Slightly heavier molding, good holding power | Medium |
| Finish Nailer | 15-Gauge | 1-3/4″ to 2-1/2″ | Heaviest molding, maximum holding power | Largest |
Remember to always use the recommended nail size for your specific nailer model, as specified by the manufacturer. Using the wrong size can cause jams or damage to the tool.
Step-by-Step Guide: Effortless Crown Molding Installation
Alright, let’s get down to business! Follow these steps for a smooth and successful crown molding installation using your nailer.
Step 1: Measure and Plan Your Cuts
Accurate measurements are key. Measure the length of each wall where the crown molding will be installed. For corners, you’ll need to make mitered cuts. The most common angle for internal and external corners is 45 degrees for a 90-degree wall/ceiling intersection. If you’re unsure about complex angles, there are great online calculators and diagrams available, like those found on This Old House.
Step 2: Set Up Your Nailer
- For Pneumatic Nailers: Connect the air hose to your nailer and compressor. Set the compressor to the appropriate PSI (check your nailer’s manual, but often around 90-110 PSI is a good starting point).
- For Cordless/Electric Nailers: Ensure the battery is charged or the tool is plugged in.
- Load Nails: Open the nailer’s magazine and load the correct gauge and length of nails.
- Test Depth Setting: THIS IS CRUCIAL. Grab a piece of scrap molding. Set your nailer to a medium depth setting. Fire a nail. Is it too deep? Too shallow? Adjust the depth setting (usually a dial or lever on the nailer) and test again on another scrap piece until you achieve a consistent result where the nail head is just slightly below the surface. Aim for a clean sink without blowing out the wood fibers.
Step 3: Locate Studs and Joists
Use your stud finder to mark the location of wall studs along the wall and ceiling joists where the molding will be installed. These marks are your targets for driving nails. It’s helpful to lightly mark their positions on the wall and ceiling near where the molding will sit.
Step 4: Make Your First Cuts
Using your miter saw, set it up for the correct angle (usually 45 degrees for corners, but verify your building’s angles). For an inside corner, you’ll typically cut the molding with the “back” against the saw fence and the “face” against the blade, sloping away from you. For an outside corner, the opposite is often true. Always practice on scrap wood first! You want to achieve a tight, gap-free joint.
Step 5: Position and Nail the First Piece
Hold the first piece of crown molding in place against the wall and ceiling. Ensure it fits snugly into the corner. Once positioned, take your nailer. Holding it firmly against the molding, aim at an angle (around 20-30 degrees) towards a marked stud or joist. Squeeze the trigger to fire a nail. Repeat this process, spacing nails about 16-20 inches apart, ensuring each nail hits a stud or joist. Don’t forget to nail into the ceiling joist where the top edge meets the ceiling, and into the wall stud where the bottom edge meets the wall.
Tip: For extra strength, especially on longer runs or at joints, apply a thin bead of wood glue to the back of the molding before placing it on the wall.
Step 6: Install Subsequent Pieces
Measure, cut, and install the next piece, making sure the joint where the two pieces meet is tight and clean. Continue the nailing process along the wall. When you reach another corner, cut the next piece to fit. Remember to nail into the studs and joists consistently.
Step 7: Tackling Inside and Outside Corners
This is where the miter saw is your best friend. For inside corners, you’ll typically cut at a 45-degree angle. The piece for the left side of the corner will have its long point towards the back and extending to the right, while the piece for the right side will extend to the left. For outside corners, the angles are typically also 45 degrees, but the direction of the cut is reversed.
A common mistake is cutting both pieces at the same 45-degree angle. You actually need to cut one piece at 45 degrees and the other piece at 45 degrees, but in the opposite direction, so they meet cleanly. Many miter saws have detents for common angles like 45 degrees. When in doubt, use a guide from Family Handyman for visual aids.
Step 8: Finishing Touches
Once all molding is installed:
- Fill Nail Holes: Use wood putty or filler to fill all the nail dimples. Let it dry according to the product instructions.
- Sand: Lightly sand the filled areas with medium-grit sandpaper, followed by fine-grit, until smooth and flush with the molding surface.
- Caulk Gaps: Apply a thin bead of paintable caulk along the top edge where the molding meets the ceiling and along the bottom edge where it meets the wall. Also, caulk any small gaps at the corners. Use a damp cloth or your finger to smooth the caulk for a clean line.
- Paint: Once the putty and caulk are dry, you’re usually ready to paint! Prime and paint on top of the filler and caulk for a seamless, professional finish.
Remember, patience is key! Don’t rush the cutting or the nailing. It’s better to take an extra minute to get a perfect cut than to deal with gaps later.
Troubleshooting Common Nailer Issues
Even with the best tools and techniques, you might run into a snag. Here are some common nailer issues for crown molding and how to fix them:
Nails Not Driving Fully
- Problem: Nail heads are sticking out, not sinking into the wood.
- Solution:
- Increase PSI (Pneumatic): Slightly increase the air pressure from your compressor. Don’t exceed the maximum PSI for your nailer.
- Adjust Depth Setting: Ensure the depth setting isn’