To use a nail gun for wooden crafts, you need to understand your nailer type, select the right nails, and practice safe operation. This guide will show you how to find the perfect nail gun for your projects and master its use for beautiful, durable wooden crafts with confidence.
Hey everyone, Jack Shaffer here from Nailerguy! Ever look at those beautifully crafted wooden projects and think, “How do they get those nails in so perfectly?” Those fancy creations often use a secret weapon: the nail gun. If you’re a beginner looking to speed up your woodworking and get cleaner results, a nail gun can be a game-changer. But if you’ve never used one, it can seem a bit intimidating. Don’t worry! Today, we’re going to break down exactly how to use a nail gun for your wooden crafts, making it simple and safe.
We’ll cover everything from choosing the right tool for the job to the nitty-gritty of operation. By the end of this, you’ll be ready to tackle your next wooden craft project with a nail gun like a pro. Let’s get started!
Table of Contents
Why Use a Nail Gun for Wooden Crafts?
Using a nail gun might seem like a big step up from a hammer and nails, but it comes with some awesome benefits, especially for wooden crafts. For starters, it’s incredibly fast. Imagine building a birdhouse, a small shelf, or even a set of decorative boxes. Hammering in dozens of nails can take a while and lead to sore wrists. A nail gun fires nails in a fraction of a second, cutting down your project time significantly. This means you can finish more projects and experiment with new ideas more often.
Beyond speed, nail guns offer more precision and a cleaner look. They drive nails straight and consistently, reducing the chances of bending nails or creating unsightly hammer marks. This is crucial when you want your wooden crafts to look polished and professional. Plus, for certain materials or thinner wood, a nail gun can prevent splitting that might happen with a hammer. It’s a tool that helps you achieve better results more easily, making woodworking more fun and less frustrating.
Choosing the Right Nail Gun for Your Crafts
The world of nail guns can seem a bit overwhelming at first, with different types and power sources. But for common wooden crafts, most beginners will find themselves choosing between a few key types. Knowing what each one does best will help you pick the perfect tool for your needs. Let’s break them down:
Types of Nail Guns
Here’s a look at the most common nail guns you’ll encounter for DIY and craft projects:
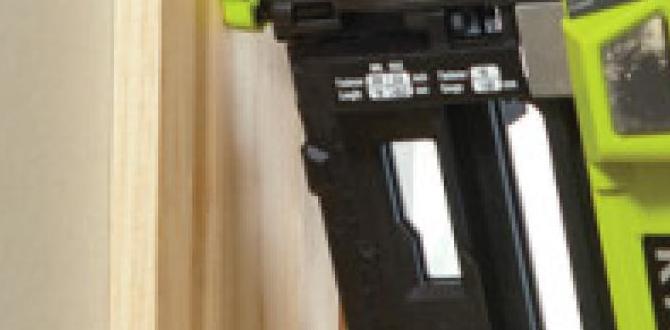
- Brad Nailers: These are fantastic for delicate trim work, attaching small moldings, and assembling smaller wooden crafts like jewelry boxes or decorative signs. They use thin, short nails (often called brads) that leave very small holes, making them ideal when aesthetics are important and you want to minimize visible fasteners.
- Finish Nailers: A step up from brad nailers, finish nailers use slightly larger nails (often called finishing nails) that offer more holding power. They’re great for attaching baseboards, crown molding, and assembling furniture components where a bit more strength is needed, but you still want a relatively clean look.
- Framing Nailers: These are the heavy-duty workhorses, designed for building structures like decks, fences, or framing walls. They use much larger and longer nails. For most small to medium wooden crafts, a framing nailer is overkill and can actually damage the wood. You’re unlikely to need one for typical crafts.
- Staple Guns (if applicable): While not strictly nail guns, some heavy-duty electric staple guns work similarly and are great for attaching fabric to wood frames, like for DIY canvas art or upholstered items.
Power Sources: How They Run
Nail guns get their power in a few different ways:
- Electric (Corded): These plug into a wall outlet. They are usually lighter and don’t require consumables like air tanks. Great for indoor projects where you have access to power.
- Cordless (Battery-Powered): These are super convenient, offering freedom of movement. They run on rechargeable batteries. While often more expensive upfront, they are a top choice for portability and ease of use.
- Pneumatic (Air-Powered): These require an air compressor to work. They are powerful and reliable but less portable due to the need for an air hose and compressor. They are favored by professionals for their power and durability but can be a bigger investment for a hobbyist.
For most beginner craft projects, an electric cordless brad nailer or finish nailer is often the sweet spot for ease of use, power, and portability. You can find great options that are lightweight and budget-friendly.
Essential Tools and Materials for Using a Nail Gun
Before you even pick up your nail gun, it’s good to have all your ducks in a row. Having the right setup makes the process smoother and safer. Here’s what you’ll want to gather:
Your Nail Gun
As we discussed, choose one that fits your project size and needs. A brad or finish nailer is usually the best bet for crafts.
Compatible Nails
This is super important! Your nail gun is designed for specific sizes and types of nails. Using the wrong ones can jam your gun or damage your work. Always check your nail gun’s manual. Nails are typically described by gauge (thickness) and length. For crafts, you’ll often use:
- Brad nails: 18-gauge (thinnest) through 16-gauge. Lengths from 5/8 inch up to 2 inches are common.
- Finish nails: 15-gauge through 14-gauge. Lengths from 1 inch to 2.5 inches are typical.
Nail packaging will tell you the gauge and length. Make sure the nails fit snugly in the magazine of your nail gun without being too loose or too tight.
Safety Gear (Non-Negotiable!)
Safety first, always! Working with power tools means protecting yourself. Never skip these:
- Safety Glasses: Essential to protect your eyes from flying debris or accidental nail misfires.
- Hearing Protection: Nail guns can be loud, especially pneumatic ones. Earplugs or earmuffs are a must.
- Gloves: Good work gloves can help you get a better grip and protect your hands from splinters and minor scrapes.
Complying with Safety Standards
The Occupational Safety and Health Administration (OSHA) provides important guidelines for using power tools, including nail guns. They emphasize training, proper maintenance, and the use of personal protective equipment (PPE). Always refer to manufacturer instructions and keep your tools in good working order to ensure safe operation. For more detailed safety information, you can often find resources on the OSHA website.
Other Useful Items:
- Workpiece Clamps: To hold your wood pieces together securely while you nail.
- Measuring Tape and Pencil: For accurate placement.
- Wood Glue: For stronger joints, often used in conjunction with nails.
- Sandpaper: For finishing the wood after assembly.
- Air Compressor and Hose (for pneumatic nailers): Ensure it’s the correct PSI rating for your nailer.
- Extension Cord (for corded electric nailers): A heavy-duty one is best.
Step-by-Step Guide: How to Use Your Nail Gun
Alright, you’ve got your nail gun, the right nails, and your safety gear. Let’s get to the fun part! Using a nail gun is straightforward once you know the basic steps. We’ll walk through it so you feel confident.
Step 1: Prepare Your Nail Gun and Workspace
First, ensure your nail gun is ready. If it’s pneumatic, connect it to your air compressor and set the pressure – check your nail gun’s manual for the recommended PSI. For electric models, make sure the battery is charged or it’s plugged in. Always ensure the nail gun is NOT powered on or loaded with nails while you do this!
Clear your workspace. You want enough room to move freely and a stable surface to work on. Keep your workspace tidy to avoid tripping hazards. Make sure your wood pieces are ready and any glue is applied if you’re using it.
Step 2: Load the Nails
This step varies slightly depending on your nail gun model, but the principle is the same. Locate the magazine (the long part that holds the nails).
- Open the Magazine: There’s usually a spring-loaded mechanism or a latch you need to pull back to open it.
- Insert the Nails: Place your chosen nails into the magazine. They should rest flat against the track. Make sure they are all facing the same direction, with the nail heads towards the back or the spring. The spring mechanism will push them forward as you fire.
- Close the Magazine: Gently push the follower or the cover back into place until it latches securely. You should feel a slight resistance from the spring pushing the nails forward.
Pro Tip: Don’t overfill the magazine. Most nail guns have a clear indicator line or you can judge by eye. Overfilling can cause jams.
Here’s a quick look at common magazine types:
| Nail Gun Type | Magazine Type Examples | Loading Process |
|---|---|---|
| Brad Nailer | Bottom loading, rear loading | Slide nails in, ensure heads are flush, release spring-loaded follower. |
| Finish Nailer | Bottom loading, side loading | Similar to brad nailers; some may have a release button to slide the follower. |
| Framing Nailer | Rear loading, side loading | Often requires more force to compress the spring; ensure nails are aligned. |
Step 3: Adjust Settings (if applicable)
Some nail guns, especially electric and pneumatic ones, have adjustable depth settings. This controls how deep the nail is driven into the wood. Too shallow, and the nail won’t hold; too deep, and it can sink too far, damaging the wood surface or even punching through.
How to Adjust Depth:
- Look for a dial or lever, often near the nose of the gun.
- Experiment on a scrap piece of the same wood you’re using.
- Start with a medium setting and adjust finer as needed. You want the nail head to be slightly below the wood surface or flush, typically referred to as “countersunk.” Avoid driving it so deep that you break through the wood.
Some nailers also have a firing mode selector (e.g., single sequential fire vs. rapid fire). For crafts, sequential fire is almost always recommended. This mode requires you to press the nose of the gun against the wood before pulling the trigger, which prevents accidental firing and allows for precise nail placement. This is often referred to as “contact actuation” or “bump fire” when used with a trigger pull, or “sequential actuation” when the nose must be pressed first. Prioritize the sequential mode for safety.
Step 4: Position the Nail Gun and Fire
Now it’s time to fire your first nail! Put on your safety glasses, hearing protection, and gloves.
- Placement: Hold the nail gun firmly with one hand. Position the nose of the nail gun squarely against the surface where you want to drive the nail. Make sure the wood is stable and won’t move. If you’re joining two pieces, position the gun so the nail will go into the intended piece.
- Nail Placement: For precise placement, especially with brad and finish nailers, try to aim for the center of the wood piece or where your joint will be strongest. Holding the gun perpendicular to the surface is key for a straight nail.
- Fire the Nail: If your gun has a safety nose or contact trip: Press the nose of the gun firmly against the wood. Then, pull the trigger. The nail should fire instantly. If you have a non-contact trigger (less common and less safe for beginners), you’d pull the trigger first, then press the nose. Always prioritize the contact trip (sequential actuation) mode for safety.
Important Safety Note: NEVER point a nail gun at yourself or anyone else, even if it’s not loaded. A nail gun is NOT a toy. Treat it with respect.
Step 5: Test and Refine
Fire a few nails into a scrap piece of wood first. Check if the depth is correct. Is the nail head sticking out? Adjust the depth setting to drive it deeper. Is the nail sinking too far and creating a large dent? Adjust the depth setting to drive it less deep. This initial testing is crucial for getting the hang of it and ensuring a clean finish.
Step 6: Continue Assembling Your Craft
Once you’re happy with the nail depth and confident in your firing technique, you can start assembling your wooden craft. Remember to hold the gun firmly and press it against the wood before pulling the trigger. You can place nails close together for stronger joints or farther apart for decorative purposes. If using wood glue, apply it to the joining surfaces before firing nails for exceptionally strong bonds.
For example, if you are building a simple wooden box:
- Apply glue to the edge of one side piece.
- Press it against the edge of the bottom piece.
- Hold them firmly together and place your nail gun nose against the joint.
- Press the nose down and pull the trigger to fire a nail.
- Repeat this process, spacing nails a few inches apart, until the joint is secured.
- Continue for all sides of your box.
This process can be significantly faster and more precise than using a hammer, especially when dealing with multiple pieces or intricate designs.
Proven Wooden Craft Projects for Nail Guns
What kind of projects are perfect for a beginner nail gun user? Loads! Nail guns excel at fast assembly and clean finishes, making them ideal for many popular DIY wooden crafts.
1. Picture Frames and Shadow Boxes
Creating custom picture frames or shadow boxes is incredibly rewarding. A brad nailer is perfect for assembling the mitered corners of a frame. For shadow boxes, you can quickly assemble the box structure and attach the backing with a brad nailer. The small nails leave minimal marks, keeping the focus on your photos or displayed items.
2. Wooden Signs and Wall Decor
Whether it’s a rustic welcome sign or a modern geometric piece, nail guns make assembly a breeze. You can attach decorative wood elements to a backing board, build box frames for signs, or assemble tiered wooden signs. A finish nailer can securely attach wooden letters or shapes, while a smaller brad nailer is good for thinner decorative trims.
3. Birdhouses and Animal Feeders
These outdoor crafts are prime candidates for nail guns. You can quickly assemble walls, roofs, and floors. The holding power of nails, especially from a finish nailer, ensures these structures will withstand the elements. A brad nailer is also useful for attaching smaller decorative elements like perches or roof shingles.
For these outdoor projects, ensure you use weather-resistant wood and fasteners, and consider sealing the wood after assembly for durability. For guidance on outdoor woodworking, the U.S. Forest Service offers some great insights into creating durable outdoor structures.
4. Small Storage Boxes and Organizers
Need custom-sized boxes for organizing shelves, drawers, or even for gifts? Nail guns are excellent for quickly assembling simple box shapes. A brad nailer or finish nailer can secure the sides and bottom, ensuring a sturdy and square result. You can even use them to attach dividers inside larger storage units.
5. DIY Furniture Accents (e.g., Shelves, Small Tables)
While you might not build a full dining table with a craft nailer, you can certainly create fantastic accents. For instance, assembling small side tables, floating shelves, or custom shelving units is much faster with a nail gun. A finish nailer is often ideal here, providing enough strength for small furniture pieces while keeping the nail heads relatively discreet.
Tips for Success and Common Pitfalls to Avoid
Even with a great tool, there are always little tricks and common mistakes that can make your experience better or worse. Let’s dive into some expert tips to help you succeed and avoid those frustrating issues.
Tips for Achieving Professional Results:
- Use Wood Glue: Always consider using wood glue along with your nails. This creates a much stronger, more durable joint that will last longer. The nail acts as a clamp while the glue dries.
- Pre-Drill for Hardwoods: If