Using a nail gun correctly ensures strong, clean connections for any project. This guide breaks down everything from selecting the right nailer and nails to safe operation and achieving flawless results, even on delicate surfaces. Get ready to build with confidence and speed!
Hey there, DIYers and aspiring woodworkers! Jack Shaffer here, your go-to guy for all things nail guns. Ever stared at a project, picturing all those nails perfectly in place, only to hesitate because you’re worried about dents, misses, or just plain making a mess? You’re not alone. Nail guns are amazing tools that can speed up your work and give you professional-looking results, but they can seem a little intimidating at first.
The good news is, with a little know-how, using a nail gun is simpler than you think. It’s all about understanding your tool, choosing the right fasteners, and following a few simple techniques. We’re going to walk through it all, step by step, so you can conquer those fears and start nailing with confidence. Ready to transform your projects from good to effortlessly perfect?
We’ll cover:
- Choosing the right nailer for your needs.
- Essential safety precautions (because safety always comes first!).
- Loading and preparing your nail gun.
- The proper techniques for driving nails flush and avoiding surface damage.
- Troubleshooting common issues.
Let’s get started!
Table of Contents
Why Use a Nail Gun? The Benefits You Can’t Ignore
Before we dive into the “how,” let’s talk about the “why.” Nail guns aren’t just fancy gadgets; they’re workhorses that can make a huge difference in your woodworking endeavors. Imagine driving dozens, even hundreds, of nails into wood with just a light pull of a trigger. That’s the kind of speed and efficiency a nail gun offers.
- Speed and Efficiency: This is the big one. What might take minutes to hammer by hand can be done in seconds with a nail gun. This is invaluable for larger projects or when you’re working under a deadline.
- Consistency: Once you get the hang of it, a nail gun drives each nail to a consistent depth. This results in a more professional and uniform look than hand-nailing, where depths can vary.
- Less Fatigue: Repeatedly swinging a hammer can be tiring. A nail gun requires minimal physical exertion, allowing you to work longer and more comfortably.
- Precise Placement: Nail guns offer excellent control over where each nail is placed, which is crucial for delicate joinery or working close to edges.
- Reduced Surface Damage: With the right technique and settings, nail guns can often leave a cleaner finish than hand hammering, especially when you’re aiming to use a nail gun without leaving surface marks. We’ll get into that more soon!
Choosing Your Nail Gun: The Right Tool for the Job
Not all nail guns are created equal. Different types are designed for specific tasks. Picking the right one means your projects will go smoother and your results will be better. Think of it like choosing between a hammer and a mallet – different jobs call for different tools!
Types of Nail Guns
Here’s a quick rundown of the most common types you’ll encounter:
- Framing Nailer: These are the heavy-duty workhorses. They’re designed to drive larger nails (like 2-inch to 3.5-inch nails) for structural framing, deck building, and other rough carpentry. They pack a punch!
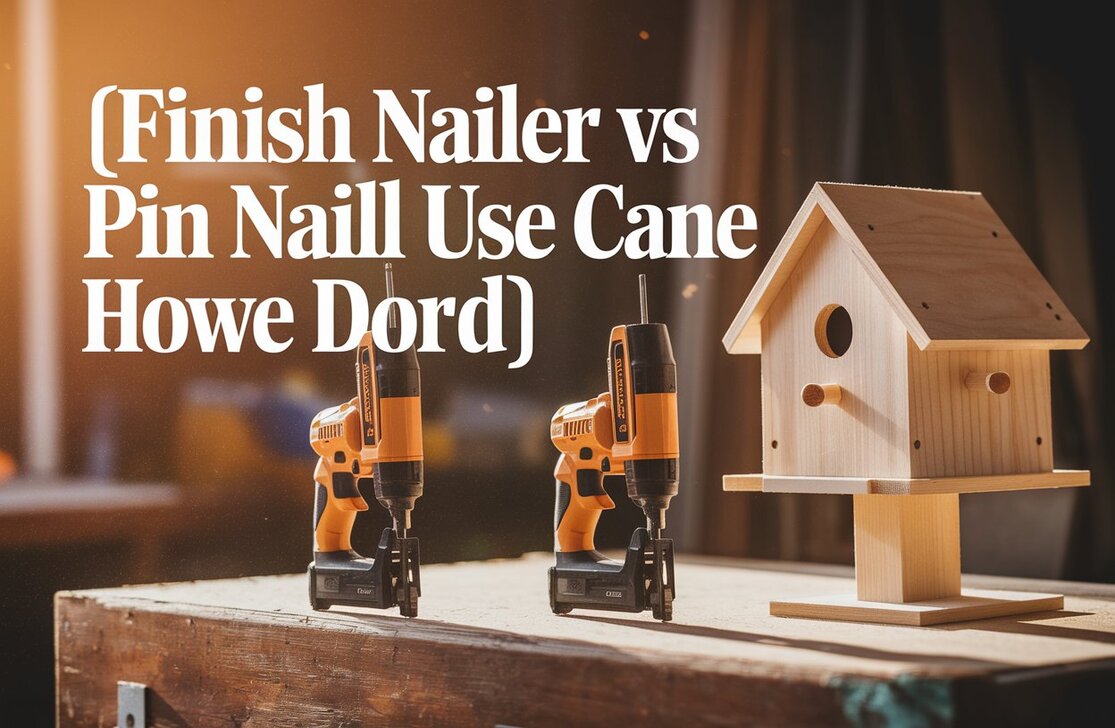
- Finish Nailer: These are more for woodworking trim, cabinetry, and decorative molding. They use slimmer nails (usually 15-gauge or 16-gauge) that leave smaller holes, making them easier to conceal.
- Brad Nailer: Even slimmer than finish nailers, these use very fine nails (18-gauge). They’re perfect for delicate trim, jewelry boxes, or any situation where you need minimal visible fasteners.
- Pin Nailer: These shoot tiny headless pins (23-gauge). They’re almost invisible when driven and are ideal for the most delicate decorative work, like attaching veneer or very thin trim.
- Stapler: While technically not a nail gun, they function similarly but drive staples. They’re great for upholstery, screen repair, or attaching felt to roofs.
For most DIY home projects, a finish nailer or a brad nailer will serve you well. If you’re planning on building a deck or a shed, you might need a framing nailer. For this guide, we’ll focus on the general principles that apply to most nail guns, with an emphasis on techniques for a clean finish, which is where finish and brad nailers shine.
Power Sources: What Gets Your Nailer Firing?
Nail guns can be powered in a few ways:
- Electric (Corded): Plug into an outlet. Great for indoor projects where you have access to power. No batteries to charge or air compressors to lug around.
- Electric (Cordless/Battery-Powered): These have built-in batteries. They offer fantastic portability and convenience, meaning you can take them anywhere. The downside can be battery life and a slightly heavier tool.
- Pneumatic (Air-Powered): These require an air compressor and an air hose. They are often lighter and more powerful than electric models, and they’re very reliable. The hose and compressor can be a bit cumbersome, though.
- Gas/Propane Powered: These use a fuel cell and battery. They are also very portable and powerful, often used in construction sites where air compressors aren’t practical.
For beginners, a cordless electric or a pneumatic nailer hooked up to a small home compressor is often a good starting point. If you’re unsure, think about the types of projects you’ll tackle most often. For woodworking and trim, cordless electric nailers are incredibly popular.
Safety First! Essential Tips for Nail Gun Operation
Nail guns are powerful tools, and like any power tool, they demand respect. Safety should always be your top priority. Let’s go over the critical rules to keep you safe and injury-free:
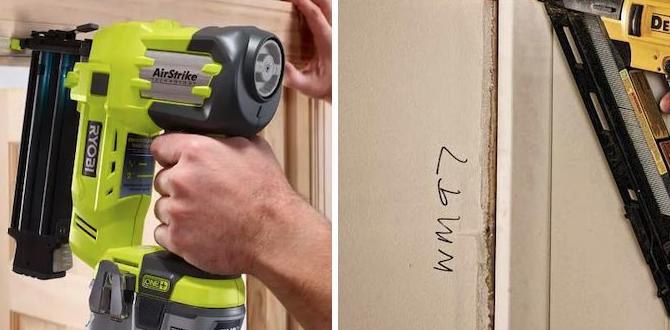
- Wear Safety Glasses: This is non-negotiable. Always wear ANSI-approved safety glasses or goggles. Nails can ricochet, and flying debris is a real hazard.
- Never Point the Nail Gun at Yourself or Others: Treat it like a real firearm. The trigger mechanism is designed to fire when the safety contact tip (the part that touches the wood) is pressed. Treat it with extreme caution.
- Keep Fingers Away from the Trigger: Do not put your finger on the trigger unless you are ready to fire a nail.
- Disengage When Not in Use: If you’re moving to another spot, repositioning your work, or taking a break, always turn off the tool or disconnect it from the power source (unplug electric, detach battery, release air pressure).
- Understand Firing Modes: Nail guns often have two firing modes:
- Single Sequential Trip (SST): You must fully press the safety contact tip against the wood before you pull the trigger to drive a nail. This is the safest mode for most applications and prevents accidental firing if the tool bumps something.
- Contact Trip (CT): You can hold down the trigger and then bump the safety contact tip against the wood to fire nails. This is faster for repetitive tasks but carries a higher risk of accidental firing. Start with SST mode.
Most tools have a switch to select these modes. Always confirm you’re in the safest mode (usually SST) before you begin.
- Secure Your Workpiece: Make sure your material is stable. A slipping workpiece can cause the nail gun to misfire or the nail to go astray. Clamps are your best friend here!
- Be Aware of Your Surroundings: Ensure no one is behind you or too close to your project when you’re firing nails.
- Read Your Manual: Every nail gun is slightly different. Familiarize yourself with your specific tool’s operation and safety features by reading the manufacturer’s manual. You can often find them online if you’ve lost yours. For example, a great resource for general tool safety can be found on OSHA’s website regarding construction equipment. OSHA Power Tool Safety.
Getting Started: Loading and Preparing Your Nail Gun
Once you’re armed with your nailer and your safety gear, it’s time to get it ready. Loading and preparing it is straightforward.
Loading Nails
The method for loading nails varies slightly by gun type, but the principle is the same:
- Disconnect Power: First, and foremost, make sure the nail gun is not powered. If it’s pneumatic, disconnect the air hose. If it’s electric, unplug it or remove the battery.
- Open the Magazine: Locate the magazine (the part that holds the nails). There’s usually a spring-loaded latch or a sliding mechanism to open it.
- Choose the Right Nails: This is crucial! Use only the type, size, and angle of nails recommended for your specific nail gun. Using the wrong nails can damage the gun or jam it. Check your manual or the markings on the side of the magazine. For example, a 16-gauge finish nailer takes 16-gauge finish nails, typically between 1-1/4 and 2-1/2 inches long.
- Insert the Nails: Place the nails into the magazine. They usually form a straight strip. Make sure they are seated correctly and facing the right direction (pointy ends forward, usually towards the tip of the gun).
- Close the Magazine: Gently slide or snap the magazine shut. Make sure it’s securely closed.
- Reconnect Power: Once loaded and secure, reconnect your power source (attach the battery, plug in, or connect the air hose).
Loading Cartridges (for Gas/Propane or some Cordless)
If you have a gas-powered nailer, you’ll also need to insert a fuel cell or cartridge according to the manufacturer’s instructions. These provide the power to drive the nails. Be sure you are in a well-ventilated area when doing this.
Important Note on Nail Strips: Some nail guns use collated nails held together by paper, plastic, or wire. Be careful not to damage these strips, as a bent or broken strip can cause jams.
Mastering the Technique: Driving Nails Flawlessly
Here’s where the magic happens! It’s all about technique to get those nails right where you want them, flush with the surface or slightly countersunk, without marring your beautiful wood.
Step-by-Step Nailing
- Safety Check: Ensure your safety glasses are on and your work is secure.
- Set Your Depth: Many nail guns have an adjustable depth setting. This is vital for controlling how far the nail sinks into the wood.
- For a flush finish (nail head even with the surface), set the depth so the nose of the gun barely touches the wood when the nail is driven fully.
- For a slightly countersunk finish (nail head just below the surface, perfect for filling later), adjust so the nail head sinks very slightly.
- For a proud finish (nail head sticks out slightly, rare for fine woodworking), you’d adjust the opposite way, but this is best avoided for a clean look.
Test this on a scrap piece of wood first! This is the single most important step to avoid over-driving or under-driving nails.
- Position the Nail Gun: Place the nose of the nail gun firmly against the surface where you want to drive the nail. Ensure the safety contact tip is flat against the wood.
- Alignment is Key: Line up the nail with your mark. For precision work, you might want to pre-drill tiny pilot holes where you want the nail to go, especially in hardwoods, to prevent splitting. However, most nail guns and nails are designed to be used without pilot holes in softer woods.
- Drive the Nail:
- Using Sequential Trip (SST): Press the safety contact tip firmly against the wood. Then, pull the trigger. The nail will be driven.
- Using Contact Trip (CT): Hold the trigger down. Firmly press the safety contact tip against the wood. The nail will fire. Release the tip. Repeat by bumping the tip against the wood while the trigger is held down. (Remember, SST is safer for beginners!).
- Maintain Pressure: Keep the gun pressed firmly against the wood while firing to get a clean drive and prevent the nail from bending.
- Repeat for Next Nail: For SST, lift the gun, reposition, press the tip firmly, and pull the trigger. For CT, keep trigger pulled, reposition and bump.
How to Use a Nail Gun Without Leaving Surface Marks
This is a common concern, especially when working with visible trim or delicate hardwoods. The key here is often the depth setting and gentle technique:
- Adjust Depth Setting: As mentioned, setting the depth correctly is paramount. Start with it set to drive the nail just flush with the surface, not deeper.
- Use a “No-Mar” Tip: Many nail guns come with or can be fitted with a rubber or plastic “no-mar” tip. This is a cover that fits over the safety contact tip and acts as a buffer between the gun and your wood. This is your best defense against accidental dents or marks from the metal contact tip.
- Don’t “Bounce” the Gun: When using Contact Trip mode, avoid excessively bumping or “bouncing” the nose of the gun against the wood. This can leave indentations even with a no-mar tip. Use a deliberate press.
- Gentle, Firm Pressure: Don’t jam the gun into the wood. Apply firm, steady pressure.
- Test, Test, Test: Always test your depth and technique on a scrap piece of the same material you’re working with. This is the golden rule to avoid imperfections on your actual project.
- Work Angles Wisely: If you’re nailing at an angle, ensure the nose still has good contact and you aren’t inadvertently slamming the edge of the gun into the wood.
With practice and attention to these details, you’ll become adept at driving nails cleanly and precisely.
Troubleshooting Common Nail Gun Issues
Even with the best efforts, you might run into a hiccup. Here are some common problems and how to fix them:
Problem: Nail Gun Jammed
- Cause: Bent nail, wrong nail size, debris in magazine, worn driver blade.
- Solution:
- Disconnect Power! (Critical first step).
- Consult your manual for the specific jam-clearing procedure for your model.
- Often, you’ll need to open the magazine, remove any jammed nails, and sometimes access an internal area to pull out a bent nail.
- If it’s a stubborn jam or happens frequently, the driver blade or other internal parts might need servicing.
Problem: Nails Not Driving Fully (Under-driven)
- Cause: Depth setting too shallow, low air pressure (pneumatic), weak battery (cordless), obstructed driver.
- Solution:
- Increase the depth setting slightly.
- For pneumatic, check your compressor’s pressure is set to the recommended PSI for your tool.
- For cordless, ensure your battery is fully charged.
- Check for jams or obstructions.
- Ensure the no-mar tip (if used) or gun nose is making firm contact.
Problem: Nails Driving Too Deep (Over-driven)
- Cause: Depth setting too deep, hitting knotty wood, nail gun pushing too hard.
- Solution:
- Decrease the depth setting.
- Always test on scrap wood after adjusting!
- This is a common scenario when you’ve accidentally over-driven a nail. If a nail is sunken too deep, you might need to set it with a nail set and hammer, or carefully fill the hole.
Problem: Nail Gun Firing Randomly (Contact Trip Mode Issues)
- Cause: Accidental bumping of the safety contact tip while trigger is held.
- Solution:
- Switch to Sequential Trip (SST) mode immediately if possible. This is the safest mode.
- Always disconnect power when not actively nailing.
- Be mindful of where the nose of the gun is pointing and avoid accidental contact with the tip against any surface.