For speedy and secure soffit installation, a nail gun is your best friend. This guide shows beginners exactly how to use a nail gun for soffit, ensuring a professional finish with less hassle. Proper selection, safety, and technique are key for a great DIY result.
Hey there, fellow DIYers and tool lovers! Jack Shaffer here, your go-to guy for all things nails, saws, and making your home projects surprisingly achievable.
Ever stared up at your house, noticing those soffits that could use a refresh? Or maybe you’re finally tackling that home improvement project you’ve been dreaming about. Whatever your reason, let’s talk about making it easier. Soffit installation might sound like a big job, but with the right tools and a little know-how, you can get it done right. One of the biggest game-changers? A nail gun!
Using a nail gun for soffit installation can seem a bit daunting at first, especially if you’re new to using power tools. But trust me, once you get the hang of it, you’ll wonder how you ever did without one. It makes the job faster, easier, and much more consistent than hammering every single nail.
In this guide, I’ll walk you through everything you need to know. We’ll cover choosing the right nail gun and fasteners, setting it up safely, and then dive into the step-by-step process of installing your soffit like a pro. Grab your safety glasses, and let’s get that soffit looking fantastic!
Table of Contents
Nail Gun Options for Soffit Installation
Before we start nailing, let’s talk tools. Not all nail guns are created equal, and for soffit installation, you’ve got a few excellent options. The best choice often comes down to what you already own, your budget, and how much soffit work you plan to do.
1. Pneumatic Nail Guns
These are the workhorses of the nail gun world. They run on compressed air from an air compressor.
Pros: Powerful, reliable, and generally more affordable for the longevity and performance. They often have less recoil than electric models. Great for any nail size you might need.
Cons: Requires an air compressor and an air hose, which adds to the initial cost and setup. The compressor can be noisy.
2. Cordless (Battery-Powered) Nail Guns
These are super convenient because they don’t need a hose or a compressor. They use a battery to power the motor and often have a small gas cartridge for some models, though most modern ones are all-electric.
Pros: Ultimate portability and freedom of movement. Quick setup, no hoses to manage. Great for smaller jobs or tight spaces.
Cons: Can be heavier due to the battery. Battery life can be a concern for long days. More expensive upfront than pneumatic systems. Nails might have slightly less driving power than high-end pneumatic models.
3. Electric Corded Nail Guns
These plug directly into an electrical outlet. They are like a hybrid, offering the convenience of no compressor but tethered by a cord.
Pros: No need for a compressor. Generally less expensive than cordless options. Easy to use for smaller projects.
Cons: Limited by the length of the power cord and the availability of outlets. Can be a tripping hazard. Might not have the power for harder woods or larger nails.
Which One is Best for Soffit?
For soffit installation, especially if you’re doing a significant amount, a pneumatic framing or finishing nailer is often the top pick. They provide consistent power, are built for durability, and you can find them at a reasonable price. If you already have an air compressor, this is likely your most cost-effective and powerful option.
If portability and ease of setup are your main priorities, a cordless framing or finishing nailer is a fantastic choice. Just make sure the battery capacity is sufficient for your project length.
Important Note: You’ll primarily be using a framing nailer for the structural aspects and a finish nailer for the trim or edge pieces of the soffit. Many DIYers opt for a framing nailer with adjustable depth, which can often drive smaller nails suitable for soffit work, making it a versatile tool.
Choosing the Right Nails
Using the correct nails is just as crucial as picking the right nail gun. For soffit installation, you’ll typically be looking for galvanized nails. This is because soffits are exposed to the elements, and galvanized nails resist rust and corrosion much better than plain steel nails.
Here’s what to look for:
Type: Common nails are often used for structural attachment, while finish nails are better for securing trim or the edges of the soffit panels.
Gauge: Soffit installation often uses nails in the 15-gauge or 16-gauge range. A 15-gauge finish nailer (often called a “cordless finish nailer” or “brad nailer” in some contexts) is a popular choice for its balance of holding power and minimal marring of the material. 16-gauge brad nails can also work for lighter materials.
Length: The length of your nails will depend on the thickness of your soffit material and how deeply they need to penetrate into the fascia or rafter tails for a secure hold. Generally, 1.5 to 2-inch nails are common.
Best Practice: Always check the manufacturer’s recommendations for your specific soffit material. They might specify the type and size of fasteners required.
Safety First: Essential Precautions
Working with power tools, especially nail guns, demands a serious commitment to safety. A moment of carelessness can lead to injury, and we want this project to go smoothly and safely for you!
Here are the non-negotiables:
Always Wear Safety Glasses: This is rule number one, and it’s non-negotiable. Nail guns can send fasteners or material fragments flying. Ensure your eyewear meets ANSI Z87.1 standards.
Read Your Nail Gun Manual: Every nail gun is a little different. Familiarize yourself with its specific features, safety mechanisms, and operating instructions.
Understand Nailer Modes: Most nail guns have different firing modes:
Sequential Trip (Safety Mode): You must press the nose of the nailer against the surface before pulling the trigger for a nail to fire. This is the safest mode and highly recommended for beginners and for most soffit work.
Contact Trip (Bump Fire): The nailer will fire a nail every time the nose contacts a surface and the trigger is depressed. This mode is faster but significantly more dangerous if not handled with extreme care. Stick to Sequential Trip for soffit installation.
Keep Fingers Away from the Trigger: Never rest your finger on the trigger while operating or carrying the nail gun. Only place your finger on the trigger when you are ready to fire a nail.
Never Point the Nail Gun at Anyone: Even when you think it’s unloaded, never point it at yourself or others.
Disconnect When Not in Use or Clearing Jams: If you need to change nails, clear a jam, or step away from the tool, always disconnect the air hose (for pneumatic) or remove the battery (for cordless).
Secure Your Work Area: Ensure the area you’re working in is clear of debris and that you have stable footing. If working on a ladder, ensure it’s properly secured. For high work, consider a guardrail system for fall protection if working at significant heights or for extended periods, as recommended by OSHA.
Wear Appropriate Clothing: Avoid loose clothing that could get caught in the tool or surrounding materials.
Following these safety guidelines diligently will make your soffit installation a much safer and more enjoyable experience.
Gather Your Tools and Materials
Before you can attach that soffit, let’s make sure you have everything ready to go. Having all your supplies organized will save you time and frustration when you’re up on the ladder.
Here’s a checklist:
Tools You’ll Need:
Nail Gun: As discussed, a framing or finish nailer (pneumatic or cordless) suitable for 15- or 16-gauge nails.
Air Compressor & Hose (if using pneumatic): Ensure sufficient PSI and airflow for your nailer.
Tool Lubricant: For pneumatic nailers, a few drops of specific pneumatic tool oil before each use can prolong the tool’s life.
Safety Glasses: A must!
Work Gloves: To protect your hands.
Measuring Tape: For accurate cuts.
Pencil: For marking measurements.
Utility Knife: For trimming materials if needed.
Miter Saw or Hand Saw: For cutting soffit panels and trim to size.
Level: To ensure your soffit is installed straight.
Ladder: A sturdy extension ladder or step ladder, depending on the height. Make sure it’s stable.
Caulk Gun & Exterior Caulk: For sealing gaps.
Stud Finder (optional): To locate joists or framing for extra secure attachment.
Materials You’ll Need:
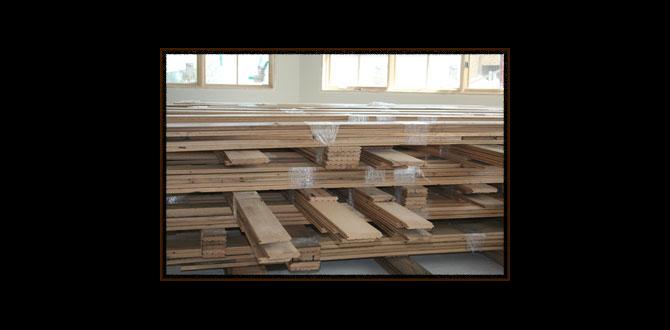
Soffit Material: Vinyl, aluminum, wood, or composite panels. Choose based on your preference, climate, and budget.
Fascia Board (if needed): To cover the ends of the rafters.
Trim or J-Channel (if needed): To create clean edges and corners, especially for vinyl siding.
Galvanized Nails: 15-gauge or 16-gauge, 1.5 to 2 inches long.
Exterior Screws (optional): For specific attachment points or if recommended by the soffit manufacturer.
Preparing the Area
Good preparation is the secret to a smooth installation. Before you even think about firing up the nail gun, take these steps:
1. Clean the Existing Soffit Area: Remove any old, damaged soffit material, loose paint, or debris from the rafter tails and fascia boards. This ensures a clean surface for the new material.
2. Inspect the Framing: Check for any rotten wood or structural issues in the rafters or fascia. Repair or replace any damaged sections before proceeding. This is critical for a long-lasting installation.
3. Measure Accurately: Measure the areas where the soffit will be installed. Note down all dimensions carefully. It’s often said, “measure twice, cut once.”
4. Cut Soffit Panels and Trim: Based on your measurements, cut the soffit panels and any necessary trim pieces (like J-channels or fascia caps). For vinyl soffit, you might need to cut out ventilation openings if your chosen product isn’t pre-vented. You can find great resources for proper cutting techniques from manufacturers like CertainTeed for vinyl siding and soffit components.
5. Pre-drill Holes (if necessary): For some materials or specific fastening methods, pre-drilling pilot holes can prevent splitting and make driving fasteners easier.
Step-by-Step: How to Use a Nail Gun for Soffit Installation
Alright, the moment you’ve been waiting for! Let’s get your soffit installed using your nail gun. Remember our safety rules – glasses on, finger off the trigger until ready, and be sure you’re in sequential mode.
Step 1: Set Up Your Nail Gun
Pneumatic: Connect your air hose to the compressor and the nail gun. Set the air regulator on your compressor to the pressure recommended in your nail gun’s manual, usually between 70-100 PSI. Test fire into a scrap piece of wood to ensure it’s driving nails correctly and not over-driving (sinking too deep) or under-driving (sticking out too much).
Cordless/Electric: Ensure the battery is charged or that it’s plugged into a power source. Load the correct size and type of nails into the magazine, following your tool’s instructions.
Step 2: Loading the Nail Gun
This is straightforward, but always check your manual.
For Pneumatic: Disconnect the air hose. Slide the magazine open, insert the nail strip, and close the magazine securely. Reconnect the air hose.
For Cordless/Electric: Remove the battery or unplug. Open the magazine, insert the nails, and close it. Reinsert the battery or plug it in once ready.
Step 3: Adjusting Depth Setting (If Applicable)
Many nail guns have an adjustable depth setting. This controls how deep the nail is driven into the material.
Test: Fire a nail into a scrap piece of soffit material that is backed by a piece of wood similar to your fascia or rafter.
Adjust: If the nail is too proud (sticking out), increase the depth. If it’s sinking too deep and damaging the soffit material, decrease the depth. You want the nail head to be slightly countersunk, just enough to dimple the surface without puncturing or cracking it, especially with vinyl or thin materials.
Step 4: Attaching the First Soffit Panel
Let’s assume you’re starting with the first panel along the fascia.
Position: Place the edge of the soffit panel against the fascia board. Ensure it’s snug and level.
Nail Strategy:
Start by firing one or two nails near the corner into the fascia to hold it in place.
Then, carefully position the nose of the nail gun.
Press the safety contact (nose) firmly against the soffit material and the substrate (fascia/rafter tail).
Gently pull the trigger.
Fire nails every 6-8 inches along the fascia or as recommended for your soffit material.
Be mindful of the expansion and contraction of vinyl soffits. Don’t nail them too tightly. Leave a little “give” so the material can move.
Step 5: Installing Subsequent Panels
Overlap or Interlock: Depending on your soffit type, subsequent panels will either overlap the previous one or interlock. Follow the manufacturer’s specific installation instructions.
Secure: Nail each panel securely to the fascia and any intermediate supports (like rafter tails or furring strips if you’ve added them).
Maintain Consistency: Try to maintain a consistent spacing for your nails. This not only looks better but also ensures the soffit is securely attached.
Step 6: Installing Soffit in Corners and Edges
Corners: If you have inside or outside corners, you’ll typically use specialized trim pieces or J-channels. Cut these to size and use your nail gun to secure them to the framing or soffit edges. Use the finishing nailer for these finer details if you have one, as it makes a cleaner, less noticeable hole.
Edges: For the edges of the soffit where it meets the house wall or other surfaces, you’ll likely use trim or J-channels for a clean, finished look. Nail these carefully, ensuring they cover any raw edges and present a neat line.
Step 7: Final Touches and Cleanup
Inspect: Walk around your house and inspect all the installed soffit. Make sure all nails are properly seated. If any are sticking out, you can gently tap them in with a hammer and nail set, or carefully use the nail gun again (adjusted appropriately).
Caulk: Apply exterior caulk to any gaps or seams where water could penetrate. This is especially important around trim pieces and where the soffit meets the house wall.
Clean Up: Disconnect your nail gun, tidy up your work area, and store your tools safely.
Soffit Installation: Nail Gun Tips & Troubleshooting
Even with the best intentions, you might encounter a few hiccups. Here are some common issues and how to solve them when using a nail gun for soffit installation.
| Problem | Cause(s) | Solution(s) |
| :————————– | :——————————————— | :———————————————————————————————————————————————————————————————————————————————————————- |
| Nail Jammed | Wrong nail size, bent nails, tool malfunction. | Turn off and disconnect power/air. Remove the magazine. Inspect the driver blade path. Remove bent nails. Try a different brand of nails if they seem poor quality. If it persists, consult your tool manual or repair service. |
| Nail Not Firing | Low air pressure (pneumatic), dead battery (cordless), safety clip not engaged, safety mechanism jammed. | Check air pressure/battery charge. Ensure the safety contact nose is pressed firmly against the surface. Make sure the trigger is pulled. Clear any obstructions in the safety mechanism. Lubricate pneumatic tools regularly. |
| Nail Sinking Too Deep | Depth setting too high, wrong material. | Adjust the depth setting on your nail gun to a shallower setting. Be extra careful with thin materials like vinyl soffit to avoid cracking. |
| Nail Not Sinking Deep Enough (Proud Nail) | Depth setting too low, low air pressure, surface is too hard. | Adjust the depth setting to a deeper position. For pneumatic tools, check and increase air pressure (within tool limits). Ensure you are pressing the tool firmly against the surface. You might need a more powerful nailer for very dense materials. |
| Tool Leaking Air | Loose hose connection, faulty O-ring or seal. | Safely disconnect air.** Check and tighten the hose connection. Inspect O