Nail shiplap walls like a pro with our straightforward, genius strategy! Get perfect, gap-free results every time using the right nailer and technique. This guide makes installing shiplap simple for any DIYer.
Ever dreamt of adding that charming, rustic shiplap look to your home? It’s a popular choice, and for good reason! Shiplap can transform a plain wall into a statement piece, bringing warmth and character to any room. But let’s be honest, the thought of installing it can feel a little daunting, especially when it comes to getting those clean lines and tight seams. Many DIYers worry about gaps, crooked boards, or just the sheer amount of work involved. Don’t let that stop you! With the right approach and a few smart tips, you can nail shiplap walls like a seasoned pro, even if you’re just starting out. We’ll walk you through a genius strategy that simplifies the process and ensures beautiful, lasting results. Get ready to roll up your sleeves and give your walls a stunning makeover!
Table of Contents
Why Shiplap? The Charm and the Challenge
Shiplap, at its core, is a type of wooden board used specifically to cover walls or exteriors. Its distinctive interlocking groove design creates a tight seal between boards, preventing drafts and giving a unified, textured appearance. Historically, it was a practical choice for barns and old homes. Today, it’s a beloved design element bringing that farmhouse chic, modern farmhouse, or coastal vibe to interiors.
Why is it so popular?
- Aesthetic Appeal: It adds instant character and visual interest.
- Versatility: It works in almost any room – kitchens, bathrooms, bedrooms, living areas, or even accent walls.
- Hides Imperfections: It’s a fantastic way to cover up less-than-perfect drywall or wall repairs.
- Adds Texture and Depth: It breaks up flat walls and can make a room feel cozier or more dynamic.
However, achieving that perfect look requires careful planning and the right techniques. The biggest challenge for beginners is often ensuring each board sits flush against the wall and that the overlapping groove is consistent, preventing unsightly gaps. This is where our “genius strategy” comes into play, focusing on preparation, the right tools, and a meticulous installation process.
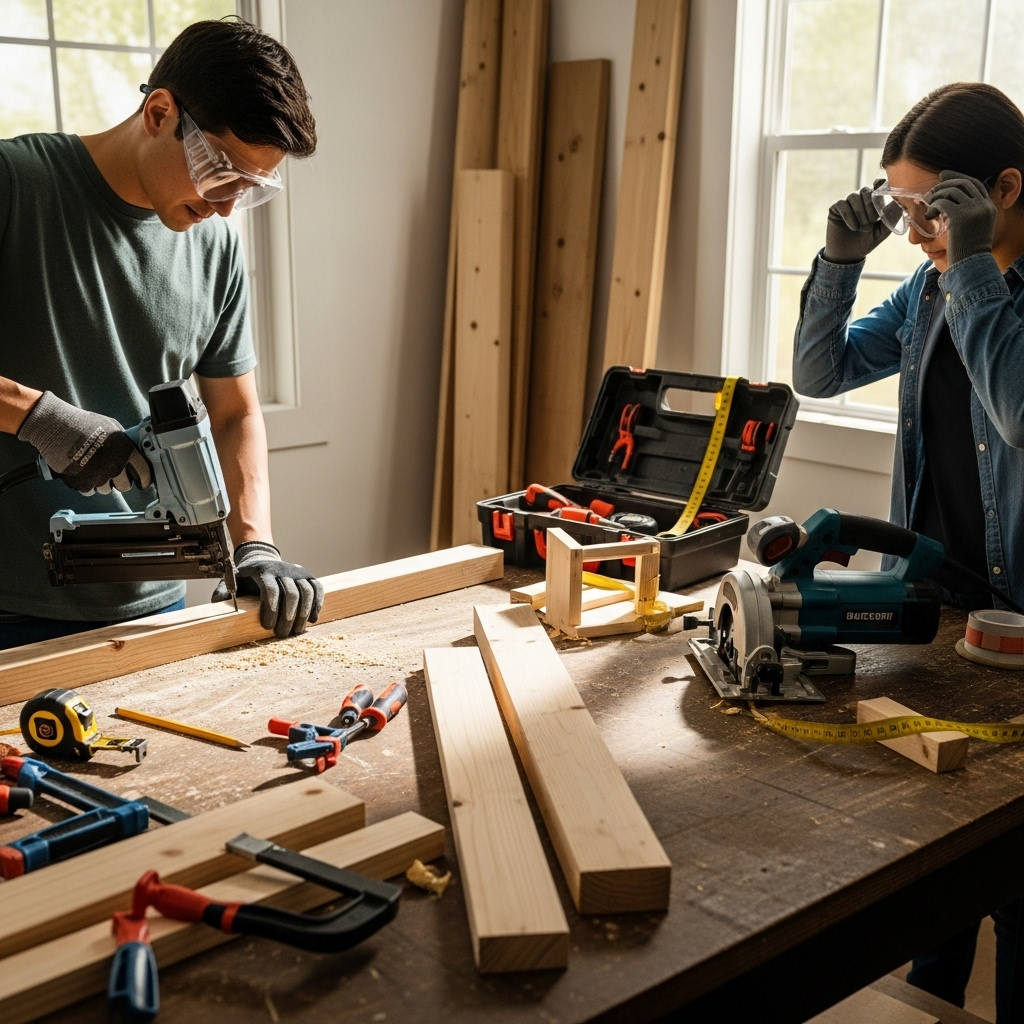
Your Shiplap Toolkit: What You’ll Need

Before we dive into the installation, gathering the right tools is crucial. Having everything ready will make the process smoother and more enjoyable. You don’t need a whole workshop full of fancy gadgets, but a few key items will make a world of difference.
Essential Tools for Shiplap Installation:
- Nail Gun: This is your best friend for shiplap. A brad nailer (18-gauge) or a finish nailer (15 or 16-gauge) is ideal for securing the boards without splitting the wood. For shiplap, a longer nail (around 1.5 to 2 inches) is usually best to get a good hold.
- Air Compressor (if using a pneumatic nailer): Make sure it has enough power to keep up with your nailing.
- Measuring Tape: For accurate measurements and cuts.
- Pencil: For marking cuts and reference lines.
- Level: Absolutely critical for ensuring your boards are straight. A longer level (4-foot) is great, but a torpedo level can also be handy.
- Miter Saw or Circular Saw: For making clean, straight cuts on your boards. A miter saw is preferred for precise angled cuts if needed, but a circular saw with a good guide can also work.
- Stud Finder: To locate wall studs for secure fastening.
- Safety Glasses: Always protect your eyes when using power tools!
- Gloves: For better grip and protection.
- Caulk Gun and Paintable Caulk: For filling small gaps and seams.
- Sanding Sponge or Fine-Grit Sandpaper: For smoothing rough edges or filling imperfections.
- Paint Roller and Brushes: For finishing your shiplap.
- Drop Cloths: To protect your floor from dust and paint.
- Optional: Trim Nailer: If you plan to add trim around windows, doors, or at the top/bottom of the shiplap wall.
Pro Tip: If you’re unsure about buying a nail gun, consider renting one for your project. However, for regular DIYers, investing in a good 18-gauge brad nailer is a worthwhile addition to your toolkit. Check out resources like ToolReviews.com for unbiased reviews to help you choose.
The Genius Strategy: Step-by-Step Shiplap Installation
This strategy focuses on preparation, precision, and a clever technique for achieving that seamless shiplap look without the frustration. Let’s break it down.
Step 1: Planning and Preparation are Key
Don’t skip this! Good planning saves a lot of headaches later.
- Measure Your Space: Determine the total square footage of the wall you’re covering. This helps you calculate how much shiplap you’ll need. Always buy about 10-15% extra for cuts and mistakes.
- Choose Your Shiplap: Shiplap comes in various materials (pine, MDF, plywood) and widths. Pine is a classic choice, but can be pricier and prone to warping if not acclimated. MDF is smooth and cost-effective but needs to be sealed well. Plywood offers durability. Consider pre-primed boards to save painting time.
- Acclimate the Boards: Let your shiplap boards sit in the room where they’ll be installed for at least 48 hours. This allows the wood to adjust to the temperature and humidity, preventing expansion or contraction issues after installation.
- Clear the Area: Remove furniture, wall decor, and outlet covers.
- Prepare the Wall: Ensure the wall surface is clean, dry, and relatively smooth. If there are major gouges or holes, repair them.
- Find and Mark Studs: Use your stud finder to locate and mark the studs on the wall. This is crucial for securely attaching the shiplap. Mark these lines lightly with a pencil all the way up the wall at your desired intervals.
- Establish a Starting Line: For your first board, you’ll want it to be perfectly level. Use a long level to draw a horizontal line where the bottom of your first board will sit. This ensures your entire shiplap installation starts straight.
Step 2: The “Spacer Trick” – Our Genius Strategy
Here’s the secret to consistent gaps (or no gaps!) and avoiding the “step” look some shiplap can have. We’re not actually creating a visible gap. Instead, we’ll use a thin shim or spacer to ensure each board is consistently set back behind the lip of the board below it. This creates a clean, layered effect.
Look at how standard shiplap boards are designed. They have a rabbet (a notched-out edge) that allows one board to overlap the other. Our goal is to ensure the overlap is consistent, and the face of the board sits slightly proud of the board below it. We achieve this by placing a very thin spacer between the face of the board you’re installing and the wall behind it, right where the back lip will sit.
The Spacer: This can be anything thin and consistent – a piece of cardboard, a paint stirrer, a thin shim, or even a dime. The thickness of your spacer will determine how much the board “juts out” from the wall. For a classic look where the boards are almost flush but have that defined shadow line, a very thin spacer (like a playing card thickness, or even less) is perfect. You’re not looking for a visible gap between boards, but rather a consistent overlap and shadow line created by the board’s own profile.
Step 3: Install the First Board
The first board sets the tone for the entire wall.
- Position the Board: Place your first board against the wall, aligning its bottom edge with your level starting line.
- Nail It In Place: Use your nail gun to secure the board. Aim for two nails per stud: one near the bottom lip (where it will be covered by the next board) and one near the top edge. Be careful not to overdrive the nails, especially in softer woods. If you’re using a wood board, you can also sink the nails just slightly and fill them later.
- Check for Levelness: Periodically check with your level as you go to ensure it remains perfectly straight.
Step 4: Installing Subsequent Boards – The Genius Continues!
This is where the “genius strategy” truly shines for consistent results.
- Apply the Spacer: Take your chosen spacer (e.g., a thin paint stirrer) and place it along the top edge of the board you just installed. This spacer sits on top of the lower board’s lip, but behind where the higher board will rest. Its purpose is to create a consistent setback for the face of the next board.
- Position the Next Board: Place the next shiplap board over the first one, ensuring the lip of the lower board fits snugly into the groove of the upper board. The face of the new board should rest slightly proud of the board below it, thanks to your spacer.
- Nail Carefully: Nail the new board into the studs. Again, aim for two nails per stud. Place one nail near the bottom edge (hidden by the overlap) and another higher up.
- Remove Spacer & Repeat: Once nailed, remove the spacer and set it aside. You’ll reuse the same spacer for every subsequent board. This ensures your spacing and overlap are identical across the entire wall.
- Stagger Your Seams: Just like with brickwork or tile, stagger the vertical seams of your shiplap boards. This means the end of one board shouldn’t align with the end of the board above or below it. Cut boards to different lengths to achieve this, aiming for at least a 16-inch stagger. This adds structural integrity and visual appeal.
- Working Around Obstacles: For electrical outlets or light switches, you’ll need to cut openings. Carefully measure and mark the shiplap board before you install it. Use a jigsaw to cut out the opening. You may need to cut the board into two pieces to fit around an outlet box.
Table: Nail Gun Recommendations for Shiplap
| Nail Gun Type | Gauge | Nail Length | Best For |
|---|---|---|---|
| Brad Nailer | 18-Gauge | 1″ to 1.5″ | Most common for shiplap. Provides good holding power without splitting wood. |
| Finish Nailer | 16-Gauge | 1.5″ to 2″ | Offers slightly more holding power. Good for thicker shiplap or if you want extra security. |
| Finish Nailer | 15-Gauge | 1.5″ to 2″ | Strongest hold among the common types. Can be best for heavier wood or situations where security is paramount. |
When choosing your nail gun, consider the type of wood you’re using. Softer woods like pine are more prone to splitting, so an 18-gauge brad nailer is often the safest bet. For harder woods or if you’re concerned about the boards staying perfectly put, a 16-gauge is a great option. Always do a test shot on a scrap piece of your shiplap before you start on the wall!
Step 5: Finishing Touches – The Professional Polish
Once all the boards are up, it’s time for the final details that truly make your shiplap pop.
- Caulking: This is where you perfect the seamless look. Use a paintable latex caulk to fill any small gaps between boards or at the edges where the shiplap meets the ceiling, baseboards, or corners. Run a damp finger or a caulking tool along the bead for a clean finish.
- Filling Nail Holes: If you sunk your nails, use wood filler or a small amount of spackle to fill each nail hole. Let it dry completely.
- Sanding: Lightly sand any rough spots, filled nail holes, or caulk lines. A fine-grit sandpaper (120-grit or higher) works best. Wipe away all dust with a tack cloth or a damp rag.
- Painting or Staining: Now for the fun part! You can paint your shiplap for a crisp, modern look or stain it for a more rustic feel. Apply primer first, especially if you’re painting over raw wood or MDF. Follow with two coats of your chosen paint or stain, allowing ample drying time between coats.
- Reinstall Trim: If you removed baseboards or installed new trim at the top or bottom, now’s the time to reattach them.
Safety Note: Always ensure good ventilation when painting or staining. If you’re sanding, wear a dust mask to protect your lungs. For detailed painting advice on different surfaces, resources like This Old House painting guides can be very helpful.
Common Shiplap Pitfalls and How to Avoid Them

Even with a genius strategy, it’s good to be aware of potential challenges.
- Gaps: The most common issue. This is usually caused by uneven walls, inconsistent board placement, or pressure from the nailer. Our spacer trick helps enormously with consistent placement. For minor wall unevenness, caulk is your friend.
- Wood Warping: Shiplap can warp if not acclimated properly or if moisture levels change significantly. Using kiln-dried wood and proper acclimatization helps prevent this.
- Splitting Wood: Using the wrong size nails or nailing too close to the edge can split the wood, especially with softer woods. Ensure you’re using the appropriate gauge nail and aim for the center of the board’s thickness where possible.
- Not Nailing into Studs: If you only nail into drywall, your shiplap could sag or come loose over time. Always locate and use those studs!
- Crooked Installation: This all comes back to starting level and checking your level frequently. Don’t assume the ceiling or floor is perfectly straight; rely on your level.
Frequently Asked Questions About Nailing Shiplap
Q1: What is the best nail gun for shiplap?
A1: An 18-gauge brad nailer is generally the best all-around choice for shiplap. It provides good holding power without damaging or splitting the wood. A 16-gauge finish nailer is also a solid option if you prefer a slightly larger nail for extra security.
Q2: How far apart should I put nails in shiplap?
A2: For each stud your board crosses, use at least two nails. Place one near the bottom of the board (where it will be covered by the next board) and another near the top edge. If a board spans more than 16 inches horizontally without hitting a stud, consider adding a nail mid-span into the drywall for extra support.
Q3: Do I need to nail shiplap into studs?
A3: Absolutely! While shiplap can be held in place by drywall anchors in a pinch, nailing into studs is essential for long-term stability and to prevent sagging. Always use a stud finder to locate studs before nailing.
Q4: Should shiplap boards touch each other?
A4: Shiplap boards are designed to overlap. The groove in one board typically fits over the lip of the board below it. Our “spacer trick” helps ensure this overlap creates a consistent shadow line, rather than a visible gap.
Q5: How do I deal with electrical outlets when installing shiplap?
A5: Measure and mark the location of the outlet opening on the shiplap board before you install it. Use a jigsaw or a multi-tool to carefully cut out the opening. You may need to cut the board into two pieces to fit around the outlet box.
Q6: Can I use liquid nails or construction adhesive with shiplap?
A6: Yes, using a good quality construction adhesive on the back of the shiplap boards can add significant holding power and help prevent rattling. Apply it in a zig-zag pattern before pressing the board into place and nailing. However, do not rely on adhesive alone; nails into studs are still paramount.
Conclusion: Your Shiplap Dreams Within Reach!

There you have it! With a little preparation, the right tools, and our foolproof “spacer trick” strategy, nailing shiplap walls is completely achievable for any DIYer. You’ve learned about the charm of shiplap, what tools you’ll need, and a step-by-step process that emphasizes precision and