Use a nail gun for shiplap to install your accent walls quickly and efficiently. This guide explains the right nail gun, nail size, and technique for a smooth, professional-looking shiplap finish. Learn simple, proven tips for flawless shiplap installation, even for beginners.
Hey there, DIYers! Jack Shaffer, your Nailerguy, here. Ever look at a beautiful shiplap accent wall and think, “I could never do that!? Well, I’m here to tell you you absolutely can! One of the biggest game-changers for shiplap installation is using the right nail gun. Forget struggling with a hammer and nails for hours. A nail gun makes the job faster, easier, and gives you that clean, professional look. But with so many nail guns out there, which one is best for shiplap? And how do you use it without messing up your beautiful boards? Don’t worry, I’ve got you covered. We’ll walk through everything you need to know, step-by-step, so you can tackle that shiplap project with confidence.
Table of Contents
Why Use a Nail Gun for Shiplap?
Let’s be honest, installing shiplap the old-fashioned way, with a hammer and nails, can be a real pain. You’re constantly trying to hit tiny nail heads, it takes forever, and sometimes you bend nails or dent your beautiful wood. A nail gun changes all of that. It drives nails quickly and consistently, saving you a ton of time and effort. Plus, it significantly reduces the chances of damaging your shiplap boards. For a project like shiplap, where you’ll be driving a lot of nails close together, a nail gun isn’t just a convenience; it’s almost essential for a professional result.
Choosing the Right Nail Gun for Shiplap
Not all nail guns are created equal, especially when it comes to shiplap. The key is to pick one that’s designed for the type and size of nails you’ll need. For shiplap, you’re typically looking for a straight or angled brad nailer.
Brad Nailers vs. Finish Nailers for Shiplap
This is where a lot of beginners get a little confused. Both brad nailers and finish nailers shoot thin nails. The main difference is the size of the nail they fire.
Brad Nailer: Shoots very thin nails (typically 18-gauge). These are great because they leave tiny holes that are easy to fill and hide. For most shiplap applications, an 18-gauge brad nailer is perfect. The nails are strong enough to hold the boards securely, but small enough to be minimally visible.
Finish Nailer: Shoots slightly thicker nails (typically 15 or 16-gauge). These nails offer a bit more holding power but leave slightly larger holes. While you can use a finish nailer for shiplap, a brad nailer is generally preferred for its less visible nail holes.
Pneumatic vs. Electric Nail Guns
You’ll often see two main types of nail guns: pneumatic (air-powered) and electric (corded or cordless).
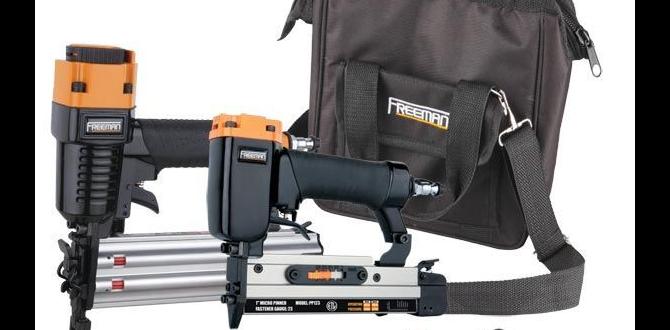
- Pneumatic Nail Guns: These are the workhorses. They require an air compressor and an air hose. They are generally lighter, more powerful, and less expensive to buy upfront than cordless electric models (though you need to factor in the compressor cost).
- Electric Nail Guns (Corded): These plug into a standard outlet. They are convenient because you don’t need a compressor, but you are tethered by a cord, which can be annoying when working around a room.
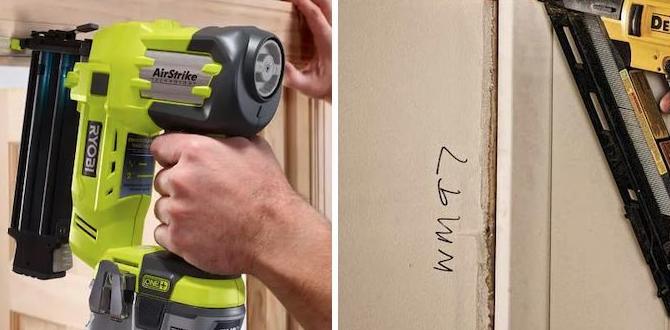
- Cordless Electric Nail Guns (Battery-Powered): These are the most convenient for portability and ease of use. They run on batteries and don’t need any cords or hoses. They tend to be the most expensive option upfront and can be a bit heavier due to the battery pack.
My Recommendation for Shiplap: For shiplap, an 18-gauge pneumatic brad nailer is a fantastic choice for power and value, especially if you plan on doing other DIY projects that might require a compressor. If you want ultimate freedom and don’t mind the higher upfront cost, a cordless 18-gauge brad nailer is hard to beat for convenience.
Essential Tools and Materials for Shiplap Installation
Before you even think about firing up your nail gun, make sure you have everything you need. Gathering all your supplies beforehand will make the installation process smooth and efficient.
Tools Checklist:
- Nail Gun (18-gauge brad nailer recommended)
- Air Compressor (if using a pneumatic nailer) & Air Hose
- Correct Gauge Nails (18-gauge, 1 ¼” to 1 ½” length usually)
- Safety Glasses (ESSENTIAL!)
- Work Gloves (optional, but recommended)
- Measuring Tape
- Pencil
- Level (a longer one is helpful)
- Miter Saw or Circular Saw (for cutting boards to size)
- Stud Finder
- Caulk Gun & Paintable Caulk
- Sanding Block or Foam Pad
- Paint/Stain (for finishing)
- Painter’s Tape
Materials Checklist:
- Shiplap boards (ensure they have the overlapping edge designed for shiplap)
- Wood filler or putty (for filling nail holes)
- Primer (if painting)
- Paint or Stain
Preparing Your Shiplap Boards
Proper prep work is key to a professional finish. This step ensures your boards are ready to go and gives you a solid surface to nail into.
Acclimation is Crucial
Wood is a natural material that expands and contracts with changes in humidity and temperature. Before you start installing, let your shiplap boards acclimate to the room’s environment for at least 24-48 hours. This helps prevent gaps from appearing later as the wood adjusts to its new home. Simply stack them where you plan to install them, ideally with some small spacers to allow air circulation.
Cutting Boards to Size
Measure twice, cut once! You’ll need to cut your boards to fit the length of your wall. Use a miter saw for clean, precise cuts, especially if you’re working with pre-primed boards and want an edge that’s ready for painting. If you don’t have a miter saw, a good circular saw with a straight edge guide can also work.
Tip: For an interior corner, cut the board square. For an exterior corner, you might need to use a 45-degree bevel cut on the edge where the boards will meet, depending on how you want them to join. For shiplap, often the overlapping nature hides these corner joints well enough with straight cuts.
Pre-Drilling (Optional but Recommended for Some Edges)
While not strictly necessary for every nail when using a nail gun, pre-drilling can be a good idea if you’re very close to the edge of a board or if you’re working with particularly hard wood. It helps prevent splitting. However, with the thin nails from an 18-gauge brad nailer and proper technique, splitting is usually not a major concern for shiplap.
Mastering Nail Gun Technique for Shiplap
Now for the fun part! Using the nail gun correctly will ensure your shiplap stays put and looks fantastic. Safety first, always!
Setting Up Your Nail Gun
- Read the Manual: Every nail gun is a bit different. Always consult your user manual for specific operating instructions and safety features.
- Load the Nails: Open the magazine, lay your 18-gauge nails in place, and close the magazine firmly. Ensure they are seated properly.
- Connect Air (Pneumatic): Connect your air hose to the compressor and then to the nail gun.
- Set Air Pressure: This is critical! Start with a lower pressure (around 70-80 PSI) and test fire on a scrap piece of wood. You want the nail to sink just below the surface of the wood, but not so deep that it blows through the wood or creates a large divot. Gradually increase the pressure if needed. For most pine or MDF shiplap, 80-100 PSI is usually a good range. A handy guide for this can be found on some tool manufacturer websites or the NIOSH Pocket Guide to Chemical Hazards, which touches on pneumatic tool safety (though not nailer pressure specifically, it highlights overall pneumatic safety).
- Engage Safety Mechanism: Most nail guns have a safety contact tip or trigger mechanism that prevents firing unless it’s pressed against a surface. Make sure this is engaged before you point the gun.
The Firing Technique
1. Position the Board: Place your shiplap board where you want it on the wall. Ensure the overlapping edge is correctly positioned over the board below (or against the ceiling/floor). Use a level to make sure it’s straight.
2. Locate Studs: For a secure installation, you need to nail into wall studs. Use a stud finder to mark the location of the studs on your wall. This is crucial for long-term stability.
3. Place the Nail Gun: Press the safety contact tip of the nail gun firmly against the shiplap board. Ensure the tip is perpendicular to the wood surface. For shiplap, you’ll want to place your nails:
- Into the stud: Drive nails into the solid wood of the wall stud behind your shiplap.
- At the overlap: Drive nails through the top edge of the board, into the board below it. This “hidden” nail placement is a hallmark of shiplap and makes the nails less visible.
4. Fire the Nail:
- Option A (Sequential Trigger): If your nail gun has a sequential trigger, you must pull the trigger first, then press the safety contact tip against the wood to fire a nail. This is the safest method.
- Option B (Contact Trip / “Bump Fire”): If your nail gun has a contact trip trigger, you press the safety contact tip against the wood first, then pull the trigger to fire. Some nailers allow you to hold the trigger down and “bump” the contact tip to fire multiple nails in succession.
For shiplap, consistent placement is key. I recommend the sequential trigger or, with a contact trip, being deliberate with each placement rather than rapid bump-firing to ensure your nails go exactly where you want them.
5. Nail Placement Strategy:
- Spacing: Aim to place nails about 6-8 inches apart along each stud.
- Hidden Nails: Drive nails through the top board, just above where it overlaps the board beneath. This allows the next board to cover the nail heads.
- Edge of the board: You can also place a nail or two near the top and bottom edges of the board, again at stud locations, to help hold it flat against the wall.
6. Check Nail Depth: After each nail, check its depth. If it’s too high, you might need to slightly increase air pressure and fire straight into the wood (not into another nail). If it’s too deep, reduce pressure and be careful not to over-drive. A nail driven slightly below the surface is ideal, as it creates a small dimple perfect for filling.
Troubleshooting Common Nail Gun Issues
- Nail Jam: This is the most common issue. First, disconnect the air supply (if pneumatic) or remove the battery. Consult your manual to find out how to safely clear a jam. Usually, it involves opening a small access panel and gently removing the stuck nail.
- Nails Not Firing: Check if the nail magazine is loaded correctly, if there are enough nails, if the safety contact is depressed, and if the tool is receiving air or has a charged battery.
- Nails Not Driving Fully: Increase air pressure slightly (if pneumatic). Ensure you’re pressing the gun firmly against the surface. Check if you’re trying to nail into a knot in the wood, which can be harder.
- Nails Driving Too Deep / Damaging Wood: Reduce air pressure. Be less aggressive when pressing the gun against the wood.
Tips for a Seamless Shiplap Finish
Getting the boards up is one thing, but making it look like a pro did it involves a few extra steps.
Spacing the Boards
This is where the classic shiplap look comes in. You need a consistent gap between your boards.
- Using Coins or Spacers: A very popular and easy method is to use coins or pre-made spacers. A quarter is a common choice for a nice-looking gap. Simply place the coin (or your chosen spacer) under the edge of the board as you install it, then move it to the next section once the board is nailed.
- Consistency is Key: Whatever spacing method you choose, stick with it for the entire wall.
Dealing with Outlets and Switches
This can be tricky, but it’s manageable.
- Mark Carefully: Before installing a board that covers an outlet or switch box, carefully mark the box location on the board with a pencil.
- Cut Before Installing: Remove the outlet or switch plate. Use a jigsaw or Roto-Zip to cut out the opening in the board. It’s often better to cut a slightly smaller hole and then enlarge it as needed by test-fitting.
- Install and Reattach: Install the board with the cutout, and then reattach the outlet or switch plate. The plate will cover any minor imperfections in your cuts.
Safety Note: Always turn off the power to the circuit at your breaker box before working around electrical outlets or switches. For this, a helpful resource is the Consumer Product Safety Commission (CPSC), which offers general safety tips for home appliances and electrical work.
Filling Nail Holes
Once all your boards are up and nailed, you’ll have a lot of little holes to deal with.
- Choose Your Filler: Use a good quality paintable wood filler or putty. For painted shiplap, a lightweight spackling compound can even work in a pinch.
- Application: Use a putty knife to press the filler into the nail hole. Slightly overfill it so you have a bit to sand down.
- Let it Cure: Allow the filler to dry completely. This can take anywhere from 15 minutes to a few hours, depending on the product and the depth of the hole.
- Sand Smooth: Once dry, gently sand the filled holes flush with the surface of the board using a sanding block or fine-grit sandpaper. You don’t want any bumps or ridges.
Caulking for a Seamless Look
This step makes a HUGE difference in achieving that professional, seamless shiplap wall.
- Caulk All Seams: Apply a thin bead of paintable caulk along all the seams where the shiplap meets the ceiling, baseboards, and any corner trim.
- Caulk Nail Holes: If you didn’t fill every single nail hole with wood filler, now is a good time to go over any remaining small ones with caulk.
- Smooth the Bead: Use a damp finger or a caulk-smoothing tool to create a neat, concave bead of caulk. Wipe away excess caulk with a damp rag.
- Allow to Dry: Let the caulk cure completely before painting.
Painting or Staining Your Shiplap
With your nail holes filled and gaps caulked, your shiplap is ready for its final flourish!
- Prime (if painting): If you’re painting, apply a good quality primer. This ensures even color and helps hide any wood knots or stains.
- Paint or Stain: Apply your chosen paint or stain. You might need two coats for complete coverage, especially over the caulk and filler.
- Work with the Grain: If staining, always work with the grain of the wood.
- Cut in Edges: Use a small brush to carefully paint or stain along the edges and into any tight corners before using a roller or sprayer for the larger surfaces.
Frequently Asked Questions About Nail Gun Shiplap
Q1: What is the best nail gun for installing shiplap?
An 18-gauge brad nailer is generally the best choice for shiplap. It drives thin nails that are strong enough to hold the boards securely but leave small, easily concealable holes.
Q2: What size nails should I use for shiplap with a nail gun?
For an 18-gauge brad nailer, 1 ¼-inch to 1 ½-inch nails are usually sufficient for most shiplap applications, especially if you are nailing into studs.
Q3: How far apart should I place the nails when installing shiplap?
You should place nails approximately