Mastering your nail gun safely is crucial for any DIYer. This comprehensive guide walks beginners through essential safety practices, proper operation, and maintenance to ensure successful and secure projects. Learn to confidently power through your next woodworking task!
Hey there, DIY adventurers! Jack Shaffer here, your go-to guy for all things woodworking and tools. Have you ever looked at a nail gun and thought, “Wow, that looks powerful, but maybe a little intimidating?” You’re not alone! These fantastic tools can speed up your projects immensely, but like any powerful tool, they demand respect and a solid understanding of how to use them safely. That’s exactly what we’re going to dive into today. Forget those confusing manuals and those scary “what-if” scenarios. We’ll break down everything you need to know to wield your nail gun with confidence and, most importantly, with complete safety. Ready to nail your next project without any hiccups? Let’s get started by getting you prepped with the absolute essentials for safe nail gun operation.
Table of Contents
Why Safety Comes First with Nail Guns
Nail guns are incredible time-savers. They drive nails faster than you ever could with a hammer, making everything from framing a wall to attaching trim a breeze. However, that power is precisely why safety is non-negotiable. A misused nail gun can cause serious injuries, from deep puncture wounds to severe damage to hands, feet, eyes, or even other body parts. The sheer speed at which a nail is fired means there’s very little time to react if something goes wrong. Prioritizing safety isn’t about being overly cautious; it’s about being smart and responsible with powerful equipment, ensuring you can enjoy your DIY passion project for years to come without incident.
According to the Occupational Safety and Health Administration (OSHA), approximately 37,000 individuals experience nail gun injuries annually, with many being preventable. This highlights the critical importance of understanding and implementing safety protocols. We want you to be part of the statistic that didn’t get hurt, the one that finished the project safe and sound.
Understanding Your Nail Gun: Types and Features
Before we power up, let’s get acquainted with the different types of nail guns and their basic features. Knowing what you have will help you understand its specific needs and safety considerations.
Common Nail Gun Types
- Framing Nailers: These are your heavy-duty workhorses, designed for structural projects like building decks, fences, or framing walls. They drive larger nails and are often powered by air (pneumatic).
- Finish Nailers: Perfect for trim work, baseboards, and crown molding. They fire smaller, thinner nails that leave a smaller hole, making them ideal where aesthetics matter. They can be pneumatic, electric, or cordless.
- Brad Nailers: Similar to finish nailers but fire even smaller, finer nails (brads). They’re great for delicate trim, decorative molding, and small craft projects.
- Pin Nailers: These use tiny, headless pins, ideal for holding delicate pieces in place without leaving a visible mark. They are often used in conjunction with wood glue.
- Roofing Nailers: Specifically designed with a large head to secure roofing materials quickly and efficiently. They are often lighter and have specific features for overhead work.
Key Features to Know
Most nail guns share some common features that are important for safe operation:
- Nose/Contact Tip: This is where the nail is fired. Many have a safety contact element that must be pressed against the workpiece for the nailer to fire.
- Trigger: The mechanism that initiates the firing sequence. Different nailers have different firing modes (sequential fire, bump fire).
- Air Hose Connection (Pneumatic): Where you connect the air hose. Ensure a secure fit.
- Magazine: Holds the nails. It’s crucial to load nails correctly according to the manufacturer’s instructions.
- Depth Adjustment Wheel: Allows you to control how deep the nail is driven into the material.
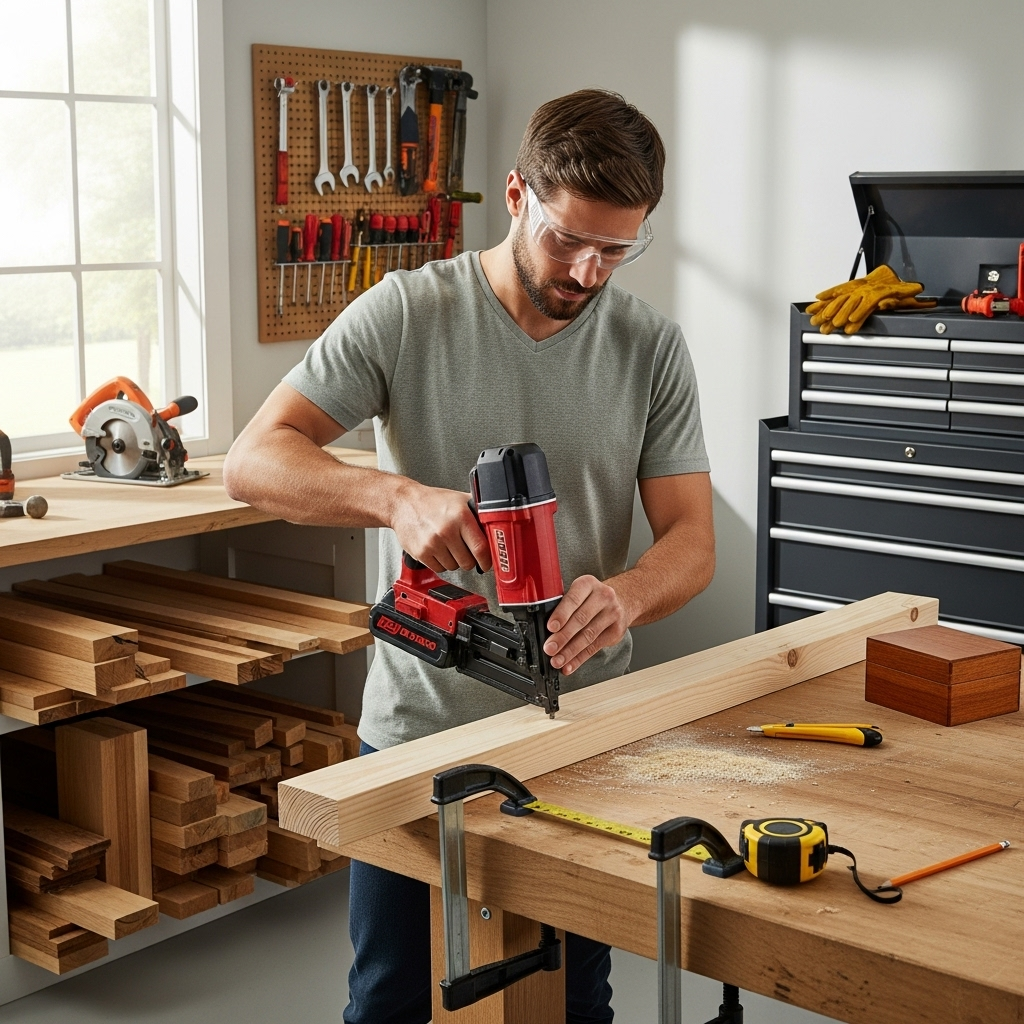
Essential Safety Gear: Your First Line of Defense
Think of this gear as your personal safety shield. Never, ever operate a nail gun without all of these in place. It only takes a second for an accident to happen, so don’t take chances!
Must-Have Personal Protective Equipment (PPE)
- Safety Glasses or Goggles: This is non-negotiable. Always wear ANSI Z87.1-compliant safety glasses. Flying debris, nail fragments, or even a deflected nail can cause permanent eye damage. Goggles offer a snugger fit and better protection.
- Hearing Protection: Nail guns can be loud, especially pneumatic ones. Prolonged exposure to loud noise can lead to hearing loss. We recommend earplugs or earmuffs.
- Work Gloves: Good quality work gloves protect your hands from splinters, abrasions, and minor impacts. They can also improve your grip on the tool.
- Sturdy Footwear: Closed-toe, sturdy shoes are essential. You don’t want to accidentally step on a nail that hasn’t been fully driven or drop the tool on your foot. Steel-toed boots offer extra protection.
- Dust Mask: If you’re working with wood that generates a lot of dust, or in an enclosed space, a dust mask will protect your lungs.
Pro-Tip: Keep your PPE in a dedicated place, like a toolbox compartment or hanging by your workbench, so it’s always ready to go.
Setting Up Your Nail Gun for Safe Operation
Proper setup is key to preventing accidents. Even before you load a single nail, take these preparatory steps.
Pre-Operation Checklist
- Read Your Owner’s Manual: Every nail gun is a little different. Your manual is your best friend for specific operating and safety instructions.
- Inspect the Nail Gun: Before each use, check for any damage, loose parts, or worn components. Ensure the safety contact tip is functioning correctly and not damaged.
- Check Nail Compatibility: Make sure you are using the correct type, size, and collation angle of nails for your specific nail gun model. Using the wrong nails can cause jams and misfires. Visit a resource like ToolReviews.com’s guide for compatibility charts.
- Clear Your Workspace: Ensure the area is free of clutter, trip hazards, and especially other people. Make sure no one is behind or beside where you are working, as a stray nail can travel further than you think.
- Secure Your Workpiece: Your material should be firmly held in place, either with clamps or by your own steady grip (while maintaining safe distance from the firing zone). A moving workpiece can cause the nail to go astray.
Powering Up Safely
The power source differs between nail gun types:
Pneumatic Nail Guns (Air Powered)
- Connect the Air Hose: Ensure the compressor is turned off. Connect the air hose to the nail gun’s air inlet. Make sure the fitting is secure.
- Set Air Pressure: Consult your nail gun’s manual for the recommended air pressure (PSI – Pounds per Square Inch). Most framing nailers run between 80-120 PSI, while finish nailers might be lower. Too much pressure can damage the tool and be dangerous; too little can cause incomplete drives. A good regulator on your compressor is essential. You can find guides on compressor use from reputable sources such as Family Handyman.
- Turn on Compressor: Once connected and pressure is set, turn on your air compressor.
Electric and Cordless Nail Guns
- Connect Power: For corded electric models, plug the tool into a GFCI-protected outlet. For cordless models, ensure the battery is fully charged and properly inserted.
- Check Batteries: For cordless models, verify the battery fits snugly and is locked in place.
How to Load Nails Correctly
Loading nails is a simple step, but doing it wrong can lead to jams or safety issues. Always ensure the tool is disconnected from its power source (unplugged, battery removed, or air hose disconnected) before loading.
General Loading Steps:
- Remove Power Source: Disconnect the air hose, battery, or power cord.
- Open the Magazine: Most nail guns have a latch or lever to open the magazine. Refer to your manual if unsure.
- Insert Nails: Place the strip of nails into the magazine. Pay attention to the angle of the nails; they must match the angle of the magazine. Most magazines have a spring-loaded follower or pusher that keeps the nails snug.
- Close the Magazine: Push the magazine cover back into place until it clicks or locks securely.
- Reconnect Power Source: Once loaded and secured, reconnect the air hose, battery, or power cord.
Firing Modes Explained: Sequential vs. Bump Fire
Many nail guns offer different firing modes, and understanding them is crucial for both efficiency and safety.
Sequential Fire (Single Shot)
In sequential mode, the nail gun will only fire a nail when two conditions are met:
- The safety contact tip is pressed firmly against the workpiece.
- The trigger is pulled.
This is the safest mode and is highly recommended for beginners and for precision placement of nails, such as when installing trim or working on intricate pieces. It minimizes the risk of accidental firing because you need a deliberate action (pressing and pulling) for each nail.
Bump Fire (Contact Trip)
In bump fire mode, once the tool is powered and the safety contact tip is engaged, the nail will fire as soon as the trigger is held down and the contact tip is actuated (pressed against a surface). This allows for very rapid nailing by essentially “bumping” the nose of the gun against the workpiece while holding the trigger.
When to Use Bump Fire: This mode is faster and useful for tasks like quickly securing framing lumber or when speed is more critical than precise placement. However, it requires more practice and extreme caution.
Safety Warning for Bump Fire: Because it fires with any contact while the trigger is held, there is a much higher risk of accidental discharge. Never engage bump fire mode unless you are in a stable position, have a clear firing path, and are confident in your control. Always keep your finger OFF the trigger when not actively firing a nail in this mode, and never “dry fire” (fire without a nail). Always start with sequential mode until you are comfortable.
Recommendation: Always start with sequential mode. Only switch to bump fire when you are experienced, understand the risks, and believe it’s appropriate for the task. Many professional nailers even exclusively use sequential fire for safety.
How to Use a Nail Gun Safely: Step-by-Step Guide
Now that we’ve covered the basics, let’s get to the practical steps of using your nail gun safely.
- Wear ALL Your PPE: I can’t stress this enough. Safety glasses, hearing protection, gloves, sturdy shoes – put them all on before you even touch the nailer.
- Prepare Your Workspace: Clear the area, ensure stable footing, and make sure no one else is in the vicinity of your work.
- Inspect the Nail Gun and Materials: Double-check the tool, ensure you have the right nails, and your workpiece is secure.
- Connect Power Source: Connect your air hose, battery, or plug in the tool.
- Set Firing Mode: If your gun has firing modes, ensure it’s set to sequential fire for maximum safety, especially as a beginner.
- Load Nails: Disconnect power temporarily if needed to load nails securely.
- Position the Nail Gun: Place the nose of the nail gun firmly against the spot where you want to drive the nail. Ensure the safety contact tip is fully depressed against the material.
- Fire the Nail: Gently pull the trigger. The nail should drive into the material.
- Adjust Depth (if needed): If the nail isn’t driven deep enough or goes too deep, stop and adjust the depth setting. Refer to your owner’s manual for how to do this. Never try to adjust depth while wearing the tool or with it powered on in a way that the safety tip can be actuated.
- Maintain Control: Always maintain a firm grip on the nail gun and be aware of where the nose is pointed. Never point the nail gun at yourself or others.
- Continuous Nailing (Sequential Mode): Move to the next spot, ensure the contact tip is depressed, and pull the trigger again. Maintain control and awareness.
- Continuous Nailing (Bump Fire Mode – Use with EXTREME Caution): If using bump fire, hold the trigger down and “bump” the nose against the workpiece to fire nails rapidly. Keep your finger off the trigger when not actively firing. Be extremely aware of your surroundings and the nail path. Many professionals advise never to use it unless absolutely necessary.
- When Finished: Always disconnect the power source (unplug, remove battery, or disconnect air hose) BEFORE you set the nail gun down, clear jams, or perform any maintenance. This is a critical safety step.
Depth Adjustment: Getting it Just Right
Driving nails to the correct depth is important for both the effectiveness and appearance of your project. A nail that isn’t driven deep enough might stick out, while one driven too deep can damage the wood or create an unsightly hole.
How to Adjust Nail Depth
Depth adjustment mechanisms vary by model, but most involve a dial or wheel, often located near the nose of the tool. Consult your owner’s manual for the exact location and operation of your depth adjustment feature.
General Process:
- Ensure Tool is Unloaded and Unpowered: Disconnect the nail gun from its power source (unplug, remove battery, disconnect air).
- Locate Adjustment Wheel: Find the adjustment wheel/dial.
- Adjust for Depth:
- To drive nails deeper: Usually, you will turn the adjustment wheel (often clockwise) to increase depth.
- To drive nails shallower: Usually, you will turn the adjustment wheel (often counter-clockwise) to decrease depth.
- Test on Scrap Material: Always test your settings on a piece of scrap wood that matches your project material. Fire a nail and check the depth. Adjust as needed and re-test until you achieve the desired result.
- Re-engage Power and Continue: Once you have your depth set correctly, reconnect the power and resume your work.
Important Note: Air pressure on pneumatic nailers also affects depth. Ensure your air pressure is within the recommended range per the manual. While the depth adjustment wheel fine-tunes depth, incorrect air pressure can make it difficult to achieve consistent results.
Troubleshooting Common Nail Gun Issues
Even with the best care, nail guns can sometimes act up. Here’s how to handle common problems safely.
| Problem | Possible Cause | Solution Steps (Safety First!) |
|---|---|---|
| Nail Gun Not Firing | No power (air, battery, or plugged in) | 1. Ensure tool is properly connected to its power source. 2. Check battery charge or air pressure. 3. Ensure safety contact tip is depressed. 4. Check for jams (see below). |
| Nail Jammed in Nose | Incorrect nail size/type, bent nail, or improper loading | 1. IMMEDIATELY DISCONNECT POWER SOURCE. 2. Open the magazine. 3. Carefully remove any jammed nails using pliers if necessary. Be gentle to avoid damaging the nose. 4. Clear any debris. 5. Reload correctly. 6. Reconnect power and test on scrap. |
| Nails Not Driving Fully | Low air pressure (pneumatic), low battery (cordless), or tool malfunction | 1. For pneumatic: Check and adjust air pressure, ensuring it’s within specified PSI. 2. For cordless: Ensure battery is fully charged and properly seated. 3. Check depth adjustment settings. 4. Ensure you are pressing the safety contact tip firmly against the workpiece. |
| Tool Leaking Air | Loose air hose connection, worn O-rings, or damaged seals | 1. For pneumatic: Disconnect air supply. 2. Check hose connection at both the compressor and the tool for tightness. 3. Inspect for visible damage to O-rings or seals. 4. If leaks persist, |