Use a nail gun for lattice installation for a fast, secure, and professional finish. This guide will walk you through selecting the right nailer, prepping your materials, and safely fastening lattice panels to posts or frames.
Ever looked at a beautifully installed lattice panel and wondered how it got so perfectly in place without a single bent nail or splintered edge? It might seem like a job for a seasoned pro, but with the right tool, you can achieve that same polished look yourself!
Installing lattice can feel a bit tricky. You want it to be sturdy, look neat, and avoid damaging the delicate lattice material. Traditional hammering can be slow, and it’s easy to miss your mark, leading to frustration. But what if I told you there’s a way to make this task much simpler, faster, and more effective?
That’s where a nail gun comes in! It’s a game-changer for projects like lattice installation. We’re going to dive into exactly how to use one, from choosing the right type to making those perfect, clean shots. Get ready to transform your outdoor spaces with confidence. Stick around, and we’ll cover everything you need to know!
### Frequently Asked Questions About Using a Nail Gun for Lattice
Q1: What’s the easiest type of nail gun for lattice installation?
The easiest for lattice is typically a brad nailer or a finish nailer. Brad nailers use thinner nails and are gentler on delicate materials like lattice, while finish nailers offer a bit more holding power if needed. Both are user-friendly for beginners.
Q2: Can I use a roofing nailer for lattice?
No, absolutely not. Roofing nailers are designed for shingles and use much larger, wider nails that will easily split and damage lattice. Always use a tool specifically suited for finer woodworking, like a brad or finish nailer.
Q3: What kind of nails should I use with my nail gun for lattice?
For most wood lattice, 18-gauge brad nails or 16-gauge finishing nails are ideal. Choose a length that goes through the lattice and into your supporting post or frame without fully penetrating the other side (usually 1 to 1.5 inches). Stainless steel or galvanized nails are best to prevent rust.
Q4: Do I need to pre-drill holes for lattice installation with a nail gun?
Generally, no. The beauty of using a brad nailer or finish nailer for lattice is that the nails are thin enough not to split the wood when fired correctly. Pre-drilling might be necessary only if you’re working with extremely dense wood or very close to an edge, which is rare with standard lattice panels.
Q5: How do I avoid sinking the nail too deep into the lattice?
Most modern nail guns have a depth adjustment setting. Start with the lowest setting and test on a scrap piece of lattice. Gradually increase the depth until the nail head sits flush with or barely below the lattice surface. You can also adjust the air pressure on your compressor; lower pressure can help prevent overdriving.
Q6: What safety precautions are essential when using a nail gun for lattice?
Always wear safety glasses. Ensure the nail gun has a contact-trip trigger (meaning it only fires when pressed against the surface). Never point the nail gun at yourself or others. Keep your fingers away from the muzzle. Disconnect the air hose when changing nails or not in use.
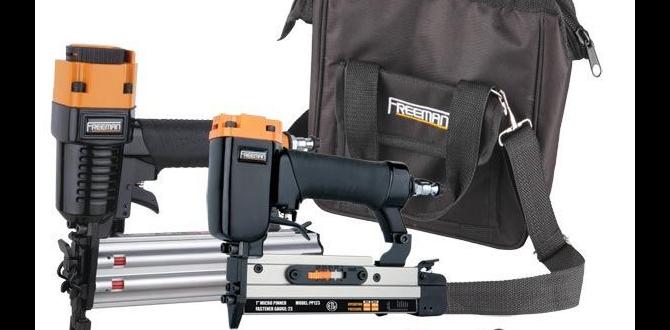
### Choosing the Right Nail Gun for Your Lattice Project
When you’re ready to tackle lattice installation, picking the right nail gun makes all the difference. For this kind of job, we’re generally looking for tools that are precise, gentle on the material, and easy to handle. Think of it like choosing the right brush for painting – you want control and finesse!
Here at Nailerguy, we often recommend two main types for lattice work:
- Brad Nailer: These are fantastic for delicate materials like lattice. They shoot thin 18-gauge nails that are less likely to split the wood. They provide a clean, almost invisible fastening point.
- Finish Nailer: A step up in power, finish nailers typically use 15-gauge or 16-gauge nails. They offer a bit more holding strength, which can be useful if your lattice is larger or exposed to more wind. The nail heads are slightly larger than brads, but still quite discreet.
Why these are great for lattice:
- Precision: Both brad and finish nailers allow you to place fasteners accurately.
- Gentle on Material: Their smaller nail sizes minimize the risk of splitting lattice, which is often made of thinner wood.
- Speed: They significantly speed up the process compared to hammering each nail by hand.
- Clean Finish: The nails sink in smoothly, leaving a neat appearance that complements the lattice pattern.
What to avoid:
- Framing Nailers: These are for heavy-duty construction and use large nails that will obliterate lattice.
- Staple Guns: While some might seem tempting for speed, staples can be harder to conceal and may not offer the same long-term hold as nails.
For most DIY lattice installations, an 18-gauge brad nailer is the go-to choice for its finesse. If you anticipate needing a bit more holding power or already own a 16-gauge finish nailer, that works beautifully too. The key is to match the nail gun’s size and power to the delicate nature of the lattice.
### Essential Supplies for Lattice Installation with a Nail Gun
Before you even power up your nail gun, having all your supplies ready is crucial for a smooth workflow. It’s like preparing your ingredients before cooking – it makes the whole process much easier and more enjoyable.
Here’s what you’ll need:
- Lattice Panels: Measure your space carefully to ensure you have the right amount.
- Nail Gun: As discussed, a brad nailer (18-gauge) or finish nailer (15- or 16-gauge) is ideal.
- Compatible Nails: Stainless steel or galvanized nails are essential for outdoor use to prevent rust and stains. Ensure they are the correct gauge and length.
- Air Compressor (if using pneumatic nailer): Make sure it’s the right size for your nail gun and has a regulator. Aim for consistent 70-100 PSI for most brad/finish nailers.
- Safety Glasses: Non-negotiable! Protect your eyes at all times.
- Work Gloves: For a better grip and protection.
- Measuring Tape: For precise placement.
- Pencil or Marker: To mark where you want to place your nails.
- Level: To ensure your lattice is straight.
- Scrap Wood/Lattice: For test shots to get your nail gun settings right.
- Clamps (optional but helpful): To hold the lattice panel in place while you nail.
- Touch-up Paint or Stain (optional): To cover nail heads if desired.
- Sandpaper (fine grit): For smoothing any minor rough spots or covering nail heads.
Having these items on hand means you won’t be scrambling mid-project. It ensures you can focus on the installation itself, making the job faster, safer, and much more satisfying. Ready to prepare the area?
### Preparing Your Space and Lattice
Before we even think about firing a nail, setting up your workspace and getting your lattice ready is key. This step ensures a clean and professional result that will last. It might seem like extra effort, but trust me, it pays off immensely!
1. Inspect the Lattice:
First, take a good look at your lattice panels. Are there any rough edges, splinters, or imperfections? Gently sand them down with fine-grit sandpaper. This not only improves the appearance but also prevents splinters while you’re working.
2. Check Your Supports:
What are you attaching the lattice to? Make sure your posts, fence pickets, or frame are sound, sturdy, and properly aligned. If you’re attaching to new posts, ensure they are set firmly in the ground and plumb (perfectly vertical) using a level. If attaching to an existing structure, check for any loose boards or rot.
3. Measure and Mark:
Decide on your placement. Do you want the lattice flush with the edges of your posts, or do you want it centered? Use your measuring tape and pencil to make light marks on your support structure where the edges of the lattice panel will align. This ensures consistent spacing and alignment across multiple panels if you’re installing more than one.
4. Plan Your Nail Placement:
Think about where you’ll drive the nails. Generally, you’ll want to place nails along the perimeter of the lattice panel, securing it to the supporting posts or frame. Aim for nails about every 6 to 8 inches. Also, consider nailing along any internal supports or cross braces within the lattice itself, especially if the panel is large.
5. Position the Lattice:
Carefully hold the lattice panel in place against your support structure. A helper is great here, or you can use clamps to temporarily secure it. Use your level to ensure the panel is perfectly vertical or horizontal, depending on your design. Once it’s in position and level, you’re ready for the next step: test firing!
This preparation might seem basic, but it sets the foundation for everything that follows. A little attention to detail now saves a lot of headaches later. Now, let’s dial in that nail gun!
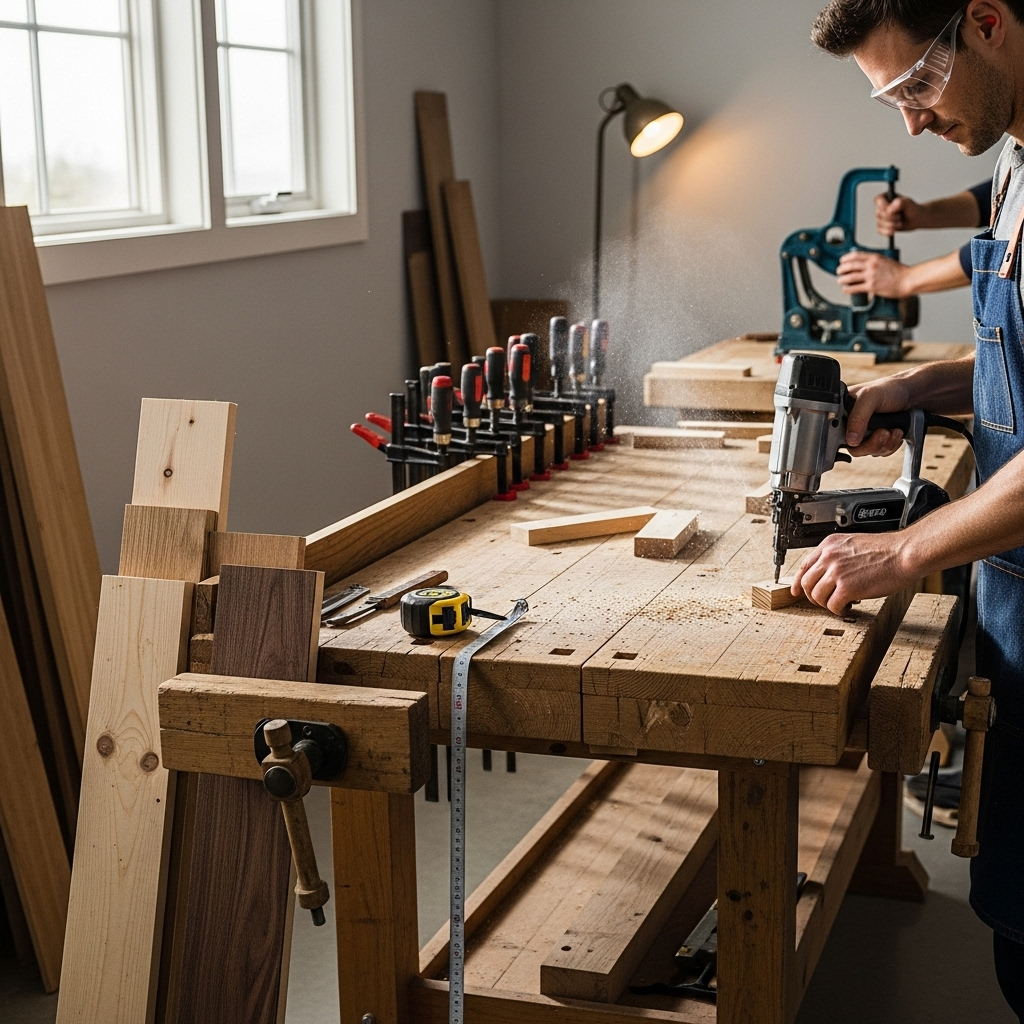
### Step-by-Step: How to Use Your Nail Gun for Lattice Installation
Alright, we’ve got our tools, our supplies, and our space prepped. Now comes the fun part – using the nail gun! Remember, safety first, and we’ll go step-by-step so you feel confident with every shot.
Step 1: Set Up Your Nail Gun and Compressor
If you’re using a pneumatic nailer, connect it to your air compressor. Set the compressor’s regulator pressure. For most brad and finish nailers, 70-100 PSI is a good starting range. Consult your nailer’s manual for the specific recommendation. Ensure the air hose is securely connected to both the compressor and the nail gun. Don’t connect the air hose to the nail gun until you are ready to start firing.
Step 2: Load the Nails
Open the magazine of your nail gun by sliding the spring-loaded carriage back. Insert the correct type and length of nails, ensuring the nail collation (the strip they are attached with, often plastic or paper) is facing the correct direction as per your nail gun’s instructions. Close the magazine until it clicks shut.
Step 3: Perform a Test Fire (Crucial!)
This is the most important step for a perfect finish. Grab a piece of scrap wood or lattice. Hold the nail gun firmly against the scrap material. Make sure the safety tip (at the end of the muzzle) is pressed firmly against the surface. Now, pull the trigger.
- Check the Nail Depth: Is the nail head flush with the surface, slightly below, or sticking out?
- Adjust as Needed:
- If the nail is sticking out or flush: You need to increase the air pressure slightly or adjust the depth setting (if your nailer has one) to drive it deeper.
- If the nail is sinking too deep, potentially breaking through the lattice: Decrease the air pressure or adjust the depth setting to prevent overdriving.
- Repeat: Continue test firing on your scrap material and adjusting until the nail head sits perfectly, just slightly countersunk into the surface, without damaging the wood.
This ensures you won’t split your delicate lattice or have nails popping out later.
Step 4: Position and Fire on the Lattice
With your nail gun properly set, it’s time to attach the lattice.
- Position: Hold the lattice panel firmly in place against your support structure. If you’re using clamps, ensure they aren’t in the way of the nail gun’s muzzle.
- Place the Nailer: Bring the nail gun’s muzzle with the safety tip pressed firmly against the lattice where you want to drive a nail. Aim for a spot that crosses over a structural element of the lattice (like an intersection of the wooden strips) to ensure good grip into the support behind it. It’s also good to place nails near the edges where the lattice meets the post.
- Fire: Pull the trigger while maintaining firm contact with the surface. The nail should drive smoothly into the wood.
Step 5: Continue Nailing and Securing
Work your way around the perimeter of the lattice panel, placing nails every 6 to 8 inches. Also, nail into any internal supports of the lattice if they align with your posts or frame. Use your level periodically to ensure the lattice remains straight and plumb as you secure it. If you’re installing multiple panels, ensure consistent spacing between them.
Step 6: Finishing Touches
Once all your lattice is securely fastened, remove any clamps. Inspect your work. If any nail heads are slightly proud (sticking out), you can very carefully tap them in with a nail set and hammer, or sometimes a quick, precise shot from the nail gun at a slightly higher setting (after another test!) can sink them. For a more finished look, you can lightly sand any minor imperfections and then touch up the nail heads with matching paint or stain.
And there you have it! A beautifully installed lattice panel, all thanks to your nail gun and a little know-how.
### Tips for Different Lattice Materials and Situations
Lattice isn’t just one-size-fits-all. You might encounter different materials or specific installation scenarios that require slight adjustments. Here are some tips to help you navigate these:
Vinyl Lattice:
- Nail Gun Choice: A brad nailer is usually ideal. Vinyl can be brittle, and thinner nails are less likely to crack it.
- Nail Length: Use shorter nails (e.g., 1 inch) as you typically don’t need to anchor deeply into vinyl. The goal is to secure it to the underlying frame or posts.
- Nail Depth: Set your nail gun to sink the nail just enough so the head sits flush with the vinyl surface. Too deep, and you risk cracking. Too shallow, and it won’t hold. Test on a scrap piece!
- Expansion Gaps: Vinyl expands and contracts with temperature. If installing large panels, consider leaving a small gap (about 1/8 inch) around the edges to allow for this movement. You can achieve this by slightly offsetting the lattice from the frame supports.
Wood Lattice (Standard):
- Nail Gun Choice: Both brad and finish nailers work well. A 16-gauge finish nailer offers a bit more holding strength if the panel is large or in a windy area.
- Nail Length: 1 to 1.5 inches is typical for securing from the lattice into wooden posts or frames.
- Nail Depth: Aim for a flush or slightly countersunk nail head. Wood is forgiving, but avoid driving too deep which can split the wood.
- Treated Lumber Supports: If attaching wood lattice to pressure-treated lumber (often used for decks and posts), ensure you use galvanized or stainless steel nails. This is vital because the chemicals in treated lumber react with standard steel, causing corrosion.
Metal Lattice:
- Nail Gun Alternative: Nail guns are generally not suitable for metal lattice. You would typically use short self-tapping screws designed for metal, or specific metal fasteners.
Attaching to Different Surfaces:
- Picket Fence: Use a brad or finish nailer, ensuring your nails go through the lattice and into the picket securely. You may need longer nails if the picket is substantial.
- Deck Railings or Planter Boxes: These are usually wood. The standard brad or finish nailer techniques apply. Ensure you’re hitting solid wood framing behind the lattice.
- Masonry (Brick/Concrete): Nail guns are not appropriate here at all. You would need to use masonry screws or anchors and a hammer drill.
Dealing with Sharp Angles or Curves: