Summary: Learn how to use a flooring nailer effectively for a professional-looking finish on your DIY flooring projects. This beginner-friendly guide covers everything from setup to safe operation, ensuring you nail your next installation with confidence and ease.
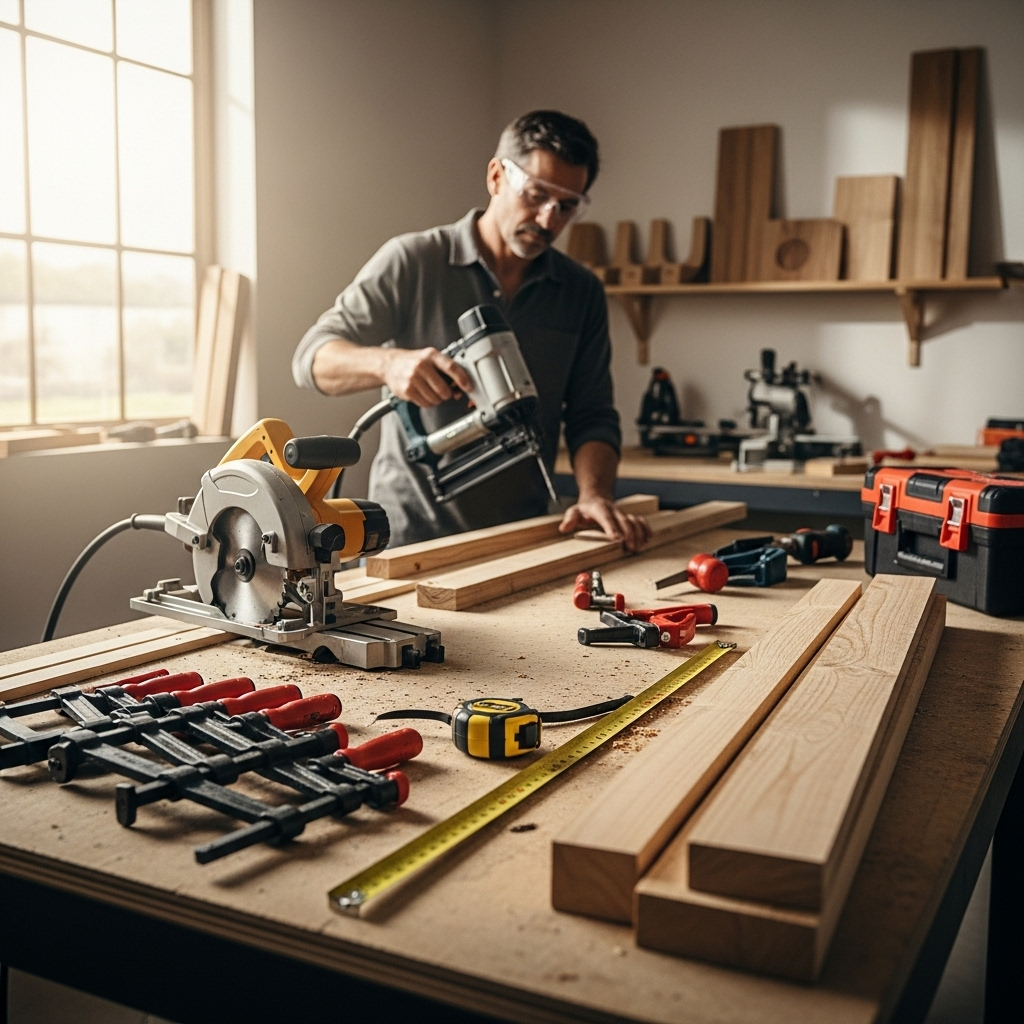
Hey there, DIYers! Jack Shaffer here, your friendly neighborhood Nailerguy. Tackling a flooring project can feel like a big undertaking, and the thought of using a specialized tool like a flooring nailer might even seem a bit intimidating. You want that beautiful hardwood, laminate, or engineered wood floor to look perfect, but you worry about mistakes. Trust me, I get it! Many beginners feel the same way.
But here’s the secret: using a flooring nailer is totally achievable for beginners with a good guide. It’s a fantastic tool that makes installing durable floors much simpler and faster. We’ll walk through it all, step-by-step, so you can feel completely prepared. Get ready to transform your space!
Table of Contents
Why Use a Flooring Nailer? The Big Picture
So, why is a flooring nailer such a game-changer for DIY flooring? Imagine trying to hand-nail every single plank. It would take forever, and your arms would be sore! Flooring nailers are designed specifically for this job. They drive nails at an angle, securing the tongue of one flooring board to the groove of the next. This creates a strong, stable floor that stands the test of time.
Using the right tool for the job not only saves you time and effort but also leads to a much more professional-looking result. For solid hardwood, it’s pretty much essential. For engineered wood and even some types of laminate, it’s the best way to get that secure, squeak-free finish. Forget fumbling with nails and hammers – a flooring nailer is your ticket to a smoother installation process and a floor you’ll be proud of.
Types of Flooring Nailers: Finding Your Perfect Match
Before we dive into how to use one, let’s quickly chat about the different kinds. Knowing your options helps you pick the right tool for your specific flooring material and budget. It’s like choosing the right hammer for the job – you want something that fits.
- Manual Flooring Nailers: These are the most basic. You load the nails, place the tool on the floorboard, and hit a lever with a hammer. They’re affordable and great for smaller jobs or if you’re on a very tight budget. They require the most physical effort.
- Pneumatic Flooring Nailers: These are powered by compressed air from an air compressor. They’re powerful, fast, and efficient. You’ll need to invest in an air compressor and hose, but they make installing a large area much quicker and easier.
- Electric/Cordless Flooring Nailers: These run on electricity, either corded or battery-powered. Battery-powered models offer the most freedom, with no hoses or compressors needed. They can be pricier upfront, but the convenience is unmatched for many DIYers.
For beginners tackling a room or two, a manual nailer might be sufficient. If you plan on doing more extensive flooring work or have a large area, a pneumatic or cordless electric nailer will likely be a better investment in the long run. Think about the type of flooring you’re installing, too. Solid hardwood often needs a nailer with a bit more power than engineered wood.
Essential Tools and Materials: What You’ll Need
Getting your workspace ready is key to a smooth installation. It’s not just about the nailer itself. Having the right supporting tools can make all the difference in achieving a professional outcome and keeping everything safe.
Your Flooring Nailer and Accessories
- Flooring Nailer: (The star of the show!) Ensure it’s compatible with your flooring thickness and type.
- Air Compressor & Hose: (For pneumatic nailers) Make sure the compressor’s PSI output matches the nailer’s requirements. Always use a good quality hose.
- Power Source: (For electric nailers) Extension cord, fully charged batteries.
- Nails: These are specialized for flooring nailers – usually L-shaped or straight brads. They fit snugly into the nailer’s magazine. Check your nailer’s manual for recommended sizes and types. Using the wrong nails can cause jams and damage your floor.
- Safety Glasses: Non-negotiable! Protect your eyes from flying debris or nail fragments.
- Work Gloves: Keep your hands protected and maintain a good grip.
Prep and Installation Tools
- Measuring Tape: For accurate measurements and planning.
- Pencil: For marking cuts or adjustments.
- Chalk Line: For long, straight layout lines if needed.
- Tapping Block: A specialized wooden block used to gently tap flooring planks into place without damaging them.
- Pull Bar: Used for pulling the last boards into place against the wall.
- Pry Bar: For small adjustments or removing errant boards.
- Miter Saw or Hand Saw: For cutting flooring boards to length.
- Chop Saw: Often useful for cleaner, more precise cuts on multiple boards.
- Underlayment: If required for your flooring type (check manufacturer specs).
- Utility Knife: For trimming underlayment.
- Vacuum Cleaner: To keep your work area clean and dust-free.
Having everything laid out and ready to go before you start will save you a lot of time and frustration. Double-check that your nails are the correct size and type for both your nailer and your flooring – this is super important!
Step-by-Step: How to Use a Flooring Nailer Like a Pro
Alright, let’s get down to business! This is where we break down the process of actually using the flooring nailer. We’ll cover everything from setting it up to firing those crucial nails. Remember, patience and precision are your best friends here.
Step 1: Prepare Your Workspace and Flooring
Before you even think about the nailer, ensure your subfloor is clean, level, and dry. Remove any debris or old flooring. If your flooring manufacturer recommends an underlayment, install that now according to their instructions. Acclimate your flooring material to the room’s conditions for at least 48-72 hours before installation to prevent expansion or contraction issues later.
Lay out your first row of flooring planks. Typically, you’ll start along the longest, straightest wall, with the groove side facing into the room. Leave an expansion gap around the perimeter of the room (usually about 1/2 inch). This gap is essential for the wood to expand and contract with changes in humidity and temperature. You can use spacers to maintain this gap.
For more on subfloor preparation, the U.S. Forest Service has excellent resources on wood flooring installation standards: Forest Products Laboratory Technical Paper 125: Wood Flooring Installation Procedures.
Step 2: Set Up Your Flooring Nailer
This step varies slightly depending on the type of nailer you have.
- Manual Nailer: Ensure the tool is clean and free of debris. You’ll manually load nails into the channel each time.
- Pneumatic Nailer:
- Connect your air hose to the compressor and the nailer.
- Turn on the air compressor and set the pressure. Check your nailer’s manual for the recommended PSI – usually between 70-100 PSI. Too low, and it won’t set the nail; too high, and you risk damaging the wood or driving the nail too deep.
- Make sure the nailer is not “cocked” (ready to fire) until you are in position.
- Electric/Cordless Nailer:
- If it’s battery-powered, ensure the battery is fully charged and inserted correctly.
- If it’s corded, plug it into a GFCI-protected outlet and ensure the cord is out of the way.
Load the Nails: Open the magazine on your flooring nailer and carefully load the correct type and size of flooring nails. Follow your nailer’s specific instructions for loading to avoid jams and ensure smooth feeding. Ensure the nails are seated correctly in the track.
Step 3: Position the Nailer
This is crucial for getting the angle right. The nailer head should rest firmly on the flooring plank you want to secure. The nailer is typically positioned at a roughly 30-45 degree angle relative to the flooring surface. The tip of the nailer should be placed so that the nail enters the tongue of the flooring board. This angle drives the nail securely into the subfloor, locking the board in place.
Important: For the first few rows, especially along walls where you can’t access the nailer’s head easily, you might need to use a hammer-strike nailing system or a standard finish nailer from the side at an angle. However, once you have a few rows down, the flooring nailer will be your go-to. Always aim to drive nails through the tongue of the board, about 3/4 inch from the edge.
Step 4: Drive the First Nail
Once the nailer is in position and the nails are loaded:
- Manual Nailer: Place the nailer firmly on the tongue of the board, ensuring the nail is positioned correctly. Strike the top of the hammer post squarely and with a firm blow. You might need a couple of hits to drive the nail fully.
- Pneumatic/Electric Nailer: Some have a safety contact tip (like a stapler or a framing nailer) which needs to be depressed against the surface for the tool to fire. Others might have a trigger or a sequential fire mode. Consult your tool’s manual. Place the nailer firmly on the tongue. If it’s a contact-fire tool, press the nose of the nailer firmly against the flooring and squeeze the trigger (or activate the firing mechanism).
Listen to the sound. A solid “thwack” usually means the nail went in well. If it sounds weak, the pressure might be too low (pneumatic) or you might not have hit it hard enough (manual). If the nail doesn’t drive all the way in, DO NOT try to pull it out immediately. Instead, try firing another nail slightly behind it or adjust your technique. If a nail is severely bent or sticking out, you might need to carefully pry it out with a pry bar (see troubleshooting.
Step 5: Continue Nailing and Nailing Pattern
Work your way down the row of flooring planks. The general rule of thumb is to place a nail every 6-8 inches along the length of the board. This provides consistent support and prevents squeaks.
Nail Spacing Table:
| Flooring Type | Recommended Nail Spacing (per board) |
|---|---|
| Solid Hardwood (3/4 inch) | Every 6-8 inches along the board, and at ends if possible. |
| Engineered Hardwood (Tongue & Groove) | Every 8-10 inches on average, ensuring good hold. |
| Laminate (Floating, typically) | Nailers are not typically used for truly floating laminate. If your laminate requires nailing (check manufacturer!), follow specs – usually similar to engineered. |
Always check your flooring manufacturer’s installation guide. They may have specific recommendations for nail type, size, and spacing that override general advice. Following their guidelines is key to maintaining warranties.
Step 6: Using the Tapping Block and Pull Bar
As you lay each new row, you’ll use the tapping block and hammer to gently snug the tongue of the new plank into the groove of the previous one. Place the tapping block against the tongue of the board you’re installing, and give it a few light taps with a hammer. This ensures there are no gaps between the boards.
When you get to the end of a row, you might need a pull bar to get the last board to seat properly against the wall. Slide the pull bar between the wall and the flooring board, hook it onto the tongue, and gently tap the other end of the pull bar with your hammer to pull the board into place. Remember that expansion gap!
Step 7: Nailing Near Walls and Obstacles
The angle of a flooring nailer can make it tricky to get close to walls or around floor vents. For these areas:
- First few rows: You might need to start with a standard finish nailer or even hand-nail if clearance is zero.
- Last few rows: These are often the most challenging. Sometimes, you’ll need to face-nail (drive nails straight down into the material from the surface) with a finish nailer. Predrilling might be necessary for hardwoods to avoid splitting.
- Compromise: Some manufacturers allow for nails driven from the side, about 45 degrees, using a standard finish nailer, especially for engineered woods.
Always review your flooring manufacturer’s specific instructions for these tricky spots, as they often provide detailed guidance. For expert advice on wood flooring installation, including best practices for subfloors and fasteners, the Resilient Floor Covering Institute (RFCI) offers valuable guides.
Step 8: Cleaning Up and Final Inspection
Once all your flooring is laid and nailed, it’s time for the final clean-up. Vacuum up all the sawdust and debris. Inspect your work: look for any popped nails, gaps between boards, or excessive sawdust that might compromise the floor’s integrity.
If a nail didn’t drive fully, you can try to gently drive it further. If it’s sticking out or bent, you may need to carefully pry it out with a flat bar and hammer, then fill the hole with wood putty that matches your flooring color. Ensure all boards are tightly seated and there are no squeaks when you walk on them. These final checks ensure a long-lasting, beautiful floor.
Troubleshooting Common Flooring Nailer Issues
Even with a great guide, sometimes things don’t go perfectly. Don’t get discouraged! Here are some common issues and how to fix them:
- Nail Jam: This is the most frequent problem.
- Cause: Often a bent nail, two nails trying to feed at once, or debris in the magazine.
- Fix: Disconnect air/power. Carefully remove the jammed nail using pliers or the tool’s jam-clearing mechanism. Inspect and clean the magazine. Reload and test.
- Nails Not Driving Fully:
- Cause: Insufficient air pressure (pneumatic), battery too low (electric), dull driver blade, or driving into a knotty or very dense piece of wood.
- Fix: Check and increase air pressure or battery charge. Make sure you’re hitting the plank squarely. If it persists, try firing a second nail slightly behind the first. For very dense wood, you might need slightly higher pressure.
- Nails Driving Too Deep (Overdriving):
- Cause: Too much air pressure, worn-out driver blade, or not holding the tool flat.
- Fix: Reduce air pressure. Ensure the tool is sitting flat on the plank. If the driver blade is worn, it may need replacement. If a nail is overdriven significantly, it’s best to carefully pry it out and replace the board if the hole is too large.
- Tool Firing Without Trigger Activation (Dangerous!):
- Cause: Damaged safety contact, internal mechanism issue, or debris interfering.
- Fix: IMMEDIATELY STOP USE. Disconnect air/power. Do not attempt to use again. Contact the manufacturer or a qualified repair service.
- Damaging the Flooring Edge:
- Cause: Improper positioning of the nailer, tool held at too steep an angle, or trying to nail too close to the edge.
- Fix: Ensure the nailer is placed squarely on the tongue and at the recommended angle. Use a tapping block for snugging boards. Be extra careful with the last few rows and use appropriate methods.
When in doubt, always refer to your flooring nailer’s specific owner’s manual. They provide detailed troubleshooting tips for your exact model.