Use a finish nailer on MDF boards by selecting the right nail size, adjusting depth settings, and firing into a pre-drilled pilot hole or a solid backing for best results. With a little care, you can achieve clean, strong connections for your MDF projects.
Working with Medium-Density Fiberboard (MDF) can be a great way to achieve smooth, professional-looking finishes for your DIY projects. But when it comes to joining pieces, especially with a finish nailer, many folks feel a bit unsure. MDF can sometimes be prone to splitting or having nails pop out if not handled correctly. Don’t worry! It’s totally manageable.
This guide is here to walk you through exactly how to use your finish nailer on MDF boards safely and effectively. We’ll cover everything from choosing the right nails to the best techniques for a clean, strong hold. Get ready to tackle your next MDF project with confidence!
Table of Contents
Why Using a Finish Nailer on MDF Can Be Tricky
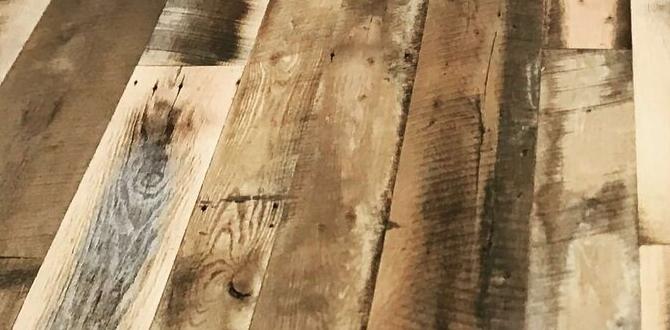
MDF is a fantastic material. It’s made from wood fibers mixed with resin and wax, then pressed under high temperature and pressure. This gives it a consistent density throughout, making it super smooth and easy to paint or veneer.
However, this consistency is also what makes it a bit different to work with compared to solid wood. MDF doesn’t have the natural grain structure that helps guide nails. It can be more brittle, meaning it’s easier to split the edge if you’re not careful. Also, the density means nails might not sink in as easily, or conversely, they might not hold as securely if the MDF is thin or the nail is too large.
The goal is to drive nails in without damaging the surface or causing the MDF to crumble around the nail. With the right approach, it’s completely achievable!
Choosing the Right Finish Nailer and Nails for MDF
Before you even pick up your nailer, let’s talk about the tools themselves. Not all finish nailers are created equal, and the type of nail you use is crucial.
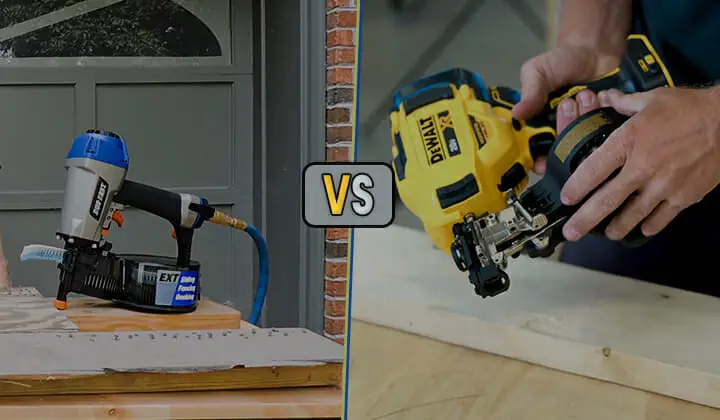
What Kind of Finish Nailer?
For MDF, a standard pneumatic or cordless electric finish nailer is usually your best bet. You don’t typically need a framing nailer, as those drive much larger nails and are designed for structural lumber. A finish nailer is perfect for attaching trim and smaller components, which is often how MDF is used.
Look for a nailer that offers:
- Adjustable Depth Setting: This is non-negotiable! You need to control how deep the nail goes into the MDF.
- Good Air Pressure (for Pneumatic): Ensure your compressor can provide consistent pressure, typically between 70-110 PSI, depending on your nailer’s specifications.
- No-Mar Tip: Many finish nailers come with a rubber or plastic tip. This protects the surface of the MDF from dings and scratches as you fire the nail.
Nail Size Matters!
This is where many beginners run into trouble. For MDF, you generally want to use slimmer and shorter nails than you might typically use for solid wood.
- Gauge: Opt for 16-gauge (also called “finish nails”) or even 18-gauge nails. 18-gauge nails are thinner and less likely to split the MDF. 16-gauge is a good middle ground for strength where needed. Avoid 15-gauge or larger nails for most MDF applications.
- Length: This depends on the thickness of your MDF and what you’re attaching it to. For thinner MDF (e.g., 1/2 inch or less), shorter nails (like 1 inch to 1 1/4 inch) are often best. If you’re attaching a thin piece of MDF to a thicker backing material (like 3/4 inch plywood or solid wood studs), you’ll want a nail long enough to go through the MDF and get a good grip on the backing – usually around 1 1/2 inches to 2 inches.
- Material: Standard steel nails are fine. Stainless steel or coated nails can provide extra corrosion resistance if your project will be exposed to moisture, but they’re usually not necessary for indoor MDF projects.
Here’s a quick table to help you decide:
| Application | MDF Thickness | Recommended Nail Gauge | Recommended Nail Length | Notes |
|---|---|---|---|---|
| Attaching trim to MDF core | 1/4″ – 1/2″ | 18-gauge | 3/4″ – 1 1/4″ | Focus on shallow depth setting to avoid blowout. |
| Attaching MDF to backing (e.g., plywood, stud) | 1/4″ – 3/4″ | 16-gauge | 1 1/4″ – 2″ | Ensure nail penetrates backing for a strong hold. |
| Detail work / delicate edges | Any | 18-gauge | 1″ – 1 1/2″ | Use with extreme care on edges. |
Safety First with Your Finish Nailer
Before we jump into the “how-to,” let’s go over safety. Finish nailers pack a punch, and MDF can be dusty. Always prioritize your well-being.
- Eye Protection: Wear safety glasses or goggles at all times. Flying debris, no matter how small, can seriously injure your eyes.
- Hearing Protection: Nail guns can be loud. Consider earplugs or muffs, especially during extended use.
- Dust Mask: MDF dust can be fine and irritating. Wear a dust mask to protect your lungs.
- Unplug When Not In Use: For electric nailers, unplug them. For pneumatic nailers, disconnect the air hose when loading nails, clearing jams, or when the tool is not in immediate use.
- Never Point at Yourself or Others: Treat every nailer as if it were loaded. Keep your fingers away from the trigger and the muzzle.
- Secure Your Workpiece: Make sure the MDF is stable and won’t shift when you fire the nailer. Clamps are your best friend here.
A great resource for general tool safety is the Occupational Safety and Health Administration (OSHA), which provides guidelines for power tool safety that are applicable to many DIY situations. You can find information on their website, osha.gov.
Step-by-Step: How to Use a Finish Nailer on MDF
Now for the main event! Follow these steps to get a clean, secure join every time you use your finish nailer on MDF.
Step 1: Prepare Your MDF and Work Area
Ensure your MDF pieces are cut to the correct size and have clean, square edges. Wipe away any dust or debris from the surface where you’ll be nailing.
If you are attaching MDF to another material, make sure that material is also ready. For instance, if you’re attaching MDF trim to a wall, you’ll want to locate studs or use furring strips for a solid anchor point. For cabinet projects, ensure the underlying structure is sound.
Step 2: Set Up Your Finish Nailer
For Pneumatic Nailers:
- Connect your air hose to the nailer and your air compressor.
- Set your air pressure. Start on the lower end of your nailer’s recommended range (e.g., 70-90 PSI) and be prepared to adjust.
For Cordless Electric Nailers:
- Ensure the battery is charged and properly inserted.
- Check the magazine to ensure it’s loaded with the correct type and size of nails.
Crucial Adjustment: Depth Setting
This is the most critical step for MDF. You need to set your nailer so that the nail head sinks just slightly below the surface of the MDF, ideally without causing a large divot or pushing through the other side if it’s thin.
- Test on Scrap: ALWAYS test your depth setting on a scrap piece of the exact same MDF thickness you are working with.
- Start Shallow: Begin with the depth setting on its shallowest setting. Fire a nail into the scrap.
- Gradually Increase: If the nail isn’t sinking enough, increase the depth setting incrementally. Fire another nail. Repeat this process until the nail head is just proud of the surface or slightly countersunk. You want it flush or barely below.
- Avoid Over-Driving: If the nail sinks too deep, it can crush the MDF fibers, creating a weak spot or a noticeable dent that might go through the material.
Step 3: Position the Nailer Correctly
Place the nose of the finish nailer firmly against the surface of the MDF where you intend to drive the nail. Make sure the “no-mar” tip, if present, is in contact with the wood.
Angle of Approach: For most applications, hold the nailer perpendicular (90 degrees) to the surface. However, if you are nailing into an edge or a corner, you might need to adjust the angle slightly. Be extremely cautious in these areas, as MDF is more prone to splitting.
Step 4: Fire the Nail
Once the nailer is positioned and you’re holding it firmly, fully squeeze the trigger to drive the nail.
For Sequential Trip Triggers: You will need to pull the trigger and then depress the safety contact tip against the work surface to fire each nail.
For Contact Trip Triggers: Depressing the safety contact tip against the work surface will fire the nail each time you pull the trigger.
Feel for the nail driving in. You should feel a solid “thump.” If it feels weak or doesn’t sound right, stop and re-evaluate your settings or air pressure.
Step 5: Nailing into Edges or Corners (Advanced Caution!)
This is where MDF can be the most challenging. Whenever possible, try to nail into a thicker piece of MDF or a solid wood backing.
- Pilot Holes: For crucial joints or when nailing very close to an edge, consider drilling tiny pilot holes. Use a drill bit that is slightly smaller than the diameter of your finish nail. This reinforces the MDF and helps prevent splitting.
- Nail Spacing: Don’t place nails too close together, especially near edges. Aim for at least 3/4 inch to 1 inch away from the edge. Spacing nails about 6-8 inches apart is a good starting point for most trim applications.
- Angle is Key: When nailing into an edge to secure it to another piece, angle the nail head slightly so it bites into the adjacent material. However, be mindful that angling can sometimes increase the risk of splitting the edge of the MDF.
The ideal scenario is to have a solid piece of wood behind the section of MDF you are nailing into. This gives the nail a firm anchor and significantly reduces the chance of splitting or pull-out. Think of cabinet construction: you’re often nailing MDF cabinet front panels into the cabinet frame, or MDF shelving into the cabinet sides.
Step 6: Check Your Work and Adjust
After driving a few nails, inspect them closely. Are they all sinking to the desired depth? Are there any signs of splitting or crushing the MDF?
- Too Deep: Reduce the depth setting on your nailer.
- Not Deep Enough: Increase the depth setting.
- Splitting: This could mean your nails are too large, too close to an edge, your air pressure is too high (causing a jarring impact), or you might need to try the pilot hole method.
- Nails Not Holding: Ensure you’re using sufficient nail length and that the nail is hitting solid material beyond the MDF.
Remember, practice makes perfect. Don’t be discouraged if your first few attempts aren’t flawless. Keep making small adjustments and you’ll get the hang of it.
When to Use Wood Glue with Finish Nails
While a finish nailer holds pieces together, adding wood glue provides a much stronger, more durable bond. For projects where strength and longevity are important, always use glue!
How to Combine Glue and Nails:
- Apply a thin, even bead of quality wood glue to the mating surfaces of your MDF pieces.
- Carefully align the pieces.
- Use your finish nailer to secure the pieces while the glue dries. The nails act as clamps, holding everything in place.
This combination is especially recommended for cabinet construction, shelving, and any application that will bear weight or be subject to stress. The glue fills small gaps and creates a chemical bond, while the nails provide immediate mechanical strength and prevent movement during the curing process.
Types of Wood Glue and Their Suitability
For MDF, standard PVA (polyvinyl acetate) wood glues are generally excellent. They are non-toxic, easy to clean up with water when wet, and provide a strong bond.
- Titebond Original (Red Cap): A good general-purpose wood glue.
- Titebond II (Blue Cap): Water-resistant, good for areas with moderate moisture.
- Titebond III (Black Cap): Waterproof, best for demanding environments.
For most indoor MDF projects, Titebond Original or II will serve you well. Just be sure to follow the manufacturer’s instructions for application and drying times.
Troubleshooting Common MDF Nailing Issues
Even with the best intentions, you might run into a few snags. Here are some common problems and their solutions:
1. MDF Splitting
Causes: Nail too large, too close to edge, excessive air pressure, brittle MDF edge.
Solutions:
- Use slimmer nails (18-gauge instead of 16-gauge).
- Increase distance from edge (at least 3/4″).
- Drill pilot holes slightly smaller than the nail diameter.
- Reduce air pressure slightly.
- Try a different section of MDF if the edge is particularly damaged.
2. Nail Heads Proud (Sticking Out)
Causes: Depth setting too shallow, insufficient air pressure, nail not hitting solid backing.
Solutions:
- Increase depth setting.
- Increase air pressure (within nailer’s recommended range).
- Check for solid backing behind the MDF.
- Manually tap the nail head with a nail set and hammer if it’s only slightly proud.
3. Nail Heads Driven Too Deep (Creating Dents/Blowout)
Causes: Depth setting too deep, excessive air pressure, thin MDF.
Solutions:
- Decrease depth setting! This is the most common fix.
- Reduce