Quick Summary:
Using a drywall nailer is straightforward! This guide walks you through setup, safety, and proper technique for quick, clean drywall fastening. Learn to load, adjust depth, and fire accurately for a professional finish on your next DIY project.
Hey DIYers! Jack Shaffer here from Nailerguy. Ever stared at a pile of drywall sheets and felt a little intimidated? Especially when it’s time to fasten them to those studs? You’re not alone! Many folks find drywall installation a bit tricky, and using the right tool can make all the difference. That’s where the drywall nailer comes in. It’s designed to speed up the job and give you a cleaner look. But like any tool, knowing how to use it correctly is key. Don’t worry, I’m here to guide you through it, step by step. We’ll cover everything from what kind of nailer to grab to how to drive those nails perfectly. Let’s get your drywall project looking smooth and professional!
Table of Contents
Choosing Your Drywall Nailer
Before we dive into how to use a drywall nailer, it’s important to know there are two main types you’ll encounter, each with its own strengths:
1. Pneumatic Drywall Nailers
These are the workhorses of the construction world. They run off compressed air from an air compressor. They are powerful, reliable, and typically offer consistent performance.
- Pros: Powerful, fast, durable, consistent nail depth.
- Cons: Requires an air compressor and hose, which can be cumbersome; initial investment might be higher.
2. Cordless/Battery-Powered Drywall Nailers
These offer the ultimate in portability. They run on rechargeable batteries and don’t need a hose or compressor. They’re becoming increasingly popular for DIYers and smaller jobs.
- Pros: Highly portable, no hoses, easy to set up and use.
- Cons: Battery life can be a concern on large jobs; might be slightly less powerful than pneumatic models; can be heavier due to the battery.
For beginners tackling a room or two, a good cordless model is often a fantastic choice. If you’re doing a major renovation or planning to use it very frequently, a pneumatic setup might be worth considering. Whichever you choose, the basic operating principles are quite similar.
What You’ll Need: Tools and Materials
Getting ready to nail? Here’s a checklist of what you should have on hand:
- Your Drywall Nailer: (Pneumatic or Cordless)
- Nails: Make sure they are specifically designed for drywall nailing. They usually have a collated head designed to sink slightly below the surface without tearing the paper. The size and type will depend on your nailer model and the thickness of your drywall. Check your nailer’s manual!
- Air Compressor and Hose: (If using a pneumatic nailer) Ensure the compressor is rated for the nailer’s air consumption.
- Safety Glasses: This is non-negotiable! Always protect your eyes from flying debris or runaway nails.
- Work Gloves: To protect your hands and provide a better grip.
- Hearing Protection: Nail guns can be loud. Earplugs or earmuffs are a good idea.
- Measuring Tape and Pencil: For marking stud locations.
- Drywall Sheets: Of course!
- Utility Knife: For cutting drywall to size.
- Straight Edge or T-Square: For making accurate cuts.
Having everything ready before you start will make the process go much smoother and faster. It’s always better to be over-prepared!
Preparing Your Space and Yourself for Safety
Safety first, always! We’re dealing with power tools and sharp objects, so a little preparation goes a long way.
Setting Up Your Workspace
- Clear the Area: Remove any clutter, furniture, or obstacles that could get in your way or be damaged. Ensure you have plenty of room to move around freely with the nailer and drywall sheets.
- Good Lighting: Make sure the area is well-lit so you can see exactly where you’re placing the nailer and where your studs are.
- Ventilation: If you’re using a pneumatic nailer, ensure good ventilation, especially if you’re working in an enclosed space.
- Secure Drywall: Make sure your drywall sheets are positioned correctly and ideally held in place (perhaps with a drywall lift or a helper) before you start nailing. This prevents them from shifting unexpectedly.
Personal Protective Equipment (PPE)
I cannot stress this enough: ALWAYS wear your PPE. It’s the most important step.
- Eye Protection: Safety glasses or goggles are a must. They protect your eyes from dust, debris, and potential ricochets.
- Hearing Protection: Nail guns can be surprisingly loud. Prolonged exposure can damage your hearing. Wear earplugs or earmuffs.
- Hand Protection: Work gloves not only protect your hands from splinters and minor impacts but also improve your grip on the tool and the drywall.
- Footwear: Wear sturdy, closed-toe shoes, preferably with slip-resistant soles.
Reviewing Your Nailer’s Manual
Every tool is a little different. Take a few minutes to read the specific manual for your drywall nailer. It will tell you about its unique features, safety warnings, and maintenance requirements. This is crucial for safe and effective operation.
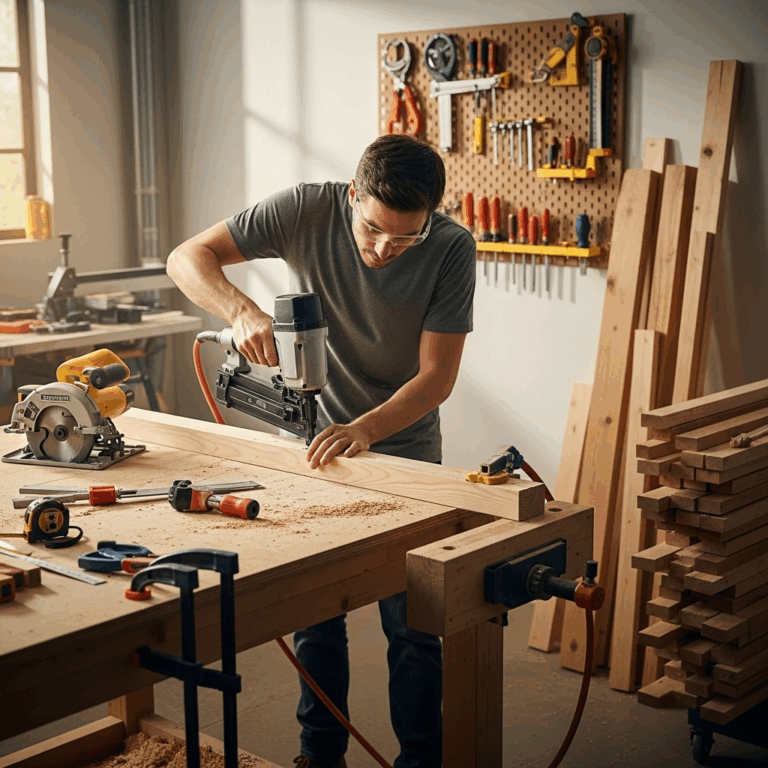
How to Use a Drywall Nailer: Step-by-Step Guide
Alright, you’ve got your nailer charged or connected, your safety gear on, and your workspace prepped. Let’s get nailing!
Step 1: Connect Power (If Applicable)
For Pneumatic Nailers:
- Connect your air hose to the compressor and the nailer’s air inlet.
- Ensure the compressor is turned off and the pressure is released before connecting the hose to the nailer.
- Turn on the air compressor and set the pressure according to your nailer’s manual. A good starting point is usually between 70-100 PSI, but always check your tool’s recommendations.
- Briefly “dry fire” the nailer (away from any material) to ensure air is flowing properly.
For Cordless Nailers:
- Ensure the battery is fully charged and securely inserted into the nailer.
- Check if there’s a safety switch or trigger lock that needs to be engaged or disengaged.
Step 2: Load the Nails
Every nailer has a slightly different loading mechanism, but the principle is the same: insert the collated nails into the magazine.
- Locate the magazine on your nailer. It’s usually at the front.
- Open the magazine. This might involve sliding a cover back or releasing a latch.
- Insert a strip of collated drywall nails. Ensure the nails are facing the correct direction (usually indicated in the manual or by markings on the nailer). The collated ends should sit snugly in the feed mechanism.
- Close the magazine securely, ensuring it latches properly.
- Gently push the follower (the part that pushes the nails forward) to seat the first nail in the driver mechanism. Some nailers do this automatically.
Tip: Never force nails into the magazine. If they don’t fit easily, double-check the orientation and the nail type.
Step 3: Adjust the Depth Setting
This is crucial for a clean finish. You want the nail head to sink slightly below the surface of the drywall paper, into the gypsum core, but not so deep that it tears the paper completely. Ripping the paper creates weak points and makes finishing difficult.
- Most drywall nailers have an adjustable depth collar or wheel, often located near the nose of the gun or on the trigger assembly.
- Test Fire: Find a scrap piece of drywall (or an inconspicuous area on a large sheet before hanging).
- Place the nose of the nailer firmly against the drywall.
- Pull the trigger to fire a nail.
- Examine the nail head.
- If the nail head is too high, protruding above the surface, you need to set the depth deeper. Rotate the adjustment collar to achieve this.
- If the nail head tears the paper, you need to set the depth shallower. Adjust the collar accordingly.
- Continue test firing and adjusting until you achieve a consistent, slightly countersunk dimple.
Important Note: Stud material can vary (wood vs. metal). You may need to make minor depth adjustments depending on the material you’re nailing into.
Step 4: Locate the Studs
Drywall needs to be fastened directly into the framing studs – the vertical supports behind the drywall sheets. Proper stud alignment is key for a strong, secure wall.
- Marking: Before hanging drywall, it’s a good idea to mark the stud locations on the existing ceiling or floor. This gives you a clear visual guide.
- Edge Nailing: Drywall sheets should typically be nailed along the edges, into the center of the vertical studs. Nails are usually spaced about 6-8 inches apart along the edges.
- Center Nailing (Optional): Some methods also call for nails into the studs for horizontal pieces or over seams, spaced about 12-16 inches apart. Always follow local building codes and recommended practices. The Building Science Corporation offers valuable insights into best practices for wall assemblies.
- Using a Stud Finder: If you haven’t marked them beforehand, a reliable electronic stud finder will help you locate the studs. Run it over the surface where you plan to hang the drywall.
Step 5: Position and Fire the Nailer
Now for the main event!
- Firm Contact: Place the nose of the drywall nailer firmly against the drywall sheet where you intend to drive a nail. Ensure the contact tip is flat against the surface. This usually engages the safety mechanism, allowing the gun to fire.
- Trigger: Pull the trigger. The nailer will drive a nail into the stud behind the drywall.
- Release and Move: Once the nail is driven, release the trigger and lift the nailer slightly.
- Spacing: Move to the next nail location, maintaining the correct spacing (e.g., 6-8 inches along edges).
- Consistency is Key: Try to maintain consistent pressure and angle for each nail.
Step 6: Nailing Pattern for Drywall
Just driving nails randomly won’t do. There’s a pattern that ensures structural integrity and prepares for finishing.
Recommended Nailing Pattern:
When attaching drywall to studs, follow these guidelines for optimal results:
- Edge Nailing: Apply nails within 3/8 to 1/2 inch from the edge of the drywall sheet. The spacing between nails along the edges should be 6 inches on center.
- Field Nailing (Interior of Sheet): For any nails driven into the studs in the middle of the drywall sheet (field nailing), space them 10 to 12 inches on center. This is less common with drywall nailers, as screw-based methods are often preferred for field fastening due to better holding power and less paper tearing, especially for large sheets. However, if your project calls for it, be accurate with spacing.
- Avoid Over-Nailing: Too many nails can weaken the drywall. Stick to the recommended spacing.
- Hammer Closer: If a nail pops up slightly or doesn’t sink well, don’t just fire another nail next to it. Use a hammer to gently tap the nail head flush or slightly below the surface. If a nail tears the paper or misses the stud, carefully remove it with the claw of a hammer and try again in a slightly different spot nearby, ensuring you hit the stud.
Step 7: Inspect and Finish
Once you’ve nailed all your sheets, it’s time for a quick inspection.
- Look over all the nail heads. They should all be consistently countersunk, creating a slight dimple in the paper.
- No paper tears: If you see any significant paper tearing, the depth setting might be too deep, or you might have hit a knot or inconsistent spot in the stud.
- No popped nails: Ensure no nails are sticking out or sitting too proud of the surface.
These dimples are where your joint compound (mud) will go during the finishing process. Perfectly countersunk nails make for a much easier and cleaner drywall finish. Building codes are important for structural integrity; the International Residential Code (IRC) is a widely adopted standard for residential construction in the US.
Troubleshooting Common Drywall Nailer Issues
Even with the best tools, hiccups can happen. Here are a few common issues and how to fix them:
| Problem | Possible Cause | Solution |
|---|---|---|
| Nailer not firing | No power (battery dead, air line disconnected/leaking) | Charge battery, connect air hose firmly, check for leaks. |
| Nailer not firing | Safety tip not engaged | Press the nose of the gun firmly against the surface. |
| Nailer not firing | Jam in the magazine | Disconnect power/air. Open the magazine and carefully remove the jammed nail(s). |
| Nails not sinking deep enough (too proud) | Depth setting too shallow | Adjust the depth setting deeper. |
| Nails sinking too deep (tears paper) | Depth setting too deep | Adjust the depth setting shallower. |
| Nails not sinking deep enough (too proud) | Insufficient air pressure (pneumatic) | Increase air pressure (within nailer’s limits). |
| Nails not sinking deep enough (too proud) | Hitting very hard wood or metal stud | May require a slight increase in air pressure or a manual hammer tap. |
| Nailer firing inconsistently | Loose air connection (pneumatic) | Tighten all air hose connections. |
| Nailer firing inconsistently | Low battery charge (cordless) | Recharge or replace the battery. |
Remember to always disconnect the power source (air or battery) before attempting any troubleshooting, especially when clearing jams or inspecting the tool.
Tips for a Professional Finish
Beyond the basic operation, a few extra tips can take your drywall work from amateur to pro:
- Stagger Your Nails: Don’t place nails directly above or below each other on adjacent studs. Staggering them helps prevent weakening the drywall panel.
- Maintain Straight Lines: While driving nails, try to keep your line of nails as straight as possible along the stud. This makes finishing much easier.
- Don’t Overlook the Edges: The edges of the drywall are critical for creating strong seams. Nail them carefully and consistently into the studs.
- Back Out if Necessary: If a nail goes in crooked or misses the stud entirely, it’s better to remove it with a hammer claw and try again nearby rather than leaving a faulty fastener.
- Work Systematically: Go section by section. Nail all the way around a sheet before moving to the next. This ensures you don’t miss any fastening points.
- Listen to Your Nailer: A healthy nailer will have a consistent sound. If it starts sounding strained, weak, or irregular, it’s time to check air pressure, battery, or look for a jam.
- Practice on Scraps: If you’re new to this, spend 15-20 minutes practicing on scrap drywall. Get a feel for the tool, learn its quirks, and dial in that depth setting before you start on visible walls.
FAQs about Using Drywall Nailers
Q1: Can I use a regular framing nailer for drywall?
A1: No, it’s not recommended. Framing nailers are designed for larger, thicker nails and their heads can easily tear through drywall paper. Drywall