Quick Summary
To use a brad nailer without damaging trim, always use the correct nail size, adjust the depth setting to sink nails flush without over-penetration, employ a sequential trigger for precision, and use a nail set for final adjustments. Practice on scrap wood first to master depth control.
There’s nothing quite like the crisp, clean finish that new trim brings to a room. But the thought of using a powerful tool like a brad nailer on delicate molding can be a little nerve-wracking, right? We’ve all seen those projects with tiny dents and divots around the nail heads, making the finished work look less than professional. The good news is, getting a perfect, damage-free finish with your brad nailer is totally achievable, even for beginners! It just takes a few simple techniques and a little understanding of your tool. In this guide, I’ll walk you through everything you need to know to nail trim like a pro, keeping your beautiful wood looking its best.
Table of Contents
Why Trim is Tricky for Nailers
Trim pieces, especially delicate crown molding, baseboards, or window casings, are often made from softer woods or have a thin veneer. They’re also usually the last finishing touch, meaning any mistakes are highly visible. The main challenge with using a brad nailer on trim is controlling the force of the nail. Too much pressure, and you’ll drive the nail too deep, splintering the wood or creating a noticeable crater. Too little, and the nail won’t be secure, leading to a loose piece of trim that can warp or detach over time.
The goal is to have the brad nail sink just below the surface of the trim, creating a small, easily concealable hole that can be filled with a bit of putty. Damaging the trim means more work, more expense to replace the material, and a less satisfying end result for your project. Let’s make sure that doesn’t happen!
Choosing the Right Brad Nailer for Trim Work
Before we dive into the “how-to,” it’s worth mentioning that not all brad nailers are created equal, and some are better suited for trim work than others. For delicate trim, you generally want a lighter-weight tool that offers good control.
Here are a few things to consider:
- Nail Size Capacity: Ensure the nailer can accept the gauge and length of brads you need for your specific trim. Most trim work uses 18-gauge brads, but some very fine molding might even benefit from 20-gauge.
- Depth Adjustment: This is arguably the most critical feature for trim work. Look for a tool with a tool-free depth adjustment dial.
- Weight and Ergonomics: You’ll likely be holding this tool for extended periods, often overhead or in awkward positions. A lighter, well-balanced nailer will save your arms and improve accuracy.
- Power Source:
- Electric: Corded electric brad nailers are affordable and don’t require a compressor, but they limit your mobility.
- Battery-Powered: Cordless options offer the most freedom and are often powerful enough for 18-gauge brads.
- Pneumatic: These require an air compressor, hose, and regulator. While they offer consistent power, they can be less convenient for smaller jobs.
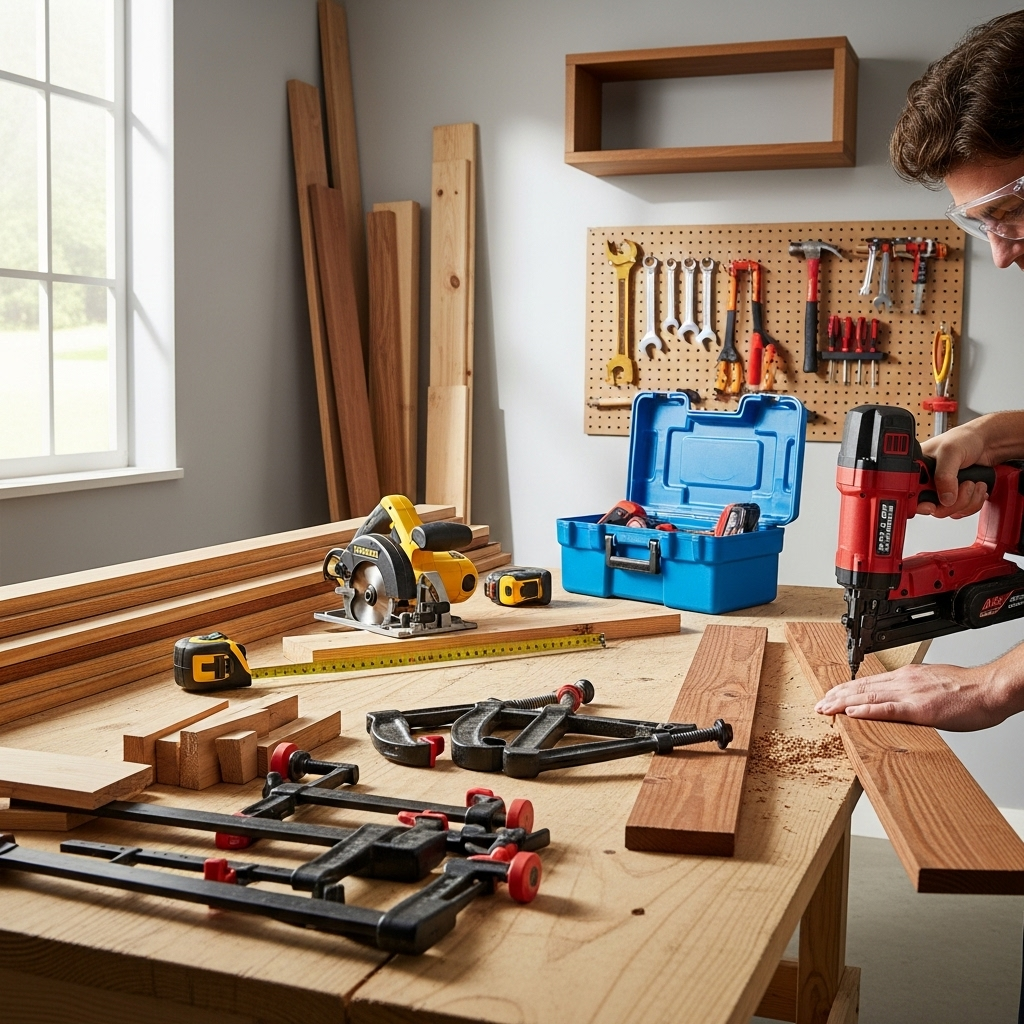
Essential Tools for Damage-Free Nailing
Having the right tools on hand makes the whole process smoother and safer. Here’s what you’ll want:
- Brad Nailer: Of course! Make sure it’s the right type for your project (as discussed above).
- Brad Nails: The correct gauge and length for your trim. We’ll talk more about this later!
- Air Compressor (if using pneumatic): Ensure it’s set to the correct PSI for your nailer.
- Hose and Regulator (if using pneumatic): To control air pressure.
- Safety Glasses: Non-negotiable for eye protection.
- Nail Set: A manual tool to set the nail head slightly below the surface without damaging the trim around it.
- Hammer: A lightweight hammer, like a standard claw hammer or a tack hammer, to gently tap the nail set.
- Wood Filler or Putty: To fill the nail holes for a seamless finish.
- Scrap Wood: For practicing your depth settings.
Step-by-Step Guide: Nailing Trim Like a Pro
Now that you’ve got your tools ready, let’s get to the main event – nailing your trim without causing any damage. Follow these steps, and you’ll be well on your way to a professional-looking finish.
Step 1: Choose the Right Brad Nails
This is crucial for a good finish. The nail should be long enough to go through your trim and get a good purchase in the wall stud or backing, but not so long that it pokes through the other side of thin trim or becomes difficult to set.
- Gauge: For most interior trim (like baseboards, crown molding, window/door casing), 18-gauge brads are the standard. They are thin enough to be less noticeable and don’t create large holes. For very delicate, thin trim, you might consider 20-gauge.
- Length: This depends entirely on the thickness of your trim. A good rule of thumb is to have the nail penetrate at least 1/2 inch into the stud or solid backing material behind your trim. For a 1/2-inch thick trim, a 1 1/4-inch or 1 1/2-inch brad is often a good choice. Always check how deep the nail goes into your scrap wood first.
Step 2: Set Up Your Nailer and Test Firing
Before you touch your trim, you must test fire and adjust the depth setting. This is where you prevent accidental damage.
- Load the Nails: Follow your nailer’s manual to load the appropriate brad nails into the magazine.
- Connect Power: If pneumatic, connect your air hose and set the regulator. A good starting pressure is typically between 70-90 PSI, but consult your nailer’s manual. For electric or battery, ensure it’s powered on and operational.
- Find Scrap Wood: Grab a piece of scrap wood that’s similar in thickness and density to your trim. If you don’t have that, use a piece of your trim material before you cut it.
- Adjust Depth Setting: Begin with the depth adjustment dial set to a medium setting. Place the nose of the nailer against the scrap wood and fire a nail.
- Inspect the Nail Head:
- Too Deep: The nail head is driven below the surface, causing a crater or splitting the wood. Turn the depth adjustment counter-clockwise (usually) to reduce power.
- Too Proud: The nail head is sticking out above the surface, making it impossible to fill cleanly. Turn the depth adjustment clockwise (usually) to increase power.
- Just Right: The nail head is slightly below or flush with the surface, leaving a small, clean hole.
- Repeat Testing: Fire several nails, adjusting the depth setting each time, until you consistently achieve the perfect depth on your scrap wood. This might take 5-10 shots. Don’t skip this!
Step 3: Position and Fire
Once your depth is dialed in, it’s time to attach your trim.
- Locate Studs: For structural integrity, your trim needs to be nailed into wall studs or solid backing. Use a stud finder to mark their locations, especially for baseboards and crown molding.
- Place Trim: Position your trim piece accurately against the wall.
- Aim Carefully: Place the nose of the brad nailer firmly against the surface of the trim. Ensure the nail will go into a stud or solid backing. It’s often a good idea to fire nails into the thicker parts of any decorative profiles or into stud lines, rather than the thinnest, most fragile sections.
- Engage the Safety (if applicable): Some nailers have a safety tip on the nose. Make sure this contact is firm against the wood.
- Fire the Nail: For maximum control and to prevent accidental firings, use the sequential trigger mode if your nailer has one. This requires you to first pull the trigger (which doesn’t fire) and then press the nose of the nailer to the surface (which fires the nail). If you only have a contact trigger, be extra careful not to depress the nose before you are ready to fire.
- Hold Firmly: Press the nailer firmly against the trim.
- Withdraw Nailer: After the nail fires, withdraw the nailer straight back.
Step 4: Using a Nail Set for a Perfect Finish
Even with perfect depth settings, sometimes a brad might be slightly proud, or you might simply want to ensure it’s perfectly flush or just below the surface for easy filling.
- Position the Nail Set: Place the tip of your nail set directly over the head of the brad nail.
- Gentle Taps: Using a lightweight hammer, give the end of the nail set a few gentle taps. You want to drive the nail head just a hair below the surface.
- Avoid Overstrike: Be very careful not to hit the nail set too hard or off-center, as this can create a noticeable dent or split the wood around the nail. The goal is minimal impact.
Step 5: Fill the Holes
Once all your trim is nailed in place and you’ve set any proud nails, the final step is to conceal the nail holes.
- Choose Your Filler: Select a wood filler or putty that matches the color of your trim, or a paintable filler if you plan to paint.
- Apply Filler: Use a putty knife or even your fingertip to press the filler into the nail hole. Slightly overfill it, as it might shrink a little as it dries.
- Smooth and Clean: Wipe away any excess filler from the surface of the trim. For dried filler, you can gently sand it smooth.
Troubleshooting Common Trim Nailing Issues
Even with the best intentions, you might run into a few hiccups. Here’s how to solve them:
- Nails Not Firing: Check for jams, ensure the magazine is properly closed, confirm power source is connected (air or battery), and check the safety lock on the nailer.
- Nails Bending or Snapping: You might be using too long of a nail for the thickness of your trim, or the nail is hitting a knot or very dense part of the wood. Try a slightly shorter nail or adjust depth. If using pneumatic, ensure your PSI isn’t too high, which can sometimes cause bending. Check nail quality; some cheaper brands are more prone to bending.
- Splitting Wood: This is often due to driving the nail too deep, too close to the edge of the trim, or firing into very brittle or knotty wood. Pre-drilling a pilot hole (though tricky with a nailer) is an option for extremely brittle wood, but usually, practicing depth control, using the correct nails, and avoiding edges is best. If you nail too close to an edge, it’s more likely to split.
- Nail Head Crater: Your depth setting is too high. Adjust it downward.
- Nail Head Proud: Your depth setting is too low. Adjust it upward or use a nail set.
Tips for Working with Different Trim Materials
The type of wood your trim is made of will affect how you approach nailing.
Softwoods vs. Hardwoods
Trim made from softwoods like pine or poplar is more forgiving and less likely to split. You might be able to get away with a slightly less precise depth setting. Hardwoods like oak, maple, or cherry are much denser. They are less prone to denting but can be more challenging to nail without splitting if you’re not careful with depth and placement. For very hard woods, a slightly lower PSI might be beneficial, or ensure your nails are sharp and of good quality.
Veneered Trim
For trim with a thin veneer, like some MDF or engineered wood products, you need to be especially careful. The veneer can chip or peel if the nail is driven too aggressively or too deep. Always test on a scrap piece first. Aim to sink the nail so the head is just below the veneer line. If the veneer starts to lift, try a shallower depth setting or a finer gauge nail (like 20-gauge).
Decorative Moldings
Complex profiles can be tricky because the surface isn’t flat. Always try to place your nailer on a solid, flat portion of the molding that will be pressed against the wall. Avoid firing into thin, decorative raised elements if possible, as these are prone to splintering or breaking.
Safety First, Always!
I can’t stress this enough: safety is paramount when using any power tool, and a brad nailer is no exception.
- Wear Safety Glasses: Always, no exceptions. Nails can ricochet, and wood splinters can fly.
- Never Point at Yourself or Others: Treat the nailer like a loaded firearm.
- Keep Fingers Away from the Trigger and Nose: Especially important with contact-actuated nailers.
- Disconnect Power When Not in Use: Unplug electric nailers, disconnect air hoses from pneumatic ones, and remove the battery from cordless tools when loading, clearing jams, or performing any maintenance.
- Understand Your Tool: Read the manufacturer’s manual thoroughly. Each nailer operates slightly differently.
- Clear Jams Carefully: Always disconnect power before attempting to clear a jammed nail.
Following these safety guidelines will protect you and ensure your tool lasts for many projects to come.
When to Switch to a Finish Nailer (or Other Tools)
While brad nailers are fantastic for trim, they aren’t always the only or best solution.
- Larger Trim Pieces: For very substantial baseboards or crown molding, a finish nailer (14 or 16 gauge) might be more appropriate. They use thicker nails that provide stronger holding power for heavier pieces.
- High-Stress Areas: If you’re attaching trim in an area that will experience a lot of impact or stress, a finish nailer might offer more security.
- Delicate Wood: For extremely delicate or antique trim, sometimes even a brad nailer can be too much. In such cases, hand nailing with fine brads and a hammer, or using specialized small-head nails, might be necessary.
- No Nailer Available: If you don’t have a brad nailer, traditional methods using hammer and finishing nails are still perfectly viable and can achieve excellent results with practice. Small pilot holes can also help prevent splitting.
A good carpenter knows which tool is right for the job. While a brad nailer is excellent for most trim, know its limitations and when another tool might serve you better.
Frequently Asked Questions About Brad Nailers and Trim
Q1: What’s the most common mistake beginners make when nailing trim?
A1: The most common mistake is not properly testing and adjusting the depth setting on scrap wood. This leads to nails being driven too deep, creating craters, or not deep enough, leaving them proud and difficult to conceal.
Q2: Can I use a brad nailer on painted trim?
A2: Yes, you can. However, you’ll need to be even more precise with your depth setting, as driving the nail too deep can chip or crack the paint around the nail head. Always test on a corner or scrap piece first.
Q3: What PSI should I use for a brad nailer on trim?
A3: For most 18-gauge brad nailers, a pressure between 70-100 PSI is common. Start around 70-80 PSI and adjust upwards if needed, but always refer to your specific nailer’s manual. Too high a PSI increases the risk of damaging the trim.
Q4: How do I avoid splitting the end of a piece of trim when nailing?
A4: Ensure your nail gun’s depth is set correctly, and try to nail into solid wood (studs). Avoid nailing too close to the very end of a piece of trim, as this is where it’s most likely to split. If you encounter very knotty or brittle wood, a slightly lower PSI on pneumatic nailers can help.
Q5: How far apart should I place brad nails in trim?
A5: For most applications, spacing your brad nails about 12 to 16 inches apart is sufficient. For longer pieces or areas under more stress, you may place them closer together. Always try to hit studs where possible, and use these nail locations as primary fastening points.