Quick Summary:
Mastering your brad nailer for cabinet making means choosing the right nail size, setting the depth correctly, and using proper technique. This guide offers genius tips for professional-looking results, ensuring secure joints and a smooth finish every time. Get ready to build beautiful cabinets with confidence!
Hey there, woodworking enthusiasts! Jack Shaffer here, your trusty Nailerguy. Are you ready to take your cabinet-making skills to the next level? Many DIYers find that getting those perfect, clean joints for cabinets can be a bit tricky. Frustrated with nails that are too long, too short, or leave unsightly marks? You’re in the right place. A brad nailer can be your secret weapon for building beautiful, sturdy cabinets. It’s all about knowing how to wield it correctly. We’ll walk through everything you need to get started, making this project feel totally achievable.
Let’s dive into how to use a brad nailer for cabinet making, turning those tricky steps into simple wins. We’ll cover everything from selecting the right nailer and nails to achieving flawless finishes. Get ready to build cabinets you’ll be proud of!
Table of Contents
Choosing the Right Brad Nailer for Cabinetry
Picking out the perfect brad nailer for cabinet making is your first crucial step. Don’t worry; it’s simpler than it sounds! You’ll want a nailer that’s lightweight and maneuverable, especially when you’re working with smaller cabinet pieces or in tight corners. Power is important, but so is precision.
Here’s what to consider:
- Gauge: For cabinet making, a 16-gauge brad nailer is often the go-to. It drives nails that hold well but are thin enough to be less noticeable and easier to conceal. An 18-gauge nailer is lighter and leaves even smaller holes, which is great for very delicate trim, but might lack the holding power for structural cabinet joints.
- Power Source: You’ll find pneumatic (air-powered), cordless (battery-powered), and electric (corded) brad nailers.
- Pneumatic nailers are powerful, reliable, and generally more affordable upfront. However, they require an air compressor and hose, which can limit mobility.
- Cordless nailers offer the ultimate freedom. Many use lithium-ion batteries, providing ample power without the hassle of cords or hoses. They are a fantastic, albeit often more expensive, choice for cabinet making.
- Electric nailers are convenient for simple jobs and don’t require batteries or compressors. However, the cord can sometimes get in the way when working on intricate projects like cabinets.
- Depth Adjustment: This is a must-have for cabinet making. Being able to fine-tune how deep the nail is driven prevents you from over-driving (sinking the nail too far, damaging the wood) or under-driving (leaving the nail head proud, making finishing difficult).
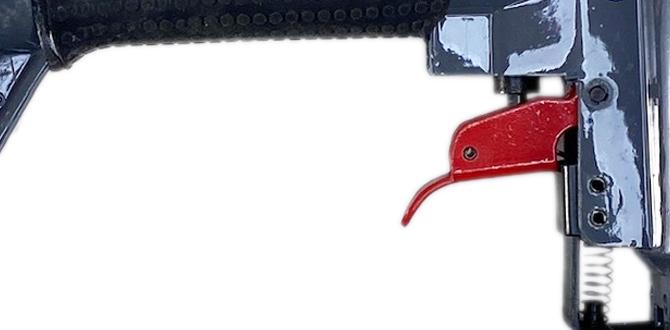
- Nail Firing Mechanism: Look for a “contact trip” or “touch-trip” safety feature. This allows you to set and release the nailer quickly, almost like a staple gun, which is super efficient for repetitive tasks like cabinet assembly. There’s usually a secondary safety trigger you must press against the wood as well, ensuring accidental firings don’t happen.
Essential Brad Nailer Accessories for Cabinet Makers
Beyond the nailer itself, a few accessories can make your cabinet-making experience smoother and more professional. Think of these as your trusty sidekicks!
- Brad Nails: This is obvious, right? But choosing the right brads is key. For cabinet frames, carcasses, and face frames, 1 ½-inch to 2-inch 16-gauge nails are common. For attaching thinner decorative elements or moldings, you might use 1 ¼-inch or even 1-inch 18-gauge nails. Always check the manufacturer’s recommendations for your specific nailer.
- Air Compressor & Hose (for Pneumatic Nailers): If you opt for a pneumatic brad nailer, a good quality air compressor and a flexible, lightweight hose are essential. A compressor with at least 2-3 CFM (Cubic Feet per Minute) at 90 PSI should be sufficient for most brad nailers used in cabinet making.
- Safety Glasses: Non-negotiable. Always protect your eyes from flying debris or accidental nail ricochets. This is the most important accessory you can own!
- Hearing Protection: Nail guns can be loud, especially in enclosed workshops. Earplugs or earmuffs will help protect your hearing over the long term.
- Work Gloves: While not strictly necessary for operation, gloves can help you grip wood pieces more securely and protect your hands from splinters.
- Tool Lubricant (for Pneumatic Nailers): Most pneumatic nailers require a few drops of specialized pneumatic tool oil with each use to keep internal components working smoothly. Check your owner’s manual.
Setting Up Your Brad Nailer for Cabinet Carcasses and Face Frames
Proper setup is where the magic truly begins. Get this right, and you’re already halfway to perfect cabinets. It’s less about complicated steps and more about careful attention to detail.
Step 1: Connect, Check, and Load
For Pneumatic Nailers:
- Ensure the air compressor is turned OFF and the regulator is set to zero.
- Connect the air hose securely to the nailer’s air inlet port and the compressor.
- Turn on the compressor and set the air pressure. For most 16-gauge framing tasks on cabinets, 80-100 PSI is a good starting point. (Always consult your nailer’s manual for recommended PSI ranges).
- Disconnect the air hose from the nailer before loading brads and testing. This is a critical safety step.
- Open the nailer’s magazine (usually by pulling back a spring-loaded piece).
- Insert a strip of the correct size brad nails, ensuring they are seated properly against the magazine floor.
- Close the magazine securely.
- Reconnect the air hose.
For Cordless/Electric Nailers:
- Ensure the battery is fully charged and inserted correctly (or the power cord is plugged into a suitable outlet).
- Open the nailer’s magazine.
- Load the correct size brad nails, making sure they sit flat and are pushed all the way to the front.
- Close the magazine securely.
Step 2: Test and Set the Depth
This is the most important step before you start firing nails into your actual cabinet parts. You need to dial in the perfect depth for a clean, strong joint without damaging your beautiful wood.
- Grab a couple of scrap pieces of wood that match the thickness and type of wood you’ll be using for your cabinets (e.g., plywood for carcasses, solid wood for face frames).
- Set your depth adjustment dial. Start with a medium setting.
- Aim the nailer at the scrap wood, pressing the safety contact tip firmly against the surface.
- Squeeze the trigger.
- Examine the nail.
- Is it sticking out? The nail is under-driven. Increase the depth setting slightly.
- Is it sunk too far in, or has it dented the wood around it? The nail is over-driven. Decrease the depth setting slightly.
- Is it flush with the surface, or just barely below it, with no wood damage? Perfect!
- Repeat this process, firing a few nails, until you achieve consistent, perfect results on your scrap material. It’s worth taking the time! You want the nail head to be just slightly below the surface, allowing for putty or filler without a visible bump.
Step 3: Engage Safety and Test Fire
Before driving any nails into your project, give it a final quick test fire. Ensure both the safety contact on the nose and the trigger are functioning correctly. This ensures your nailer is ready for action and fires as expected.
Genius Tips for Using Your Brad Nailer in Cabinet Making
Now that you’re set up and ready to go, let’s talk about making your nailing super effective and professional. These are the little tricks that the pros use!
1. Proper Nail Placement is Key
Think about where each nail goes. You want enough nails to hold the pieces together securely, but you don’t want them to be so close that they split the wood or look cluttered once filled.
- Spacing: For cabinet carcasses and face frames, aim for nails spaced about 4-6 inches apart.
- Distance from Edge: Drive nails at least ½ inch (13mm) from the edge of thinner material to prevent splitting. For thicker material, you can usually get closer.
- Countersinking: Even when set perfectly, sometimes a nail might sit just proud. A manual nail set can gently tap these down without damaging the wood surface if needed.
- Angle: Whenever possible, drive nails perpendicular to the surface. If you need to nail at an angle (e.g., attaching a face frame to a cabinet box at an angle), ensure the nail penetrates both pieces adequately and doesn’t blow out the back of the second piece.
2. Sandwich and Brace Your Joints
For strong cabinet joints, particularly when attaching face frames to carcasses or assembling box joints, it’s helpful to have a second person help brace the pieces while you nail. If you’re working alone, use clamps or temporary bracing. You want the pieces to stay perfectly flush and square as you drive the nails. A slightly misaligned nail can cause a gap that’s hard to fix later.
3. Use Wood Glue for Maximum Strength
A brad nailer is excellent for holding pieces together while the glue dries. It’s not a substitute for glue! Applying a thin, even layer of quality wood glue to the joining surfaces before nailing will create joints that are exponentially stronger and more durable. Wipe away any excess glue that squeezes out with a damp cloth before it dries – it’s much harder to remove later!
4. Be Mindful of the Wood Type and Thinness
Softwoods are more forgiving, but hardwoods can split if you drive nails too close to the end or edge, especially very thin hardwoods. If you’re working with delicate veneers or thin plywood, it’s extra important to:
- Use a lower PSI setting.
- Use shorter nails if possible.
- Ensure your depth setting is perfect.
- Consider pre-drilling pilot holes in very hard woods if splitting is a concern, though this can be time-consuming.
5. For Face Frames, Nail from the Outside-In
When assembling face frames (the solid wood border around cabinet doors), nail the cross pieces and stiles from the outside of the face frame. This way, the nail heads will be on the exterior, which is less visible and easier to fill or conceal. Use glue for these joints too!
6. Consider a Nail Set for Perfect Flushness
Even with perfect depth adjustment, sometimes a nail doesn’t sit quite flush. Keep a manual nail set and hammer handy. A few gentle taps on the nail head can sink it just a hair below the surface, ready for wood filler or putty. Be careful not to hit the wood surrounding the nail.
7. Fill Those Nail Holes for a Pro Finish
This is your final touch for a really professional look. Once your cabinet is assembled and the glue is dry, fill any visible nail holes. You can use wood filler, putty, or even a colored wax stick that matches your wood. Sand smooth after filling, and you’ll be amazed at how the nail holes seem to disappear. For smaller holes from an 18-gauge nailer, a good quality wood filler will work wonders. For larger 16-gauge holes, you can also use a bit of wood glue mixed with sawdust from your project for a perfect color match.
8. Safety First, Always!
I can’t stress this enough: always wear your safety glasses. Never point the nailer at yourself or others. Keep your fingers away from the trigger and the nose of the tool when not actively nailing. Understand the “contact trip” mechanism – it means the nailer can fire if the nose is pressed against something and the trigger is pulled, so be mindful even when you’re just positioning it.
Brad Nailer vs. Finish Nailer for Cabinets
It’s common to wonder about the difference between brad nailers and finish nailers, especially when you’re starting out. They look similar, but they have different jobs. Knowing this will help you choose the right tool for the right task.
Here’s a quick comparison:
| Feature | Brad Nailer (e.g., 18-gauge, 16-gauge) | Finish Nailer (e.g., 15-gauge, 14-gauge) |
|---|---|---|
| Nail Size (Thickness) | Thinner (0.0475″ to 0.0575″ diameter) | Wider (0.0625″ to 0.075″ diameter) |
| Nail Holding Power | Moderate. Good for holding parts while glue dries, attaching trim. | Stronger. Better for heavier trim, baseboards, and structural joints requiring more holding power. |
| Hole Size & Visibility | Very small, almost invisible holes. Easy to fill. | Small but more noticeable holes. Still easy to fill, but might require a bit more filler. |
| Risk of Splitting Wood | Lower, especially in hardwoods and thin materials. | Higher, particularly in hardwoods and at the thin edges of panels. |
| Common Cabinet Use | Assembling cabinet boxes, attaching face frames, securing smaller decorative moldings, drawer assembly. | Attaching thicker trim, base shoe, some crown molding for cabinets, heavier structural elements. |
For most typical cabinet construction, a 16-gauge brad nailer is often the most versatile tool. It offers a good balance of holding power and minimal visibility. An 18-gauge brad nailer is perfect for very delicate decorative work or where nail size is absolutely critical. A 15-gauge (or even 14-gauge) finish nailer is better suited for tasks where a stronger hold is needed, and the slightly larger nail head won’t detract from the aesthetic.
Common Cabinet-Making Scenarios and Brad Nailer Solutions
Let’s look at how your brad nailer can help in specific cabinet-making situations:
Assembling the Cabinet Box (Carcass)
This is where your brad nailer shines. When joining plywood or particleboard sides, top, and bottom panels, applying glue to the edges and then using your brad nailer to hold everything perfectly square while the glue cures is incredibly efficient.
- Materials: Plywood, MDF, particleboard
- Nailer: 16-gauge brad nailer
- Nail Length: 1 ½” to 2″ (depending on material thickness)
- Technique: Apply glue to edges. Clamp pieces firmly together, ensuring perfectly square corners