Unfinished hardwood flooring offers a customizable, natural look, allowing you to choose the perfect stain color and finish for your home. While it requires more upfront work than prefinished options, it provides a smoother, more durable surface and can be a cost-effective choice for DIYers. This guide will walk you through everything you need to know.
Hey there, DIYers! Jack Shaffer here, your go-to guy for all things tools and wood. So, you’re eyeing up some beautiful unfinished hardwood flooring? That’s fantastic! It’s like a blank canvas for your floors, letting you create a look that’s uniquely yours. But I know – it can seem a little daunting compared to the stuff already finished in the box. Don’t you worry! We’re going to break down exactly what you need to know, step-by-step, to get those gorgeous floors installed and looking like a million bucks. Let’s dive in and make your flooring dreams a reality!
Table of Contents
What is Unfinished Hardwood Flooring?
Unfinished hardwood flooring, in its simplest terms, is raw wood that hasn’t been stained or sealed yet. It arrives at your home straight from the mill. This is different from prefinished flooring, which has already been manufactured with a factory-applied stain and protective coating. Think of it like buying a raw piece of lumber versus a perfectly crafted table.
This raw state is the big advantage! It gives you complete control over the final look and feel of your floors. You can choose a stain to match your décor, a finish to give it that perfect sheen (or matte, if you prefer!), and even have it sanded perfectly smooth once it’s installed.
Why Go With Unfinished Flooring?
Many homeowners and DIYers choose unfinished hardwood for several compelling reasons. It boils down to customization, quality, and potential savings.
Ultimate Customization: This is the main draw. You get to pick the exact stain color and finish type. Want a rustic farmhouse grey? Or a deep, glossy espresso? You can achieve it. This level of personalization is hard to match with prefinished options.
Smoother Surface: When unfinished boards are installed and then sanded in place, the result is a completely smooth, seamless floor. There are no bevels or micro-beveled edges that can sometimes trap dirt and make cleaning a bit trickier.
Potentially Lower Material Cost: Often, the raw, unfinished wood itself can be less expensive per square foot than its prefinished counterpart. While you’ll have labor and finishing material costs, the initial material purchase can be a budget-saver.
Deeper Grain Penetration: Stains and finishes can penetrate deeper into the wood grain when applied to unfinished flooring after installation, leading to richer colors and more durable protection.
Easier Repairs: If you ever need to repair a damaged section, it’s often easier to blend new unfinished wood into an existing unfinished floor because you can match the stain and finish precisely.
Is Unfinished Flooring the Right Choice for You?
Let’s weigh the pros and cons. Unfinished flooring is a fantastic choice if you:
Want complete control over the color and finish.
Appreciate a perfectly smooth, seamless floor surface.
Are willing to invest the time and effort into the finishing process.
Enjoy the satisfaction of a truly custom DIY project.
Are looking for potential cost savings on the raw material.
However, it might not be the best fit if you:
Need a quick installation and have very little time.
Are not comfortable with staining and finishing or don’t want to hire professionals for it.
Prefer the convenience of opening a box and installing immediately.
Choosing the right flooring type is the first big step in any successful DIY project. Understanding what makes unfinished flooring unique will set you up for a great result!
The Installation Process: Step-by-Step
Alright, let’s get down to business. Installing unfinished hardwood flooring involves a few more steps than simply laying down prefinished planks, but each step is totally manageable with the right approach and tools.
Step 1: Planning and Preparation are Key
Before you even unbox your flooring, careful planning is essential.
Measure Your Space: Accurately measure the square footage of the room(s) where you’ll be installing the floor. Always add an extra 10-15% for waste, cuts, and potential mistakes. It’s better to have a little extra than to run short!
Acclimate the Wood: This is CRUCIAL. Hardwood needs to adjust to the humidity and temperature of your home. Store the unopened boxes flat in the room where they will be installed for at least 72 hours (or as recommended by the manufacturer). Improper acclimation can lead to warping, buckling, or gapping later.
Check Your Subfloor: Ensure your subfloor is clean, dry, level, and sound. Any issues here will translate directly to your new floor. You might need to repair squeaks or add leveling compound. A good subfloor is the foundation of a great floor. For guidance on subfloor preparation, the National Wood Flooring Association (NWFA) is an excellent resource: NWFA Technical Resources.
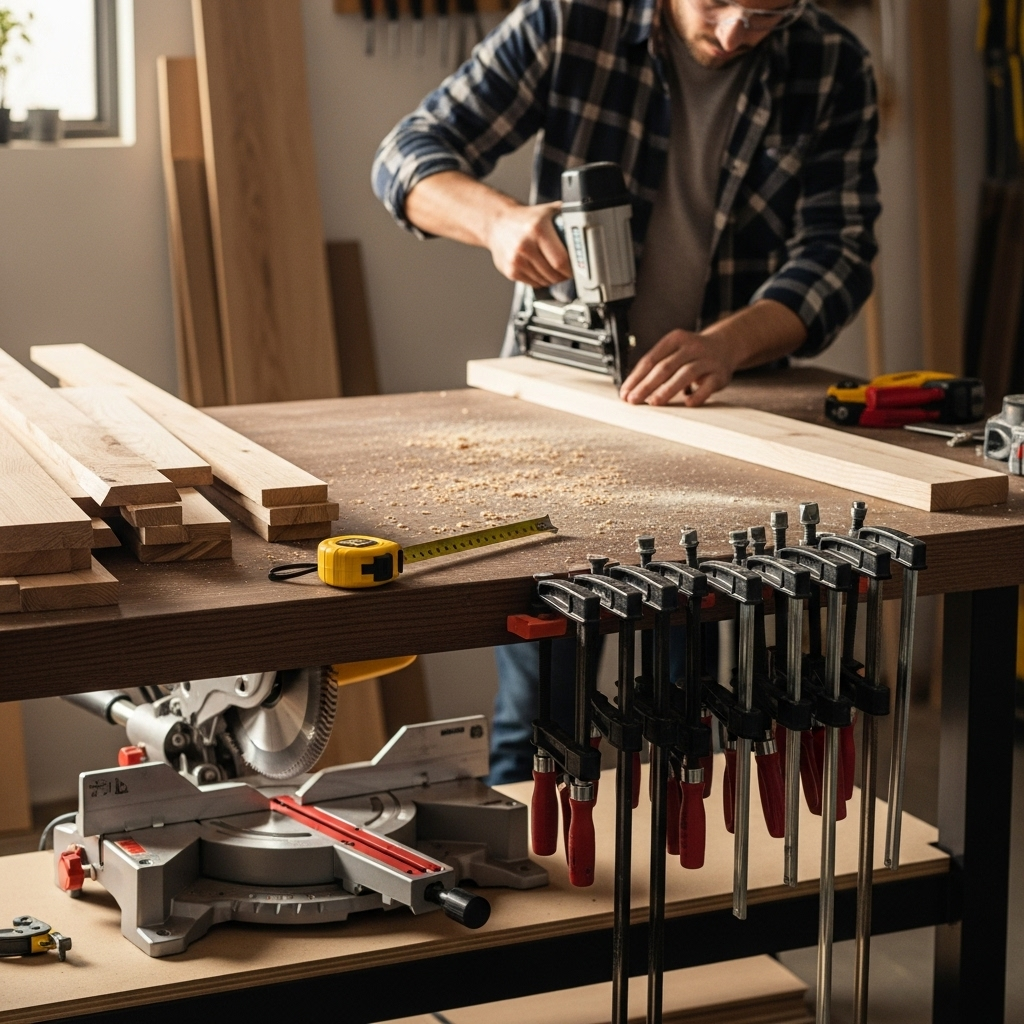
Gather Your Tools: You’ll need a good selection of tools. For installation itself, this typically includes:
Flooring nailer (cleat nailer or staple gun designed for wood flooring)
Air compressor and hose
Miter saw for precise cuts
Table saw for ripping boards (if needed)
Jigsaw for intricate cuts (around doorways, vents)
Measuring tape
Pencil
Chalk line or long straight edge
Hammer and pry bar
Safety glasses and work gloves
Wood flooring adhesive (if doing a glue-down installation, though nail-down is more common for unfinished)
Moisture meter (to check subfloor and wood)
Step 2: Laying the First Row
The first row is the most important because it sets the stage for everything that follows. It needs to be perfectly straight.
Establish a Straight Line: Use a chalk line or a long straight edge to mark a line parallel to the longest wall in the room, about 1/2 inch to 1 inch away from that wall. This accounts for expansion and will be hidden by your baseboard. If your starting wall isn’t perfectly straight, this chalk line will ensure your first row is.
Cut the Tongue: For the very first row, you’ll typically need to remove the tongue side of the planks that will face the wall. This allows the planks to sit flush against the wall. You can do this with a table saw.
Nail the First Row: Place the first board with its groove side facing the wall. Secure it by hand-nailing or using your flooring nailer angled along the tongue. Be sure to nail into the joists if possible or through the subfloor according to best practices. Continue laying boards for the first row, ensuring they are tightly butted together and perfectly straight along your chalk line.
Step 3: Laying Subsequent Rows
This is where the rhythmic pounding of the flooring nailer begins!
Stagger Your Joints: For strength and visual appeal, stagger the end joints of your boards. Aim for joints to be at least 6 inches apart from the joints in the previous row. You can achieve this by using the offcut from the end of one row as the start of the next.
Use the Flooring Nailer: Position your flooring nailer on the tongue of the board, with the base plate firmly against the wood. Drive nails through the tongue at roughly a 45-degree angle. A good rule of thumb is to place a nail every 6-8 inches and at each end joint. Follow your nailer’s instructions and your flooring manufacturer’s recommendations. A quality flooring nailer will make this go much smoother.
Fit Boards Tightly: Use a tapping block and hammer to gently tap boards together, ensuring there are no gaps between them. This is crucial for a good installation and proper sanding later.
Cut for Obstacles: For areas like doorways, cabinets, or vents, use your jigsaw to cut boards to fit snugly around them. Remember to leave a small expansion gap (about 1/2 inch) where the flooring meets any fixed vertical surfaces.
Step 4: The Last Row
The last row often requires some creative cutting.
Measure and Mark: Measure the gap between your last laid row and the wall. Mark this width onto a board, remembering to account for the tongue or groove that needs to be removed to fit.
Rip the Board: Use a table saw to rip the board to the correct width.
Remove Tongue/Groove: Depending on how the board fits, you might need to remove the tongue or groove from both edges of the board to allow it to slide into place. A router with a slot-cutting bit or simply cutting it off with a circular saw can do this.
Use a Pull Bar: For the final row, you’ll likely need a pull bar to lever the boards tightly against the previous row and into place. Secure these boards by face-nailing (driving nails through the face of the board) and then filling the holes with wood putty later, or by toenailing through the tongue from an angle if space allows.
Congratulations! You’ve successfully installed your unfinished hardwood flooring. But the journey isn’t over yet – the magic of the finish is next!
Sanding Your Unfinished Hardwood Floor
This is where unfinished flooring truly shines. Sanding in place reveals a perfectly smooth, level surface, free of milling imperfections and ready for your chosen finish. This step requires careful planning and the right equipment.
Types of Sanding
Drum Sander: This is the heavy machinery. It’s powerful and efficient for the main body of the floor. However, it can be aggressive and is best used by experienced hands to avoid gouging the wood.
Edger: This circular sander gets the edges of the room, near walls and cabinets, where the drum sander can’t reach.
Orbital/Multi-Disc Sander: These are much easier for DIYers to use. They cut less aggressively and provide a smoother finish without as much risk of creating swirl marks or divots. Many hardware stores rent these out, and they can often do a great job for DIYers.
The Sanding Process: A Step-by-Step Approach
1. Preparation:
Remove Baseboards: If you haven’t already, carefully remove baseboards. You’ll want to reinstall them after finishing.
Fill Gaps: Fill any larger gaps or screw holes with wood filler that matches your un-sanded wood color. Let it dry completely.
Secure Loose Boards: Ensure all boards are securely fastened. Any loose boards will cause problems now.
2. The First Cut (Coarse Grit):
Start with 60-80 Grit Sandpaper: This is for removing any milling marks, minor imperfections, and leveling the surface.
Drum Sander Technique (if used): Start on one side of the room and move the drum sander parallel to the direction of the wood grain. Make overlapping passes. For subsequent passes, go perpendicular to the previous direction. For the final pass with the drum sander, go parallel to the grain again.
Edger and Orbital Sander Technique: Use these tools to sand the perimeter of the room and any areas the drum sander missed. Work in a systematic pattern.
3. The Medium Cut (Mid Grit):
Move to 100-120 Grit Sandpaper: This step is to remove the scratch marks left by the coarser grit.
Repeat Pattern: Whether you used a drum sander or focused on an orbital sander, repeat the sanding process with the new grit. Always sand in a different direction from the previous pass or perpendicular to the direction for the final smoothing.
4. The Final Buff (Fine Grit):
Use 150-220 Grit Sandpaper: This final sanding creates the smooth surface ready for finishing.
Orbital or Multi-Disc Sander: This is where an orbital or multi-disc sander is often preferred for its ability to create a very smooth finish without deep scratches. Sand in a consistent pattern, covering the entire floor.
Edge Sanding: Ensure all edges are sanded to match the main floor.
5. Clean, Clean, Clean!
Vacuum Thoroughly: Use a shop vac with a brush attachment to vacuum the entire floor. Get into every corner and crevice.
Tack Cloth: Go over the entire floor with a high-quality tack cloth. This is essential for removing the finest dust particles that vacuuming might leave behind. Any dust left will show up in your finish!
This is a lot of physical work, but the reward is a perfectly smooth canvas. If you’re unsure about using a drum sander, hiring a professional for this sanding phase is a wise investment to ensure a flawless result.
Choosing and Applying Wood Floor Finish
Now for the fun part – bringing your floor to life with color and protection! This is where your vision becomes reality.
Understanding Wood Floor Finishes
There are two main types of finishes for hardwood floors:
Surface Finishes (Polyurethane): These form a protective film on top of the wood. They are durable and widely used.
Oil-Based Polyurethane: Known for its ambering effect, which gives wood a warm, rich look. It’s very durable and offers excellent protection. The trade-off is longer drying times and stronger fumes. This is often a favorite for achieving a classic wood floor look.
Water-Based Polyurethane: Dries much faster, has lower VOCs (volatile organic compounds), and is clear, meaning it won’t significantly alter the wood’s natural color. It’s also very tough but can sometimes be less forgiving on DIY application if not worked quickly.
Penetrating Finishes (Oils/Waxes): These soak into the wood fibers, offering protection from within. They provide a more natural, matte look and feel.
Hardwax Oils: A popular modern choice, they combine the natural feel of oils with the durability of a hard wax layer on top. They are often easy to repair and maintain. They can be applied relatively easily with rollers or cloths.
Natural Oils: These soak deep into the wood. They require more frequent reapplication but offer a very authentic, natural look.
Waxes: Often used over penetrating oils or as a standalone finish for a traditional look. They offer less durability than polyurethanes and require regular buffing and reapplication.
Choosing Your Stain
Test, Test, Test! Always, ALWAYS buy a few small sample cans of your desired stain colors and apply them to scrap pieces of your flooring wood. Apply your chosen finish over these samples to see how the color looks with the final protection. Stains can look very different on the wood once the finish is applied.
Color Considerations:
Light Stains: Offer a natural, airy, modern look. They can make a room feel larger.
Medium Stains: Versatile and classic, they work with many décor styles.
Dark Stains: Create a dramatic, elegant, and warm feel. They can show dust and scratches more easily.
Custom Colors: Many DIYers mix stains to achieve a unique shade perfectly suited to their home.
Applying Stain and Finish
This is where safety precautions are vital due to fumes and potential flammability of some products. Ensure excellent ventilation!
Application Steps:
1. Apply Stain:
Work in Sections: Stain small, manageable sections at a time (e.g., 3-4 boards wide).
Apply Evenly: Using a foam brush, applicator pad, or clean rag, apply the stain according to the manufacturer’s instructions. Work with the grain of the wood.
Wipe Off Excess: Allow the stain to penetrate for the time recommended by the manufacturer (usually 5-15 minutes). Then, using clean rags, wipe off all excess stain. The longer you leave it on, the darker the color. A consistent wiping technique is key to an even color.
Let it Dry: Allow the stain to dry completely (usually 12-24 hours, depending on the product and humidity).
2. Apply Finish (e.g., Polyurethane):
Ventilation: Open windows and doors where possible. Use fans to move air out of the room. Consider wearing a respirator mask designed for organic vapors.
Use a High-Quality Applicator: For oil-based poly, a natural bristle brush or lambswool applicator works well. For water-based, a good synthetic brush or high-quality foam roller is recommended.
Apply Thin, Even Coats: Apply the finish in thin, even coats, working the product with the grain of the wood. Avoid overworking the product, which can lead to bubbles or streaks.
Maintain a Wet Edge: Overlap each stroke slightly with the previous “wet” stroke to ensure a seamless finish without lap marks.
Between Coats: After each coat dries (check manufacturer’s times – typically 4-12 hours for water-based, 12-24 hours for oil-based), lightly de-glaze the surface with a screen or very fine sandpaper (220 grit). This smooths any dust nibs and ensures good adhesion for the next coat. Clean thoroughly with a tack cloth after de-glazing.
Number of Coats: Most floors need at least 3 coats of polyurethane for good durability. High-traffic areas might benefit from a fourth coat.
3. Curing Time:
Light Foot Traffic: You can usually walk on the floor in socks after 24-48 hours (follow manufacturer’s guidelines).
Heavy Furniture: Wait at least 7 days before placing heavy furniture back. Use felt pads under all furniture legs to prevent scratching.
Rugs and Mats: Avoid placing rugs or mats for at least 30 days, as trapped moisture can damage the finish.
The finishing process is a critical part of achieving a beautiful and durable floor. Patience and attention to detail here will pay off immensely.
Maintaining Your New Floors
Once your beautiful unfinished hardwood floors are installed and finished, you’ll want to keep them looking their best for years to come. Maintenance is generally straightforward.
Regular Cleaning:
Sweep or Vacuum: Use a soft-bristle broom or a vacuum cleaner with a hard floor attachment (no beater bar!) to remove dust and debris daily or every few days. This prevents grit from scratching the finish.
Damp Mopping: Use a damp (not wet!) mop with a hardwood floor cleaner recommended by your finish manufacturer. Avoid using too much water, as it can damage the wood. Always wring out your mop thoroughly.
Protect from Damage:
Furniture Pads: As mentioned, felt pads on all furniture legs are a must. Check and replace them as they get worn down.
Entry Mats: Place mats both inside and outside all exterior doors to catch dirt, grit, and moisture before it’s tracked onto your wood floors.
High Heels and Cleats: Advise household members and guests to remove high heels or sports cleats before walking on the floors.
Avoid Harsh Chemicals: Never use abrasive cleaners, ammonia-based cleaners, or waxes on polyurethane-finished floors, as they can dull or damage the finish. Stick to pH-neutral cleaners specifically designed for hardwood floors.
Humidity Control: Wood expands and contracts with changes in humidity. Using a humidifier in dry winter months and a dehumidifier in humid summer months can help maintain a stable environment, around 35-55% relative humidity is often recommended. This helps prevent excessive gapping or buckling. For more on maintaining wood moisture content, check out resources from the NC Wood Learning project from NC State University.
Sunlight: Direct sunlight can fade wood over time, especially certain species and finishes. Use curtains or blinds to protect your floors from intense, prolonged sun exposure.
By following these simple maintenance tips, your unfinished hardwood floors will remain a stunning feature of your home for decades.
Frequently Asked Questions About Unfinished Hardwood Flooring
Q1: Is unfinished hardwood flooring more expensive than prefinished?
Not always. The raw wood material for unfinished flooring is often less expensive. However, you must factor in the cost of stains, finishes, and labor (either your time or a professional’s) if you choose unfinished. Prefinished flooring has higher initial material costs but saves on the finishing labor.
Q2: How long does it take to install and finish unfinished hardwood floors?
This can vary greatly depending on the size of the area, your speed, and whether you hire professionals. A DIY installation and finishing project can easily take anywhere from 4-10 days. Professionals can often complete it faster. The drying and curing times between coats are a significant part of the overall duration.
Q3: Can I install unfinished hardwood myself?
Yes, absolutely! If you’re comfortable with basic carpentry, using power tools, and have patience, you can install unfinished hardwood yourself. Renting the right tools (especially the flooring nailer and sanders) is key. If you’re unsure about sanding and finishing or don’t have the time, hiring professionals for those specific stages is a good compromise.
Q4: What tools do I absolutely need for installing unfinished hardwood?
For installation, the essentials include a flooring nailer (or staple gun designed for wood flooring), an air compressor, a miter saw for cuts, a measuring tape, a hammer, safety glasses, and gloves. For finishing, you’ll need sanders (drum, edger, or orbital) and all the necessary application tools for stain and finish.
Q5: What’s the biggest mistake beginners make with unfinished floors?
One of the biggest mistakes is skipping or inadequately performing the acclimation process. Wood needs to adjust to your home’s environment to prevent future issues like gapping or buckling. Another common pitfall is improper sanding or inadequate cleaning between coats, which can lead to an unprofessional-looking finish.
Q6: How do I choose the right stain and finish for my unfinished floors?
Always test your chosen stain and finish on scrap pieces of the same flooring wood. See how the color looks once the finish is applied. Consider the overall style of your home – light, airy, or rich and dramatic. For finishes, think about durability (polyurethane is very tough) versus natural look (oils/waxes). Read reviews and manufacturer recommendations carefully.
Q7: Is sanding unfinished hardwood difficult?
Sanding can be physically demanding and requires care. Using a drum sander requires practice to avoid damaging the floor. Orbital sanders are more beginner-friendly but may take longer. Many DIYers find success renting the right equipment. If flawless results are a priority and you lack experience, hiring a professional for sanding is often recommended.
Conclusion
Tackling unfinished hardwood flooring is a journey that, while requiring more effort, rewards you with a truly custom, beautiful, and durable floor that reflects your personal style. From the precise planning and careful installation to the satisfying final sanding and the artistic choice of stain and finish, each step is a building block towards a stunning result.
Remember, the key to success lies in preparation, patience, and using the right tools for the job, whether that’s a flooring nailer, a high-grit sandpaper, or a quality applicator for your chosen finish. Don’t underestimate the importance of acclimation and thorough cleaning between coats. If any step feels beyond your comfort zone, like the aggressive sanding a drum sander provides, don’t hesitate to hire professionals for those specific tasks.
You’ve got this! By following this guide, you’re well on your way to installing and finishing a gorgeous hardwood floor that you can be incredibly proud of for years to come. Happy building!