Have you ever tried to use a finish nailer, only to find that the nails don’t go in deep enough? It’s frustrating! You might think you’re doing everything right, but the results just don’t match your efforts.
Let’s imagine a common scene. You’re finishing a beautiful woodworking project and want everything to look perfect. But then, you notice the nails stick out like tiny hills on a flat plain. What went wrong?
Understanding how to troubleshoot finish nailer depth can make all the difference. Many people face this problem, but few know the tricks to solve it. Did you know that something as simple as adjusting a knob can change everything?
This article will guide you through some easy steps to fix nail depth issues. You’ll learn tips and tricks that even beginners can follow. Soon, you’ll have nails that sit just right, making your projects look smooth and professional. Are you ready to dive in?
Table of Contents
Troubleshooting Finish Nailer Depth: Common Issues & Solutions

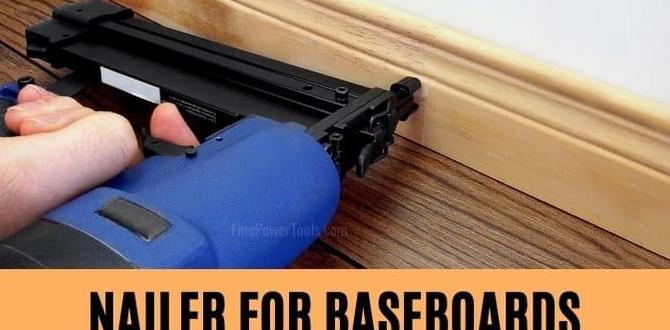
Troubleshooting Finish Nailer Depth
Understanding finish nailer depth is crucial for any DIY project. If nails stick out or sink too deep, it can ruin your work. Adjusting the depth setting typically fixes these issues quickly. Check the air pressure; low pressure can cause problems, too. A fun fact: Did you know that finish nailers can drive nails up to 2.5 inches deep? Mastering this tool saves time and helps you create stunning finishes!Understanding Finish Nailer Depth Adjustment
Explanation of depth adjustment mechanism in finish nailers. Importance of proper nail depth for various materials.Adjusting the depth on a finish nailer is like tuning a guitar—get it right, and you’ll hit all the sweet notes! This little knob determines how deep the nail goes. Too deep? Oops, you might get a splinter. Not deep enough? That nail will ride high like a cat on a fence! Proper depth is essential for different materials. For soft wood, play it light; for hard surfaces, add some pressure. Every project needs its own nail depth finesse!
| Material Type | Suggested Nail Depth |
|---|---|
| Soft Wood | 1/8 inch |
| Hard Wood | 1/4 inch |
| Plywood | 3/16 inch |
Common Depth Issues with Finish Nailers
Identification of symptoms related to depth problems. Potential causes of insufficient or excessive nail depth.Have you ever noticed nails that are either too deep or not deep enough? That can be a headache! Typically, if nails sink too much, they may leave tiny craters. If they stick out, it looks like a porcupine got too friendly with your wood. Nail depth issues can happen for a few reasons. It could be a problem with the air pressure, the wrong wood thickness, or even the tool settings not being adjusted correctly.
| Symptoms | Potential Causes |
|---|---|
| Nail heads sunk deeply | High air pressure, incorrect depth adjustment |
| Nails sticking out | Low air pressure, wrong nail size |
Remember, keeping your finish nailer in check can save you from looking like a DIY disaster!
Tools Required for Depth Troubleshooting
List of tools needed for inspection and adjustment. Recommendations on maintenance tools for finish nailers.To troubleshoot the depth of a finish nailer, you need the right tools. These tools help you inspect and adjust settings easily. Here’s what you should have on hand:
- Depth adjustment tool
- Pressure gauge
- Safety glasses
- Hex wrench set
- Oil for maintenance
These tools help keep your nailer working well and safe to use. A well-maintained finish nailer can make your projects smoother and more enjoyable.
What tools are needed for finish nailer maintenance?
You need a cleaning brush, lubricant, and replacement parts for better performance.
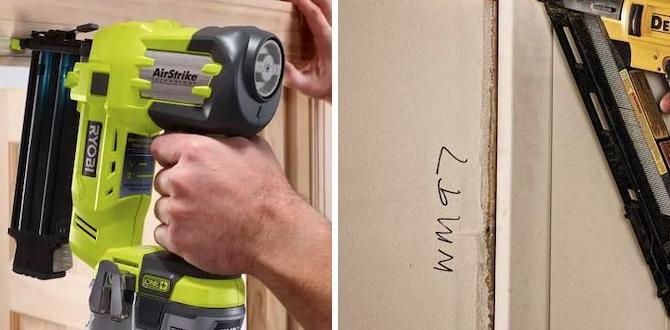
Step-by-Step Guide to Adjusting Nail Depth
Detailed procedure for adjusting nail depth correctly. Safety precautions to take during the adjustment process.Adjusting the depth of your finish nailer can be a breeze if you follow these steps! First, check your tool’s manual for specific guidelines. Next, locate the depth adjustment dial or lever—it’s often right on the nose of the nailer. Turn it clockwise to sink the nails deeper. For a shallower depth, go counterclockwise. Always wear safety glasses to protect your eyes. Remember, a nailer is not a toy; it won’t laugh if you miss the target!
| Step | Action | Safety Precautions |
|---|---|---|
| 1 | Check the manual | Ensure your tool is unplugged |
| 2 | Find the adjustment dial | Wear safety goggles |
| 3 | Turn the dial | Keep fingers clear of the firing area |
And there you have it! Adjusting depth is simple and helps ensure your nails go exactly where you want them. Happy nailing!
Testing the Nail Depth Adjustment
Methods to verify the effectiveness of depth adjustment. Tips on testing with different materials.Finding the right nail depth is like trying to find the perfect pizza topping—tricky but so worth it! To test if your nailer is set right, use different materials like wood and plastic. This helps you see how deep the nails go. Check the depth by pulling the nails back out gently; they should sit just below the surface. If not, adjust your settings!
| Material | Depth Result | Adjustment Needed? |
|---|---|---|
| Softwood | Perfect! | No |
| Hardwood | Too deep | Yes, adjust up |
| Plastic | Too shallow | Yes, adjust down |
This simple method helps you ensure that your depth adjustment is spot on. Remember, each material may need a little tweak. Testing can make you feel like a nail wizard, minus the magic hat!
Preventive Measures to Avoid Depth Issues
Best practices for using and maintaining finish nailers. Recommended schedules for routine checks and adjustments.Using a finish nailer can be tricky, but a few simple steps can keep it working like a charm. First, always check the depth settings before you start nailing. Too deep? Ouch! The wood won’t be happy! A good practice is to inspect your tool every month for any loose screws or dirt. You can even schedule a “Nailer Spa Day” for routine cleaning. Here’s a little schedule to guide you:
| Routine Check | Frequency |
|---|---|
| Check Depth Settings | Every Use |
| Clean Tool | Monthly |
| Tighten Screws | Monthly |
| Inspect Pneumatics | Every 3 Months |
Following these steps will keep your finish nailer happy and your projects on track. Remember, a happy tool makes for a happy builder!
When to Seek Professional Help
Signs that indicate a need for professional servicing. How to choose a qualified technician for your finish nailer issues.Signs that show your finish nailer needs expert help include unusual noises, nails not sinking properly, or the tool leaking air. If your nailer acts like it’s auditioning for a horror movie, it’s time to call in the pros. Choose a technician who has good reviews and experience with nailers, like asking around at the hardware store or checking online. Remember, a qualified tech is like a superhero—they save the day when things get sticky!
| Signs for Professional Help | How to Choose a Technician |
|---|---|
| Unusual noises | Look for reviews |
| Nails not sinking | Check their experience |
| Tool leaking air | Ask for recommendations |
Conclusion
In summary, troubleshooting your finish nailer’s depth is crucial for great results. Check the settings and air pressure often. Adjust the depth dial for thicker or thinner materials. Practice on scrap wood first to perfect your technique. If issues persist, consult your manual or online resources. With these tips, you can nail it every time! Keep learning and happy building!FAQs
What Are The Common Causes Of Insufficient Depth Penetration When Using A Finish Nailer?Insufficient depth penetration with a finish nailer often happens because of three main reasons. First, the air pressure may be too low, so the nail doesn’t go deep enough. Second, the nail might be the wrong size for your project. Lastly, if the tool isn’t held straight, it can make the nail not go in far enough. Make sure to check these things before nailing!
How Can I Adjust The Depth Settings On My Finish Nailer To Achieve The Desired Nail Insertion?To change the depth on your finish nailer, look for a dial or switch on the tool. You can turn it to set how deep the nail goes. If the nails are too deep, turn the dial to a higher number. If they are not deep enough, lower the number. Always test on a scrap piece first to see how it works!
What Type Of Nails Should I Use With My Finish Nailer To Ensure Proper Depth For Different Materials?You should use finish nails with a length based on what you’re nailing. For soft materials like pine, use shorter nails around 1.25 to 1.5 inches. For hardwoods, use longer nails, like 2 to 2.5 inches. Make sure your nails are the right size for better holding power!
How Can I Troubleshoot A Finish Nailer That Is Over-Penetrating And Causing Damage To The Work Surface?To fix a finish nailer that goes too deep, first check the pressure setting. You can lower the air pressure if it’s too high. Next, adjust the depth control on the nailer, if it has one. Finally, make sure you’re using the right size nails for your project. This will help the nails go in just the right amount.
Are There Any Techniques Or Tips To Enhance The Accuracy Of Depth Setting On A Finish Nailer For Delicate Trim Work?To make sure your finish nailer works well for delicate trim, you can try a few helpful tips. First, practice on scrap pieces of wood before working on the real trim. This lets you see how deep the nails go. Next, adjust the depth setting carefully for different types of trim. Always aim for just the right depth, so you don’t damage the wood. Lastly, make sure you hold the nailer steady when you fire it.