Quick Summary: For flawless baseboard installation, choose a pneumatic or cordless finish nailer (16-gauge or 18-gauge). Look for adjustable depth, a slim nose, and comfortable grip. Top models offer consistent performance, ease of use, and excellent results for DIYers.
Hey everyone, Jack Shaffer here, your go-to guy for all things nail guns! Putting up baseboards can seem like a big project, but with the right tool, it’s totally manageable. You might have looked at those different nail guns and felt a bit overwhelmed. Don’t worry! This guide is here to make choosing the perfect nail gun for your baseboard project a breeze. We’ll break down what makes a nailer great for this job, look at some top performers, and get you ready to tackle those walls with confidence. Stick around, and you’ll be installing trim like a pro in no time!
Table of Contents
Why the Right Nail Gun Matters for Baseboards
Installing baseboards is a finishing touch that truly elevates a room. Those crisp lines between your walls and floors make your space look polished and complete. When it comes to attaching baseboards securely and neatly, a nail gun is a game-changer. Using just nails and a hammer might work, but it’s a slow process, and you risk damaging the wood, leaving unsightly hammer marks, or not driving nails deep enough for a strong hold. A good nail gun drives fasteners precisely and flush, making your job faster, easier, and with much better results. It’s about achieving that professional look without all the fuss. Let’s dive into why the right nailer is your best buddy for this task.
Speed and Efficiency
Imagine hammering in dozens—or even hundreds—of nails by hand. It takes time and a lot of effort. A nail gun dramatically speeds up this process. With a quick squeeze of the trigger, a nail is driven exactly where you need it. This efficiency means you can finish your baseboard project in a fraction of the time, leaving you more time to enjoy your beautifully updated space.
Precision and Finish Quality
Achieving a clean, professional finish is key for baseboards. Nail guns are designed for precision. They drive nails flush or slightly countersunk, meaning you won’t have hammer dents or protruding nail heads. This minimizes the need for extensive filling and sanding later, giving your baseboards a factory-smooth appearance. Plus, the consistent depth control of most nail guns ensures every nail is driven perfectly, avoiding splitting delicate molding.
Reduced Material Damage
Wood molding, especially softer woods used for trim, can be fragile. A misplaced hammer strike can easily dent, crush, or split the wood. A nail gun, when set correctly, delivers a controlled force right where it’s needed, significantly reducing the risk of damaging your material. This means less wasted wood and a smoother installation process.
Understanding Nail Gun Types for Baseboards
When you’re looking for the best nail gun for baseboards, you’ll primarily be considering two types: pneumatic and cordless. Each has its own set of pros and cons, and the “best” one often depends on your specific needs and preferences.
Pneumatic Nail Guns
These are the workhorses of the nail gun world, powered by compressed air from an air compressor. They are known for their power, reliability, and lighter weight (as the motor is in the compressor, not the gun itself).
- Pros:
- Incredible power: Can handle almost any nailing task.
- Lightweight gun: Easier to maneuver compared to some cordless models.
- Lower cost per tool: Often less expensive than high-end cordless options.
- Consistent performance: Air power is very reliable.
- Cons:
- Requires an air compressor: An additional piece of equipment, which can be bulky and noisy.
- Hose management: You need to manage air hoses, which can sometimes get in the way.
- Need for power source: Must be near an outlet for the compressor.
For baseboards, a pneumatic finish nailer is an excellent choice if you already have an air compressor or plan on doing more projects that require one. It offers consistent power and a lightweight tool in your hand.
Cordless Nail Guns
Cordless nail guns offer the ultimate in portability and convenience. They run on battery power, eliminating the need for hoses and compressors. There are a few sub-types, but for trim work like baseboards, battery-powered (often called cordless electric or Li-ion) and sometimes gas-powered (though less common and often for framing) are the main contenders.
- Pros:
- Unmatched portability: No hoses, no compressor, just grab and go.
- Fast setup: Ready to use in seconds.
- Great for various locations: Ideal for working in tight spaces or up high where a compressor and hose are impractical.
- Modern cordless are powerful: Advanced models now offer comparable power to pneumatics.
- Cons:
- Heavier tool: The battery and motor add weight to the gun.
- Battery dependence: You need charged batteries, and they can be expensive to replace.
- Potentially higher initial cost: The battery and charger add to the price.
- Power can vary: Some entry-level models may struggle with denser woods.
Cordless nail guns, particularly the battery-powered ones, have become increasingly popular for trim work due to their ease of use and portability. They are fantastic if you want to get started quickly and don’t want to invest in a compressor.
Choosing the Right Gauge and Nail Type
The “gauge” of a nail refers to its diameter. Lower gauge numbers mean thicker nails, while higher gauge numbers mean thinner nails. For baseboards, you generally want a nail that is strong enough to hold securely but thin enough not to split the wood or leave a large hole.
16-Gauge vs. 18-Gauge Nailers
For baseboard installation, the most common nailer types are the 16-gauge and 18-gauge finish nailers.
- 16-Gauge Finish Nailer: These use slightly thicker nails (about 1.6mm in diameter). They offer a bit more holding power, making them a great choice for thicker or heavier baseboard materials, or if you want extra security. The nail head is still relatively small, so it’s less noticeable than a framing nailer. They are often the preferred choice for most baseboard applications.
- 18-Gauge Brad Nailer: These use thinner nails (about 1.2mm in diameter). They are excellent for very delicate trim or when you absolutely want to minimize any visible nail holes. However, they might not provide enough holding power for heavier baseboard profiles on their own. Some DIYers use an 18-gauge nailer in conjunction with wood glue for lighter materials. While a great tool for trim in general, a 16-gauge is often better suited as the primary tool for baseboards.
Recommendation: For most DIY baseboard projects, a 16-gauge finish nailer is your best bet. It provides the right balance of holding power and a discreet finish.
Nail Size Matters
Beyond gauge, the length of the nail is crucial. For baseboards, you typically want nails that are long enough to penetrate at least 3/4 inch into the wall stud (for solid holding) while also being long enough to secure the baseboard itself. Common lengths are 1-1/2 inches to 2 inches for baseboards, depending on the thickness of the molding.
It’s essential to ensure your nailer can drive the correct length of nail for your specific baseboard material and preferred wall attachment method. Always check the manufacturer’s specifications for the nail lengths your chosen nail gun can handle.
Key Features to Look For in a Baseboard Nail Gun
Not all nail guns are created equal, especially when it comes to trim work. Here are the essential features that will make your baseboard installation smoother and more effective.
Slim Nose and Precision Tip
This is critical for trim work. A nail gun with a slim, pointed nose allows you to get into tight corners and work precisely along the edge of the molding. This precision helps you place nails exactly where you want them, often right near the top edge of the baseboard, which offers better holding and is easier to conceal with caulk.
Adjustable Depth Control
The ability to adjust how deep the nail is driven is vital for getting that perfect finish. You want to sink the nail head slightly below the surface of the wood so you can easily fill it with putty or caulk, but you don’t want to drive it so deep that it blows through the other side or creates an unnecessarily large hole. Most good finish nailers have an easy-to-use depth adjustment dial, usually located near the trigger or nose of the gun.
Sequential vs. Contact Firing Mode
Nail guns typically have two firing modes:
- Sequential (or “safe” mode): You must first press the nose of the gun against the surface (the safety contact) and then pull the trigger. This is the safer mode and ideal for precision placement on visible trim.
- Contact (or “bump” mode): You can hold the trigger down and then bump the nose of the gun against the surface to fire nails. This is faster but less precise and can lead to accidental firings if not used carefully.
For baseboards, you’ll primarily use sequential firing mode for controlled placement, but having contact firing available can be useful for quickly tacking pieces in place before final nailing, provided you are careful. Look for a nailer that offers both modes.
Ergonomics and Weight
You’ll be holding this tool for extended periods, often at awkward arm angles. A comfortable grip, good balance, and manageable weight are essential for reducing fatigue and maintaining control. Pistol grips, rubberized handles, and lightweight designs contribute to better ergonomics.
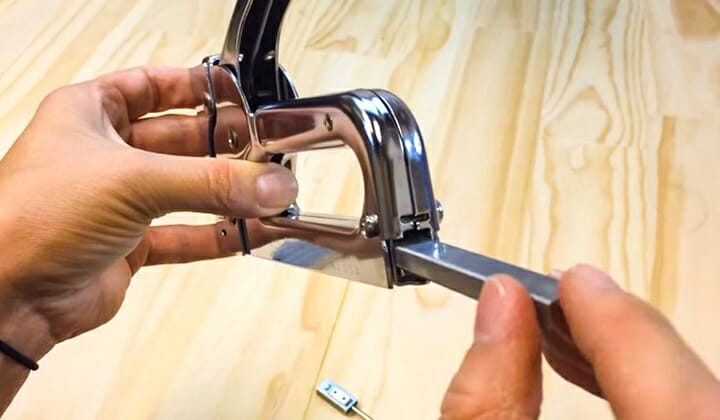
Jam Release Mechanism
Nail jams are an unfortunate reality of using nail guns. A tool with an easy-access jam release mechanism means you can clear a jam quickly and get back to work without needing a lot of tools or frustration. Many models have a latch or panel on the nose that flips open effortlessly.
No-Mar Nose Tip
Some nail guns come with a rubber or plastic tip on the nose. This is designed to protect the surface of your wood trim from scratches or dents, especially important when working with pre-finished or delicate materials. It’s a small feature but can save you a lot of touch-up work.
Top-Rated Nail Guns for Baseboard Installation
Based on user reviews, expert opinions, and my own experience, here are some of the top-rated nail guns that consistently perform well for baseboard installation. These options balance features, performance, and value for DIYers.
| Nail Gun Model | Type | Gauge | Key Features | Ideal For |
|---|---|---|---|---|
| Bostitch SM35190 16-Gauge | Pneumatic | 16-Gauge | Lightweight, adjustable depth, tool-free jam release, slim nose. | Durable, reliable performance; great for extended use. |
| Senco SHS41 16GA | Pneumatic | 16-Gauge | High power, comfortable grip, rear exhaust, easy-access nose. | Professional-grade durability and power for demanding jobs. |
| DeWalt DCN660B 16-Gauge Cordless Finish Nailer | Cordless (Battery) | 16-Gauge | Brushless motor, excellent battery life, dual LED lights, adjustable depth, belt hook. | Ultimate convenience and portability without sacrificing performance. |
| Metabo HPT NT50AE8 16-Gauge | Pneumatic | 16-Gauge | Lightweight, ergonomic design, tool-less depth adjustment, no-mar tip. | Budget-friendly yet highly capable, great for beginners. |
| Hitachi NT65MA6 15-Gauge (often used for baseboard) | Pneumatic | 15-Gauge (slightly thicker than 16ga) | Powerful, lightweight, comfortable grip, tool-less depth adjustment, swivel hook. | For those needing a bit more holding power or working with slightly heavier trim. |
Note: Always check the latest model numbers and specifications as manufacturers frequently update their product lines. Also, remember that cordless models require batteries and chargers, which are often sold separately or in kits.
Step-by-Step Guide: Installing Baseboards with a Nail Gun
Ready to get started? Here’s how to use your new nail gun to install baseboards like a pro. Safety first, always!
Step 1: Gather Your Tools and Materials
Before you begin, make sure you have everything:
- Your chosen nail gun (and air compressor/hoses if pneumatic)
- The correct gauge and length nails for your baseboard
- Safety glasses (non-negotiable!)
- Hearing protection (especially for pneumatic nailers)
- Measuring tape and pencil
- Miter saw for cutting molding precisely
- Caulk and caulk gun
- Wood filler or putty
- Stud finder
- Level
- Optional: Wood glue
Step 2: Prepare the Area and Your Nailer
- Safety Check: Read your nail gun’s manual. Ensure safety glasses are on.
- Check Air Pressure (Pneumatic): If using a pneumatic nailer, connect it to your compressor and set the pressure according to the tool’s manual (usually between 70-100 PSI). Too low pressure means under-driven nails; too high can damage the wood or cause jams.
- Load Nails: Open the nailer magazine and load the appropriate nails. Ensure they are seated correctly.
- Select Firing Mode: Set your nailer to sequential firing mode for precise placement.
- Test Fire: Find a scrap piece of wood that matches your baseboard material. Fire a few test nails into it, adjusting the depth control until the nails sink just below the surface without damaging the wood.
Step 3: Locate Wall Studs
Baseboards need to be nailed into wall studs for a secure hold. Use a stud finder to locate and mark the center of each stud along the wall where you’ll be installing the baseboard. Most studs are 16 or 24 inches apart. Marking these locations will guide your nailing. For added security, some people also apply a bead of wood glue to the back of the baseboard. For more on finding studs safely, consult resources like Family Handyman’s guide.
Step 4: Cut Your Baseboard Pieces
Measure carefully and use your miter saw to cut the baseboard pieces to size. Most inside and outside corners require a 45-degree miter cut. For accuracy, measure more than once and cut once.
Step 5: Position and Nail the Baseboard
- Hold the baseboard piece firmly in place against the wall.
- Align the nail gun tip where you want the nail to go (ideally about 1/2 inch from the top edge of the molding).
- Ensure the nose of the nailer is pressed firmly against the baseboard.
- Squeeze the trigger to drive the nail.
- Continue placing nails every 16-24 inches, ensuring you are hitting the marked studs.
- Work your way around the room, fitting and nailing each piece securely. For very long pieces, you might use nails an inch or two from each end, then space others evenly.
Step 6: Finish Touches
- Fill Nail Holes: Once all baseboards are installed, use wood filler or putty to fill all the nail holes.
- Caulk Gaps: Apply a bead of paintable caulk along the top edge of the baseboard where it meets the wall, and any other gaps.
- Sand and Paint: After the filler and caulk have dried, lightly sand any rough spots and paint your new baseboards.
Tips for a Professional Finish
Achieving that showroom look with your baseboards is all about attention to detail. Here are some expert tips:
- Use Quality Wood Filler: Choose a wood filler that matches your wood type or is easily paintable and sandable.
- Don’t Over-Nail: While secure fastening is important, driving too many nails can weaken the wood and make filling