Top-rated brad nailers make cabinet installation a breeze. These versatile tools drive thin nails accurately, holding cabinet pieces securely without damaging delicate wood. Choosing the right one means faster, cleaner, and more professional results for your DIY projects.
Ever tried to assemble cabinets or trim with just a hammer and nails? It can be a frustrating experience, right? You either miss the nail, bend it, or your delicate wood gets dented. For anyone looking to build or install cabinets, there’s a much better way. This is where the humble brad nailer steps in, becoming your best friend in the workshop.
A good brad nailer is key to getting clean, professional-looking cabinetry. It drives small, thin nails precisely where you want them, holding pieces together tightly. This means less struggle, fewer mistakes, and a much more polished final product. If you’re ready to upgrade your woodworking game and tackle cabinet projects with confidence, you’re in the right place.
Let’s dive into what makes a brad nailer the MVP for cabinetry and explore some of the top choices out there. We’ll cover everything you need to know to pick the perfect tool for your needs.
Table of Contents
Why a Brad Nailer is a Cabinet Maker’s Best Friend
When you’re working with cabinets, precision and a clean finish are super important. You don’t want big nail holes or split wood, especially on visible surfaces. That’s exactly why a brad nailer is so valuable. It’s designed to drive thin nails, called brads, which are much smaller than common nails. This makes them ideal for tasks where aesthetics matter.
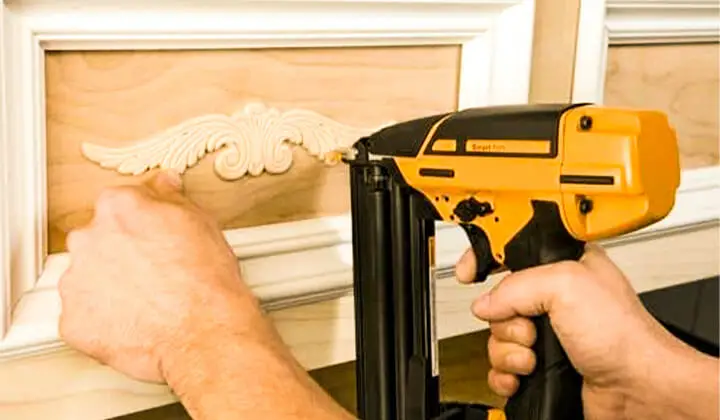
Think about it: you’re joining thin pieces of wood for drawer boxes, attaching trim to cabinet frames, or even assembling the main cabinet carcass. A brad nailer lets you do this quickly and securely. The nails are so small that they often don’t even require filling, though you might choose to for an extra-smooth finish. This saves you time and effort, giving your cabinets that professional touch.
Beyond just holding things together, a brad nailer offers a level of control that a hammer just can’t match. It fires the brad with consistent force, ensuring that each nail is driven to the correct depth. This consistency is crucial when you’re building multiple cabinets or working on a large project.
Key Advantages for Cabinetry:
- Precision: Drives small nails accurately, ideal for delicate joinery and trim.
- Speed: Fires nails much faster than hammering, speeding up assembly.
- Clean Finish: Small nail heads leave minimal marks, often requiring no filling.
- Reduced Damage: Less likely to split wood or mar surfaces compared to traditional methods.
- Versatility: Useful for cabinet boxes, trim, drawer slides, hardware installation, and more.
Types of Brad Nailers: Gas vs. Electric vs. Pneumatic
When you start looking for a brad nailer, you’ll quickly notice there are a few main types. Each has its own pros and cons, and the best one for you will depend on your workspace, power availability, and how often you plan to use it. Let’s break them down.
Pneumatic Brad Nailers (Air-Powered)
These are the workhorses of the professional woodworking world. Pneumatic brad nailers require an air compressor to operate. They connect to the compressor via a hose.
Pros:
- Powerful and Consistent: Deliver excellent driving power and reliability.
- Lightweight: The nailer itself is often lighter as the motor is in the compressor.
- Lower Cost (Tool): The nail gun itself can be less expensive than high-end cordless models.
- No Batteries to Charge
Cons:
- Requires Air Compressor: Adds significant cost, space, and noise.
- Hose Restriction: The hose can be cumbersome and limit mobility.
- Maintenance: Air compressors and hoses require some upkeep.
Cordless Electric Brad Nailers (Battery-Powered)
These are incredibly popular for DIYers and pros alike because they offer freedom of movement. They run on rechargeable batteries and have a motor and mechanism built right into the tool.
Pros:
- Maximum Mobility: No cords or hoses, offering complete freedom of movement.
- Convenient: Easy to set up and use anywhere, anytime.
- Good Power: Modern cordless models offer plenty of power for most brad nailing tasks.
- Versatile: Many use the same battery platform as other cordless tools from the same brand.
Cons:
Fuel Cell Brad Nailers (Gas-Powered)
These use a combination of a small fuel cell (like a propane canister) and a battery. The battery ignites the fuel, creating a small explosion that drives the nail. They are entirely cordless.
Pros:
- Completely Cordless: No hoses or large batteries to worry about.
- Good Power: Generally provide strong driving force.
- Compact Power: Offer good power in a relatively small package.
Cons:
Top-Rated Brad Nailers for Cabinetry Installation in [Current Year]
Choosing the “best” brad nailer really depends on your specific needs, but certain models consistently hit the mark for quality, performance, and value, especially for cabinet work. Here are some of the top-rated options that are perfect for DIYers and hobbyists tackling cabinetry projects.
1. Metabo HPT 18V Brushless Cordless Brad Nailer (Model: NT1850DFA)
Metabo HPT (formerly Hitachi) has a strong reputation for reliable power tools, and their cordless brad nailer is a standout. It’s a favorite for its power, ease of use, and the fact that it doesn’t rely on fuel cells or air hoses.
Key Features:
- Brushless motor for efficient power and longer tool life.
- Drives up to 1,100 brads per charge with its 18V lithium-ion battery.
- Adjustable depth control for precise nail placement.
- Tool-free jam release for quick fixes.
- Integrated belt hook for convenience.
Why it’s Great for Cabinets:
This nailer offers excellent power that handles hardwoods well for cabinet construction. The cordless convenience is a huge plus for working around a kitchen or bathroom. Its balance and ergonomics make long workdays more comfortable.
2. DEWALT 20V MAX XR Cordless Brad Nailer (Model: DCBN920B / DC612K)
DeWalt is a name synonymous with robust power tools, and their 20V MAX XR line is built for demanding jobs. Their brad nailers are known for their solid construction and reliable performance.
Key Features:
- Brushless motor for increased efficiency and run time.
- Delivers consistent nail depth into various wood types.
- Tool-free depth adjustment.
- Sequential and contact actuation firing modes.
- Excellent battery life, often compatible with other DeWalt 20V tools.
Why it’s Great for Cabinets:
DeWalt tools are built to last, and this brad nailer is no exception. It hits nails cleanly and effectively, making it ideal for attaching face frames, trim, and assembling cabinet boxes. The ability to switch firing modes is very handy for different tasks.
3. BOSTITCH 18V Cordless Brad Nailer (Model: BTFP71894)
Bostitch has a long history in the nailer market, and their cordless offerings are highly regarded. This 18V model is a strong contender for cabinet installations.
Key Features:
- Brushless motor technology for enhanced power and runtime.
- Ability to drive up to 1,300 nails per charge.
- Tool-free jam release and nosepiece for easy maintenance.
- Adjustable belt hook.
- Good weight distribution for comfortable handling.
Why it’s Great for Cabinets:
This nailer provides the power needed to sink brads into oak, maple, and other common cabinet woods without needing to be constantly adjusted. Its reliability and cordless freedom make it a top choice for furniture and cabinet makers.
4. Ryobi ONE+ 18V Cordless Brad Nailer (Model: P320 / PBLBN201B)
Ryobi offers fantastic value, especially for the DIYer. Their ONE+ system is extensive, and the cordless brad nailer is a popular choice for home projects. You can often find great deals which makes it very budget-friendly.
Key Features:
- Drives two nails per second.
- Features like a battery level indicator and a tool-free jam release.
- Adjustable belt clip.
- Tool-less depth of drive adjustment.
Why it’s Great for Cabinets:
If you’re on a budget or just starting out with cabinet projects, the Ryobi is an excellent entry point. It’s lightweight, easy to use, and performs well for most interior trim, cabinet assembly, and DIY tasks. Plus, if you already own Ryobi ONE+ tools, you already have batteries and a charger.
5. SENCO 18V Cordless Brad Nailer (Model: CP4N00)
Senco is another brand with a deep heritage in fastening tools. Their cordless brad nailers are known for their robust build and consistent performance, rivaling even the top pneumatic tools.
Key Features:
- Drives 18-gauge brads from 5/8” to 2-1/8” long.
- Features a powerful motor that drives brads into hard woods.
- Tool-free depth of drive adjustment and jam clearing.
- Lightweight ergonomic design.
Why it’s Great for Cabinets:
The SENCO CP4N00 offers a satisfying experience with its consistent power and accuracy. It’s a great option for those who need a cordless tool that performs like a pneumatic one. It’s reliable for everything from attaching decorative trim to assembling cabinet boxes.
Choosing the Right Brad Nailer for Your Cabinet Projects
With so many great options, how do you pick the one that’s right for your specific needs? Consider these key factors:
1. Power Source (Pneumatic vs. Cordless)
Pneumatic: If you already have an air compressor and prioritize lightweight tools and consistent power above all else, pneumatic is a solid choice. It’s also often more budget-friendly if you factor in the compressor cost you might already have. For dedicated workshops, this is often preferred.
Cordless: For most DIYers and for working on-site or in kitchens/bathrooms where an air compressor isn’t practical, cordless is the way to go. The freedom from hoses and cords is invaluable. Choose a reputable brand with a good battery system if you plan to expand your tool collection.
2. Gauge of Brad Nailer
For cabinetry and trim work, you’ll almost always want an 18-gauge brad nailer. These use the thinnest brads, leaving the smallest hole.
- 18-Gauge: The go-to for trim, molding, cabinet assembly, and delicate woodworking. Nails are slim and leave minimal marks.
- 16-Gauge: Slightly thicker nails, good for more robust trim work or attaching sturdier pieces where a slightly larger hole is acceptable.
- 15-Gauge (Finishing Nailer): Even thicker, often used for thicker molding or structural wood components.
For cabinetry, stick with 18-gauge to ensure the cleanest, most professional finish. You can find resources like WoodworkingTalk that offer detailed explanations of nail gauges if you want to learn more.
3. Battery Platform (for Cordless)
If you’re going the cordless route, consider which tool brand’s battery system you want to invest in. If you already own other tools from DeWalt, Ryobi, Metabo HPT, or Makita, it makes sense to buy a brad nailer that uses the same battery. This saves you money as you won’t need to buy new batteries and chargers for each tool.
4. Features and Ergonomics
Depth Adjustment: Essential for setting nails flush or slightly below the surface without damaging the wood. Look for easy-to-use, tool-free adjustment.
Jam Release: A tool-free jam release means you can clear a jammed nail quickly without needing extra tools, saving you valuable time.
Firing Modes: Selectable modes (sequential vs. contact actuation) offer versatility. Sequential mode fires one nail per trigger pull (for precision), while contact actuation fires when the nose is pressed against the surface (for speed).
Weight and Balance: You’ll be holding the tool for extended periods. A well-balanced, comfortable grip significantly reduces fatigue.
LED Light: Handy for working in dimly lit areas, like inside cabinets.
5. Price and Warranty
Brad nailers range from around $100 to over $300. Set a budget based on your needs and how often you’ll use the tool. Longer warranties, especially on motors and batteries, offer peace of mind.
Essential Accessories and Consumables
Beyond the brad nailer itself, you’ll need a few things to get started and keep your tool running smoothly, especially for cabinetry projects.
1. Brad Nails
You absolutely need the right size and type of brad nails. For 18-gauge brad nailers, you’ll want 18-gauge brads. They come in various lengths, typically from 5/8 inch up to 2 inches. For cabinet construction and trim, lengths between 1 inch and 1 1/4 inches are very common.
- Material: Most are steel. Some may have coatings like electro-galvanized for rust resistance.
- Size: Always check your nailer’s specifications for the recommended nail lengths and gauge.
2. Safety Glasses
This is non-negotiable. Always wear safety glasses when operating any power tool, especially nailers. Flying debris or a ricochet can cause serious eye injury. The Occupational Safety and Health Administration (OSHA) has strict guidelines on personal protective equipment (PPE) for workplace safety.
3. Work Gloves
Protect your hands from splinters and minor impacts with a good pair of work gloves.
4. Air Compressor and Hose (for Pneumatic)
If you opt for a pneumatic nailer, you’ll need a suitable air compressor (with a tank size and CFM rating appropriate for your nailer) and at least a 25-foot air hose with quick-connect fittings.
5. Batteries and Charger (for Cordless)
For cordless models, ensure you have at least one fully charged battery and the appropriate charger. Having a spare battery is highly recommended for uninterrupted work, especially on larger projects.
Step-by-Step: How to Use a Brad Nailer for Cabinet Installation
Using a brad nailer is quite straightforward, but following these steps will ensure a safe and effective installation for your cabinets or trim.
Step 1: Preparation is Key
Before you even pick up the nailer, make sure your work area is clean and well-lit. Read your brad nailer’s manual thoroughly. Understand its safety features, how to load nails, and how to adjust settings.
Step 2: Load the Brad Nails
Most brad nailers have a magazine that slides out. Open it, place the strip of 18-gauge brads inside, ensuring they are seated correctly against the pusher. Close the magazine securely.
Important: Never insert nails or try to fire the tool without a battery (for cordless) or air connected (for pneumatic) unless the manual specifically says it’s safe for loading.