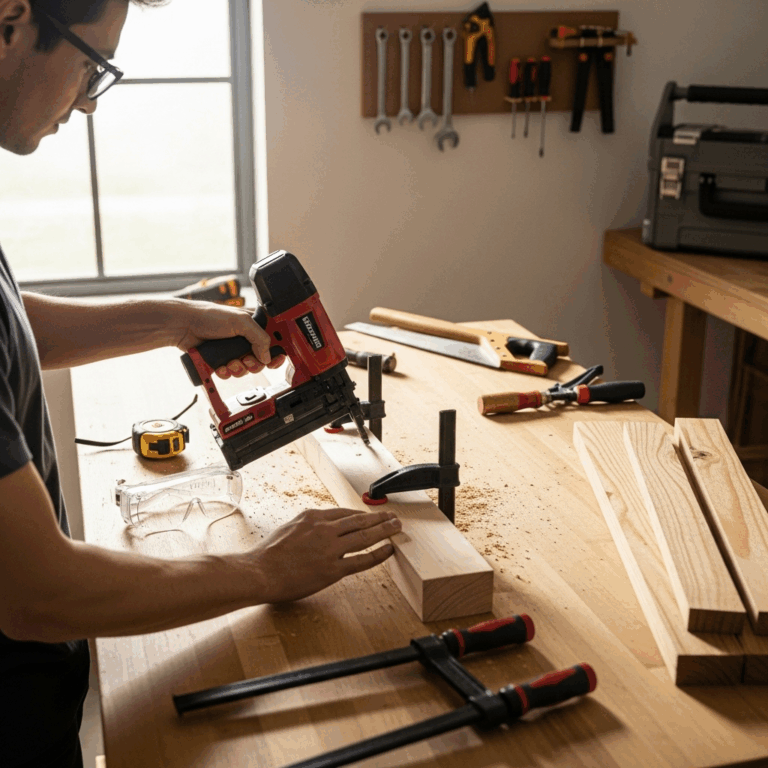
To use a coil roofing nailer safely, always wear safety glasses, keep both hands on the tool, avoid power lines, inspect your work area, and understand your nailer’s safety features. Proper technique and preparedness are key to a secure and accident-free job.
Hey there, DIYers and aspiring roofers! Jack Shaffer here from Nailerguy. Tackling a roofing project can feel a bit intimidating, and one of the biggest helpers on the job is the coil roofing nailer. It’s a powerful tool that can speed things up considerably, but like any powerful tool, it demands respect. Using it without the right precautions can lead to accidents, and nobody wants that. This guide is all about making sure you use your coil roofing nailer safely, so you can finish your project with confidence and, most importantly, without a hitch.
We’ll break down all the essential safety tips, from the gear you need to the little things that make a big difference when you’re up on the roof. Ready to get started? Let’s dive in!
Table of Contents
Understanding Your Coil Roofing Nailer: The Basics
Before you even think about firing a nail, it’s crucial to get acquainted with your coil roofing nailer. These tools are designed for efficiency, driving nails quickly into roofing materials. Think of them as your trusty sidekick for shingle installation. They use compressed air, typically from an air compressor, to power a piston that drives the nail.
There are a few key parts to know:
- Nail Magazine: This is where you load your coil of nails. It’s usually a long chamber that feeds nails into the firing mechanism.
- Nosepiece (or Contact Trip): This is the part that touches the shingle. Most roofing nailers have a “contact trip” mechanism, meaning the nail fires when you press the nosepiece against the surface and squeeze the trigger.
- Trigger: This activates the nailer.
- Depth Adjustment: Many models allow you to adjust how deep the nail drives into the material.
- Air Hose Connection: Where you connect your air hose from the compressor.
Understanding these parts helps you operate the tool correctly and also recognize if something isn’t working as it should. For detailed information specific to your model, always consult the manufacturer’s manual. It’s your best resource for understanding your specific tool’s features and safety instructions.
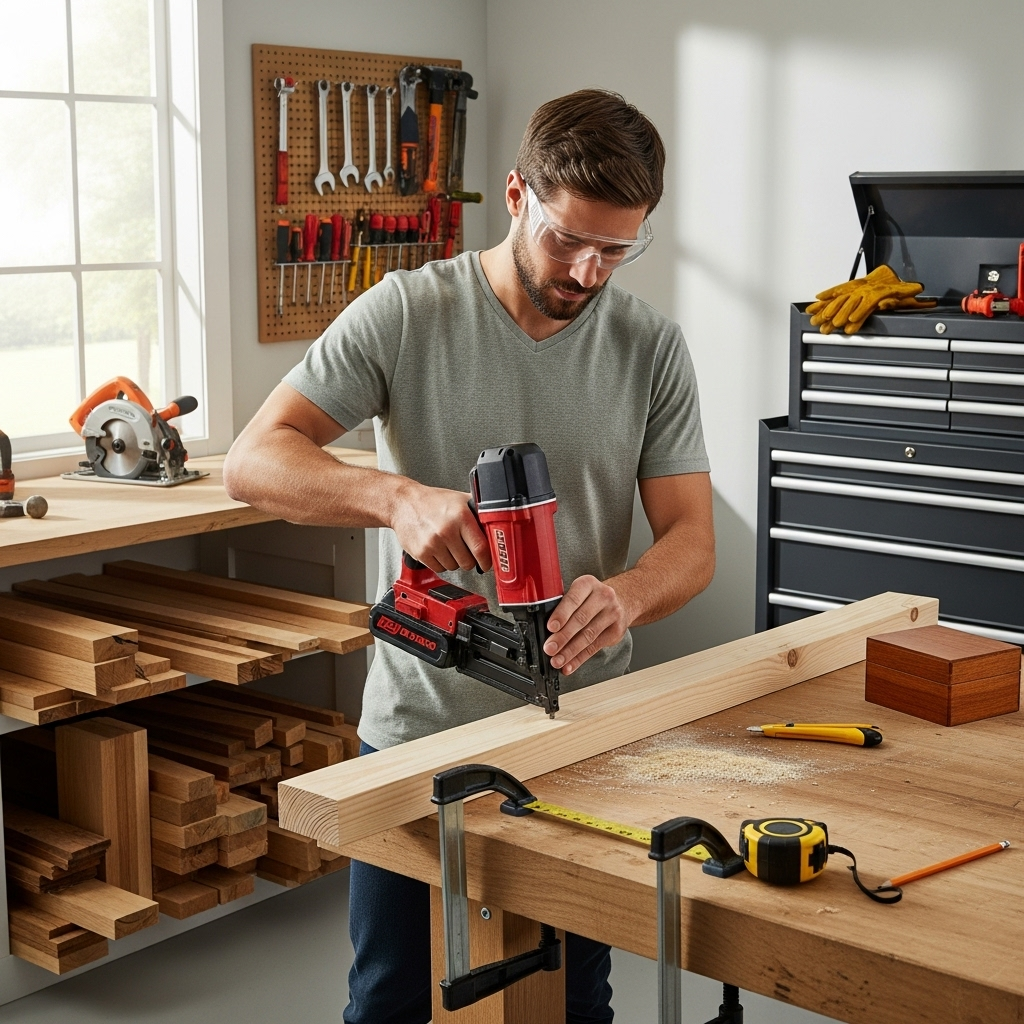
Essential Safety Gear: Your First Line of Defense
When you’re working with a nail gun, especially one on a roof, safety gear isn’t optional – it’s absolutely mandatory. Think of it as your personal protective equipment (PPE) that keeps you safe from potential hazards.
1. Eye Protection is Non-Negotiable
This is the most critical piece of safety gear. Always wear certified safety glasses or goggles that meet the ANSI Z87.1 standard. Flying debris, nail fragments, or even a ricocheting nail can cause severe eye injury, and safety glasses are your only shield.
- Look for glasses with side shields for extra protection.
- Ensure they fit snugly and comfortably so you’re not tempted to take them off.
- Don’t rely on regular eyeglasses or sunglasses; they don’t offer adequate protection for this type of work.
2. Hearing Protection
Nail guns are loud! Repeated exposure to loud noises can cause permanent hearing damage. Wear earplugs or earmuffs designed to reduce noise levels when operating your coil roofing nailer.
3. Gloves for Grip and Protection
Sturdy work gloves are a must. They provide a better grip on the tool, reducing the chance of it slipping, and offer some protection against splinters, abrasions, and minor impacts.
4. Sturdy Footwear
When you’re on a roof, good traction is essential. Wear slip-resistant boots with good ankle support. This helps prevent slips and falls, which are serious hazards when working at heights.
5. Hard Hat (Especially in Certain Environments)
If there’s any chance of falling objects from above, or if you’re working on a roof where there’s construction happening overhead, a hard hat is a smart addition to your safety gear. It protects your head from impacts.
Remember, your safety gear is only effective if you wear it correctly and consistently. Make it a habit to put on your PPE before you even pick up the nailer.
Safe Operation: Using Your Coil Roofing Nailer Responsibly
Once you’re geared up, it’s time to focus on how you actually use the nailer. Safe operation is all about understanding the tool and being mindful of your surroundings and actions.
1. Read Your Manual!
I can’t stress this enough! Every nailer is a little different. Your owner’s manual is your best friend. It will tell you about your specific model’s features, maintenance, and, most importantly, its safety guidelines. Take the time to read it thoroughly before you start.
2. Inspect Your Tool Before Each Use
Perform a quick check before you power up. Look for:
- Damaged cords or hoses.
- Loose parts.
- Any visible damage to the nailer itself.
- Ensure the magazine is clean and free of debris.
If anything looks amiss, don’t use the tool until it’s repaired or replaced. A damaged tool can malfunction and cause injury.
3. Understand the Firing Mechanism: Sequential vs. Contact Trip
Most coil roofing nailers use a “contact trip” or “bump fire” mode. This means the nailer will fire a nail every time the nosepiece is pressed against the surface and the trigger is pulled. Understanding this is crucial to prevent accidental firing.
- Never walk or carry the nailer with your finger on the trigger if the nosepiece is depressed or touching anything.
- Always keep the safety mechanism engaged (if your tool has one) when not actively nailing.
Some tools also offer a sequential trip mode, which requires you to place the nosepiece on the surface and then pull the trigger. If your nailer has this option, learn how to switch to it for greater control when needed.
4. Keep Both Hands on the Nailer
When you are actively nailing, keep both hands on the tool – one on the handle and one supporting the body. This gives you better control and helps you react quickly if the tool behaves unexpectedly.
5. Aim and Fire with Precision
Always look at where you are placing the nail. Don’t try to fire nails blindly or at awkward angles. Ensure the nosepiece is flat and firmly against the surface before squeezing the trigger.
6. Never Point the Nailer at Anyone
It sounds obvious, but it bears repeating. Treat the nailer like a loaded weapon. Never point it at yourself, another person, or even a pet. Accidental firing can happen, and the consequences can be severe.
7. Don’t Overreach
Try to position yourself so you can nail comfortably without overextending your arms or body. Overreaching can lead to loss of balance, especially when you’re on a roof. Move your feet to reposition yourself whenever possible.
8. Clear Nails Properly
If a nail jams, turn off the air supply, disconnect the air hose, and remove the safety glasses. Consult your manual on how to safely clear jams. Never try to force a jammed nail out with your fingers.
Working Environment Safety
Where you’re working is just as important as how you operate the tool. Your environment presents its own set of risks.
1. Inspect Your Work Area
Before you start, survey the roof. Look for:
- Loose shingles or debris.
- Wet or slippery surfaces.
- Power lines.
- Obstacles that could cause you to trip or lose balance.
Make the area as safe as possible before you begin nailing.
2. Be Aware of Power Lines
This is a critical one. Always maintain a significant distance from overhead power lines. Even if they appear inactive, they carry a deadly electrical current. Check with your local utility company about safe working distances, but generally, staying at least 10 feet away is recommended, and significantly more if you are using long tools or working on elevated surfaces.
The Occupational Safety and Health Administration (OSHA) provides guidelines on electrical safety in construction, which can be a valuable resource for understanding these risks: OSHA Electrical Safety.
3. Secure Your Ladder and Yourself
If you’re using a ladder to access the roof, make sure it’s properly positioned and secured. Use fall protection if you’re working at significant heights, such as a harness and lifeline, especially if working on steep or high roofs. Familiarize yourself with OSHA’s fall protection standards.
4. Weather Conditions Matter
Never work on a roof during storms, high winds, or when surfaces are wet or icy. Wait for safe weather conditions. Your safety is worth more than beating a deadline.
5. Work with a Partner
If possible, have someone else on site, especially for larger roofing jobs. They can help with spotting hazards, providing assistance, and summoning help in case of an accident.
Air Compressor and Hose Safety
Your coil roofing nailer needs an air compressor to function, and these also come with their own safety considerations.
1. Use the Right Air Pressure
Check your nailer’s manual for the recommended operating pressure (PSI). Running the nailer at too high a pressure can damage the tool and increase the risk of recoil or misfires. Too low a pressure might lead to weak nail penetration or jams.
2. Inspect the Air Hose
Before each use, check the air hose for cracks, leaks, or damage. A damaged hose can burst under pressure, creating a serious hazard.
3. Keep the Hose Tidy
Keep the air hose out of your work area to prevent tripping hazards. Avoid running it across high-traffic areas or placing heavy objects on it.
4. Disconnect When Not in Use
Always disconnect the air hose from the nailer when you’re done with a task, when clearing jams, or when storing the tool. This prevents accidental firing and reduces the risk of the compressor running unexpectedly.
5. Secure Hose Fittings
Ensure all quick-connect fittings are secure. A loose fitting can disconnect under pressure, causing the hose to whip around.
Maintenance for Safety
Regular maintenance ensures your tool runs smoothly and safely.
1. Clean Your Nailer
Keep the nailer clean, especially the magazine and nosepiece. Debris can cause jams and malfunctions.
2. Lubricate as Recommended
Most coil roofing nailers require a few drops of appropriate lubricating oil daily or weekly, depending on usage. Over-oiling and under-oiling can both cause problems. Refer to your manual for the correct type of oil and frequency.
3. Professional Servicing
If your nailer starts behaving erratically, making strange noises, or consistently misfiring, it’s time to have it professionally serviced. Don’t try to repair complex internal issues yourself unless you are trained to do so.
Common Mistakes to Avoid
Even experienced users can fall into bad habits. Here are some common mistakes that compromise safety:
- Forgetting Safety Glasses: The most frequent and dangerous mistake.
- Finger on the Trigger Near the Nosepiece: Leads to accidental firing.
- Using the Wrong Nails: Always use the specific type and size of nails recommended for your nailer. Using the wrong ones can cause jams or damage.
- Ignoring Jammed Nails Until They Cause a Problem: Address jams immediately and safely.
- Rushing the Job: Haste makes waste, and in this case, it can lead to injury.
Safety Features: What to Look For and Understand
Most modern coil roofing nailers come with built-in safety features. Knowing what they are and how they work is crucial.
1. Contact Trip Mechanism
As mentioned, this is standard. It requires the nose of the gun to be pressed against the work surface before it can fire. However, remember it’s not foolproof if you’re not careful.
2. Safety Lock-Off (if applicable)
Some nailers have a safety lock that prevents activation. Always engage this when the tool is not in use or when moving it.
3. Depth Adjustment
While primarily for setting nails correctly, proper depth adjustment can also prevent over-driving nails, which can split wood or cause other issues. Ensure your nails are set flush with the shingle surface—not too deep, not too proud.
4. Air Deflector
Many nailers have a deflector that blows air away from your face. Ensure this is functioning properly.
Table: Nail Depth Essentials
Getting the nail depth just right is crucial for both structural integrity and avoiding damage. Here’s a quick guide to what constitutes proper nailing:
| Nail Depth | Description | Potential Issues |
|---|---|---|
| Too Shallow | Nail head is above or just flush with the shingle surface. | Shingles can lift, leading to leaks. Exposed nail heads can cause premature corrosion. |
| Properly Set | Nail head is driven flush into the shingle, but not so deep as to break through or crush the shingle material significantly. | Secure attachment without compromising shingle integrity. |
| Too Deep | Nail head crushes the shingle or breaks through any protective layers, sometimes even into the decking below. | Can create a weak spot, leading to leaks. May damage the nail gun over time. Compromises the shingle’s weatherproofing. |
Always test your depth settings on scrap material first. The ideal depth can vary slightly based on the shingle type and the material underneath.
FAQ Section
Q1: What kind of respirator should I wear when roofing?
It’s always a good idea to wear a respirator, especially when dealing with dust and debris. A minimum of an N95 particulate respirator is recommended to filter out fine dust particles. If you’re working with certain sealants or chemicals, you might need a respirator with specific chemical cartridges.
Q2: How do I hold the nailer for maximum safety?
When you’re actively driving nails, hold the nailer firmly with both hands. Keep your finger off the trigger unless you intend to fire a nail. When moving between locations or during breaks, keep the nailer pointed in a safe direction, away from yourself and others, and don’t rest your finger on the trigger.
Q3: Can I use my roofing nailer for other projects?
While some coil nailers can be adapted for certain types of siding or general framing, they are specifically designed for roofing. Using them for other purposes might not be efficient and could even be unsafe if the nailer isn’t suited for the task or materials. Always check your tool’s specifications and manual.
Q4: What should I do if the nailer jams?
First, release the trigger and set the nailer down. Turn off the air supply and disconnect the air hose. Put on your safety glasses. Then, refer to your nailer’s manual for the specific procedure to clear the jam. Never try to force a jammed nail with your fingers.
Q5: How often should I lubricate my roofing nailer?
Most manufacturers recommend lubricating coil roofing nailers with a few drops of specialized tool oil either daily or after about 1,000 to 2,000 nails, depending on usage. Check your tool’s manual for the exact specifications. Consistent lubrication is key to its longevity and safe operation.
Q6: How do I know if my nailer’s pressure is set correctly?
Consult your nailer’s owner’s manual for the recommended PSI range. It typically falls between 70-120 PSI. Start at the lower end of the recommended PSI and gradually increase it while testing on scrap material until nails are set properly flush. Avoid exceeding the maximum PSI listed for your tool.
Conclusion
Using a coil roofing nailer is a fantastic way to get your roofing projects done efficiently. By prioritizing safety with the right gear, understanding your tool inside and out, and being mindful of your environment and how you operate the nailer, you’re setting yourself up for success. Remember, safety isn’t just a set of rules; it’s a mindset.