Quick Summary:
Using a brad nailer on crown molding is achievable with the right technique! This guide offers essential tips for a clean, professional finish, focusing on nail selection, proper angle, and avoiding damage to delicate molding. Get ready to elevate your DIY projects with confidence and ease.
Crown molding adds a touch of elegance and polish to any room. But when it comes to installing it, especially for beginners, the thought of all those tiny nails can be a bit daunting. Don’t worry! With the right approach, using a brad nailer on crown molding is totally within your reach. We’re going to walk through everything you need to know, step-by-step, to get those beautiful results you’re dreaming of. Let’s get those walls looking sharp!
Table of Contents
Why Use a Brad Nailer for Crown Molding?
You might be wondering why a brad nailer is the go-to tool for crown molding. Well, it’s all about precision and a clean finish. Unlike a hammer, which can easily dent or split delicate molding, a brad nailer drives small, thin nails with minimal impact. This means less mess, fewer mistakes, and a more professional-looking installation.
Brad nailers are particularly good for tasks where aesthetics are important. For crown molding, you want fasteners that are barely visible once installed. This is exactly what a brad nailer provides. It’s less about brute force and more about finesse, making it ideal for materials that are often made of softer woods or composites.
Here’s a quick look at why a brad nailer shines:
- Minimal Damage: Drives small, thin nails that leave tiny holes, reducing the chance of splitting molding or leaving large dents.
- Speed and Efficiency: Quickly secures molding, saving you a lot of time compared to manual nailing.
- One-Handed Operation: Many models allow for placement and firing with one hand, which is incredibly helpful when holding molding in place.
- Consistent Results: Delivers nails at a uniform depth, contributing to a smooth, professional finish.
Choosing the Right Brad Nailer and Nails
Before you start, selecting the right tools is paramount. Not all brad nailers are created equal, and the type of nails you use can make a significant difference in your project’s success.
Types of Brad Nailers
There are a few main types of brad nailers, each with its own advantages:
- Pneumatic Brad Nailers: These are the most common and powerful. They require an air compressor, which adds to the setup but offers reliable performance and consistent power. They are often preferred for longer projects or by those who already own a compressor.
- Electric Brad Nailers: Corded electric models plug into an outlet. They offer convenience without the need for a compressor but can be less powerful than pneumatic versions.
- Cordless Brad Nailers (Battery-Powered): These offer excellent portability and convenience. They use batteries, eliminating the need for cords or compressors, making them ideal for quick jobs or working in areas without easy power access.
Selecting Nails for Crown Molding
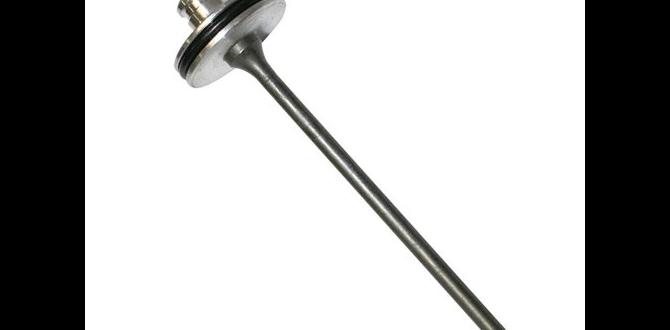
The size and type of nail are crucial for proper fastening without damaging the crown molding. For most residential crown molding, 18-gauge brads are the standard choice. These nails are thin and leave a very small hole that’s easy to fill and hide.
Nail Length: The length of your brad nails depends on the thickness of your crown molding and how well it sits against the wall and ceiling. You want the nail to go through the molding and securely into the wall stud or ceiling joist behind it. A common range is 1-1/4 inches to 2 inches. Always aim for the nail to penetrate the framing securely, ideally at least 3/4 of an inch into the stud.
Material: Most brads are made of steel. For interior projects, galvanized or coated brads are usually sufficient.
Essential Setup and Safety Precautions
Safety first, always! Working with power tools requires attention to detail, and setting up your workspace correctly is key to a smooth and safe job. Let’s get you prepped.
Workspace Preparation
Before you even pick up your brad nailer, ensure your work area is ready:
- Clear the Area: Remove any furniture, decorations, or obstacles from the room or the area where you’ll be working. This prevents damage to your belongings and ensures you have plenty of space to move.
- Lighting: Good lighting is essential for precision. Make sure the area is well-lit so you can clearly see where you’re placing your nails and how the molding is fitting.
- Secure Ladder/Scaffolding: If you’re working at height, ensure your ladder or scaffolding is stable, on a level surface, and properly secured. Never overreach.
Brad Nailer Safety Gear
Wearing the right personal protective equipment (PPE) is non-negotiable:
- Safety Glasses: Always wear ANSI-approved safety glasses or goggles to protect your eyes from flying debris or accidental nail ricochets. Even with a brad nailer, this is critical.
- Hearing Protection: While brad nailers aren’t as loud as some other power tools, prolonged use can still be harmful to your hearing. Earplugs or earmuffs are recommended.
- Gloves: Work gloves can provide a better grip on the molding and protect your hands from splinters or minor abrasions, especially when you’re maneuvering pieces into place.
Nailer Setup Specifics
Properly setting up your nailer ensures it functions correctly and safely:
- Check Air Pressure (Pneumatic): If using a pneumatic nailer, set your air compressor to the recommended PSI (Pounds per Square Inch) for your specific nailer model. This is usually found in the user manual. Too high, and you risk overdriving nails or damaging the molding. Too low, and nails won’t fully set. A common range is 70-100 PSI, but always check your tool’s specifications.
- Load Nails Correctly: Ensure you load the brads into the magazine according to the manufacturer’s instructions. Make sure they are seated properly and that the magazine is free of debris.
- Adjust Depth Setting: Most brad nailers have an adjustable depth setting. Start with a moderate setting and test it on a scrap piece of wood similar to your molding. You want the nail head to be slightly countersunk (just below the surface) or flush, not proud (sticking out) or driven too deep to break the surface tension.
For a deeper dive into the specifics of pneumatic tool safety, the Occupational Safety and Health Administration (OSHA) provides valuable guidelines and standards that apply to compressed air usage.
Step-by-Step Guide: Using a Brad Nailer on Crown Molding
Now that you’re set up and safe, let’s walk through the actual process of attaching your crown molding with a brad nailer. Precision and practice are your best friends here.
Step 1: Fit and Position the Molding
This is arguably the most critical step. Dry-fit your crown molding pieces carefully. Ensure they sit flush against the ceiling and wall. Any gaps here will be magnified and difficult to fix later.
- Check Fit: Make sure the molding sits snugly against both the ceiling and the wall.
- Mark Placement: Lightly mark the position of the molding on the wall and ceiling if needed, especially for the first few pieces, to ensure consistent alignment.
Step 2: Locate Wall Studs and Ceiling Joists
You can’t just nail molding anywhere; it needs to be secured to structural framing for a strong, lasting installation. This is where your stud finder and sometimes a small pilot hole with a nail or awl comes in handy.
- Use a Stud Finder: Electronically locate studs in the wall. For ceiling joists, you might need to rely on common spacing (often 16 or 24 inches on center) or use a pilot hole and a small finish nail to probe for the framing.
- Mark Studs/Joists: Mark the center of each stud and joist that the molding will cover. These marks are your target for nailing.
Pro Tip: If you’re having trouble finding joists, knowing common building practices can help. For more on finding framing in walls and ceilings, resources like This Old House offer practical advice.
Step 3: Angle Your Brad Nailer
This is where the magic happens for a strong hold and discreet fastening.
- Into Studs/Joists: When driving a nail into a stud or joist, aim the nailer at a slight angle (around 15-20 degrees) from the front face of the molding. This helps the nail grip the framing better.
- Blind Nailing Through the Back: For extra holding power, especially on longer pieces or where you might not hit a stud with every nail, position the nailer at a steeper angle (45 degrees or more) through the back edge of the molding where it meets the wall or ceiling. This “blind nail” goes into the framing and is largely hidden by the molding itself.
Step 4: Drive the Nails
With the molding in place and your nailer angled correctly, it’s time to fire.
- Place the Tip: Position the nose of the brad nailer firmly against the molding where you intend to drive a nail. Ensure the safety tip of the nailer is making contact with the surface.
- Apply Pressure: Press the nailer firmly against the molding. This activates the safety mechanism that allows the tool to fire.
- Squeeze the Trigger: Squeeze the trigger smoothly. The nail should drive into the molding and secure it to the wall or ceiling.
- Test Depth: Check if the nail is set at the correct depth. You can adjust the nailer’s depth setting or air pressure and test again on scrap wood if needed. For crown molding, ideally, the nail head should be just below the surface, making it easy to fill.
Step 5: Nailing Strategy for a Strong Hold
Don’t just nail randomly. A smart strategy ensures your crown molding stays put:
- Every 16-20 Inches: Aim to place a nail into a stud or joist roughly every 16 to 20 inches along the length of the molding.
- Use Both Angles: Combine front-face nailing into studs with the steeper-angled “blind nailing” for maximum holding power, especially on longer runs.
- Nail near Corners: When joining pieces at corners, ensure you drive nails into the corner blocks and studs if possible to anchor those critical joints.
- Nail into Support Blocks: If you’re using corner blocks or intermediate support blocks, make sure to nail into these as well.
Step 6: Filling Nail Holes
Once the molding is securely fastened, the final touch is making those nail holes disappear.
- Use Wood Filler or Spackle: Choose a paintable wood filler or spackle that closely matches the color of your molding or is intended for painting.
- Apply and Smooth: Use a putty knife or your fingertip to press the filler into the nail holes. Slightly overfill them, as the filler may shrink a little as it dries.
- Sand (Optional): Once the filler is completely dry, you can lightly sand the filled areas smooth with fine-grit sandpaper (220 grit or higher) to make them flush with the molding surface. Be careful not to sand the molding itself.
- Clean and Paint/Stain: Wipe away any dust, and then paint or stain your crown molding as planned. The filled holes should be virtually invisible.
Tips for Avoiding Common Problems
Even with the best intentions, things can go wrong. Here are some common issues and how to avoid them when using a brad nailer on crown molding.
Splitting the Molding
This is the most dreaded problem. Thin and delicate molding can easily split if a nail is driven too close to an edge or if the nail is too thick.
- Use 18-Gauge or Finer: Stick to 18-gauge brads. 16-gauge is often too thick for delicate crown molding and can cause splitting.
- Pre-drill Near Edges: If you absolutely must nail close to the very end of a piece of molding, consider pre-drilling a small pilot hole with a very thin drill bit. This relieves the pressure where the nail will enter.
- Nail into Wood: Ensure you are nailing into a stud or joist. Nailing into drywall alone will not provide adequate support and can lead to blow-out or splitting.
- Check Air Pressure/Depth: Overdriving nails can cause the wood to split around the nail head. Ensure your depth setting and air pressure are dialed in correctly.
Overdriving or Underdriving Nails
The depth of your nail is crucial for both aesthetics and hold.
- Underdriving: The nail head sticks out above the surface. This looks unprofessional and is difficult to fill.
- Fix: Increase air pressure or adjust the depth setting for more penetration. Ensure the nailer is pressed firmly against the surface.
- Overdriving: The nail head is punched too deep into the wood, breaking through the surface fibers or creating a large divot.
- Fix: Decrease air pressure or adjust the depth setting for less penetration. Sometimes, especially with softer woods, overdriving can crack the wood around the nail head.
Always test your settings on scrap wood first! This is the single best way to avoid these depth issues.
Gaps Between Molding and Wall/Ceiling
A perfect fit is hard to achieve, but the goal is minimal gaps.
- Shim as Needed: Use small shims behind the molding where it doesn’t sit flush against the wall or ceiling. Nail through the shim into the framing.
- Caulk is Your Friend: Small gaps (1/16 inch or less) can often be expertly hidden with a bead of paintable caulk after painting.
- Careful Cutting: Ensure your miter cuts are precise. Even a slight inaccuracy can create a gap.
Nail Guns Jamming
It happens to the best of us! Most jams are preventable or easily fixed.
- Use Quality Nails: Cheap or inconsistent nails are a common cause of jams. Ensure you’re using good quality, correctly sized brads from a reputable brand.
- Don’t Force It: If a nail doesn’t drive fully, don’t immediately slam another nail next to it. Try to troubleshoot the depth or pressure first.
- Clear Jams Safely: Always disconnect the air supply (for pneumatic) or battery (for cordless) before attempting to clear a jam. Follow your tool’s manual for jam-clearing procedures.
Table: Brad Nailer vs. Other Fastening Methods for Crown Molding
To help illustrate the advantages of a brad nailer, let’s compare it to other common fastening methods:
| Method | Pros | Cons | Best For |
|---|---|---|---|
| Brad Nailer (18-Gauge) | Minimal damage, clean finish, fast, easy to fill holes, good holding power when used correctly. | Requires air compressor or power source, can still split delicate wood if not careful, small holes may require filling. | Most crown molding installations. |
| Finish Nailer (16-Gauge) | Stronger hold than brad nailer, faster than hammer, good for slightly larger molding. | Larger holes than brad nailer, higher risk of splitting delicate molding, more noticeable fastener. | Heavier crown molding, applications where a slightly larger fastener is acceptable. |
| Hammer and Finishing Nails | No power source needed, very cheap consumables. | Slow, requires significant skill to avoid damaging molding, difficult to set nails flush, easy to dent or split wood. | Very small, low-impact projects, or when power tools are unavailable. Generally not recommended for crown molding by DIYers. |
| Screws | Strongest possible hold, allows for adjustments before final tightening. | Holes are very obvious and require filling/sanding, can split wood if not pre-drilled, time-consuming. | Structural framing, not typically used for visible trim like crown molding. |