Quick Summary: Get perfectly straight nails every time with your nail gun! Follow these simple, expert tips: ensure proper depth setting, hold the gun firmly and square, use the right nails for your material, and maintain your tool. Nailerguy’s guide makes straight nailing easy for any DIYer.
Ever fire a nail gun and end up with a crooked fastener peeking out? It’s a common frustration, especially when you’re striving for that clean, professional finish on your DIY projects. We’ve all been there, wrestling with a nail that decided to take a detour! But don’t worry, achieving straight nails is totally within your reach. With a few smart techniques and a little practice, you can nail it (pun intended!) every time, making your woodworking go smoother and look a whole lot better.
This guide from Nailerguy is packed with straightforward advice designed to help you master the art of straight nailing. We’ll cover everything from setting up your gun correctly to holding techniques that make a real difference. Get ready to boost your confidence and your finishing skills!
Table of Contents
Your Nailer’s Best Friend: Setting Up for Success
Before you even squeeze the trigger, a few crucial setup steps can save you a world of trouble. Think of it as prepping your tools for a perfect performance. Getting these basics right is the foundation for every straight nail you’ll drive.
Understanding Your Nail Gun’s Depth Adjustment
This is arguably the most important setting you’ll control. The depth adjustment knob or lever on your nail gun dictates how deep the nail will be driven into the material. Setting this correctly ensures your nails sit flush or slightly countersunk, not proud of the surface or buried too deep.
- Too Shallow: The nail head sticks out, leaving a jagged edge and a weak hold.
- Too Deep: The nail head is driven past the surface into the wood, potentially damaging the material or requiring extra filling.
- Just Right: The nail head is driven flush with the surface, or slightly below, especially in softer woods.
How to Adjust: Most nail guns have a rotating wheel or a lever near the nose of the tool. Experiment with scrap pieces of the same material you’ll be working with. Start with a medium setting and fire a few test nails. Adjust finer until you achieve the desired depth. It’s always better to be slightly shallow and adjust deeper than to go too deep and damage your workpiece.
Choosing the Right Nail
Using the correct type and size of nail for your project is non-negotiable for straight driving. Nail guns are designed to work with specific nail collations (how the nails are held together, like paper or wire). Mismatched nails can cause jams, misfires, or crooked shots.
- Nail Size: Ensure the length and diameter of the nail match the thickness and type of material you are fastening. For example, don’t use a 2-inch finishing nail to attach a 1-inch thick board to a stud.
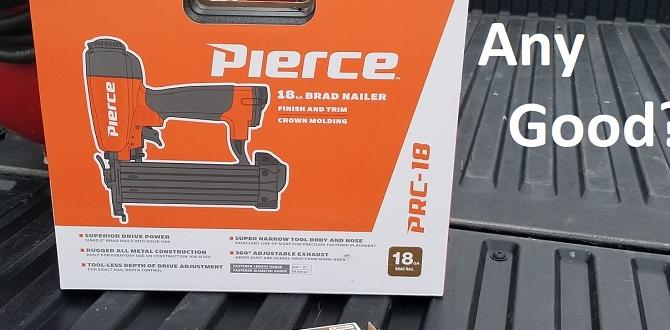
- Nail Type: Brad nails (18-gauge) are thin, leaving tiny holes ideal for trim. Finish nails (16-gauge) are slightly thicker for more holding power but still require minimal filling. Framing nails are heavy-duty for structural work.
- Nail Collation Angle: Nail guns are often angled (e.g., 15°, 21°, 30°, 34°). The angle of the nail gun’s magazine must match the angle of the nails it uses. Using the wrong collation can lead to jams and crooked nails.
Always check your nail gun’s manual for the specific nail types and sizes it accepts. Reputable manufacturers like DEWALT provide detailed specifications.
Technique is Key: Your Grip and Stance
Once your nail gun is set up, your physical interaction with the tool becomes paramount. The way you hold the gun and position yourself can dramatically impact its performance. Think of it as a dance between you and the machine.
Achieving the Perfect Grip
A firm, consistent grip is essential for controlling the nail gun. You want to feel in command, not like the tool is controlling you!
- Firm but Relaxed: Grip the handle firmly enough to prevent the gun from recoiling and shifting, but avoid a death grip. Too much tension can lead to fatigue and less control.
- Full Hand Contact: Ensure your entire hand is around the grip for maximum stability.
- Trigger Finger Ready: Keep your trigger finger relaxed initially, only placing it on the trigger when you are ready to fire.
A good grip helps you maintain consistent pressure against the workpiece, which is vital for the safety contact trip (the part you press against the wood to fire) to engage correctly and for the nail to be driven straight.
The Power of a Square Stance
Your stance and how you position the nail gun against the material are critical. A common mistake is approaching the material at an angle.
- Perpendicular Contact: Always press the nose of the nail gun directly perpendicular (at a 90-degree angle) to the surface you’re nailing into. Imagine a plumb line from the nail to the surface – it should be perfectly straight.
- Even Pressure: Apply firm, even pressure straight down onto the nose of the gun. This ensures the safety contact trip is fully depressed and the nail driver (the part that strikes the nail) is aligned correctly.
- Avoid Angled Shots: Firing a nail at an angle is a surefire way to get a crooked nail. This often happens when trying to nail into a corner or an awkward spot without proper positioning.
If you’re working with thin material or attaching something near an edge, you might need to use a spacer or clamp to ensure the gun can sit flush and square. For instance, when attaching trim, you want the gun flush against the trim and pressing straight into the framing stud or backing.
Mastering the Trigger and Firing Sequence
The trigger mechanism on a nail gun isn’t always as simple as “squeeze and go.” Different firing modes and techniques can help you achieve cleaner results.
Sequential vs. Contact Actuation
Most modern nail guns offer at least two firing modes:
- Sequential (or Single Fire): You must press the safety contact trip against the surface first, and then pull the trigger for each nail. This mode offers the most control and is ideal for precision work where you don’t want accidental firing. It’s excellent for ensuring you nail exactly where you intend.
- Contact (or Bump Fire): With the tool powered on (and safety engaged), you can hold the trigger down and then tap the nose against the material to fire nails rapidly. This is faster for framing or when you need many nails quickly, but it can lead to accidental firings and less precise placement if not handled carefully. When aiming for straightness, sequential mode is generally your best bet for initial setups and critical joints.
For learning and ensuring straight nails, start with sequential mode. Once you’re comfortable, you can explore contact mode, but always be mindful of where the nose is before tapping.
The Firing Rhythm
Once you’ve got the gun positioned square and are using sequential mode, the “push-pull” or “push-squeeze” technique can be very effective:
- Position: Place the nail gun nose firmly and squarely against the material where you want the nail.
- Press: Ensure the safety contact trip is fully depressed.
- Push: Apply a slight, steady outward pressure (pushing the gun away from you).
- Squeeze: Gently squeeze the trigger. Some users find a slight “tug” as you squeeze helps seat the nail perfectly.
This sequence helps ensure the nail is driven straight and the gun doesn’t jump or shift as the nail is fired. It’s a subtle but effective technique.
Troubleshooting Common Straight Nailing Issues
Even with the best techniques, you might run into a snag. Here are some common problems and their solutions.
Nails Driving at an Angle
- Cause: Gun not held perpendicular to the surface, inconsistent pressure, or trying to nail into a very hard knot or metal obstruction.
- Fix: Re-evaluate your stance and grip. Ensure the nose is perfectly square to the surface. Apply firm, even pressure. If it persists, check the material for obstructions; sometimes, you need to reposition the nail slightly.
Nails Not Driving Deep Enough (or Too Deep)
This usually comes back to your depth adjustment setting (covered earlier) or the power source.
- Cordless/Battery Nailers: A low battery can reduce driving power, leading to nails not sinking fully. Ensure your battery is fully charged.
- Pneumatic Nailers: Check your air pressure. Too low pressure won’t drive nails properly. A good rule of thumb is to set your regulator to the middle to upper range of the manufacturer’s recommended PSI (pounds per square inch). You can find this information in your tool’s manual. Most pneumatic nailers operate between 70-120 PSI. OSHA regulations also touch on the safe setup and operation of pneumatic tools.
Nails Bending Before Driving
This often happens when hitting extremely hard wood, knots, or very thin material without adequate backing.
- Cause: Hitting a hard obstruction, using bent nails in the magazine, or nailing into material that splinters easily.
- Fix: Try repositioning the nail slightly. Ensure you’re using quality, undamaged nails. For very hard woods, you might consider a pilot hole for the first few nails if precision is paramount, or a nail gun with higher power. Use a nail gun designed for hardwoods if this is a frequent issue.
Nails Firing When They Shouldn’t (Nail Gun “Doubling”)
This is more of a safety and accuracy issue than a straightness one, but worth mentioning.
- Cause: Often happens with contact actuation when the gun bounces or the trigger gets accidentally depressed.
- Fix: Use sequential mode for better control. Be mindful of trigger discipline. If the gun is continuously firing without intention, there may be a mechanical issue, requiring professional service.
Nail Gun Maintenance for Optimal Performance
A well-maintained nail gun is a happy nail gun—and happy nail guns drive straight fasteners!
Regular Cleaning
Keep the nose and driver area free of sawdust, wood fragments, and debris. This ensures the driver can move freely and strike the nail squarely.
Lubrication (Pneumatic Guns)
Pneumatic nailers require proper lubrication. Use only the manufacturer-recommended air tool oil. A few drops before use, as per the manual, keep internal parts moving smoothly. Don’t over-oil, as this can gum up the works.
Checking for Damage
Inspect the nose and safety contact trip regularly for any signs of wear or damage. A damaged nose can prevent the gun from sitting squarely against the workpiece. Likewise, if the contact trip is worn, it may not actuate sensors properly.
Secure Connections (Pneumatic Guns)
Ensure your air hose has a secure connection to the gun and compressor. Leaks reduce efficiency and can affect consistent air pressure, impacting nail driving.
Refer to your specific nail gun’s manual for detailed maintenance instructions. For example, RIDGID tool support often includes manuals and maintenance tips for their lineup.
Nailer Types and Their Impact on Straight Nailing
Different nail gun types might require slight adjustments in technique, but the core principles of straight nailing remain the same. Here’s a quick rundown:
| Nailer Type | Typical Use | Straight Nailing Considerations |
|---|---|---|
| Framing Nailer | Building walls, decks, subfloors (structural work) | Larger nails, higher power. Focus on consistent pressure and square positioning. Angling can be less noticeable with larger fasteners in rougher work, but still aim for straightness. |
| Finish Nailer | Installing trim, molding, cabinetry | Smaller nails, requires precision. A must for straight shots as angles are very obvious and can mar aesthetic. Depth adjustment is critical. |
| Brad Nailer | Attaching small trim, delicate molding, craft projects | Very thin nails, low power. Ideal for light-duty work. Straight shots are essential for appearance. Handle with care. |
| Stapler | Upholstery, fencing, sheathing | Uses staples, which behave differently. Ensure the stapler nose is perfectly flush for even staple placement and depth. |
| Pin Nailer | Very fine decorative trim, joining small pieces | Uses tiny pins with no head. Straightness is paramount for invisibility. Very forgiving on material. |
No matter the type, the golden rule always applies: hold it square, press it firmly, and select the right fastener. The principles of straight nailing are universal across the board.
FAQs About Straight Nailing with a Nail Gun
Q1: What’s the most common reason nails go in crooked?
The most frequent cause is not holding the nail gun perfectly perpendicular (square) to the surface you’re nailing into. Any angle can push the nail off course as it enters the material.
Q2: How do I ensure my nail gun settings are correct for straight nails?
Focus on the depth adjustment. Set it so nails are flush or slightly countersunk. Test on scrap material to get it perfect before working on your project. For pneumatic guns, ensure adequate air pressure.
Q3: Can I use any nail in my nail gun?
No, absolutely not. You must use the specific type, size, and collation angle of nails recommended by your nail gun’s manufacturer. Using the wrong nails will lead to jams and crooked shots.
Q4: My nail gun keeps jamming. Is this related to straight nailing?
While jamming is often due to incorrect nail size/type or damaged nails, it can sometimes be a symptom of an issue that affects straightness. If the driver is sticking or not fully retracting, it can misfire or drive nails at an angle. Regular maintenance is key.
Q5: How much pressure should I apply when holding the nail gun to the wood?
You need enough firm, even pressure to fully depress the safety contact trip (the part you press against the wood). Over-applying pressure isn’t necessary and can be counterproductive. Just ensure consistent contact.
Q6: What if I need to nail near an edge?
Nailing too close to an edge can cause the wood to split and the nail to go crooked. If possible, add backing material or a cleat to provide more support. You might also need to pre-drill a small pilot hole or use a nail that’s not too long for the material thickness.
Q7: My batter-powered nailer doesn’t have enough power for straight nails. What’s wrong?
Ensure your battery is fully charged. Most battery-powered nailers deliver consistent power, but a low battery can significantly reduce the driving force, leading to nails not sinking fully or even bending. Some models also have power settings.
Bringing It All Together: Your Straight Nailing Confidence Boost
Mastering straight nailing with a nail gun is all about understanding your tool and applying consistent technique. It’s not magic; it’s a blend of proper setup, a good grip, a square stance, and mindful trigger control. Remember to always use the right nails for the job and keep your tool in good working order.
By focusing on these simple, actionable tips—from understanding depth adjustment and choosing the right fasteners to perfecting your hold and stance—you’ll find yourself driving straighter nails with more confidence in no time. Don’t get discouraged if your first few attempts aren’t perfect. Every DIYer starts somewhere, and practice is your best teacher. Soon, you’ll be achieving those clean, professional finishes you’ve been aiming for, making all your woodworking projects look even better. Happy nailing!