Quick Summary
To tighten a magazine, ensure it’s empty. Loosen any screws on the base plate or body, then carefully snug them back up, but don’t overtighten. This simple check often resolves magazine looseness and ensures reliable feeding.
Hey there, fellow builders! Jack Shaffer here, your guide from Nailerguy! Ever had your nailer magazine feel a bit loose or wobbly? It’s a common little hiccup, especially with frequent use, and it can make your nailing feel less precise or even cause jams. But don’t you worry! It’s usually a quick fix that doesn’t require a trip to the repair shop. We’re going to walk through a simple, proven tip to get that magazine feeling snug and secure again, so you can get back to building with confidence. Let’s dive in and get your tools working like new!
Table of Contents
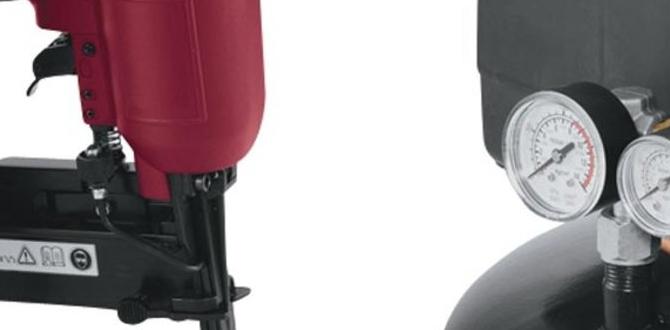
Your Nailer Magazine: More Than Just a Holder
That magazine on your nail gun isn’t just a place to stack nails. It’s a precisely engineered part of your tool that guides each nail into the perfect position for firing. When it gets a bit loose, it can throw off that perfect alignment. This can lead to frustrating issues like nails not feeding smoothly, jams, or even bent nails. It’s a small problem, but it can really interrupt your workflow and add unnecessary stress to your projects. Think of it like a wobbly wheel on a bicycle – it still works, but not as smoothly or efficiently as it should!
The good news is that this isn’t usually a sign of a major problem. More often than not, it’s just down to a few fasteners working themselves loose over time through vibration. Woodworking and construction involve a lot of natural vibration, and tools are no exception. Over thousands of nail fires, tiny screws can settle slightly. We’re going to tackle this with a straightforward, step-by-step process. You’ll be amazed at how a little bit of attention can restore the crisp, solid feel to your nailer.
Understanding Magazine Looseness
Before we grab our tools, let’s chat for a moment about why your magazine might be feeling loose. Nine times out of ten, it’s due to the screws that hold the magazine housing together. These screws typically secure the metal tracks where the nails slide, and they also connect the magazine body to the main nailer assembly. Think about it: every time your nailer fires, there’s a jolt. Over time, these jolts can cause the screws to vibrate loose, just a tiny bit. This slight loosening creates play, making the whole magazine feel less solid.
Other less common reasons could include wear on the plastic or metal components of the magazine itself, or perhaps a dropped tool that caused some warping. But for most users, it’s that simple screw loosening. It’s a testament to the robust design of these tools that they don’t often fail completely, but require a little maintenance to keep them performing at their best. This is why regular, simple checks are so important for the longevity and efficiency of your tools.
The Core Tip: How to Tighten Magazine Fasteners
Here’s the main event, the proven tip to get your magazine feeling tight and reliable again. This process is quick, requires minimal tools, and can often be done right there on your workbench or even at the job site.
Step 1: Safety First – Unload Your Magazine
This is the absolute most crucial step. Never attempt to work on your nailer’s magazine while it’s loaded with nails. The risk of accidental firing is too high, and it could lead to serious injury. So, before you do anything else, carefully remove all nails from the magazine. If you’re unsure how to unload your specific nailer model, now is a great time to consult your owner’s manual. Most models have a simple latch or mechanism to release the follower and empty the magazine.
- Locate the follower (the part that pushes the nails forward).
- Press or lift the follower to release tension on the nails.
- Carefully slide all nails out of the magazine.
- Confirm the magazine is completely empty.
Step 2: Identify the Fasteners
Now that your magazine is empty and safe, take a close look at its construction. You’ll need to identify the screws or bolts that hold the magazine together. Most nailer magazines are made up of a few key components:
The main body, which is often a combination of metal rails and a plastic or metal housing.
A base plate or cap, which might secure the bottom end of the magazine.
Sometimes, there are screws directly on the side of the magazine body, and other times, they are hidden beneath a removable base plate.
Grab your owner’s manual if you’re having trouble finding them. It’s an invaluable resource for understanding your specific tool’s anatomy. Look for any small circular indentations that indicate screw heads. These are what we need to tighten.
Step 3: Select the Right Tool
The type of screw head will dictate the tool you need. Most nailer magazines use either Phillips head screws or hex head (Allen) screws. For Phillips head screws, you’ll need a Phillips head screwdriver. For hex head screws, you’ll need a set of Allen wrenches (also known as hex keys). It’s best to use a screwdriver or Allen wrench that fits the screw head perfectly. Using a tool that’s too small can strip the screw head, making it much harder to tighten or remove later.
If you’re dealing with a slightly larger or more stubborn screw, a powered screwdriver with the correct bit can be a great help. However, always start with manual tools for this specific task to ensure you don’t accidentally overtighten. Having a good quality set of screwdrivers and Allen wrenches is a fundamental part of any DIYer’s toolkit, and this is a perfect example of why!
Step 4: The Tightening Process – Be Gentle!
This is where the magic happens! With your magazine empty and the correct tool in hand, it’s time to snug up those screws. Here’s the crucial part: you want to tighten them, not crank them down with all your might. Overtightening can strip the screw threads, crack plastic components, or even warp metal parts. The goal is to remove the play, not to create new problems!
Start with one screw. Gently turn it clockwise until you feel resistance. Don’t force it. Now, try wiggling the magazine. Does it feel tighter? If so, move to the next screw. If not, give it another tiny turn, just a fraction. Continue this process for all the screws you identified in Step 2. Work in a pattern, perhaps diagonally or in a star pattern, similar to how you’d tighten lug nuts on a car wheel. This helps ensure the magazine components seat evenly.
The key is to apply just enough pressure to make the magazine feel solid and secure. You should feel a firm connection, but not a “stress” feeling. Trust your senses; if it doesn’t feel right, back off a little.
Step 5: Test the Magazine
Once you’ve gone around and snugged up all the visible screws, it’s time for a test. Gently try to wiggle the magazine again. Does it feel significantly more stable? Is there less movement from side to side or front to back? If it feels much better, you’ve likely solved the problem!
Next, carefully reload your magazine with a few nails. Insert it back into the nailer. Try a few test fires (pointing in a safe direction, away from people and yourself). Listen to the tool. Does it sound smoother? Do the nails feed without issue? A perfectly snug magazine contributes to the overall smooth operation of your nailer.
When to Seek Further Help
While tightening screws is the most common fix, sometimes a loose magazine can indicate a deeper issue. If you’ve gone through the steps above, ensured all screws are snug, and the magazine still feels loose or isn’t feeding nails correctly, it might be time to investigate further:
Worn Components: Over extensive use, the plastic or metal parts of the magazine can wear down, especially the feed lips or the channels where the nails slide. This wear can create looseness that tightening screws won’t fix. You might notice the plastic looking grooved or the metal rails feeling rough.
Damaged Housing: If the magazine has been dropped or impacted, the housing itself might be cracked or bent. Even if screws are tight, a damaged housing won’t hold things in alignment.
Internal Spring Issues: The spring that pushes the follower forward might be damaged or its track within the magazine might be compromised. This can affect how smoothly nails are presented to the driver blade.
If you suspect any of these issues, it’s often best to consult your nailer’s manual for part diagrams. You can often order replacement magazine parts directly from the manufacturer. For more complex repairs, or if you’re not comfortable disassembling further, consider taking your nailer to a certified repair center. Tools like those from DEWALT® Service Centers or authorized repair shops for other brands can diagnose and fix more intricate problems.
Preventative Maintenance: Keeping Your Magazine Tight
An ounce of prevention is worth a pound of cure, especially when it comes to keeping your tools in top shape! By incorporating a few quick habits, you can often prevent that magazine looseness from becoming a problem in the first place. Regular checks are your best friend here.
Regular Visual Inspections
Make it a habit to give your magazine a quick once-over before starting a big project, or especially after finishing one. Look for any obvious signs of damage. Gently try to wiggle the magazine to see if it feels as solid as it should. This quick check takes seconds but can catch issues early.
Post-Project Clean and Check
After a dusty job or a long day of nailing, take a few minutes to clean your nailer. Dust and debris can sometimes get into the screw threads, which might contribute to them loosening over time. A quick wipe-down and a check of screw tightness can make a big difference.
Mindful Handling
Be mindful of how you handle your tools. While we can’t avoid every bump and jostle, try to avoid dropping your nailer. If it does fall, inspect it thoroughly afterward, paying close attention to the magazine and its attachment points.
Occasional Screw Tightening
Depending on how heavily you use your nailer, a gentle tightening of the magazine screws once every few months can be beneficial. You don’t need to overtighten; just a small snugging motion to ensure everything is secure. Think of it like a tune-up for your tool!
Choosing the Right Nailer & Common Magazine Types
Understanding how to maintain your magazine is great, but choosing the right nailer for your needs is equally important. Different nailer types often have slightly different magazine designs. Here’s a quick rundown:
| Nailer Type | Common Magazine Design | Notes |
|---|---|---|
| Framing Nailer | Long, robust metal magazine, often adjustable for depth. | Designed for power and durability, handles larger nails (2-3.5 inches). |
| Finish Nailer | Sleek, often painted metal magazine, usually with a no-mar tip. | For more delicate woodworking, handles 1.5-2.5 inch nails for trim and molding. |
| Brad Nailer | Slim, often plastic-capped metal magazine. | For very fine work, tiny nails (0.5-1.25 inches) for delicate trim or upholstery. |
| Pin Nailer | Very thin, highly precise magazine. | Uses headless pins (0.5-1 inch) for invisible fastening, often in cabinetry or intricate molding. |
Regardless of type, the principle of magazine maintenance remains the same. A well-maintained magazine is crucial for delivering the consistent performance you expect from your tool. For more in-depth information on choosing the right nailer, resources like Family Handyman’s guide to nail guns offer excellent comparisons.
Troubleshooting Common Magazine Issues
Let’s quickly touch on a couple of other common issues you might encounter and how they relate to magazine tightness or function:
Nails Not Feeding
This is the most common symptom of a loose or problematic magazine. If tightening the screws doesn’t help, check for debris jamming the follower, or if the follower spring is damaged. Sometimes, a nail can get bent and lodged in the magazine, preventing others from moving. Carefully try to remove any stuck nails.
Double Feeding
This is less common but can occur if the feeding mechanism is slightly misaligned, possibly due to a loose magazine. When two nails are presented to the driver blade at once, it can cause jams and damage. Ensuring the magazine is properly secured is the first step to resolving this.
Nails Firing at an Angle
If your nails aren’t going in straight, it’s a strong indicator that the magazine isn’t perfectly aligned with the driver blade. This misalignment can stem from a loose magazine, a warped magazine, or issues with the nailer’s internal components. Tightening the magazine screws described in this article is the primary fix to try!
Frequently Asked Questions (FAQ)
Q1: How often should I check my nailer magazine for tightness?
A1: It’s a good practice to give it a quick wiggle check before starting a major project and again after you’re done. If you use your nailer very frequently, a gentle tightening of the screws every few months is recommended.
Q2: Can overtightening screws damage my magazine?
A2: Yes, absolutely. Overtightening can strip screw threads, crack plastic parts, or warp metal components, which can lead to bigger problems or costly repairs.
Q3: My magazine is still wobbly after tightening screws. What else could it be?
A3: It could be worn-out components, a cracked housing, or an issue with the internal follower spring. Inspect the magazine for visible damage and wear. If you don’t see an obvious cause, it might be time for professional assessment.
Q4: What kind of tools do I need to tighten magazine screws?
A4: Typically, you’ll need a Phillips head screwdriver or a set of Allen wrenches (hex keys) that match the size of the screws on your specific nailer magazine.
Q5: If I replace magazine parts, are they usually easy to find?
A5: Often, yes! Most manufacturers offer replacement parts like base plates, followers, and springs. Your owner’s manual should have a part number guide, and you can usually order directly from the manufacturer’s website or a reputable tool parts supplier.
Q6: Is it safe to use my nailer if the magazine is slightly loose?
A6: It’s not ideal. While it might still fire, it can lead to misfires, jams, bent nails, and potentially damage to the nailer itself. It’s best to fix the looseness before continuing heavy use.
Conclusion: Keep Building with Confidence
There you have it! A simple, effective method to tighten your nailer magazine and get your tool back to its reliable best. By taking just a few minutes to follow these steps – prioritizing safety by unloading, identifying the right screws, using the correct tools, and tightening gently – you can often resolve that frustrating wobble. Remember, a well-maintained tool is a happy tool, and it leads to smoother projects and better results.
Don’t let minor issues like a loose magazine slow you down. With a little bit of regular attention and the know-how from Nailerguy, you can keep your tools in great shape for years to come. So, give that magazine a check, snug up those screws, and get back to creating! Happy building, everyone!