Quick Summary: Testing nailer calibration ensures consistent nail depth. Simply drive a nail into scrap wood, then measure its head depth. Aim for a depth that just slightly countersinks the nail head. Adjust depth settings until you achieve this every time for a flush or slightly proud finish.
Hey there, fellow DIYers and woodworking enthusiasts! Jack Shaffer here from Nailerguy. Ever find yourself driving nails that are either sticking out too much or sinking way too deep into your project? It’s a common frustration, and usually, it means your nailer needs a little calibration. Don’t worry, it’s not complicated! Getting your nailer set just right makes a huge difference in the quality of your work, making things look professional and holding together securely. We’re going to walk through exactly how to test your nailer for calibration, step-by-step, so you can get back to building with confidence. Let’s dive in and get those nails driving perfectly!
Table of Contents
Why Nailer Calibration Matters
So, why is this whole “calibration” thing so important for your trusty nail gun? Think of it like tuning a musical instrument. If it’s out of tune, it just doesn’t sound right. A nailer that’s out of calibration won’t drive nails consistently. This means you get a mixed bag of results:
- Nails too deep: These can break through the wood surface, creating unsightly holes that need filling and sanding. In thin wood, they might even split it.
- Nails too proud: These stick up from the surface, leaving sharp edges that snag on things and look unfinished. They also won’t hold the material as securely as they should.
- Inconsistent drives: Even on the same setting, some nails go too deep and others not deep enough. This is frustrating and slows down your project big time.
Getting your nailer calibrated ensures that every single nail drives to the same, perfect depth. This leads to stronger joints, a cleaner appearance, and a much more enjoyable building experience. It’s a small adjustment that makes a world of difference, whether you’re building a birdhouse or framing a deck. Proper calibration is key to a professional finish and a sturdy build.
Understanding Your Nailer’s Depth Adjustment
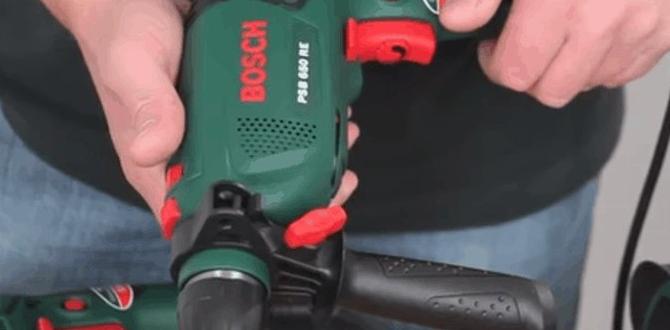
Before we start testing, let’s get familiar with how your nailer controls how deep the nails go. Most modern nail guns have a depth adjustment feature. This is typically a wheel, dial, or button located somewhere on the tool, often near the nose (the part that presses against the wood) or on the rear of the tool. You’ll usually see markings on it, like `+` and `-`, or numbers that sometimes correspond to different depths.
Turning the adjustment in one direction (usually towards `+`) will typically make the nail drive deeper. Turning it the other way (towards `-`) will bring it shallower. The exact mechanism and feel can vary between brands and types of nailers – like framing nailers, finish nailers, brad nailers, and staplers. It’s always a good idea to consult your nailer’s owner’s manual for the specifics of your model. Knowing where this adjustment is and how it works is the first step in calibrating it.
This depth adjustment directly controls how far the piston travels inside the nailer, which in turn determines the force and impact on the nail. A finer adjustment allows for precise control, crucial for working with different wood types and thicknesses.
Essential Tools for Testing Calibration
You don’t need a workshop full of fancy gadgets to get your nailer calibrated. Here’s a simple list of what you’ll need:
- Your Nail Gun: This is the star of the show! Make sure it’s loaded with the correct type and size of nails it’s designed for.
- Air Compressor (if pneumatic): If you have an air-powered nailer, you’ll need a compressor to supply the air. Ensure it’s connected and running at the recommended pressure for your nailer. Many nailers have a recommended PSI (pounds per square inch) range listed on the tool or in the manual.
- Power Source (if electric/cordless): For electric or cordless models, ensure they are charged or plugged in and ready to go.
- Scrap Wood: This is crucial! You’ll need pieces of the same type and thickness of wood you plan to use for your project. Pine, plywood, or even some construction-grade lumber works perfectly for testing. Avoid using your actual project wood for these initial tests.
- Measuring Tool: A ruler, tape measure, or digital caliper is essential for accurately measuring how deep the nail heads are driven into the wood. A caliper offers the most precision.
- Safety Glasses: Always, always wear safety glasses when operating any power tool, especially a nailer. Flying debris or misplaced nails are a real hazard.
- Ear Protection: Nail guns can be loud. Protect your hearing, especially during prolonged use.
- Gloves (Optional but Recommended): Good work gloves can protect your hands.
Having these items ready will make the calibration process smooth and efficient. Remember, always prioritize safety first!
Step-by-Step Guide to Testing Nailer Calibration
Alright, let’s get down to business! Follow these steps carefully to test and calibrate your nailer. We’ll aim for a perfect, flush, or slightly countersunk nail head. This is what most DIYers and woodworkers strive for.
Step 1: Prepare Your Workspace and Nailer
Find a stable surface to work on, such as a workbench or a sturdy table. Make sure you have plenty of space. Put on your safety glasses and ear protection. Load your nailer with the appropriate nails. For pneumatic nailers, connect the air hose and set your compressor regulator to the lower end of your nailer’s recommended PSI range. You can always increase the pressure later if needed, but it’s safer to start low.
Step 2: Make Your First Test Drive
Take a piece of your scrap wood. Hold the nailer firmly against the wood surface. For most nailers, you’ll need to engage a safety contact tip (the part that sits on the wood) before you pull the trigger. This safety feature prevents accidental firing. Squeeze the trigger while maintaining firm contact with the wood.
Drive one nail. Listen to the sound of the nailer and observe how the nail goes in. Don’t worry about perfection on this first shot; we’re just gathering data.
Step 3: Assess the Nail Depth
Now, take your measuring tool. Carefully measure how deep the head of the nail is driven into the wood. Here’s what you’re looking for:
- Too Proud: Head above the wood surface. This means the nail hasn’t been driven deep enough.
- Flush: Head perfectly level with the wood surface. This is often a good result, especially for applications where you might paint over the nail head.
- Slightly Countersunk: Head just below the wood surface. This is generally the most desirable and professional result. It allows for easy filling with wood putty.
- Too Deep: Head has significantly broken through the wood surface. This can damage the wood, especially softer varieties.
It’s helpful to measure from the highest point of the nail head to the wood surface. A reading of 0mm would be flush. A negative reading (e.g., -1mm) means it’s countersunk. A positive reading (e.g., +1mm) means it’s proud.
Step 4: Adjust the Depth Setting
Based on your measurement, it’s time to adjust your nailer’s depth setting. If the nail was too proud, you need to drive it deeper. This usually means turning the depth adjustment knob or wheel towards the `+` or a similar “deeper” indicator. If the nail was too deep, you need to bring it shallower, so turn the adjuster towards the `-` or “shallower” indicator.
Make a small adjustment. Don’t crank the dial all the way. A small turn can make a big difference. Remember, if you over-adjust, you can always try to correct it on the next test.
Step 5: Drive Another Test Nail and Measure
Grab another piece of scrap wood or use a different spot on the same piece. Drive another nail with your adjusted setting. Again, hold the nailer firmly and engage the safety contact. Pull the trigger.
Measure the depth of this second nail. Compare it to your previous measurement. Is it closer to where you want it? If not, repeat Step 4 and Step 5, making small adjustments each time.
Step 6: Fine-Tune and Find Your Sweet Spot
Continue this process of driving a nail, measuring, and adjusting. The goal is to find the sweet spot where every nail drives to a consistent, desired depth – typically slightly countersunk for a clean finish. It might take 3-5 test nails to get it just right.
Pay attention to the feel. Does the nailer sound different? Does the trigger feel different? These can be clues that you’re getting close.
Step 7: Test on Different Angles and Surfaces (Optional but Recommended)
Once you think you’ve found the perfect setting, it’s wise to do a few more test drives. Try driving nails into different parts of the scrap wood, or even into different pieces of scrap wood of the same type. Also, try driving nails at different angles. This helps ensure the calibration is consistent across the board.
If you are working with a material that is denser or softer than your scrap wood, you might need to make slight adjustments. For example, a harder wood might require a slightly higher air pressure or a deeper setting to achieve the same penetration as a softer wood. You can often find recommended pressure settings for different materials in your nailer’s manual or on the manufacturer’s website, such as DeWalt’s support pages for manuals.
Troubleshooting Common Nailer Calibration Issues
Even with careful testing, you might run into a few snags. Here are some common calibration problems and how to solve them:
Problem: Inconsistent Nail Depth (Nails Go Too Deep or Not Deep Enough Randomly)
Possible Causes:
- Air Pressure Fluctuations (Pneumatic): The compressor might not be maintaining a steady PSI.
- Solution: Check your compressor’s regulator. Ensure it’s set correctly and isn’t faulty. Make sure the air hose isn’t kinked and that your compressor is properly sized for the nailer’s demands. For example, a framing nailer needs consistent high volume and pressure, which smaller compressors might struggle with.
- Worn O-rings or Seals: Internal seals in the nailer can wear out, causing air leaks and inconsistent power.
- Solution: This might require taking the nailer to a service center or, if you’re comfortable, purchasing a seal kit for your specific model and performing the repair yourself. Look for maintenance guides specific to your nailer model.
- Dirty Tool or Magazine: Debris in the magazine or drive mechanism can impede smooth nail feeding and driving.
- Solution: Clean the nail magazine and the area around the driver blade according to your manual’s instructions. A bit of compressed air can often dislodge light debris.
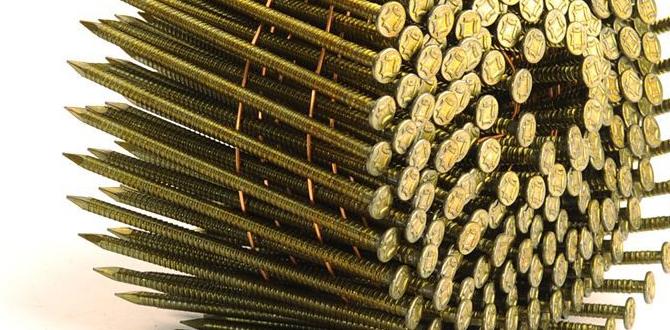
- Incorrect Nail Size/Type: Using nails that aren’t exactly what the nailer specifies can cause feeding and driving issues.
- Solution: Always use the brand and type of nails recommended for your specific nailer. Check the nailer’s specifications for shank diameter, head size, and length.
Problem: Nailer Firing Weakly or Not Firing at All
Possible Causes:
- Low Air Pressure (Pneumatic): The most common culprit!
- Solution: Increase the PSI at the compressor regulator. Ensure you are within the nailer’s operating range (check manual).
- Air Leaks: Leaks in the hose, fittings, or from the nailer itself reduce the power delivered to the piston.
- Solution: Listen for hissing sounds. Check all connections. A simple soap and water test can reveal small air leaks. Repair or replace faulty parts.
- Low Battery (Cordless): A dying battery won’t provide enough power.
- Solution: Charge or replace the battery.
- Obstructed Driver Blade: Something might be preventing the driver blade from fully extending.
- Solution: Inspect the nose of the nailer. Ensure no debris is blocking the driver blade. Refer to your manual for safe ways to clear obstructions.
Problem: Nails Bending or Jamming Frequently
Possible Causes:
- Incorrect Air Pressure: Too much pressure can bend lighter nails, while too little can cause them to jam if they don’t drive straight.
- Solution: Adjust PSI within the recommended range.
- Poor Quality Nails: Cheap or inconsistent nails can bend easily.
- Solution: Switch to higher-quality, brand-recommended nails.
- Nails Not Striking the Wood Squarely: The nailer might be at an angle, or the wood surface isn’t flat.
- Solution: Ensure you’re holding the nailer perpendicular to the surface. Check your wood for warpage.
- Magazine Issues: The track that guides the nails into position might be misaligned or damaged.
- Solution: Inspect the magazine for any damage or obstructions. Gently try to realign any bent metal. If damaged, professional repair might be needed.
When troubleshooting, always disconnect the power source (air or battery) and follow safety precautions before inspecting or attempting any repairs. For complex internal issues, consulting your tool’s manual or contacting the manufacturer’s customer service is often the best route. For example, many manufacturers like Metabo HPT offer extensive support and service information for their tools.
Calibrating for Different Wood Types and Finishes
The perfect nail depth isn’t always one-size-fits-all. Different wood species and your desired finish will impact how you calibrate your nailer.
Hardwoods vs. Softwoods
Hardwoods (Oak, Maple, Cherry): These woods are dense and tough. You’ll likely need a higher air pressure (within your nailer’s range) and potentially a slightly deeper setting to drive nails flush or countersunk without bending them. Too little power, and the nails will be proud. Too much power, and you risk damaging the wood surface.
Softwoods (Pine, Fir, Cedar): These woods are much more forgiving. They require less power to drive nails. You can usually use a lower air pressure setting. Be careful not to set the depth too deep, as you can easily blow through the surface or split the wood, especially with thinner pieces.
Desired Finish: Flush vs. Countersunk
Flush Finish: When the nail head sits perfectly level with the wood surface. This is ideal for applications where you might paint the surface and don’t want the nail heads to show through. To achieve this, you’ll use your measuring tool to ensure the top of the nail head is exactly at the wood’s surface level. You might need to make very fine adjustments on your nailer.
Countersunk Finish: When the nail head is slightly below the wood surface. This is generally the most professional look and is preferred for most woodworking projects, including furniture making and trim work. It allows for easy filling with wood putty, which can then be sanded smooth for a seamless finish. For a slight countersink, aim for the nail head to be about 1/32 to 1/16 of an inch (around 1-2mm) below the surface. This is where a digital caliper is incredibly helpful for precision.
Table: Calibration Settings for Common Scenarios
Here’s a general guideline. Always test on scrap wood of the same species and thickness first!
| Wood Type | Typical PSI Range (Example) | Desired Nail Head Position | Adjustment Strategy |
|---|---|---|---|
| Softwood (Pine, Fir) | 70-90 PSI | Slightly Countersunk (1-1.5mm) | Start with lower PSI and shallower setting. Gradually increase PSI/depth until perfect. |
| Hardwood (Oak, Maple) | 90- |