Framing with nail guns is faster, easier, and more precise than ever. This guide provides a clear, step-by-step approach to building with nail guns, ensuring safety and great results for any DIY project.
Ever feel like framing a wall or building a deck takes forever with a hammer? You’re not alone! Many DIYers find traditional nailing slow and tiring. But what if I told you there’s a way to speed things up, get a more consistent result, and even have a bit more fun doing it? That’s where nail guns come in!
Nail guns might look intimidating, but they’re incredibly user-friendly once you know the basics. They can transform your woodworking projects from daunting tasks into satisfying accomplishments. Don’t worry if you’ve never used one before; I’m here to walk you through everything, step by step.
In this guide, we’ll break down the process of framing with nail guns. We’ll cover choosing the right tool, understanding safety, and finally, building your project with confidence. Let’s get those nails flying!
Table of Contents
Why Use a Nail Gun for Framing?
Honestly, the biggest perk is speed. A nail gun drives nails in a fraction of the time it takes to swing a hammer. This means you can frame a wall in minutes, not hours. It’s a game-changer for larger projects or when you’re on a tight schedule.
Beyond speed, consistency is a huge benefit. Each nail is driven to the same depth, giving your framing a clean, professional look. This also means stronger joints because the nails are set uniformly. Plus, it’s much easier on your body! Fewer hammer swings mean less strain on your wrists and shoulders.
Key Benefits at a Glance:
- Speed: Dramatically reduces framing time.
- Consistency: Nails are driven to a uniform depth.
- Strength: Consistent nailing leads to stronger joints.
- Ergonomics: Less physical strain compared to hammering.
- Efficiency: Speeds up the entire building process.
Choosing the Right Nail Gun for Framing
Not all nail guns are created equal, especially when it comes to framing. You’ll want a tool built for the job, typically a framing nailer. These are robust and designed to drive larger nails into dense lumber.
There are a few main types you’ll encounter:
Types of Framing Nailers:
- Pneumatic (Air-Powered): These are the workhorses. They require an air compressor and hose. They’re powerful, reliable, and generally the most cost-effective option for serious DIYers.
- Cordless (Battery-Powered): These offer freedom from air hoses and compressors. They use a battery to power a motor that drives the nail. Modern cordless framing nailers are surprisingly powerful and a great choice if you value portability.
- Gas/Fuel Cell Powered: These use a small fuel cartridge and a battery. They offer good power and portability but can be more expensive to operate due to the fuel cells.
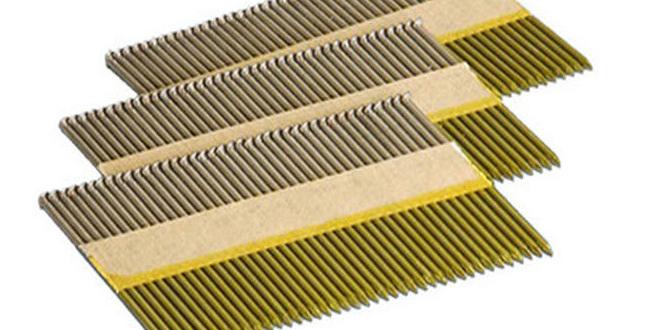
For framing, you’ll primarily be looking for a “framing nailer” or a “collated nailer.” Collated just means the nails are held together in a strip (usually paper or plastic) for easy loading. You’ll see two common angles:
Nail Angle:
- 21-degree (Plastic Collated): These are very common for framing. The plastic coating on the nails helps them glide through wood.
- 30-34 degree (Paper or Plastic Collated): These also work well for framing. The slightly different angle can sometimes make them easier to get into tighter spaces.
My recommendation for beginners? A good pneumatic framing nailer is a solid, reliable choice. If you plan on doing a lot of mobile projects or don’t want to fuss with an air compressor, a high-quality cordless framing nailer is an excellent upgrade. Always check the nail size and type the gun accepts. For framing, you’ll want one that drives nails typically between 2 inches and 3.5 inches long.
Essential Safety Gear and Setup
Safety is non-negotiable when working with power tools, and nail guns are no exception. Think of a nail gun not just as a tool, but as a high-speed projectile launcher. Treating it with respect is paramount.
Your Safety Checklist:
- Safety Glasses: Always, always, always wear safety glasses. A flying nail or a ricochet can cause serious eye injury. Look for ANSI Z87.1 impact protection.
- Hearing Protection: Nail guns, especially pneumatic ones, can be LOUD. Earplugs or earmuffs are a must.
- Work Gloves: Protect your hands from splinters and minor impacts.
- Sturdy Footwear: Keep your feet protected from dropped lumber or tools. Steel-toed boots are ideal.
- Avoid Loose Clothing: Dangling sleeves or drawstrings can get caught.
Setting Up Your Nail Gun:**
If you’re using a pneumatic nailer, you’ll need an air compressor. Ensure it’s properly filled and regulated. Most framing nailers require around 90-120 PSI (pounds per square inch) of air pressure. Check your tool’s manual for specific recommendations.
Connect the air hose securely. Make sure you have a good quick-connect fitting to prevent air leaks.
For cordless nailers, ensure the battery is fully charged. It’s also a good idea to have a spare battery on hand for longer work sessions.
Crucial Safety Tip: Never treat a nail gun like a toy. Don’t point it at anyone, and always keep your finger off the trigger until you are absolutely ready to drive a nail. Always disconnect the air hose or battery when not in use or when changing nails.
Step-by-Step Framing With Your Nail Gun
Alright, you’ve got your nail gun, your safety gear, and your lumber. It’s time to build! We’ll walk through framing a simple wall as an example.
Step 1: Plan Your Project and Measure
Before you fire a single nail, have a clear plan. For a wall, this means knowing the length, height, and where your studs, top plate, and bottom plate will go. Measure twice, cut once – this old adage is still true!
Use a tape measure and a pencil to mark your lumber. For a standard wall, you’ll need:
- A bottom plate (sill plate)
- A top plate
- Multiple studs (usually spaced 16 or 24 inches on center)
- A double top plate for added strength
- King studs and jack studs if you have openings like windows or doors
Double-check all your measurements. A square is helpful here to ensure your cuts are 90 degrees.
Step 2: Prepare Your Lumber
Cut all your lumber to size according to your plan. You can use a circular saw or a miter saw for this. Ensure your cuts are clean and precise.
For framing, you’ll typically use dimensional lumber like 2x4s or 2x6s. Ensure the wood is straight and free of major knots or defects that could cause issues.
Step 3: Load Your Nail Gun
This is a crucial step that varies slightly depending on your nail gun model. Always consult your tool’s manual.
For pneumatic nailers:
- Ensure no air is connected.
- Open the magazine (the part that holds the nails).
- Insert the strip of nails, ensuring the pointed ends are facing the correct direction (usually up or toward the nose of the gun).
- Close the magazine securely.
- Reconnect the air hose and set your compressor to the recommended pressure.
For cordless nailers:
- Ensure the battery is inserted and charged.
- Open the magazine.
- Insert the strip of nails, paying attention to orientation.
- Close the magazine firmly.
Step 4: Set Your Nail Depth
Most framing nailers have an adjustable depth setting. This is vital for consistent results. You want the nail head to be slightly countersunk (below the surface of the wood) but not so deep that it punches through the wood, weakening the joint.
Test this on a scrap piece of the same lumber you’ll be using. Adjust the depth setting until the nails are driven consistently to your liking. A good target is for the nail head to just disappear below the wood surface.
Step 5: Assemble Your Frame (Bottom Plate and Studs)
Lay your bottom plate on a flat, stable surface (like sawhorses or the floor). Position your first stud at one end, perpendicular to the plate. For most framing, studs are placed at 16 or 24 inches on center.
To attach a stud to the bottom plate:
- Hold the stud firmly in place.
- Press the nose of the nail gun against the stud and the bottom plate.
- Keep your finger off the trigger.
- Ensure the safety contact tip is pressed flat against the wood. This is a critical safety feature that prevents accidental firing.
- Once everything is aligned and the contact tip is engaged, squeeze the trigger.
- Drive two nails through the stud into the bottom plate, spaced a few inches apart.
Repeat this process for all your studs, measuring the on-center spacing carefully. For maximum strength, always nail through the stud into the piece it’s joining.
Step 6: Attach the Top Plates
Once your first set of studs is attached to the bottom plate, you’ll add the top plate. You’ll typically use a single top plate first, aligning it with the tops of the studs.
Nail the top plate to each stud using two nails per stud connection. Again, press the gun firmly against the lumber, ensure the contact tip is engaged, and squeeze the trigger.
Next, you’ll add the second top plate. In a double top plate, the second plate overlaps the first, staggering the joints for added strength. This means the second top plate will run continuously across the wall structure, but its ends will land on the studs in the middle of the wall, not at the ends where the first top plate has its joints.
Nail the second top plate to the first top plate and into the studs below. Use plenty of nails to ensure a strong, rigid connection.
Step 7: Framing Openings (Windows and Doors)
Framing openings involves adding “jack studs” (cripples) that support “header beams” and “king studs” that run full height alongside the jack studs.
Here’s a simplified breakdown for a window opening:
- Header: This is a strong beam that carries the load above the window. It’s often made of doubled 2x lumber with plywood in between.
- Jack Studs (or Cripples): These studs support the header. Cut them to the exact height of the header. Nail them to the king studs and the header.
- King Studs: These are full-height studs that run from the bottom plate to the top plate, located on either side of the opening.
- Sill: The bottom horizontal piece of the window frame. Mark its position and attach it between the king studs.
- Sill Studs (or Cripples): Short studs that run from the bottom plate up to the sill plate.
Use your nail gun to attach all these components securely. For headers, you’ll often need longer nails (3-inch or 3.5-inch) driven through the king studs into the header assembly.
A great resource for understanding framing details is the U.S. Department of Housing and Urban Development’s guide on residential framing, which details best practices.
Step 8: Squaring and Bracing
Once your basic wall frame is assembled, it’s crucial to ensure it’s square. You can check this by measuring the diagonals. If the diagonals are equal, your wall is square. If not, gently push or pull opposite corners until it is.
Temporary diagonal bracing is essential to keep the wall square and stable until it’s erected and permanently secured. Use scrap lumber tacked into place with your nail gun.
Nail Gun Maintenance and Troubleshooting
Just like any tool, your nail gun needs a little TLC to keep it running smoothly. Regular maintenance will prevent frustrating issues down the line.
Basic Maintenance:
- Lubrication: Pneumatic nailers typically require a few drops of specialized pneumatic tool oil in the air inlet after each use. Follow your tool’s manual.
- Cleaning: Keep the tool clean. Wipe down the exterior and periodically clean the magazine and firing nose to prevent sawdust and debris buildup.
- Check O-rings and Seals: Over time, these can wear out, causing air leaks. If you notice hissing air, this might be the culprit.
- Inspect The magazine: Ensure it’s not damaged and slides smoothly for easy nail loading.
Common Troubleshooting Tips:
Here’s a quick look at what to do if your nailer isn’t cooperating:
| Problem | Possible Cause | Solution |
|---|---|---|
| Nails not driving all the way | Low air pressure (pneumatic) | Increase PSI on the compressor. Ensure compressor is adequately sized. |
| Nails not driving all the way | Incorrect depth setting | Adjust the depth setting on the nail gun. Test on scrap wood. |
| Nails not driving all the way | Worn driving blade or internal seals | Requires professional service or replacement parts. |
| Tool firing erratically or not at all | Safety contact tip dirty or malfunctioning | Clean the contact tip. Inspect for damage. Press it firmly against the wood. |
| Tool firing erratically or not at all | Low air pressure (pneumatic) or low battery (cordless) | Check air supply or battery charge. |
| Nails jamming in the magazine | Incorrect nail collation angle or type | Ensure you are using the correct nails for your specific nail gun model. Check nail strip alignment. |
| Nails jamming in the magazine | Damaged or bent nails | Inspect the nail strip for bent nails and remove them. |
| Air leaks from the tool | Loose hose connection (pneumatic) | Securely tighten the air hose connection. |
| Air leaks from the tool | Worn O-rings or seals | May require replacing seals. Consult manual or a professional. |
Remember, always disconnect the air hose or battery before performing any maintenance or trying to clear a jam. This is the most important safety rule to avoid accidental firing.
Frequently Asked Questions (FAQ)
Q1: Do I need an air compressor for a framing nail gun?
A1: Only if you’re using a pneumatic (air-powered) framing nailer. Cordless and gas-powered framing nailers do not require a compressor, offering more portability.
Q2: What type of nails do I need for my framing nailer?
A2: You need nails that match your nail gun’s collation angle (e.g., 21-degree, 30-degree, 34-degree) and are the correct length for framing (typically 2 inches to 3.5 inches). Always check your tool’s manual for specifications.
Q3: How do I prevent the nail gun from firing accidentally?
A3: Always keep your finger off the trigger until you are ready to drive a nail. Also, ensure the safety contact tip (the part that touches the wood) is pressed firmly against the surface before squeezing the trigger. Never point the nail gun at anyone.
Q4: What’s the difference between sequential and contact actuation?
A4: Sequential actuation fires a nail only when the trigger is pulled and the safety contact tip is pressed. Contact actuation fires a nail when the tip is pressed, and then fires again each time the trigger is pulled. For framing, sequential is generally safer for beginners.
Q5: How deep should framing nails be driven?
A5: Ideally, the nail head should be slightly counters