Quick Summary:
A cordless nailer safety checklist ensures you always use your tool correctly. It covers pre-use checks, proper operation, and post-use care. Following these steps protects you and your work, making DIY projects safer and more successful.
Hey there, fellow DIY enthusiasts! Jack Shaffer here, your guide from Nailerguy! So, you’ve got a shiny new cordless nailer and a stack of projects waiting. That’s fantastic! But before you start, let’s make sure we’re talking the same language when it comes to safety. It’s easy to get excited and dive right in. However, a few simple checks can prevent accidents and ensure your nailer performs at its best. We’ll walk through everything, step-by-step, so you can build with confidence and, most importantly, with peace of mind. Ready to power up safely?
Table of Contents
Why a Cordless Nailer Safety Checklist Matters
Cordless nailers are absolute game-changers for DIYers. They offer incredible freedom without the hassle of air hoses or cords. Whether you’re framing, trim carpentry, or building a backyard fence, these tools speed things up considerably. But power tools, by their very nature, require respect and proper handling. A missed step in safety procedures can lead to injuries that are easily preventable.
Think of this checklist not as extra work, but as your essential partner for every project. It’s like a pre-flight check for your nailer – ensuring everything is in tip-top shape before you take off. We’ll cover everything from what to look for before you even pick up the tool, to how to operate it safely, and what to do when you’re done. This guide is designed to be super easy to follow, even if you’ve never used a nailer before. Let’s get started on building those skills and projects, safely!
Pre-Use Safety Checks: Before You Even Press the Trigger
This is where the magic of safe operation begins. Before you insert a battery or load nails, take a moment with your nailer. A quick scan can save a lot of trouble later. Don’t skip these steps – they are foundational for safe and effective use.
1. Inspect the Nailer Itself
Your cordless nailer is a piece of precision equipment. A thorough visual inspection is your first line of defense. Even minor damage can compromise safety.
- Housing and Casing: Look for any cracks, breaks, or excessive wear on the plastic or metal body of the nailer. If you see damage, do not use the tool. Contact the manufacturer or a certified repair shop.
- Nose Piece: Check the tip of the nailer, where the nail is driven. Ensure it’s clean, free from debris, and not bent or damaged. A damaged nose piece can misfire nails or even cause them to ricochet.
- Moving Parts: Gently test any movable parts, like the safety contact tip (the part that depresses against the workpiece). It should move freely without sticking.
- Battery Connection: If it’s a battery-powered nailer, ensure the battery compartment is clean and free from corrosion. When you attach the battery, it should click securely into place.
2. Inspect the Nails
The nails you use are just as important as the tool itself. Using the wrong type or damaged nails is a common safety hazard.
- Correct Type and Size: Always use nails specifically recommended by the nailer’s manufacturer. Check your manual! Using the wrong size or type (e.g., nails that are too long, too short, or have the wrong collation angle) can lead to jams, misfires, or the nail not driving properly. This is critical for preventing ricochets.
- Condition of Nails: Inspect the whole strip of nails before loading. Look for bent, chipped, or deformed nails. These can cause jams and damage to the tool. Discard any faulty nails.
- Collation Integrity: Ensure the nails are properly glued or papered together (their collation). If the collation is weak, nails might shift, causing jams or feeding issues.
3. Inspect the Battery
The power source for your cordless nailer is crucial. A faulty battery can be a safety risk and will certainly impact performance.
- Physical Condition: Check the battery for any cracks, leaks, or swelling. If a battery looks damaged, stop using it immediately and consult the manufacturer’s instructions for safe disposal.
- Contacts: Ensure the battery contacts and the contacts in the tool are clean and free of debris or corrosion.
- Proper Charge: Make sure the battery is adequately charged. A low battery can lead to inconsistent nail driving, which can be frustrating and potentially unsafe if nails aren’t fully seated.
4. Check Your Work Area
Safety isn’t just about the tool; it’s about your surroundings too. A cluttered or unsafe work area is an accident waiting to happen.
- Clear Obstructions: Remove any clutter, tools, materials, or debris from the immediate work area. This prevents tripping hazards and ensures you have stable footing.
- Adequate Lighting: Make sure the area is well-lit. You need to see clearly where you are placing the nailer and where the nails are going.
- Ventilation: While cordless nailers don’t produce fumes like gas-powered tools, good ventilation is always a best practice in any workshop setting, especially if you’re working with adhesives or finishes.
- Stable Work Surface: Ensure the material you are nailing into is stable and properly supported. Don’t nail into workpieces that are precariously balanced.
For more detailed insights into tool maintenance and safety, the Occupational Safety and Health Administration (OSHA) standard for power-activated safety equipment provides comprehensive guidelines that are excellent to be aware of, even for DIYers.
During Use Safety: Operating Your Cordless Nailer Responsibly
Now that your tool and workspace are ready, it’s time to talk about operating the nailer itself. These are the golden rules that keep you and your project out of harm’s way.
1. Always Wear Safety Glasses
This is non-negotiable. Not just any glasses, but ANSI Z87.1 compliant safety glasses or a full face shield. Small debris, wood splinters, or even a nail fragment can fly unexpectedly.
- Impact Resistance: Ensure your eyewear is rated for impact resistance.
- Coverage: Wear them over your regular prescription glasses if needed, or use prescription safety glasses.
- No Gaps: Make sure they fit snugly to prevent tiny debris from entering.
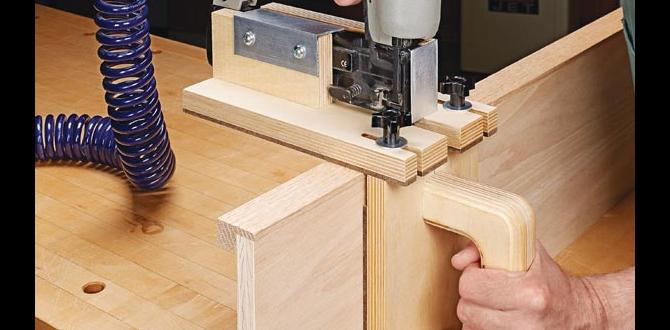
2. Secure Your Workpiece
Never hold the material you are nailing with one hand while operating the nailer with the other, especially when nailing near your hands. Use clamps or a vise to hold your workpiece securely.
- Clamps are Your Best Friend: Invest in good quality clamps. They make assembly easier and worlds safer.
- Stable Setup: Ensure the workpiece is not going to shift or bounce when you fire the nailer.
3. Understand the Firing Modes
Most cordless nailers come with two primary firing modes: Sequential (Single Sequential) and Contact (Bump Fire). Always know which mode you are in and use the appropriate one for the job.
- Sequential Mode: This is the safer mode. The nailer will only fire a nail when the safety contact tip is depressed and the trigger is pulled. This allows precise placement of each nail. It’s ideal for finish work, trim, and situations where accuracy is paramount.
- Contact Mode: In this mode, the nailer will fire a nail each time the safety contact tip is depressed, regardless of whether the trigger is pulled or held. This allows for rapid nailing but significantly increases the risk of accidental firing. Use this mode with extreme caution. It’s best suited for repetitive nailing on large framing projects where rapid nailing is needed and awareness of trigger control is high. Always ensure the tip is only pressed against the intended nailing surface.
Refer to your nailer’s manual to learn how to switch between modes – it’s often a switch near the trigger. A great resource for understanding tool operation can be found on sites like Popular Mechanics’ guides, which often break down tool functions clearly.
4. Keep Fingers Away from the Nose and Trigger
This sounds obvious, but in the heat of a project, it’s easy for instincts to take over. Always keep your trigger finger off the trigger when not actively firing a nail. Keep all other fingers and body parts away from the nose of the nailer.
- Trigger Discipline: Only place your finger on the trigger when you intend to drive a nail.
- Awareness Zone: Be mindful of where the nose of your nailer is pointing at all times.
5. Never Point the Nailer at Yourself or Others
This is paramount. A cordless nailer, even when not actively firing, can still drive a nail if the safety mechanism is compromised or accidentally engaged. Never use a nailer as a hammer or a lever, and always treat it as if it is loaded and ready to fire.
6. Nail Straight into the Material
Aim the nose of the nailer squarely against the surface where you want the nail to go. Firing at an angle increases the risk of the nail bending, not seating properly, or ricocheting off the workpiece or out the side.
- Maintain a 90-Degree Angle: For best results and safety, keep the nailer perpendicular to the surface.
- Avoid Edges and Corners: Be extra cautious when nearing the edges of your material. Nails driven too close to an edge or corner can split the wood or, worse, cause the nail to exit the workpiece unexpectedly.
7. Listen to Your Nailer
Pay attention to any unusual sounds. Grinding noises, excessive vibration, or a weak firing sound could indicate a problem. If something doesn’t sound right, stop immediately and investigate. It might be a jam, a low battery, or a more serious issue.
8. Avoid Over-Driving Nails
Ensure nails are driven enough to be flush or slightly countersunk as desired, but not so deep that they severely damage the wood or break the surface tension too much. Over-driving can weaken the joint. Most nailers have depth adjustment settings. Learn how to use them. An independent review site like ToolReviews.com (ensure to check for reputable tool review sites once published) often has articles on adjusting depth settings for different nailer types.
9. Battery Management
Keep spare batteries charged and ready, but don’t leave them fully charged for extended periods if they are not in use, as this can degrade battery life. Also, allow batteries to cool down if they get hot during use before recharging.
Troubleshooting and Jams: Safety First!
Jams happen. Even with the best practices, a nail can get stuck. The key is to clear them safely. Never try to force a jam or dislodge a nail with your fingers.
1. Disconnect Power
The very first step, every single time, is to remove the power source. For cordless nailers, this means removing the battery immediately.
2. Access the Magazine
Most nailers have a way to open the magazine (where the nails feed). This might be a latch or a sliding mechanism. Consult your manual if you’re unsure.
3. Gently Remove Obstruction
- Use Pliers or Pliers-like Tools: Use a pair of needle-nose pliers or a similar tool to carefully grip and remove the jammed nail.
- Avoid Force: Never use excessive force. If the nail is truly stuck, the nailer might require professional service.
- Check for Alignment: Once the jam is cleared, ensure the nail channel is clear and the magazine is properly reassembled.
4. Reconnect Power and Test
Once the jam is cleared and the nailer reassembled, reinsert the battery. If your nailer has a mode selector or depth adjustment, ensure they are set correctly. Do a test fire (away from your work and yourself) to confirm it’s operating correctly.
Post-Use Safety: Putting it Away Properly
Your work is done, but your safety responsibilities aren’t quite over. Proper storage and upkeep ensure your nailer remains safe and reliable for the next project.
1. Remove Battery
Always remove the battery when the nailer is not in use for an extended period, or when storing it. This prevents accidental firing and conserves battery power.
2. Clean the Tool
Wipe down your nailer with a clean, dry cloth to remove dust and debris. Pay attention to the nose piece and the magazine area.
3. Store Safely
- Cool, Dry Place: Store your nailer in a cool, dry environment, away from extreme temperatures or moisture.
- Original Case: If you have the original case, use it! It offers protection and organization.
- Out of Reach: Store it where children and unauthorized individuals cannot access it.
4. Battery Storage
Store batteries according to the manufacturer’s recommendations. Generally, this means in a cool, dry place and not in extreme temperatures. Avoid storing them in direct sunlight or near heat sources.
Cordless Vs. Other Nailer Types: A Quick Comparison
Understanding the differences helps appreciate the safety nuances of cordless nailers.
| Nailer Type | Power Source | Pros | Cons | Safety Considerations |
|---|---|---|---|---|
| Cordless (Battery) | Rechargeable Battery | Extremely portable, no cords/hoses, quick setup, versatile. | Battery life/charge time can be limiting, heavier than pneumatic, initial cost can be high. | Battery integrity, trigger discipline, safety contact tip use. |
| Pneumatic (Air) | Air Compressor & Hose | Lightweight tool, powerful, consistent firing, generally lower tool cost. | Requires compressor and hose (limits mobility), slower setup/takedown, hose can be a tripping hazard. | Hose management, air pressure settings, trigger discipline. |
| Gas Powder-Actuated | Fuel Cell & Battery | Extremely portable, very powerful, can drive into tough materials like concrete. | Fumes from fuel cell, requires fuel cells and batteries, higher maintenance. | Fumes, exhaust port safety, exhaust can be hot. |
A well-maintained air compressor system is also crucial for pneumatic nailers. Resources on proper compressor maintenance can be found on sites dedicated to workshop equipment, similar to those found on Family Handyman for home shop advice.
Common Beginner Mistakes to Avoid
We all start somewhere! Here are some common pitfalls beginners encounter with cordless nailers, and how to sidestep them:
- Not Reading the Manual: Every nailer is slightly different. The manual is your first and best resource for specific safety and operating instructions.
- Using the Wrong Nails: As mentioned, this is a big one. Always match nails to your tool.
- Skipping Safety Gear: Safety glasses are a must. Gloves and hearing protection are also highly recommended, especially for extended use.
- Holding Workpiece While Nailing: Clamp it down! Your safety is worth more than a few extra seconds to find a clamp.
- Improper Firing Mode Use: Understanding and correctly using sequential vs. contact mode is crucial for safety and control.
- Rushing the Process: Take your time, especially when learning. Rushing leads to mistakes and potential accidents.
- Nailing Too Close to Edges: This can split wood and lead to unexpected nail exit. Plan your nail placement carefully.
Frequently Asked Questions (FAQ)
Q1: What is the most important safety rule when using a cordless nailer?
The most crucial rule is to always wear ANSI Z87.1 compliant safety glasses. Second only to that is to never point the nailer at yourself or others and to always remove the battery before performing any maintenance or clearing jams.