Quick Summary
Easily unjam your nail gun by following these crucial safety steps: disconnect power, remove the magazine, and carefully clear the jam with pliers, avoiding forceful prying. This guide ensures you can resume your project quickly and safely.
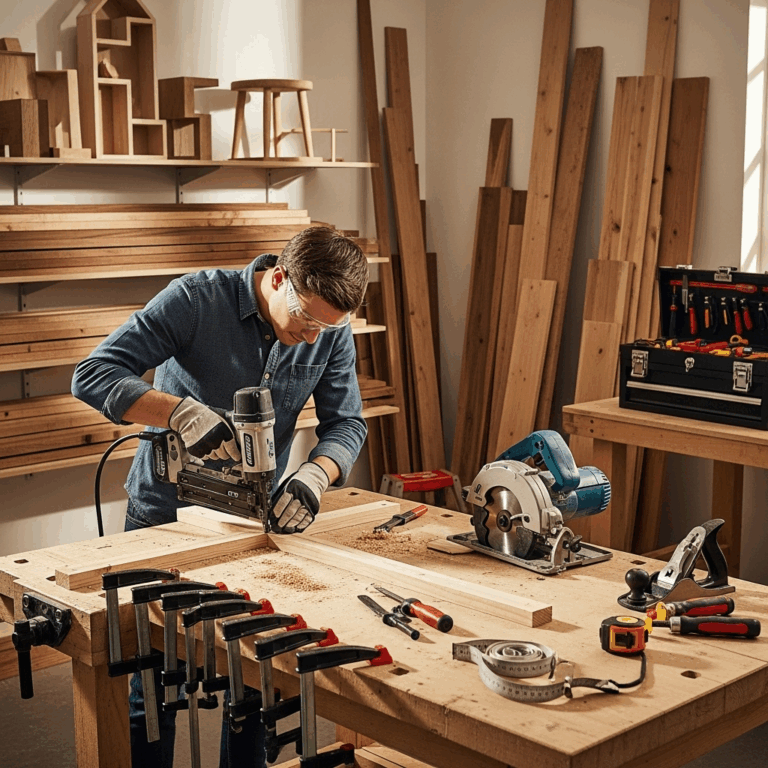
Hey there, fellow DIYers and woodworking fans! Jack Shaffer here from Nailerguy. We’ve all been there, right? You’re in the zone, building that awesome deck or framing up a wall, and BAM! Your nail gun jams. It’s frustrating, breaks your workflow, and can even be a little scary if you don’t know what you’re doing. But don’t worry, a jammed nail gun is usually a simple fix. This guide will walk you through how to safely unjam your nail gun, step-by-step, so you can get back to what you love doing without any hassle or risk. We’ll cover everything you need to know to handle this common issue like a pro.
Table of Contents
Why Do Nail Guns Jam?
Nail guns are incredible tools that make woodworking and construction tasks so much faster. However, like any mechanical gadget, they can sometimes get a bit stubborn. Understanding why they jam is the first step to preventing them and fixing them when they happen. Most jams aren’t a sign of a broken tool, but rather a small hiccup in the feeding or firing mechanism.
The most common culprits behind a nail gun jam include:
- Improper Fasteners: Using nails that are too long, too short, or the wrong gauge for your specific nailer is a prime reason for jams. They might not feed correctly or could bend and get stuck. Always check your nail gun’s manual for the recommended fastener size and type.
- Low Air Pressure (for pneumatic nailers): If your air compressor isn’t supplying enough pressure, the nail might not be driven all the way, leading to jams. Ensure your compressor is set to the manufacturer’s recommended PSI for your tool. Here’s a great guide on compressor PSI that might help.
- Dust and Debris: Over time, dust, wood chips, and other debris can build up inside the nailer’s magazine and firing chamber. This gunk can obstruct the nail feeder or the driver blade, causing misfires and jams.
- Worn Internal Parts: While less common for new tools, older nail guns might have internal parts like springs or seals that are worn out. This can affect the nail feeding mechanism.
- Holding the Trigger Incorrectly: Some nail guns have safety features that require specific trigger pulls or sequences. Accidental trigger presses or not holding it down long enough can sometimes lead to a jam.
- Impact on the Tool: Dropping the nail gun or hitting it hard can misalign internal components, leading to jams.
Safety First! The Golden Rules of Unjamming
Before we even think about poking anything into that nail gun, we need to talk about safety. A nail gun, even when jammed, is still a potentially dangerous tool. It stores pressure (either air or from a battery/spring) and has a powerful firing mechanism. Treat it with respect, and always follow these safety rules. This is non-negotiable when you’re learning how to safely unjam a stuck nail gun.
Here are the absolute must-do safety steps:
- Disconnect Power IMMEDIATELY: This is the most critical step.
- For Pneumatic Nailers: Disconnect the air hose from the compressor. Do not rely on just turning off the compressor; the hose itself can still hold residual pressure.
- For Cordless/Battery-Powered Nailers: Remove the battery pack. This completely cuts off the power supply to the tool’s motor and firing mechanism.
- For Electric Nailers: Unplug the power cord from the electrical outlet.
- Never Point the Nail Gun at Yourself or Others: Even with the power disconnected, habit is a powerful thing. Always be mindful of where the nose of the nail gun is pointed.
- Keep Fingers Away from the Trigger: Don’t rest your finger on the trigger while working on the jam.
- Wear Safety Glasses: Even when the tool is powered down, flying debris or spring-loaded parts can still be a hazard. Always wear sturdy safety glasses or goggles.
- Work in a Well-Lit Area: Make sure you can clearly see what you are doing.
Following these safety steps is paramount. They prevent accidental firing, which could cause serious injury, and ensure that you can work on the jam without further incident. Remember, taking an extra minute to ensure safety is always worth it.
Step-by-Step Guide: How to Safely Unjam Your Nail Gun
Now that we’ve got the safety handshake down, let’s get down to business. Unjamming a nail gun is typically a straightforward process. The key is to be gentle and methodical. Don’t force anything, as this can cause more damage to your tool. We’ll break it down into simple, actionable steps.
Step 1: Power Down and Disconnect
This is the repeat of our most important safety rule, but it’s worth saying again. Ensure your nail gun is completely de-energized.
- Pneumatic: Unscrew the air hose from the compressor and then from the nailer. Bleed off any remaining air by pressing the trigger while the hose is disconnected.
- Cordless: Eject the battery pack.
- Electric: Unplug the power cord.
Double-check that the power source is indeed disconnected and that there’s no residual charge or pressure that could cause the tool to fire.
Step 2: Remove the Nail Magazine
The nail magazine (or feeder) is where your nails are stored. Most nail guns allow you to easily open or detach this. This step is crucial because it removes the fuel source of the jam – the nails themselves.
Look for a latch, slide, or release button on the side or back of the magazine. Consult your nail gun’s manual if you’re unsure how to open it. Be careful; there might still be nails loaded inside.
- Gently slide or tilt the magazine open.
- If nails are loaded, carefully remove any loose nails. Be mindful that they could slide out unexpectedly.
Step 3: Inspect the Jammed Area
With the power off and the magazine open, it’s time to take a close look. The jam usually occurs right where the nails feed into the barrel and where the driver blade operates.
You’ll want to look for:
- Bent Nails: A nail that’s bent or jammed at an angle is a common cause.
- Mis-fed Nails: A nail that isn’t lined up correctly in the feed track.
- Debris: Small wood chips or dust preventing smooth operation.
Use a flashlight if needed to get a clear view. Don’t push too hard or try to force anything at this stage. We’re just observing.
Step 4: Carefully Remove the Obstruction
This is where you’ll physically remove the offending nail or debris. The tool you use here matters.
Recommended Tools:
- Needle-nose Pliers: These are your best friend for gripping and pulling out stubborn nails. Their fine tips allow for precise maneuvering.
- Tweezers: Useful for picking out small pieces of debris.
- Gloves: Protect your hands from getting pricked by nail heads or sharp edges.
What to Avoid:
- Sharp Objects (Screwdrivers, Knives): While tempting, these can scratch or damage the internal components of your nail gun. It’s easy to slip and cause more harm than good.
- Excessive Force: If a nail isn’t coming out easily, don’t yank it with all your might. This can bend the nail further, damage the tool, or even break a component.
Take your time. Gently grip the nail head or the jammed object with your pliers and try to pull it straight out. Wiggling it slightly might help, but avoid aggressive manipulation. If it’s a piece of wood debris, try to pick it out carefully with tweezers. You can also try tipping the nailer and tapping it gently with the palm of your hand to dislodge small particles.
Step 5: Reassemble and Test
Once you’ve successfully removed the cause of the jam and ensured the feeding mechanism is clear, it’s time to reassemble and test your nail gun.
- Close the Magazine: Carefully close the nail magazine, making sure no nails are pinched or misaligned.
- Reload Nails: Load the correct type and gauge of nails into the magazine. Make sure they are seated properly.
- Reconnect Power:
- Pneumatic: Reconnect the air hose. Ensure your compressor is on and at the correct pressure.
- Cordless: Reinsert the battery pack.
- Electric: Plug the power cord back in.
- Test Fire (Safely!): Find a scrap piece of wood. Position the nail gun firmly against the wood. Point it AWAY from yourself and any other people or animals. Hold the trigger down. The nail gun should fire.
If it fires correctly, congratulations! You’ve safely and successfully unjammed your nail gun.
Troubleshooting Persistent Jams
What if the simple steps above don’t solve the problem? Don’t panic! A persistent jam usually means there’s something a bit more stubborn at play. Here are a few more things to check:
Check the Nosepiece/Contact Trip
Many nail guns have a safety tip or contact trip mechanism at the nose. This needs to be depressed (pressed against the surface) for the nail gun to fire. Sometimes, debris can get lodged here, preventing it from engaging properly, or a bent nail might be stuck preventing it from retracting.
How to Check:
- With power still disconnected, firmly press the nose of the nail gun against a solid surface (like your workbench). You should feel or see this tip retract slightly.
- If it feels stuck or doesn’t move freely, inspect it closely for any obstructions. You might be able to gently pry out any visible debris with tweezers or careful use of your needle-nose pliers.
- Some models allow for easier access to clean this area by releasing a lock or removing a small plate. Again, check your manual.
Inspect the Driver Blade
The driver blade is the part that actually strikes and drives the nail. If a nail jams and you try to force things, the driver blade itself could be bent or jammed.
How to Check:
- With the power disconnected and the magazine empty, you can usually see the driver blade at the top of the barrel, inside the firing chamber.
- Carefully try to push it up and down (it should move freely, and usually retract against a spring). If it’s stuck or bent, this is a more serious issue.
- If the driver blade appears bent or damaged, you might need to seek professional repair or consider replacing the tool. Attempting to fix a bent driver blade yourself can void warranties and lead to further damage.
Clean Your Nail Gun Regularly
Prevention is key! Regularly cleaning your nail gun will significantly reduce the chances of jams.
Tips for Cleaning:
- After Each Use (or periodically): Wipe down the exterior of the tool with a damp cloth.
- Magazine Cleaning: Open the magazine and use a dry cloth or a small brush to remove dust and debris.
- Lubrication (Pneumatic): For air-powered nail guns, a drop or two of specialized nailer oil in the air inlet fitting before connecting the air hose is often recommended. Check your manual for specific lubrication instructions. Many cordless models do not require user lubrication.
- Deep Cleaning: For a more thorough clean, you might need to consult your manual on how to safely access and clean the internal piston and driver blade area. Always do this with the power disconnected.
Regular maintenance is often overlooked, but it’s essential for keeping your tools in top working order and preventing frustrating jams.
Types of Nail Guns and Jamming Nuances
While the basic principles of unjamming apply to most nail guns, different types can have slightly different characteristics that might influence a jam or its fix. Understanding these nuances can be helpful.
Pneumatic Nail Guns
These are powered by an air compressor. Jams are often related to air pressure issues, leaks in the air line, or dirty air.
Table 1: Pneumatic Nail Gun Jam Causes & Solutions
| Common Cause | Troubleshooting Action | Additional Notes |
|---|---|---|
| Low Air Pressure | Check compressor PSI setting; ensure compressor is adequate for the tool. | Nails might not drive fully, leading to jams. |
| Air Leaks | Inspect hoses and connections for audible leaks. | Weak air delivery can cause feeding issues. |
| Dirty Air Filter | Clean or replace the air compressor’s filter. | Contaminants can enter the tool. |
| Overtightened Hose Fitting | Ensure the air hose fitting isn’t crimped or damaged. | Can restrict air flow. |
Cordless/Battery-Powered Nail Guns
These offer portability. Their jams are typically mechanical, similar to pneumatics, but less commonly related to power supply beyond a depleted battery.
Table 2: Cordless Nail Gun Jam Causes & Solutions
| Common Cause | Troubleshooting Action | Additional Notes |
|---|---|---|
| Battery Not Fully Seated | Remove and reinsert the battery pack firmly. | Tool may not have enough power to fully drive nails. |
| Internal Mechanism Wear | Inspect for visible damage; consult manual for basic maintenance. | More likely on older tools. |
| Overheating | Allow the tool to cool down if it feels excessively hot. | Some tools have thermal cut-offs. |
Electric Nail Guns
Similar to cordless, but tied to a power outlet. Jams are primarily mechanical.
- Power Supply Issues: Ensure the outlet is working and the cord isn’t damaged.
- Internal Motor/Mechanism: Like other types, could have wear or debris issues.
Brad Nailers vs. Framing Nailers
Brad nailers use very thin, small nails. They are more prone to jams from bent brads due to their delicate nature. The fix is usually gentle extraction of a bent brad.
Framing nailers use larger, thicker nails. Jams here might be from larger debris, more forceful bending of nails, or issues with the magazine feeder mechanism designed for heavier fasteners.
Regardless of the type, the fundamental safety and unjamming procedure remains the same: disconnect power, clear the obstruction carefully, and reassemble.
When to Call a Professional or Seek Further Help
While most nail gun jams are user-fixable, there are times when you should put down the pliers and seek expert assistance. Don’t be afraid to admit when a problem is beyond your comfort zone — it’s part of being a smart DIYer.
You should consider calling a professional tool repair service or contacting the manufacturer if:
- The Driver Blade is Bent or Damaged: As mentioned, this is a critical component. Trying to fix it yourself could lead to more damage or unsafe operation.
- Internal Components Feel Stuck: If you’ve removed all visible nails and debris, but the mechanism still feels seized or won’t cycle, there may be an internal issue.
- The Nail Gun Continues to Jam After Multiple Attempts: If you’ve followed all the steps and the problem persists, it indicates a deeper issue that might require specialized tools or knowledge.
- You Are Uncomfortable or Unsure: Safety is paramount. If at any point you feel unsafe or are unsure of what you’re doing, stop. It’s better to pay for a