Quick Summary: Safely loading nails into your nail gun prevents jams and ensures secure fastening for your DIY projects. This guide walks you through the simple, essential steps for confidence and safety every time you reload. Keep your tools ready and your projects moving smoothly!
Hey there, fellow DIYers! Jack Shaffer, your Nailerguy, here. Ever found yourself staring at your newly acquired nail gun, a bit unsure about the whole “loading nails” thing? It’s a common feeling, especially when you’re just starting out. You want to get that project done, but you also want to do it right and, most importantly, safely. The good news is that loading a nail gun is quite straightforward once you know the process. We’ll cover every little detail to make sure you feel totally confident before you even press the trigger. This isn’t just about getting nails into your tool; it’s about doing it the smart, safe way. Stick with me, and by the end of this guide, you’ll be a nail-loading pro!
Table of Contents
Why Safe Nail Loading Matters
Loading nails into your nail gun might seem like a minor step, but it’s crucial for several reasons. First and foremost, it’s about your personal safety. An improperly loaded nail gun could accidentally fire, even when you’re not intending to shoot a nail. This is incredibly dangerous and can lead to serious injuries. Think about it: you’re holding a tool designed to drive metal fasteners, so any accidental discharge needs to be avoided at all costs.
Beyond safety, correctly loading your nail gun ensures optimal performance. If nails aren’t seated properly, you’re more likely to experience jams. Nail gun jams are frustrating, they slow down your work, and they can sometimes damage your tool if not cleared correctly. By understanding and practicing safe loading procedures, you minimize these risks, ensuring your nailer works efficiently and reliably project after project. It’s about respecting the tool and the work you’re doing.
Understanding Your Nail Gun’s Magazine
Before we get to the actual loading process, let’s take a quick look at the part of your nail gun that holds the nails: the magazine. Most nail guns have a magazine that’s essentially a long slot or channel where the nails are stored and fed into the firing mechanism.
The magazine usually has a spring-loaded follower that pushes the nails forward. You’ll often find a lock or latch mechanism to open the magazine for loading. Some magazines are straight, while others might be angled to accommodate different nail collations (the way nails are held together, like paper, plastic, or wire). Knowing your specific nail gun’s magazine is the first step to loading it correctly. Referencing your tool’s manual is always a great idea, as each model can have slight variations.
Essential Safety Precautions Before Loading
Safety is paramount when working with any power tool, and nail guns are no exception. Before you even think about touching a nail or opening the magazine, make sure you’ve taken these vital steps:
- Disconnect the Power Source: This is the absolute golden rule. For air-powered nailers, this means disconnecting the air hose. For cordless electric or battery-powered nailers, ensure the battery is removed or disconnected. This prevents any accidental firing.
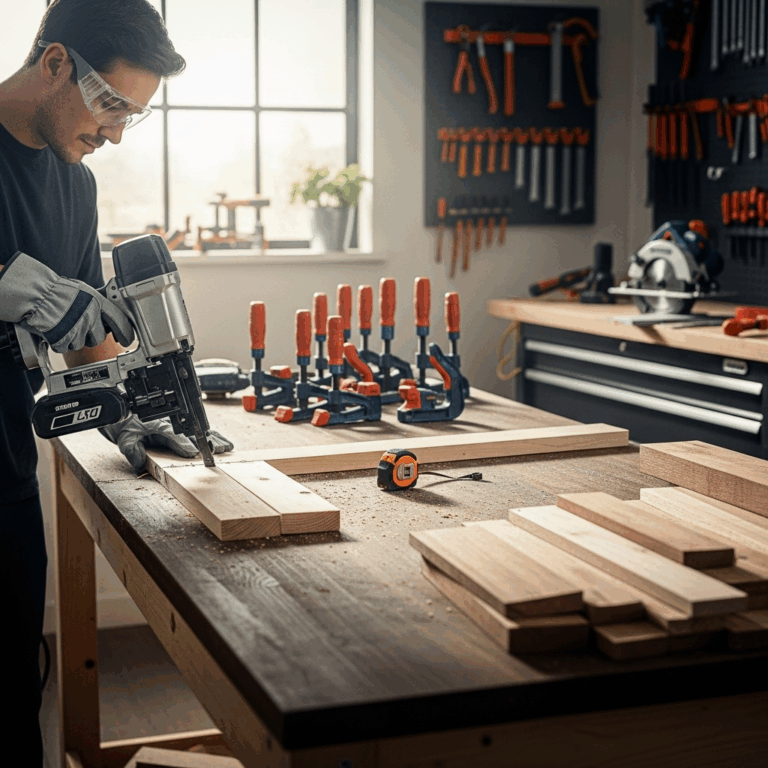
- Wear Safety Glasses: Always protect your eyes. Small metal pieces or debris can fly off unexpectedly. Good quality safety glasses are non-negotiable.
- Familiarize Yourself with Your Nailer’s Safety Features: Most nail guns have a safety contact tip or trigger mechanism that requires the tip to be pressed against a surface before it will fire. Understand how this works on your specific model.
- Understand the Nail Type: Make sure you are using the correct type and size of nails for your nail gun. Using the wrong nails can cause jams and damage the tool. Check your nail gun’s manual for specifications.
- Work in a Clear Area: Ensure your workspace is free from clutter and distractions. This helps you focus on the task at hand and reduces the chance of accidents.
Step-by-Step Guide: Loading Nails
Alright, let’s get down to business. Loading your nail gun is a simple process, but doing it step-by-step ensures you don’t miss anything important. Remember to follow the safety precautions we just discussed before starting these steps.
Step 1: Disconnect the Power Source
I can’t stress this enough. For pneumatic (air) nailers, disconnect the air hose. For cordless models, remove the battery pack. This is your primary safety barrier. Make sure the tool is completely de-energized before proceeding.
Step 2: Open the Nail Magazine
Locate the mechanism that opens the nail magazine. This is usually a latch, lever, or a sliding part. You’ll need to gently pull it away or slide it to open the magazine. Some magazines might hinge open, while others may slide off.
Refer to your nail gun’s manual if you’re unsure about how to operate this mechanism. The goal is to reveal the interior channel where the nails will sit.
Step 3: Insert the Nails
Now, take your collated nails (the nails held together in strips or frames). Notice the way the nails are presented in the strip – usually one side of the nail head is slightly higher or angled. This orientation is important for proper feeding.
Place the strip of nails into the open magazine. The nails should slide smoothly into the channel. Make sure the nail heads are oriented correctly according to your nail gun’s design. Most nail guns are designed to only accept nails in one specific orientation.
Tip: If using paper collated nails, be careful not to bend or damage the paper strip, as this can cause feeding issues.
Step 4: Engage the Follower and Close the Magazine
Once the nails are in place, you’ll need to push the spring-loaded follower forward to press against the nails. This follower is what keeps the nails pushed towards the nose of the nail gun, ready to be fired. You might need to pull the follower back slightly to get the nails seated, then let it gently spring forward.
After the follower is engaged, carefully close the magazine. This usually involves sliding the open part back into place or closing the hinged section until it latches securely. You should hear or feel a click when it’s properly closed and locked. Ensure there are no gaps or loose parts.
Step 5: Reconnect the Power Source and Test Fire
With the magazine securely loaded and closed, you can now reconnect your power source – reattach the air hose or reinsert the battery pack.
Before you start your project, it’s a good practice to test fire the nail gun. Point the nail gun in a safe direction (away from yourself and others, and not at a hard surface where the nail could ricochet). Press the safety contact tip firmly against a piece of scrap wood and pull the trigger. You should hear the nail gun fire and drive a nail. This confirms that the nails are loaded correctly and the tool is functioning as expected. If it doesn’t fire, or if you hear odd noises, disconnect the power again and recheck your loading steps.
Types of Nail Guns and Loading Differences
While the core principles of safe loading remain the same, there can be slight variations depending on the type of nail gun you’re using. Here’s a quick look:
Pneumatic (Air-Powered) Nail Guns
These are powered by compressed air from a compressor. The loading process is generally like what we’ve described: disconnect the air hose, open the magazine, load nails, close the magazine, and reconnect the air hose. They are known for their power and speed but require an air compressor and hose.
Cordless Electric Nail Guns (Battery-Powered)
These run on rechargeable batteries, offering great portability. Loading involves removing the battery pack, opening the magazine, inserting nails, closing it, and then reinserting the battery. The mechanism might be slightly different for opening the magazine depending on the brand.
Gas/Fuel Cell Nail Guns
These use a combination of a fuel cell (like propane) and a battery. Loading the nails is similar to other types: open magazine, load nails, close magazine. However, always ensure the battery is out and the tool is not armed when loading. These require cartridge refills for the fuel cell.
Regardless of the power source, the fundamental steps of disconnecting power, careful loading, and testing remain constant for safety and functionality.
Common Nail Loading Mistakes and How to Avoid Them
Even with clear instructions, beginners can sometimes run into a few snags. Here are common mistakes to watch out for and how to easily sidestep them:
- Loading the Wrong Type of Nails: This is a big one. Using nails that are too long, too short, have the wrong shank diameter, or the wrong collation type is a recipe for jams and potential tool damage. Always check your nail gun’s manual.
- Not Disconnecting Power: Seriously, don’t skip this. Accidentally firing the nailer while loading is dangerous and can cause injury. Make it a habit: disconnect, load, reconnect, test fire.
- Overfilling the Magazine: While you want a good strip of nails, trying to cram too many in can strain the follower and spring, and even prevent the magazine from closing properly. Load a standard strip as intended.
- Improper Nail Orientation: Nails need to feed correctly into the firing chamber. If you load them backward or upside down, they won’t feed properly, leading to misfires or jams. Pay attention to how the nails sit in the magazine.
- Forcing the Magazine Shut: If the magazine doesn’t close easily, don’t force it. Something is likely wrong – either the nails are misaligned, the follower isn’t seated, or there’s debris in the track. Recheck your work.
- Not Testing After Loading: A quick test fire ensures everything is seated correctly and the gun is ready. Skipping this step means you might only discover a problem mid-project.
Troubleshooting Common Nail Loading Issues
What if things don’t go perfectly? Don’t panic! Most nail loading issues are fixable. Here’s how to tackle them:
Nails Won’t Feed
Cause: Incorrect nail type, improper orientation, debris in the magazine, or the spring follower isn’t pushing effectively.
Solution: Disconnect power. Empty the magazine. Ensure you have the correct nails, loaded in the proper orientation. Check the magazine for any debris and clean it out. Inspect the follower and spring mechanism for damage. Reload carefully.
Magazine Won’t Close or Latch
Cause: Nails are sticking out too far, the follower is not fully engaged, or there is an obstruction.
Solution: Disconnect power. Ensure all nails are seated properly within the magazine and follower. Gently push the follower forward to make sure it’s snug against the nails. Check for any foreign objects preventing closure. Reload and try closing again.
Nail Gun Fires But No Nail Comes Out (Dry Fire)
Cause: This typically means the nail gun is loaded, but the nails aren’t feeding into the chamber correctly, or the pusher mechanism isn’t functioning right. It could also be that you’ve run out of nails and a false ‘empty’ click happened earlier.
Solution: Disconnect power. Open the magazine and inspect the nail strip. Are there any bent nails or damaged collations? Is the magazine empty? Realign or replace the nail strip. Ensure the follower is engaging the nails properly. Reload and test.
Nails Are Jammed
Cause: Most often caused by using incorrect nails, bent nails, or improper loading that causes nails to misalign in the feed chute.
Solution: Disconnect power IMMEDIATELY. Refer to your nail gun’s manual for specific instructions on how to clear a jam. This usually involves opening the magazine, sometimes removing a nose piece, and carefully extracting the jammed nails with pliers. Never force it.
Best Practices for Nail Gun Maintenance
Keeping your nail gun in good working order not only ensures it performs well but also contributes to safe operation. A well-maintained tool is a safer tool.
- Clean Your Nail Gun Regularly: Dust, sawdust, and debris can build up inside the magazine and firing mechanism. Periodically wipe down the exterior and use compressed air (if pneumatic) or a dry cloth to clean accessible internal parts.
- Lubricate When Recommended: Air-powered nailers often require a few drops of specialized pneumatic tool oil in the air inlet before each use. Consult your manual for the correct type and frequency of lubrication. Battery-powered tools usually require less maintenance.
- Inspect for Damage: Before and after use, quickly check the nail gun for any visible cracks, loose parts, or worn components. Pay attention to the safety contact tip and the magazine.
- Store Properly: When not in use, store your nail gun in a clean, dry place, ideally in its carrying case. Ensure the battery is removed from cordless models while in storage.
- Use the Right Consumables: Always use the manufacturer-recommended nails and air pressure (for pneumatic tools). Using sub-par or incorrect consumables puts undue stress on the tool.
Understanding Nail Gun Specifications & Nail Collations
Choosing the right nail gun for your project and then loading it with the correct nails is a significant part of the process. It’s worth a moment to delve into what this means.
Nail Gun Types vs. Nail Usage
Different nail guns are designed for different tasks and use specific types of nails, known as “collations.” Understanding these collations ensures you buy the right nails for your gun.
Here’s a quick overview:
| Nail Gun Type | Common Nail Collation in Magazine | Typical Gauge (Diameter) | Typical Use |
|---|---|---|---|
| Brad Nailer (e.g., 18-gauge) | Thin, often glued strips | 18 (thin and small head) | Trim work, small moldings, delicate projects |
| Finish Nailer (e.g., 15 or 16-gauge) | Slightly thicker, glued strips | 15 or 16 (thinner than common nails) | Baseboards, crown molding, furniture building |
| Framing Nailer (e.g., 2-inch or 3-inch) | Various: Paper-collated, plastic-collated, wire-collated | 8–12 (thick, strong nails) | House framing, decks, fences, heavy-duty construction |
| Roofing Nailer | Coated wire or plastic collation | 11–13 (large heads for shingles) | Attaching shingles to roof decks |
| Detail Nailer | Very thin, often glued strips | 23 (almost pin-like) | Picture framing, very delicate trim |
Always confirm your nail gun’s specifications in its manual for the exact gauge, length, and collation type it accepts. Forcing the wrong nails can damage the tool and cause dangerous jams, as mentioned in our troubleshooting section.
Understanding Nail Head Types
Nails also come with different head types, which can affect how they look and perform:
- Flat Head: The most common. Sits flush or slightly above the surface. Standard for most framing and construction.
- Brad Head (or Straight Brad): Very small heads found on brad nails. Designed to be nearly invisible and easy to conceal with putty.
- Casing Head: Slightly larger than a brad head, but still designed for minimal visibility. Commonly used in finish carpentry.
- Duofast Head: A specific type of head used in some collations; consult your tool’s manual.
The collation method (how nails are joined) is also important: paper, plastic, or wire. Each has pros and cons regarding holding strength, susceptibility to weather, and how cleanly they break away during firing. Your nail gun is designed for a specific collation type; using another can lead to jams.
Links for Further Learning
For those who like to dig a little deeper, here are some excellent resources that offer reliable information on tool safety and best practices:
- The Occupational Safety and Health Administration (OSHA) provides extensive regulations and guidelines for construction safety, including the use of pneumatic tools. You can find their resources at OSHA.gov.
- Many tool manufacturers offer detailed user manuals and safety videos for their specific nail gun models. If you know your tool’s brand (e.g., DeWalt, Milwaukee, Paslode, Bostitch), a quick search on their official website will yield valuable information.
- Reputable DIY and woodworking forums often have sections dedicated to specific tools where experienced users