Build a rustic wooden garden fence yourself with this guide! It’s an achievable DIY project for beginners, giving your garden charm and defining your space. We’ll cover planning, materials, and step-by-step instructions to help you get it done right.
Thinking about adding a beautiful, rustic wooden fence to your garden? It’s a great way to enhance your outdoor space, offering privacy and a touch of classic charm. Many homeowners feel a bit daunted by the idea of building their own fence, worrying about complicated steps or needing professional tools. But guess what? With the right information and a little patience, this is a totally doable DIY project for beginners!
Imagine strolling through your garden, framed by a sturdy, beautiful wooden fence you built with your own hands. It’s not just about aesthetics; it adds definition, security, and can even increase your home’s appeal. This guide is designed to break down every step, from picking your lumber to putting in the very last post. We’ll cover the essential tools, materials, and techniques to make your rustic wooden garden fence DIY project a success. Ready to get started? Let’s dig in!
Table of Contents
Rustic Wooden Garden Fence DIY Project: Your Essential Guide
Hey there, DIYers! Jack Shaffer here, your go-to guy for all things woodworking and nailing. Building things with your own hands is incredibly rewarding, and a rustic wooden garden fence is a fantastic project to tackle. It’s more than just a boundary; it’s a statement piece for your yard. Whether you’re adding character to a flower bed, defining a vegetable patch, or just want that classic country look, this guide is for you.
We’ll walk through everything you need to know to build a sturdy and charming rustic fence. No fancy jargon, just clear, simple steps that make sense. My goal is to help you feel confident and equipped to create a fence you’ll be proud of for years to come. Let’s get our hands dirty and build something amazing!
Why Choose a Rustic Wooden Garden Fence for Your DIY Project?
A rustic wooden garden fence brings a unique charm that many other fencing materials just can’t match. It blends seamlessly with nature, giving your garden a timeless, earthy feel. Here’s why it’s a top choice for DIYers:
- Aesthetic Appeal: The natural beauty of wood adds warmth and character to any garden. It complements a wide range of garden styles, from cottage to modern farmhouse.
- Versatility: You can customize the height, style, and type of wood to perfectly suit your needs and aesthetic.
- Cost-Effectiveness: Compared to professionally installed fences or some other materials, a DIY wooden fence can be a more budget-friendly option, especially if you plan and source your materials wisely.
- Sense of Accomplishment: There’s a huge satisfaction that comes with building something functional and beautiful with your own hands.
- Environmental Friendliness: Wood is a renewable resource, and natural wood fences are generally more environmentally sound than plastic or metal alternatives.
Planning Your Rustic Wooden Garden Fence Project
Before you even think about picking up a hammer or a nailer, good planning is key. This is where you set yourself up for success and avoid headaches down the road. Let’s run through the essential planning steps.
Step 1: Define Your Fence’s Purpose and Style
What do you want your fence to do? Is it purely decorative? Does it need to keep pets in or out? Is it for privacy? The purpose will influence the height, style, and sturdiness you need. For a “rustic” look, think about:
- Palings: These are the vertical boards. You can use rough-sawn lumber, reclaimed wood, or even branches for a truly rustic feel.
- Post Tops: Square-cut tops are simple, but you can also get creative with decorative cuts like diamond tops or pointed tops.
- Spacing: Tighter spacing offers more privacy and security. Wider spacing can be more decorative and let more light through.
- Stain/Finish: Will you leave the wood to weather naturally, or will you apply a stain or sealer?
For a classic rustic vibe, we’ll focus on a simple but sturdy design with vertical boards on a solid frame. This is easy for beginners and looks fantastic.
Step 2: Check Local Regulations and Property Lines
This is super important! Before you dig one hole, make sure you know exactly where your property lines are. You don’t want to build a fence that encroaches on your neighbor’s yard. Contact your local municipality or county planning department. They can provide guidelines on:
- Permit requirements (some areas require permits for fences over a certain height).
- Setback requirements (how far the fence must be from property lines or public sidewalks).
- Height restrictions.
- Any rules about the “finished” side of the fence facing out.
It’s also a good idea to have a friendly chat with your neighbors about your plans. Everyone likes to be informed, and it can prevent misunderstandings.
Step 3: Design and Measure
Sketch out your fence design. How long will it be? Where will the gate(s) go? Measure the total length of the fence line carefully. This will help you calculate the materials you’ll need.
Consider the spacing between your posts. Typically, fence posts are spaced 6 to 8 feet apart for standard fencing. For a rustic garden fence, you might opt for 6-foot spacing for maximum stability without adding unnecessary material. A common fence height for gardens is 4 to 6 feet.
Step 4: Material Calculation (We’ll detail this more later!)
Based on your measurements and design, you’ll need to estimate:
- Number of fence posts.
- Length of rails (horizontal pieces connecting posts).
- Number and size of pickets (vertical boards).
- Gravel and concrete for post stability.
- Fasteners (screws or nails).
- Gate hardware (if adding a gate).
Essential Tools and Materials for Your Rustic Fence
Choosing the right tools and materials can make your DIY project much smoother and more enjoyable. Here’s a breakdown of what you’ll likely need for your rustic wooden garden fence.
Tools You’ll Need
As your go-to nailer and tool guy, I always say having the right tools makes all the difference! For this project, you won’t need a whole workshop, but a few key items are essential.
- Measuring Tape: For accurate measurements.
- Shovel or Post Hole Digger: To dig post holes. A power auger can be rented for larger jobs.
- Level: To ensure your posts and rails are straight. A good 4-foot level is ideal.
- Circular Saw or Miter Saw: For cutting lumber to size. A miter saw is great for straight, repeatable cuts.
- Drill/Driver: For pre-drilling holes (especially in hardwood) and driving screws. Cordless is best for convenience.
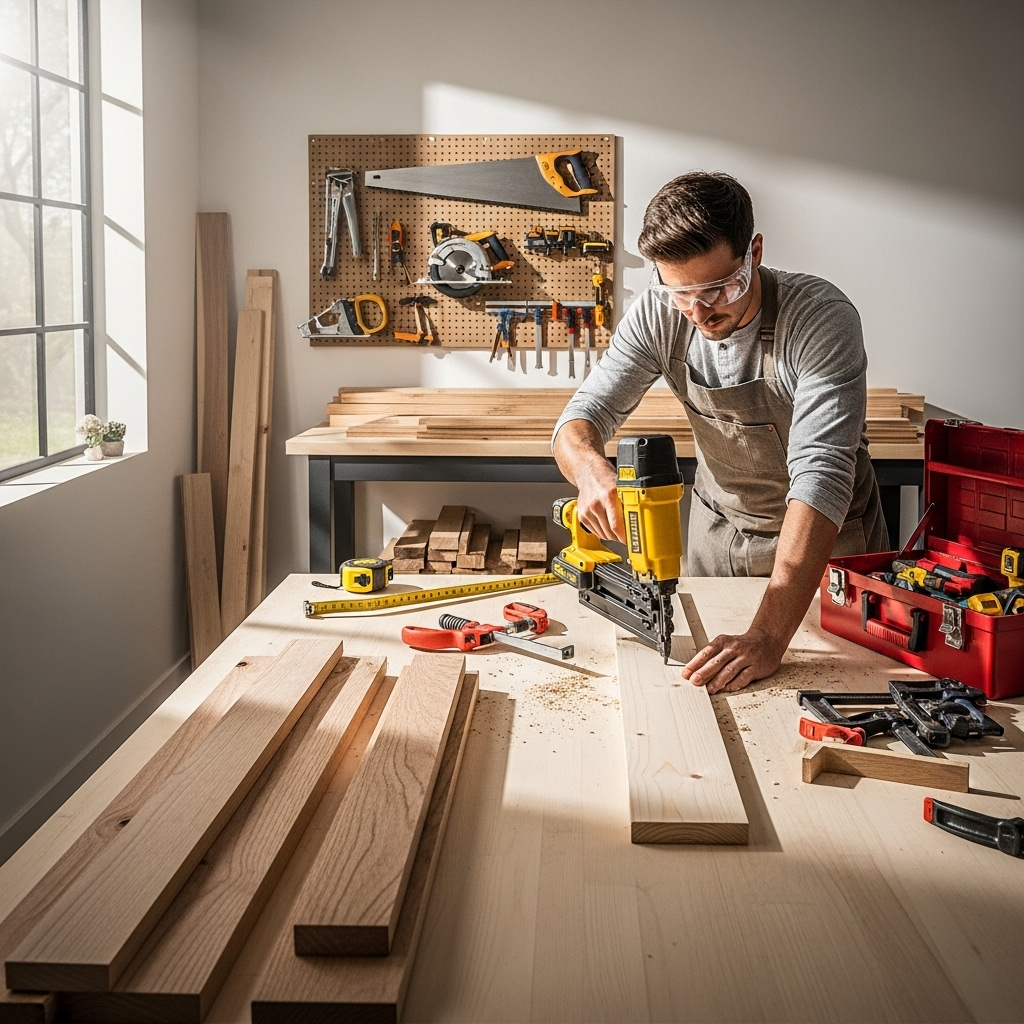
- Hammer or Nail Gun: For attaching pickets and rails. A framing nailer or a siding nailer can speed this up considerably, but a heavy-duty hammer works too if you’re patient. I love my framing nailer for projects like this—it makes driving nails quick and consistent. Just make sure you use the right size nails!
- Safety Glasses: Always, always, always wear them when cutting or fastening!
- Work Gloves: To protect your hands.
- Pencil: For marking cuts.
- Wheelbarrow: For mixing concrete and moving materials.
- String Line and Stakes: To ensure your fence line is straight.
Materials You’ll Need
The type of wood you choose significantly impacts the look, durability, and cost of your rustic fence. For a rustic feel, consider:
- Posts: 4×4 or 6×6 treated lumber (for longevity). Cedar or redwood are also excellent, naturally rot-resistant choices, though they can be more expensive. Posts should be long enough for about 1/3 of their length to be in the ground, plus the desired fence height. For a 5-foot fence, you’d need 8-foot posts (3 feet in ground + 5 feet above).
- Rails: 2×4 or 2×6 lumber. These run horizontally between posts. You’ll typically need two or three rails depending on fence height.
- Pickets (Boards): 1×4, 1×6, or even rough-sawn lumber for that authentic rustic look. The length depends on your fence height. You can leave ends straight-cut for a simple look or add decorative caps later.
- Gravel: For drainage at the bottom of post holes.
- Concrete Mix: To secure posts. You’ll need enough to fill the bottom portion of your post holes. (You can also use compacted soil and gravel if your soil drains well and you’re not in a hurricane zone!).
- Screws or Nails: Exterior-grade screws (like deck screws) are recommended for durability as they resist rust. If using a nail gun, ensure you have the correct galvanized nails for outdoor use.
- Optional: Wood Stain or Sealer
- Optional: Gate Hardware
Pro Tip: If you want a truly rustic, weathered look without waiting years, you can sometimes find reclaimed lumber. Just be sure it’s structurally sound and free of old nails or fasteners that could damage your tools.
Step-by-Step Guide to Building Your Rustic Wooden Garden Fence
Alright, let’s get building! This step-by-step guide will help you through the process. Remember to work safely and take your time.
Step 1: Mark Your Fence Line and Post Locations
Use your measuring tape and stakes to mark the exact path of your fence. Drive stakes at each corner and at intervals where you plan to place your posts (usually every 6 to 8 feet). Run a string line tightly between the corner stakes to give you a straight guide for setting your posts. This is crucial for a professional-looking fence.
Step 2: Dig Your Post Holes
Now for the digging! For a typical 5-6 foot fence, your holes should be about 2 to 3 feet deep and 8-12 inches wide. The depth is important for stability, especially in areas with frost or high winds. To ensure stability, aim for at least one-third of the post to be below ground level.
- Use your post hole digger or shovel.
- Clear out any rocks or large roots.
- Make sure the holes are consistent in depth and width along your line.
A good rule of thumb for depth is to add 1/3 to the desired above-ground height of your post (e.g., for a 6-foot fence, you need around 8 feet of post; 6 ft above + 2 ft below ground = 8 ft post). Many experts recommend digging below the frost line specific to your region to prevent buckling, which you can find at sites like huduser.gov.
Step 3: Set Your Posts
This is arguably the most critical step for a solid fence. Posts need to be plumb (perfectly vertical) and properly anchored.
- Add Gravel: Pour about 4-6 inches of gravel into the bottom of each hole. This helps with drainage and prevents the bottom of the post from sitting in standing water, which causes rot.
- Position Posts: Place your 4×4 or 6×6 posts into the holes, resting them on the gravel.
- Plumb and Brace: Use your level to ensure each post is perfectly vertical on two adjacent sides. Temporarily brace the posts with scrap wood stakes and screws to hold them plumb while the concrete sets. Make sure the tops of your posts are at the desired height and level with each other (or cut them later).
- Mix and Pour Concrete: Prepare your concrete mix according to the bag’s instructions. You want a consistency that’s mixable but not too soupy. Fill the hole around the post with concrete, leaving about 2 inches from the top. Slope the top of the concrete away from the post to help water run off.
- Tamp and Check: Tamp the concrete gently with a shovel or stick to remove air pockets. Double-check that your posts are still plumb and adjust if necessary before the concrete starts to set.
- Cure: Let the concrete cure fully, typically 24-48 hours, depending on the weather. Do not attach rails or pickets until the concrete is hardened.
Step 4: Cut and Attach Rails
Once your posts are securely set, it’s time for the horizontal rails. These will support your pickets. For a typical 5-6 foot rustic fence, you’ll want at least two rails: one near the top and one near the bottom. Three rails (adding a middle one) offer even more support and a classic look.
- Measure and Cut Rails: Measure the distance between each pair of posts. Cut your 2×4 or 2×6 lumber to fit snugly. If you’re not using a miter saw, measure carefully and cut with a circular saw, ensuring straight edges.
- Determine Placement: Decide where your rails will go. For a 6-foot fence, a common layout is: bottom rail about 10-12 inches from the ground, a middle rail about halfway up, and a top rail about 6-12 inches from the top of the post.
- Attach Rails: Position the rails against the posts. Use your level to ensure they are horizontal. Secure them to the posts using exterior-grade screws (two per post connection is usually sufficient). Pre-drilling pilot holes can prevent the wood from splitting, especially near the ends of the rails.
Beginner Tip: Make sure your rails are perfectly level! It makes attaching the pickets much easier and ensures your fence looks straight and professional.
Step 5: Attach the Pickets (The Fun Part!)
This is where your fence really starts to take shape and get its rustic character. You’ll be attaching the vertical boards to the rails.
- Cut Pickets: Cut your 1×4 or 1×6 boards to the desired length for your fence height. If you want a uniform look, cut them all the same length. For a more rustic, varied look, you can cut some shorter or leave them slightly uneven.
- Start at One End: Begin attaching your first picket at one end of the fence. Place it flush against the edge of the post and the rails.
- Fasten Securely: Use your nail gun or drill and screws to attach the picket to each rail. For 1×4 or 1×6 boards, two fasteners into each rail is a good practice. Make sure your fasteners are long enough to go through the picket and securely into the rail (e.g., 2.5-inch screws for 1-inch thick pickets into 2×4 rails).
- Maintain Spacing: This is where you decide on your rustic look.
- Close Spaced: Butt each picket right up against the previous one for maximum privacy.
- Slight Gap: Leave a small gap (e.g., 1/2 inch) between pickets for a more airy feel and to allow for wood expansion and contraction. This is often better for the wood’s longevity.
- Overlapping: For a picket fence where pickets overlap, it appears more decorative and has a classic look.
- Use a Gauge (Optional): If you want consistent spacing, you can cut a small piece of wood to the desired gap width and use it as a spacer between each picket.
- Continue Across: Work your way across the fence line, attaching each picket. Use your level periodically to ensure your pickets are remaining plumb.
Nailer Tip: If you’re using a nail gun, a 2-inch or 2.5-inch galvanized framing or siding nailer is usually perfect for attaching pickets. A quick tap and the nail is in! Remember to always keep your safety glasses on and maintain a firm grip.
Step 6: Add a Gate (If Desired)
Adding a gate can be a project in itself, but here’s a simplified approach:
- Measure the Opening: Determine the width of your gate opening. Gates are typically a bit narrower than the opening to allow for swing and latching.
- Build the Gate Frame: Construct a rectangular frame using 2x4s that fits your opening. Add a diagonal brace across the frame (from top hinge side to bottom latch side) to prevent sagging.