Quick Summary:
Easily remove jammed nails from your nailer by first unplugging or disconnecting the power. Then, carefully release air pressure, open the nose of the nailer, and gently pull out the jammed nails. With a few simple steps, you’ll have your nailer working again in no time, ready for your next project.
Hey there, DIYers and aspiring woodworkers! It’s Jack Shaffer from Nailerguy, and if you’ve ever found yourself staring at a nailer that’s decided to hold onto its nails like a stubborn toddler, you’re not alone. It’s a frustrating moment when your tool stops working mid-project. Don’t worry, this is a super common issue, and thankfully, it’s usually quite simple to fix. I’m here to walk you through it, step by step, so you can get back to building and creating with confidence. We’ll make that nailer sing again, I promise!
This guide will cover everything you need to know, from the immediate safety steps to the best ways to tackle different types of nail jams. We’ll get your nailer cleared and ready for action, ensuring your projects don’t miss a beat.
Table of Contents
Why Do Nails Get Stuck in Nailers?
Nailers are fantastic tools, making quick work of attaching wood. But like any tool, they can sometimes have a mind of their own. Nails can get stuck, or “jammed,” for a few common reasons. Understanding these will help you prevent future issues and make clearing jams even easier.
One of the most frequent culprits is driving a nail into an incredibly hard knot or a piece of very dense wood. The nail might bend, and a bent nail can easily wedge itself inside the nailer’s mechanism. Sometimes, using the wrong size or type of nail for your specific nailer is also a problem. Nailers are designed for specific dimensions and types of fasteners, and straying from those can lead to misfeeds and jams.
Another reason is insufficient air pressure (for pneumatic nailers) or low battery power (for cordless models). If the nailer doesn’t have enough force behind it, the nail might not drive all the way in, causing it to stick at an angle and create a jam. Even a slight misalignment in how you’re holding the nose of the nailer against the wood can contribute to feeding issues.
Finally, dust and debris can accumulate inside the nailer over time. This gunk can interfere with the smooth operation of the firing pin and the nail feeding system, eventually leading to a jam. Regular maintenance and cleaning are key to avoiding this!
Essential Tools You’ll Need
Before we dive into the nitty-gritty of removing those stubborn nails, let’s gather the simple tools you’ll need. You probably have most of these around your workshop already. Having the right tools on hand makes the whole process much smoother and safer.
- Safety Glasses: This is non-negotiable! Always protect your eyes when working with tools, especially when there’s a risk of flying parts or debris.
- Gloves: A sturdy pair of work gloves will protect your hands from sharp edges and splinters, both from the tool and the nails themselves.
- Pliers: Needle-nose pliers are ideal. They allow you to get into tight spaces and grip small, potentially bent nails for extraction. A regular set of pliers can also work in a pinch.
- Flathead Screwdriver: Sometimes, you might need a flathead screwdriver to gently pry or lever a nail out, especially if it’s deeply wedged.
- Allen Wrench (Hex Key): Many nailers come with a small set of Allen wrenches for disassembly. Check your nailer’s manual to see if one is needed for accessing the jammed area.
- Soft Mallet or Hammer (optional): In rare cases, a very gentle tap with a soft mallet or the handle of your screwdriver might help dislodge a nail, but use this with extreme caution to avoid damaging the tool.
- Your Nailer’s Manual: This is your best friend. Different nailers have different designs, and your manual will show you the specific points where you can access the magazine and firing mechanism.
Step-by-Step Guide: How to Remove Nails From a Nailer
Alright, let’s get down to business. Clearing a jam from your nailer is a straightforward process if you follow these steps carefully. Safety first, always!
Step 1: Disconnect Power Source
This is the absolute most critical first step. Never attempt to clear a jam with the nailer connected to its power source. This prevents accidental firing, which could cause serious injury.
- For Pneumatic (Air) Nailers: Unscrew and disconnect the air hose from the nailer’s coupler. Ensure there’s no residual air pressure in the line.
- For Electric/Corded Nailers: Unplug the power cord from the electrical outlet.
- For Cordless/Battery Nailers: Remove the battery pack from the tool. This is usually done by pressing a release button and sliding the battery out.
Take a moment to confirm the power is off. It’s a simple step that ensures your safety and prevents damage to the tool or yourself.
Step 2: Release Any Stored Air Pressure
Even after disconnecting from an air source, pneumatic nailers can hold a small amount of residual air pressure. It’s good practice to release this before proceeding.
Some nailers have a small exhaust valve you can press. If yours doesn’t, simply holding the trigger down briefly after disconnecting the air hose can help release any remaining trapped air. You won’t hear a loud hiss, but it’s a good habit.
Step 3: Access the Nailer’s Nose/Magazine
This is where you’ll directly interact with the jam. Most nailers have an easy-access mechanism to get to the area where nails are fed and fired.
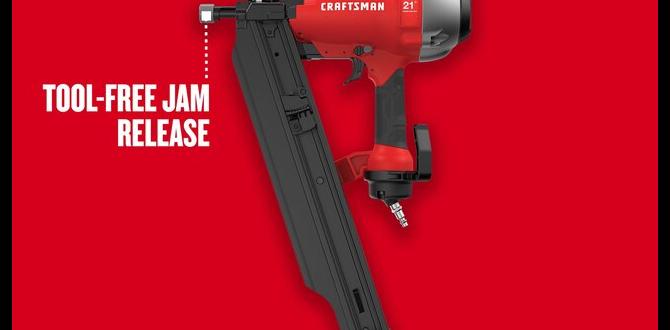
Look for a latch, a lever, or a screw-off cap on the front or side of the nailer, near where the nails come out. This is often called the nose piece or magazine cover. Refer to your nailer’s manual if you’re unsure. Many modern nailers are designed for tool-free access to clear jams.
Gently open this section. You might need to slide, lift, or unscrew a part of the casing. Be careful not to force anything; if it feels stuck, double-check your manual or look for release tabs.
Step 4: Position the Magazine
Once the nose piece or cover is open, you should have a clear view of the nail channel and the driver blade (the part that strikes the nail). If the magazine is loaded with nails, it’s often helpful to tilt the nailer so the nails are pointing away from you or downwards, making it easier for them to slide out once dislodged.
Some nailers allow you to slide the entire magazine forward or backward to expose the nail path. Others have a more integrated design. Either way, the goal is to expose the area where the nail is stuck.
Step 5: Identify and Remove the Jammed Nail(s)
Now it’s time to get your hands (gently!) on the offending nail.
- Examine the Jam: Look closely to see where the nail is caught. Is it bent? Is it partially driven? Is there more than one nail jammed?
- Use Pliers: If you can get a good grip on the head or shaft of the nail with your needle-nose pliers, gently try to pull it straight out. Wiggle it slightly if necessary, but avoid excessive force that could damage the internal components.
- Use a Screwdriver (with caution): If the nail is stuck at an angle or too deep for pliers, you might use the tip of a flathead screwdriver to gently pry it loose. Be very careful not to scratch or gouge the metal parts inside the nailer. The goal is to nudge it out, not to force it aggressively.
- Dealing with Multiple Nails: If multiple nails are jammed, you’ll need to remove them one by one. Sometimes, removing an outer nail can free up an inner one.
- Bent Nails: A bent nail can be tricky. Try to grasp the bent section with pliers and pull. If it’s really lodged, a gentle levering motion with a screwdriver might be needed.
Take your time here. Patience is key. Forcing a jammed nail can often make the problem worse and potentially damage your nailer. If a nail is deeply embedded and won’t budge, it might be time to consult your manual or consider professional help.
Step 6: Clear Any Debris or Broken Pieces
While you’re in there, take a moment to ensure there are no small pieces of nails, wood fragments, or dust bunnies causing issues. Blow out any loose debris, or use a soft brush or a can of compressed air if you have it. A clean nailer is a happy nailer!
Step 7: Reassemble the Nailer
Once the jammed nail is completely removed and the area is clear, it’s time to put your nailer back together.
- Carefully close and secure the nose piece or magazine cover. Make sure it latches or screws back into place properly.
- If you removed a battery, slide it back in until it clicks.
- If it’s a pneumatic nailer, reattach the air hose firmly.
Step 8: Test the Nailer
Before you resume your project, it’s crucial to test the nailer to ensure it’s working correctly and safely.
- Safety First: Ensure the nailer is aimed at a piece of scrap wood, never at yourself or anyone else. Keep your fingers away from the trigger and the nose.
- Pneumatic Nailers: Connect the air hose and ensure the pressure is set to the recommended level (check your manual for PSI specifications).
- Cordless Nailers: Make sure the battery is sufficiently charged.
- Test Fire: Squeeze the trigger while pressing the nose of the nailer firmly against the scrap wood. You should hear a satisfying “thwack” and see a nail drive into the wood.
- Check for Functionality: Try firing a few more nails to confirm that it’s feeding and firing correctly without any issues.
If the nailer fires and functions normally, congratulations! You’ve successfully cleared the jam and are ready to get back to your project. If it still seems sluggish or jams again quickly, you might need to investigate further, perhaps with a more thorough cleaning or by checking for wear and tear on internal parts.
Troubleshooting Common Nailer Jam Scenarios
Sometimes, a jam isn’t just a simple stuck nail. Here are a few specific scenarios and how to tackle them:
Bent Nails
Bent nails are the most common cause of jams. They get wedged at awkward angles. Your best bet is usually needle-nose pliers. Try to grip the nail near the bend or the head and pull it out with a steady, straight motion. If it’s really stuck, a bit of gentle wiggling might help, but avoid forcing it. Patience is key here. You’re essentially trying to coax it out, not hammer it through.
A good resource for understanding fastener mechanics and common issues is the International Code Council Evaluation Service (ICC-ES), which often provides standards and testing for building materials and fasteners.
Double Firing / Riding Nails
This happens when a nail doesn’t fully drive, and the next nail strikes it, pushing the first one in partially. This often leads to a jam. Clearing it is similar to a bent nail. First, disconnect power. Then, open the nose as described above. Use pliers to remove the first nail, then try to extract the second one. Ensuring you have sufficient air pressure and are holding the nailer flush against the surface can help prevent this.
Nails Not Feeding
If nails aren’t feeding into the firing chamber, it could be a problem with the magazine spring. The spring that pushes the nails forward might be weak, dirty, or obstructed. Check the magazine for any debris blocking the nails’ path. You might need to remove the magazine (if your model allows) and clean out any dust or wood shavings. Some magazines have a removable end cap to help clear obstructions.
A weak spring might need to be stretched slightly or, in rare cases, replaced. Refer to your nailer’s manual for how to access and service the magazine and its spring mechanism. You can also find helpful tips on tool maintenance from organizations like Wood Magazine, which often feature tool repair and maintenance advice.
Jamming During Rapid Fire
If your nailer jams frequently when you’re working quickly, it’s often an issue of insufficient power or not allowing the nailer to fully reset between shots. For pneumatic nailers, ensure your air compressor provides consistent pressure and volume. For battery models, the battery might be low on charge, or it might be overheating.
Also, make sure you’re pressing the nose of the nailer firmly against the surface and allowing the driver blade to retract fully before the next nail is fired. Rapid firing can dislodge parts slightly if not done with proper technique.
Nailer Types and Jam Clearing Specifics
While the general principles for clearing jams are similar across different nailer types, there can be minor design differences that affect how you access the jam. Understanding your specific nailer type can save you time and frustration.
| Nailer Type | Power Source | Jam Clearing Notes |
|---|---|---|
| Pneumatic (Air) Nailers | Air Compressor via Hose | Always disconnect the air hose first. Ensure residual air is released. Access to the nose is typically tool-free or requires a simple latch. |
| Electric/Corded Nailers | Household Electrical Outlet | Unplug the power cord. These often have integrated mechanisms, so access to the jam might involve sliding a cover or accessing a side panel. |
| Cordless/Battery Nailers | Rechargeable Battery Pack | Remove the battery pack. Designs vary greatly; some have very accessible nose pieces, while others might require a specific sequence for opening. |
| Gas/Fuel Cell Nailers | Fuel Cell & Battery Ignition | Remove the battery and the fuel cell (if applicable and safe to do so). Follow the manufacturer’s specific instructions for clearing jams, as these can be more complex due to the ignition system. |
For instance, some higher-end pneumatic nailers might feature sequential vs. contact trip modes. While not directly related to clearing jams, understanding these modes (found in resources like NAHCTools blog) can indirectly help you avoid situations that lead to jams by ensuring you’re using the tool as intended.
Pneumatic Nailers
These are the workhorses of many workshops. Disconnecting the air hose is your primary safety step. The mechanism for clearing jams is usually straightforward, focusing on opening the front magazine. Pay attention to the recommended air pressure settings; too low can cause jams, and too high can damage the tool.
Electric and Cordless Nailers
These offer convenience, but their internal mechanisms can be more complex. Always remove the battery or unplug the cord. Some models might have a specific sequence to follow for opening the nose or magazine. If you’re unsure, your manual is your best friend here. For battery-powered models, a low battery can lead to incomplete nail drives and subsequent jams.
Gas/Fuel Cell Nailers
These are common for framing and trim work where portability is key. They use a combination of a fuel cell (like a small propellent canister) and a battery for ignition and driving. Clearing jams on these requires extra caution. You must disconnect both the battery and safely store or remove the fuel cell if instructed by the manual. The internal parts can be more intricate due to the combustion system.
Preventing Nailer Jams: Proactive Tips
The best way to deal with a nailer jam is, of course, to avoid it altogether! A little preventative maintenance and proper usage can save you a lot of headaches.
- Use the Correct Nails: Always use the brand and type of nails recommended for your specific nailer. Check the gauge, length, and collation type (e.g., clipped head, round head). Using the wrong nails is a surefire way to cause jams.
- Maintain Proper Air Pressure (Pneumatic): Consult your nailer’s manual for the recommended PSI (pounds per square inch). Too low pressure means incomplete drives and jams. Too high pressure can damage the tool or drive nails too deep. An adjustable regulator