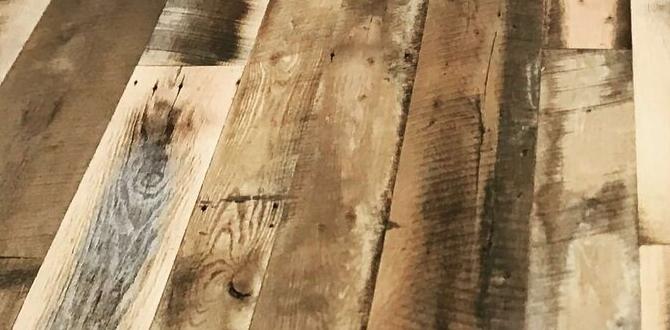
Have you ever walked on beautiful wooden floors that seem to tell a story? Reclaimed wood flooring offers a special charm. It comes from old buildings and barns, giving it a unique character and history. Imagine giving a second life to this wood in your home!
But wait, before you install that stunning reclaimed wood, there’s an important step: sanding. Why is sanding so crucial? Sanding helps to smooth the surface, reveal the wood’s beauty, and prepare it for finishing. Without proper sanding, your floors can look rough and uneven.
Did you know that sanding can also remove old paint and stains? This can transform tired-looking wood into something fresh and vibrant. In fact, people often feel amazed by the difference after sanding their reclaimed wood floors. Are you excited to learn how to sand reclaimed wood flooring like a pro? Let’s dive in!
Table of Contents
Reclaimed Wood Flooring Sanding: A Step-By-Step Guide

Reclaimed Wood Flooring Sanding
Reclaimed wood flooring sanding brings new life to old wood. It helps remove dirt, scratches, and stains. Did you know some boards are over a century old? This process shows their hidden beauty and character. Sanding also prepares the wood for finishes that protect and enhance its look. Not only does it create a smooth surface, but it also adds value to your home. Isn’t it amazing what a little sanding can do?What is Reclaimed Wood Flooring?
Definition and sources of reclaimed wood. Benefits of using reclaimed wood in flooring.Reclaimed wood comes from old buildings, barns, or furniture. It is saved from being wasted. Using this wood for flooring is great for many reasons. First, it helps the environment by reducing waste. Second, it offers a unique look with its own history. Many people love the natural beauty of reclaimed wood. It can make any room feel warm and inviting.
Why Choose Reclaimed Wood?
- It is eco-friendly.
- Each piece tells a story.
- It is durable and strong.
- It can add value to your home.
In fact, many homeowners say using reclaimed wood makes their space special. Every board has a character that new wood often lacks. It truly showcases nature’s artistry.
What are the benefits of using reclaimed wood for flooring?
Reclaimed wood flooring offers health benefits, aesthetic appeal, and sustainability.
Importance of Sanding Reclaimed Wood Flooring
Enhancing appearance and texture. Preparing the surface for finishes and sealants.Sanding reclaimed wood flooring is very important. It improves the appearance and texture of the wood. Smooth wood looks nicer and feels better underfoot. Sanding also prepares the surface for finishes and sealants. This helps protect the wood from damage. Sealed wood lasts longer and looks great in any home.
Why is sanding reclaimed wood flooring important?
Sanding helps to make the wood smooth and allows finishes to stick better. This means the floor will look beautiful and last for years.
Key Benefits of Sanding:
- Enhances the look of the flooring.
- Makes the surface smooth.
- Prepares for better finishes.
- Increases the lifespan of the wood.
Tools and Equipment for Sanding Reclaimed Wood
Essential hand tools and machinery. Safety gear recommendations.Sanding reclaimed wood is like giving your floor a nice spa day. You need the right tools to make this happen. First, grab a hand sander and some sandpaper. And let’s not forget a power sander— it’ll do the heavy lifting while you sip on your favorite drink! Safety is key, too; goggles and a mask are your best buddies to keep dust away. Here’s a handy table to remember:
| Tool/Equipment | Purpose |
|---|---|
| Hand Sander | For small areas and detailed work |
| Power Sander | To cover large surfaces quickly |
| Sandpaper (various grits) | Smooths and finishes the wood |
| Goggles | Protect your eyes from dust |
| Dust Mask | Keep your lungs happy |
Remember, a little prep can make a big difference. Now, get ready to make that wood shine!
Step-by-Step Guide to Sanding Reclaimed Wood Flooring
Preparing the workspace and materials. Detailed sanding process for optimal results.First things first, you need a clean workspace. Clear away furniture and sweeping the floor is a must. Make sure to grab your tools; you’ll need sandpaper, a sander, and a vacuum. No one wants dust everywhere!
Once everything is set up, it’s time to sand. Start with a rough grit paper to tackle those pesky imperfections. Work in small sections, moving back and forth like a dance—only less fun, but still important! Gradually switch to finer grit for a smooth finish. Keep it steady and let the wood shine!
| Materials | Purpose |
|---|---|
| Sander | For sanding the wood |
| Sandpaper | To smooth the surface |
| Vacuum | To clean up dust |
By following these steps, you’ll have a beautiful, smooth reclaimed wood floor in no time. Happy sanding!
Common Challenges in Sanding Reclaimed Wood
Dealing with uneven surfaces and imperfections. Addressing wood species differences.Sanding reclaimed wood can be quite the adventure! First, you might face uneven surfaces and those sneaky imperfections. It’s like a hide-and-seek game—one minute you’re cruising along, and the next, bam! A dip surprises you. Wood species differences can also make things tricky. Each type has its quirks, making it essential to adjust your sanding strategy. Remember, patience is key. Think of it like brushing a giant furry dog; it takes time, but the result is worth it!
| Challenge | Solution |
|---|---|
| Uneven Surfaces | Use a belt sander for rough areas. |
| Wood Species Differences | Know your wood! Adjust sandpaper choice. |
Choosing the Right Finish After Sanding
Options for stains and sealants. Pros and cons of each finish type.After sanding your wood floor, it’s time to choose a finish. Think of finishes like ice cream flavors—everyone has a favorite! Here are a few tasty options to consider:
| Finish Type | Pros | Cons |
|---|---|---|
| Polyurethane | Durable and water-resistant. | Takes time to dry. |
| Oil-Based Stain | Rich color and easy application. | Strong smell and long drying time. |
| Water-Based Stain | Quick drying and low odor. | Less durable than oil-based. |
Choosing the right finish can change your floor from drab to fab! Remember, each option has its own quirks. It’s a bit like picking the right shoe for a dance—comfort is key!
Maintenance Tips for Reclaimed Wood Flooring
Cleaning and upkeep best practices. Restoring wood flooring after years of wear.Keeping reclaimed wood flooring in top shape is easier than you think! Regular cleaning can keep dust bunnies at bay. Use a soft broom or a vacuum with a wood floor attachment. For deeper cleaning, dampen a mop but avoid soaking it—no one wants a soggy floor! To fix years of wear, try sanding lightly to reveal the wood’s natural beauty. A little elbow grease can go a long way, making your floor sparkle like new!
| Maintenance Task | Frequency |
|---|---|
| Dusting | Weekly |
| Mopping | Monthly |
| Sanding | Every few years |
DIY vs. Professional Sanding Services
Evaluating skill levels and time commitment. When to hire a professional.Deciding between DIY sanding and hiring an expert can be tricky. If you enjoy some good old-fashioned elbow grease and have time to spare, you might like to tackle it yourself. Just remember, sanding is dusty work! If you’re a DIY newbie and worried you might turn your wood floor into a potato chip, it might be wise to call in a pro. They have the skills and tools to get the job done right.
| Skill Level | Time Commitment | When to Hire a Pro |
|---|---|---|
| Beginner | Several days | If you want a flawless finish |
| Intermediate | A few days | If you’re short on time |
| Expert | One weekend | If the floor is extra fancy |
In simple terms, DIY might save you money but can take weeks. Hiring a pro can cost more, but they handle the hassle. Knowing your limits helps you decide!
Cost Considerations for Sanding Reclaimed Wood Flooring
Breakdown of DIY costs vs. professional estimates. Budgeting for materials and tools.Budgeting for reclaimed wood flooring sanding can be as tricky as finding a needle in a haystack! First, let’s look at DIY costs. If you’re ready to channel your inner handy-person, you might spend around $100-$300 on materials and tools, like sandpaper and a sander. But if you prefer to leave it to the pros, expect to fork out $800-$2,000 for their expertise. It’s a classic battle of sweat equity versus cash! Here’s a quick breakdown:
| Cost Type | DIY Estimate | Professional Estimate |
|---|---|---|
| Tools & Materials | $100 – $300 | N/A |
| Labor | N/A | $700 – $1,700 |
| Total | $100 – $300 | $800 – $2,000 |
Remember, the right choice depends on your comfort level with tools. Choose wisely; your floors will thank you (or perhaps not, if you make a mess!).
Conclusion
In conclusion, sanding reclaimed wood flooring brings out its beauty and durability. It removes old finishes and smooths rough surfaces. This process helps protect the wood and enhances its character. You can tackle this project yourself or hire a pro. Either way, consider exploring more about tools and techniques to get the best results. Happy sanding!FAQs
What Are The Benefits Of Sanding Reclaimed Wood Flooring Compared To Traditional Hardwood Flooring?Sanding reclaimed wood flooring can be really special. You get to reuse old wood, which is good for the planet. It often has unique colors and textures that make your floor special. Traditional hardwood floors are new, but they don’t have the neat stories that reclaimed wood has. Plus, sanding can make both types look fresh and beautiful!
How Do You Prepare Reclaimed Wood Flooring For Sanding To Ensure The Best Results?To prepare reclaimed wood flooring for sanding, first, you need to clean the surface. Use a broom or vacuum to remove dust and dirt. Next, check for nails or screws sticking out and remove them. Finally, make sure the wood is dry. This way, your sanding will go smoothly!
What Types Of Sandpaper Or Sanding Equipment Are Recommended For Sanding Reclaimed Wood Floors?When sanding reclaimed wood floors, you should use different types of sandpaper. Start with coarse sandpaper, like 40 or 60 grit, to remove rough spots. Then, use medium sandpaper, like 80 or 100 grit, to smooth the surface. Finally, finish with fine sandpaper, like 120 grit, for a nice touch. You can also use a floor sander, which makes the job easier and faster.
Are There Any Specific Challenges Or Considerations To Keep In Mind When Sanding Reclaimed Wood Flooring?Yes, sanding reclaimed wood can be tricky. You need to be careful of nails or screws still in the wood. The wood may have different soft and hard sections, so you should go slowly. Also, old wood can be thinner, so don’t sand too much or it might break. Always wear a mask to avoid breathing in dust!
How Can You Maintain The Appearance And Durability Of Reclaimed Wood Flooring After Sanding And Finishing?To keep your reclaimed wood flooring looking nice and lasting a long time, you can do a few simple things. First, you should regularly clean it with a soft broom or vacuum without a beater bar. Next, avoid using too much water when mopping, as that can hurt the wood. Finally, apply a little finish or wax every few years to protect the wood and keep it shiny. These steps will help your floor stay beautiful!


