For a 16 gauge finish nailer, the ideal PSI range typically falls between 70 and 120 PSI. The exact setting depends on the nailer model, nail length, and the type of wood you’re working with. Too low PSI can lead to under-driven nails, while too high can damage the wood or cause over-penetration. Finding that sweet spot ensures clean, professional results for your projects.
Hey there, fellow DIYers and woodworking fans! Jack Shaffer here from Nailerguy. Ever find yourself staring at your finish nailer, wondering about that little dial or gauge, and feeling a bit lost about the pressure setting? You’re not alone! Getting the PSI right for your 16 gauge finish nailer is super important. It’s the key to making sure your nails go in just right – not sticking out, and not disappearing too deep into your beautiful wood. We’ve all been there, wrestling with a nailer and wishing for a little guidance. This guide is here to help banish that confusion. We’ll walk through everything you need to know, step-by-step, so you can nail your projects with confidence every single time. Let’s dive in and make sure your next project is a nail-driving success!
Table of Contents
Understanding Your 16 Gauge Finish Nailer and PSI
So, what exactly is PSI, and why does it matter so much for your 16 gauge finish nailer? PSI stands for Pounds per Square Inch. Think of it as the “oomph” or the force that your nailer uses to drive those nails into the wood. An air compressor supplies this air pressure, and your nailer uses it.
For a 16 gauge finish nailer, this pressure setting is crucial because these nailers are designed for finer woodworking tasks. You’re not trying to build a deck or frame a house; you’re attaching trim, molding, cabinetry, and other decorative or lighter structural elements. These projects often involve softer woods or require a clean, flush finish where the nail head isn’t visible.
Why the Right PSI is Key
Setting your 16 gauge finish nailer to the correct PSI isn’t just about speed; it’s about precision and the quality of your work. Here’s why getting it just right makes all the difference:
Flush Driving: The primary goal is to drive the nail so the head is flush with the surface of the wood. This allows for a smooth finish, perfect for painting or staining.
Preventing Damage: Too much pressure can overdrive the nail, causing it to sink too deep, splinter the wood surface, or even split delicate trim. This requires extra work to fix, like filling or sanding.
Ensuring Hold: Not enough pressure means the nail won’t be driven fully into the wood. This can leave heads sticking out, creating a tripping hazard or an unsightly blemish that compromises the integrity of your joinery.
Consistency: Using the right PSI setting ensures that every nail drives consistently, leading to a professional and polished look on your projects.
Let’s break down the typical PSI range and what influences it.
The Ideal PSI Range for a 16 Gauge Finish Nailer
As a general rule of thumb, most 16 gauge finish nailers perform best in the 70 to 120 PSI range. This is a fairly broad spectrum, and finding the exact sweet spot involves a few factors.
Think of this range as your playground. You have room to adjust based on specific needs.
Lower End (70-90 PSI): This is often suitable for softer woods like pine or poplar, or when using shorter nails. It provides enough force for a clean drive without risking damage to the material.
Mid-Range (90-110 PSI): This is a versatile setting that works well for a variety of woods, including medium-density hardwoods like oak or maple, and for typical nail lengths (around 1.5 to 2 inches).
Higher End (110-120 PSI): You might need this for denser hardwoods or when driving longer nails (closer to the maximum length your nailer can handle). It ensures the nail has sufficient power to penetrate fully without leaving the head exposed.
It’s always best to check your nailer’s manual for its specified operating pressure. Manufacturers often provide a recommended range. For example, some sources suggest that a good starting point for many 16-gauge finish nailers is around 100 PSI.
Factors Affecting Your PSI Setting
Several elements come into play when you’re dialling in the perfect PSI for your 16 gauge finish nailer:
Nailer Model: Different brands and models have varying internal mechanisms and air requirements. Some might run more efficiently at a slightly lower PSI than others. Always consult your specific tool’s manual.
Nail Length: Longer nails require more force to drive completely flush. If you’re using the longest nails your nailer can accept, you’ll likely need a higher PSI than when using shorter ones.
Wood Type: This is a big one!
Softwoods (Pine, Fir, Cedar): These woods are less dense and easier to penetrate. You can often get away with a lower PSI setting, which also reduces the risk of denting or marking the surface.
Hardwoods (Oak, Maple, Walnut): Denser woods require more force. You’ll likely need to increase your PSI to ensure nails drive in completely without the heads sticking out.
Engineered Woods (MDF, Particle Board): These can be tricky. MDF can be very dense, while particle board can crumble if the pressure is too high. You might need to experiment with a medium-to-high PSI, but be cautious.
Depth Adjustment Feature: Most modern finish nailers have a depth adjustment dial. You can sometimes use this in conjunction with PSI. If you’re slightly overdriving with a good PSI, you might be able to compensate with the depth adjustment. However, relying solely on the depth adjustment without the correct PSI can lead to inconsistent drives. The PSI is about the force, and the depth adjustment is about how far it travels.
Step-by-Step Guide: Setting Your 16 Gauge Finish Nailer’s PSI
Getting your PSI set correctly is a straightforward process, but it requires a little testing. Here’s how to do it like a pro:
Step 1: Connect Your Air Compressor and Nailer
Ensure your air compressor is turned off before connecting any hoses.
Connect the air hose securely to the compressor’s outlet and to the nailer’s air inlet (coupler).
Make sure you have a good quality air hose that can handle the required pressure.
Step 2: Set Your Air Compressor’s Regulator
Turn on your air compressor. Let it build up pressure.
Locate the regulator on your air compressor. This is the dial or knob that controls the output pressure to your tool.
Important: Do not connect the nailer to the compressor’s tank pressure. You need to use the regulator to set the tool pressure.
Start by setting the regulator to the lower end of the recommended range for your nailer, perhaps around 80 PSI.
Step 3: Choose Your Test Material
Find a scrap piece of the same wood you’ll be working with for your project. If you’re working with a mix of materials, test on the densest one first.
Ensure the scrap piece is at least as thick as your project material to get an accurate test.
Step 4: Drive Your First Nail(s)
Load a few nails into your 16 gauge finish nailer.
Place the nose of the nailer firmly against the scrap wood.
Squeeze the trigger to drive a nail.
Observe:
Is the nail head flush with the wood surface?
Is it slightly protruding?
Is it driven too deep, creating a dent?
Step 5: Adjust PSI and Test Again
If the nail is protruding: Your PSI is too low. Increase the regulator setting on your air compressor by 5-10 PSI. Test another nail.
If the nail is overdriven (dented): Your PSI is too high. Decrease the regulator setting by 5-10 PSI. Test another nail.
If the nail is flush: Congratulations, you’ve found your starting point!
Step 6: Fine-Tune for Consistency
Once you’re getting close to a flush drive, continue making small adjustments (2-5 PSI at a time) and driving nails.
Test a few nails in different spots on your scrap wood to ensure consistency.
Pay attention to the feel of the nailer and the sound it makes. A properly set nailer will have a clean “thwack” sound.
This trial-and-error process is your best friend when setting PSI.
Troubleshooting Common PSI Issues
Even with careful tuning, you might run into a few snags. Here’s how to tackle them:
Problem: Nails Not Driving Fully (Protruding Heads)
Possible Causes:
PSI too low: This is the most common reason.
Long nails in dense wood: You might need to push the PSI higher within your nailer’s range.
Leaky air hose or fittings: A slow leak means less consistent pressure.
Compressor not keeping up: The compressor might not be delivering enough CFM (Cubic Feet per Minute) for your nailer’s demand, causing pressure drops. Check your compressor’s CFM rating against your nailer’s requirements. You can find CFM information from the U.S. Department of Energy’s energy efficiency guides for compressors.
Nailer issue: Clogged driver blade, worn springs, or internal leaks.
Solutions:
Increase PSI gradually (5-10 PSI increments).
Double-check all air connections for leaks.
Ensure your compressor’s tank is adequately pressurized.
Consider a more powerful compressor if this is a recurring issue.
Clean and lubricate your nailer according to the manufacturer’s instructions.
Problem: Nails Overdriving (Dent Markings)
Possible Causes:
PSI too high: The nail is being driven with excessive force.
Depth adjustment set too deep: The nailer’s depth control is set to drive the nail further than desired.
Thin or soft material: Even a moderate PSI can cause damage on very thin or soft woods.
Solutions:
Decrease PSI gradually (5-10 PSI increments).
Gently increase the depth adjustment setting on your nailer (effectively reducing how far the nail can be driven).
Use a piece of scrap wood behind your project piece, especially when working with thin materials. This provides a solid backing for the nail.
Consider using slightly shorter nails if you’re consistently overdriving.
Problem: Inconsistent Drives
Possible Causes:
Fluctuating air pressure: The compressor’s regulator might be poorly set, or there’s a blockage in the system.
Air leaks: Even small leaks can interrupt consistent airflow.
Nailer firing mechanism issue: The internal parts may need cleaning or repair.
Using nails of inconsistent quality or type: Ensure you’re using good quality nails designed for your 16 gauge nailer.
Solutions:
Check your compressor’s regulator and gauge. Ensure it’s functioning correctly.
Thoroughly inspect the entire air line and all fittings for leaks.
Perform regular maintenance on your nailer (cleaning, lubrication).
Use reputable brands of finish nails. Different brands can sometimes have slight variations.
Practical PSI Settings for Common Woods and Nails
To give you a helpful starting point, here’s a table with common PSI settings. Remember, these are guidelines, and you should always perform test drives on your specific material.
| Wood Type | Nail Length (approx.) | Recommended PSI Range | Notes |
| :—————— | :——————– | :——————– | :———————————————————————— |
| Pine (Softwood) | 1.5 inches | 70-90 PSI | Easy to drive, minimal risk of damage. |
| Pine (Softwood) | 2 inches | 80-100 PSI | A bit more force needed for longer nails. |
| Oak (Hardwood) | 1.5 inches | 90-110 PSI | Dense wood requires higher pressure for flush drives. |
| Oak (Hardwood) | 2 inches | 100-120 PSI | Maximize force for longer nails in hardwoods. |
| Maple (Hardwood) | 1-1.5 inches | 95-115 PSI | Very dense; often requires higher PSI than oak. |
| Poplar (Medium Wood)| 1.75 inches | 85-100 PSI | A good balance of PSI needed here. |
| Plywood | 1.25 inches | 75-95 PSI | Can be driven relatively easily. |
| MDF | 1.5 inches | 90-110 PSI | Can be brittle; watch for overdriving and splintering. |
Note: Always start at the lower end of a range and gradually increase until you achieve a flush drive without damaging the wood.
Essential Tools and Accessories for Nailer Operation
Beyond the nailer and compressor, a few other items make operating your 16 gauge finish nailer smoother and safer:
Air Compressor: The heart of the system. Ensure it meets or exceeds your nailer’s CFM requirements. For nail guns, a pancake or hotdog style compressor is usually sufficient for DIY tasks.
Air Hose: A good quality, flexible hose of adequate length. Look for hoses rated for the PSI you’ll be using. Standard 1/4-inch national pipe thread (NPT) fittings are common.
Air Regulator: Usually integrated into the compressor, but essential for controlling tool pressure.
Air Filter and Water Separator: Highly recommended! These prevent moisture and debris in your air line from damaging your nailer and causing jams. Many compressors have these built in, or you can add inline units.
Safety Glasses: Non-negotiable! Always wear safety glasses that meet OSHA standards (or your local equivalent) to protect your eyes from flying debris or ricocheting nails.
Work Gloves: Protect your hands and improve grip.
Hearing Protection: Nail guns can be loud, especially in enclosed spaces. Earplugs or earmuffs are a good idea.
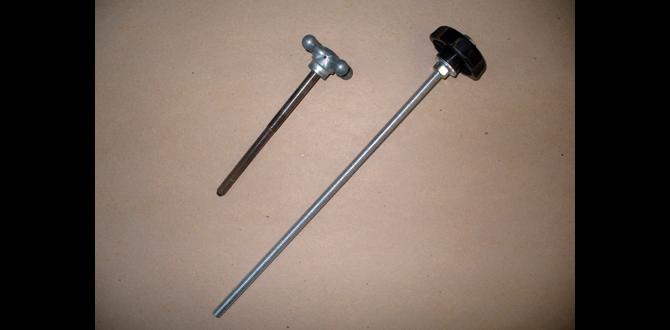
Nails: Use the correct type and size of nails for your 16 gauge finish nailer. They are typically 15 or 16 gauge and come in collations of 15, 20, or 34 degrees. Always match the nails to your nailer’s specification.
Safety First: Always Prioritize Your Well-being
Working with pneumatic tools like nailers is rewarding, but safety must always come first. Here are some essential safety tips:
Read Your Manual: Every tool is different. Familiarize yourself with your specific nailer and compressor manuals.
Wear Safety Glasses: This cannot be stressed enough. Always wear them when operating or near a nailer.
Never Point the Nailer at Yourself or Others: The safety mechanism on the nose prevents firing unless it’s pressed against a surface, but never assume it won’t fire. Treat it like a loaded firearm.
Disconnect Air When Not in Use or When Changing Nails: Always disconnect the air hose from the nailer before loading nails, clearing jams, or performing maintenance.
Be Aware of Your Surroundings: Ensure there’s no one behind your workpiece where a nail could pass through.
Keep Fingers Away from the Trigger: Avoid placing your finger on the trigger while walking around or when the nailer is connected to air pressure.
Proper Grip: Maintain a firm grip on the nailer. This will help you control the recoil and keep the tool steady.
* Clear Jams Carefully: If a nail jams, disconnect the air supply and carefully follow the manufacturer’s instructions to clear it. Never force it.
Adhering to these safety guidelines will ensure you can enjoy your woodworking projects without incident.
Frequently Asked Questions (FAQ)
Q1: What is the most common PSI setting for a 16 gauge finish nailer?
A1: The most common and versatile PSI setting for a 16 gauge finish nailer is around 100 PSI. However, it’s best to use this as a starting point and adjust based on your specific wood and nail length.
Q2: Can I use my 16 gauge finish nailer without an air compressor?
A2: Generally, 16 gauge finish nailers are pneumatic tools and require an air compressor to operate. There are battery-powered or cordless finish nailers available, but they use a different technology and are not pneumatic.
Q3: How do