For contractors, a professional flooring nailer is a genius essential for efficient, high-quality hardwood floor installation. It dramatically speeds up the process, ensures secure fastening, and delivers a polished finish that manual nailing can’t match.
Putting down a beautiful hardwood floor can seem like a big undertaking, especially if you’re new to it. You might be wondering if there’s a better way than relying on old-school methods. If you want your flooring projects to look professional and be done without all the back-breaking effort, you’re in the right place! We’re going to dive into why a professional flooring nailer is an absolute game-changer for anyone installing floors. It’s not just a tool; it’s your secret weapon for speed, precision, and a finish that wows. Get ready to discover how this one tool can transform your approach to flooring installation.
Table of Contents
Why a Professional Flooring Nailer is a Contractor’s Best Friend
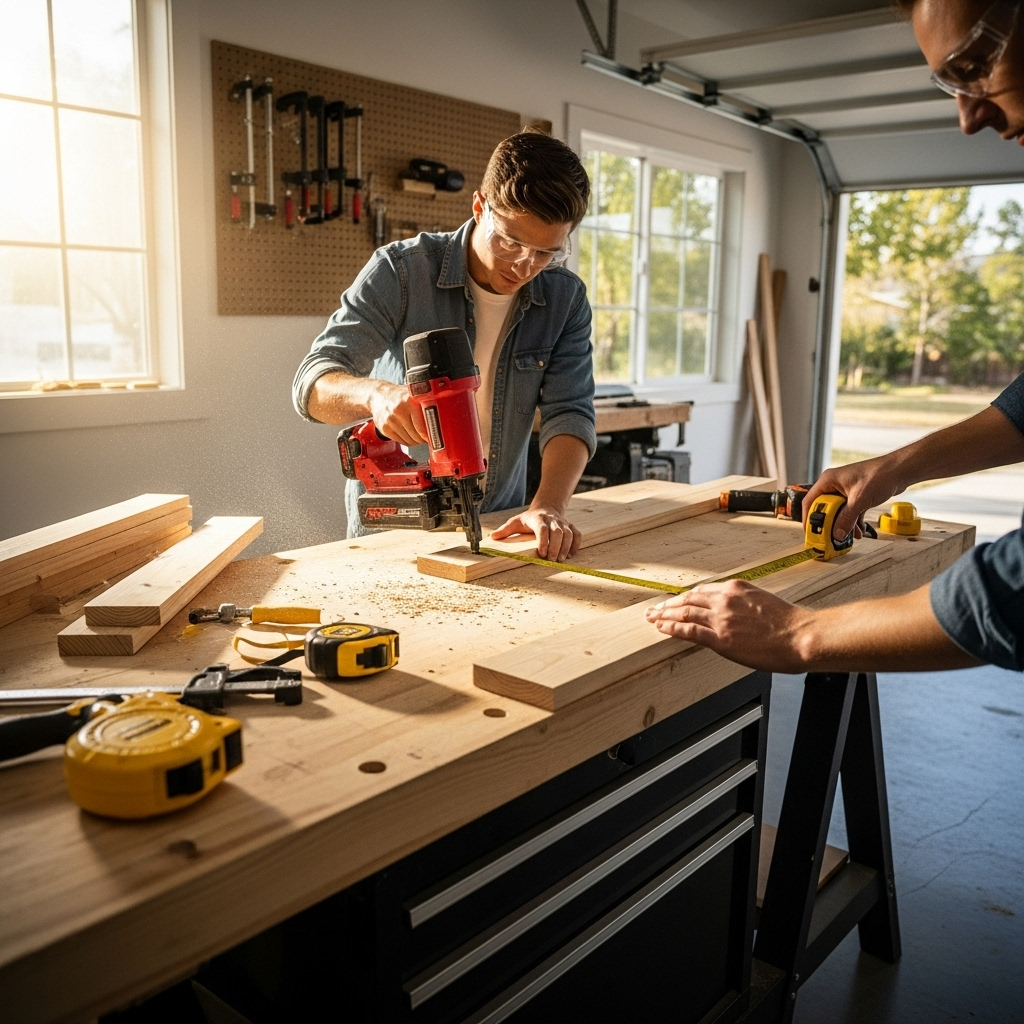
When you’re working on a flooring project, especially for clients, speed and quality are paramount. You need tools that don’t just work, but work brilliantly, making your job easier and the final result spectacular. This is where a professional flooring nailer truly shines. It’s designed specifically for the demanding task of fastening hardwood and engineered wood planks securely and efficiently. Forget the hammer and nails—it’s slow, labor-intensive, and often leads to inconsistent results. A good flooring nailer is built for power, precision, and repeated use, making it an indispensable part of a contractor’s toolkit.
The Power of Pneumatics (and sometimes Battery!)
Most professional flooring nailers are pneumatic, meaning they run on compressed air from an air compressor. This might sound like an extra piece of equipment to haul, but the power it delivers is incredible. The air-driven mechanism drives nails quickly and deeply into the hardwood tongue, providing a solid grip that prevents squeaks and loose boards down the line. Some newer models even offer battery-powered options, giving more flexibility on job sites where power outlets are scarce, though these often come with a higher price tag and may require carrying spare batteries.
Speed and Efficiency: More Floors, Less Time
Let’s talk about time. For contractors, time is money. A professional flooring nailer can drive a nail in a fraction of a second. Compare that to carefully positioning each nail and striking it with a hammer. You can easily see how much time is saved. This speed not only means you can complete jobs faster but also take on more projects, ultimately boosting your earning potential. It’s about working smarter, not harder.
Consistency and Quality: The Professional Finish
A major challenge with manual nailing is consistency. It’s tough to drive every nail to the exact same depth and angle. Too deep, and you risk damaging the wood or the nail head. Too shallow, and the nail won’t hold, leading to potential issues later. Professional flooring nailers, especially those with adjustable depth settings, ensure each nail is driven consistently. This leads to a much more secure floor and a clean, professional look that clients will love. Plus, they often use specialized flooring nails that are designed to hold perfectly.
Ergonomics and Safety: Your Body Will Thank You
Contractors spend long hours on their feet, often in awkward positions. Bending over, reaching, and repeatedly swinging a hammer can take a toll on your body. A flooring nailer significantly reduces the physical strain. Most floor nailers are designed to be used while standing or in a comfortable kneeling position. They also have safety features, like contact-trip mechanisms, that prevent accidental firing, making them safer than traditional hammering methods. Investing in your health and safety is always a smart move.
Types of Flooring to Install with Your Nailer
While we often think of hardwood when we talk about flooring nailers, they are versatile tools suitable for a range of flooring types. Understanding what your nailer can handle is key to successful installations. Here’s a breakdown:
Solid Hardwood Flooring
This is the classic application. Solid hardwood planks are traditional and durable. Their thickness and hardness require a powerful nailer to ensure the tongue-and-groove edges are securely fastened to the subfloor. A professional flooring nailer is, without a doubt, the best tool for this job. It drives nails through the thickest hardwoods with ease, creating a stable and long-lasting floor.
Engineered Wood Flooring
Engineered wood is a popular alternative to solid hardwood. It’s made of layers of wood veneer with a solid wood top layer. While slightly less dense than some hardwoods, it still requires secure fastening. Most engineered planks are designed to be nailed down, and your professional flooring nailer will be perfect for this. Always check the manufacturer’s specifications, as some thinner engineered products might have specific installation guidelines.
According to the National Wood Flooring Association (NWFA), proper mechanical fastening is crucial for the longevity of wood flooring, regardless of whether it’s solid or engineered.
Bamboo Flooring
Bamboo flooring has grown in popularity due to its sustainability and unique aesthetic. It’s often very dense, which can be a challenge for some tools. However, professional-grade flooring nailers are typically powerful enough to handle most bamboo installations when the planks are at least 1/2 inch thick and can be nailed. Again, consulting the bamboo flooring manufacturer’s installation guide is essential.
Parquet Flooring
Parquet flooring involves smaller wood pieces arranged in decorative patterns. While some parquet can be glued down, many types are designed to be nailed. A flooring nailer can be effective here, though you might need to be extra careful with spacing and ensure the nailer’s nose piece is appropriate for the smaller plank sizes to avoid damaging the intricate patterns.
What NOT to Nailer
It’s also important to know what these nailers are not designed for. They are generally not suitable for laminate flooring (which usually floats or is glued), vinyl plank flooring (which often clicks together or is glued), or very soft woods that could be easily damaged. Using the wrong tool or flooring type can lead to costly mistakes.
Choosing the Right Flooring Nailer: Key Features to Consider
Not all flooring nailers are created equal. When you’re ready to invest, looking at a few key features will help you select a tool that meets your needs—and your budget. Think of this as finding the perfect set of hands for your flooring projects.
Nail Type: Cleats vs. Staples
This is a big one. Flooring nailers primarily use two types of fasteners:
- Cleats: These are L-shaped metal fasteners, usually made of steel. They are driven through the tongue of the flooring plank at an angle and into the subfloor. Cleats are the standard for hardwood and engineered wood. They provide superior holding power.
- Staples: Some flooring nailers can also fire staples. While often used for thinner engineered woods or subflooring, they generally offer less holding power than cleats and can be more prone to splitting the wood, especially with harder species. Many professional contractors prefer cleat nailers for the best results.
Pneumatic vs. Cordless/Electric
We touched on this earlier, but it’s worth reiterating.
- Pneumatic: These are the workhorses. They require an air compressor and a hose. They are typically more powerful, lighter in hand (as the motor is in the compressor), and more affordable upfront. The main downside is managing the air hose on a large job.
- Cordless/Battery-Powered: These offer ultimate freedom of movement. No air compressor or hose needed, which can be a huge plus for smaller jobs or tight spaces. However, they are generally heavier, more expensive, and you need to manage battery life and charging.
For most professional contractors working on significant projects, a pneumatic system remains the go-to for its reliability and power.
Weight and Ergonomics
A tool you use all day needs to be comfortable to hold and maneuver. Look for nailers with good weight distribution and comfortable grip handles. Some models are designed to be used with a mallet, while others are self-contained staplers/nailers. Trying out different models in a store if possible can provide valuable insight.
Magazine Capacity and Loading Mechanism
The magazine holds the fasteners. A larger capacity means fewer reloads, saving time. Also, consider how easy it is to load the magazine. Some are front-loading, others top-loading. Aim for a system that’s quick and straightforward.
Adjustable Depth Setting
This is crucial for precise installation. An adjustable depth setting allows you to control how deep the nail is driven. This prevents over-driving (damaging the wood) or under-driving (not securing the plank). Consistent nail depth is key to a professional finish and a squeak-free floor.
Pressure Compatibility
If you’re going pneumatic, know the operating pressure range of the nailer and ensure it’s compatible with your air compressor. Most standard flooring nailers operate between 70-100 PSI.
Top Flooring Nailer Models for Contractors (Examples)
While specific models change, certain brands consistently produce reliable tools. Here are a few examples of types of nailers contractors frequently rely on. (Note: This is not an endorsement, but examples of reputable brands and tool types.)
| Brand/Model Type | Fastener Type | Power Source | Pros | Cons |
|---|---|---|---|---|
| Bostitch MFN-201 / LFP-722 (Pneumatic) | Cleats (16-gauge L-cleats) | Pneumatic | Lightweight, reliable, excellent for hardwood, good for ¾ inch planks, easy to maneuver. | Requires air compressor and hose. |
| Powernail PowerMaster 5000 (Pneumatic) | Cleats (15-gauge L-cleats) | Pneumatic | Drives nails deep and consistently, robust build, good for dense hardwoods. | Can be slightly heavier, requires compressor. |
| Senco SCN45XP Siding Nailer (Pneumatic – often used for flooring) | Cleats (16-gauge L-cleats) | Pneumatic | Versatile, durable, powerful enough for many flooring applications. | May require slight modification or specific cleat types for ideal flooring use. Check manufacturer specs. |
| DeWalt DCN692B 20V MAX XR Brushless Cordless Nailer (Battery) | Cleats (hybrid use, often requires specific accessories for flooring) | Battery-powered (20V MAX XR) | No hose or compressor needed, portable, convenient for specific tasks. | Heavier tool, battery life dependent, higher cost, may not be as powerful as pneumatic for dense hardwoods. |
Important Note: Always check the nailer’s specifications to ensure it’s compatible with your specific flooring thickness and material. Some nailers are designed for specific types of cleats or for certain plank thicknesses.
How to Use a Professional Flooring Nailer: A Step-by-Step Guide
Using a flooring nailer is straightforward, but a few key steps ensure safety and a perfect installation. Think of it like learning to ride a bike – a little practice, and you’ll be cruising.
Step 1: Gather Your Tools and Materials
Before you start, make sure you have everything. You’ll need:
- Your professional flooring nailer
- Air compressor and hose (if pneumatic)
- Appropriate flooring nails (cleats) for your nailer and flooring type
- Safety glasses (non-negotiable!)
- Work gloves (optional, but recommended)
- Measuring tape, pencil, chalk line
- Flooring planks
- Subfloor (properly prepared)
Step 2: Set Up Your Air Compressor (if pneumatic)
Connect the air hose to your compressor and your flooring nailer. Set the compressor to the recommended PSI for your nailer. Most flooring nailers operate best between 70-100 PSI. You can usually find this information in the nailer’s manual. Too little pressure, and the nail won’t seat properly; too much, and you risk damaging the floor or the tool.
Step 3: Prepare Your Flooring and Subfloor
Ensure your subfloor is clean, dry, and level. Check your flooring manufacturer’s recommendations regarding subfloor requirements and any necessary underlayment.
Step 4: Position the Nailer
Place the nose of the flooring nailer onto the tongue of the flooring plank you are about to secure. Position it so the nail will enter the tongue at a slight angle, typically around 45 degrees, driving into the subfloor. Most nailers are designed to seat perfectly on many standard flooring profiles.
Step 5: Drive the Nail
This is where the magic happens!
- For palm-style nailers: You will typically need to tap the nailer firmly with a rubber mallet (or sometimes just apply downward pressure, depending on the specific tool) to initiate the firing mechanism. The nail will be driven instantly.
- For foot-actuated or reciprocating nailers: You’ll usually press the tool’s foot down onto the plank, which engages a safety trigger. Then, squeeze the main trigger to drive the nail.
Always keep your free hand clear of the nailer’s firing zone. Ensure your eye protection is on.
Step 6: Adjust Depth if Needed
After driving a few nails, check their depth. If they are too proud (sticking out) or sunk too deep, adjust the depth setting on your nailer. Refer to your nailer’s manual for instructions on how to do this. Consistent depth is key!
Step 7: Continue Installation
Work your way across the room, following your flooring layout plan. Typically, you’ll nail every 8-12 inches along the length of the plank and at the end joints. The exact nailing pattern will depend on the flooring manufacturer’s recommendations and building codes. Aim for nails close to the edges of the boards to ensure a tight fit.
Step 8: Use the Manual Edge at Walls
For the rows of flooring closest to the walls, you won’t be able to use the nailer’s foot. In these cases, you’ll need to use a manual nailer or staple gun to fasten the boards. The last row might also need to be face-nailed (where the nail goes through the surface of the board, about 1/2 inch from the wall) and then covered with quarter-round molding.
Always refer to the specific user manual for your flooring nailer, as operation can vary slightly between models. Safety first, always!
Maintenance for Your Flooring Nailer
Like any high-performance tool, your flooring nailer needs regular care to keep it running smoothly and extend its lifespan. Think of it as a tune-up for your favorite tool.
Daily Checks and Cleaning
- Wipe Down: After each use, wipe down the exterior of the nailer with a clean, dry cloth to remove dust and debris.
- Check for Damage: Inspect the tool for any visible damage, loose parts, or worn components.
- Clear the Magazine: Ensure the fastener magazine is clean and free of debris.
Regular Lubrication (Pneumatic)
Pneumatic tools require lubrication. Most flooring nailers have a small oil port. Add a few drops of high-quality pneumatic tool oil (often specified by the manufacturer) daily or every few uses, depending on how much you use it. This lubricates the internal O-rings and pistons, preventing wear and tear.
Air Filter Maintenance (Pneumatic)
If your nailer has an inline air filter, check it regularly and clean or replace it as needed. A clogged filter can reduce the tool’s power and introduce moisture into the system.
Inspect O-rings and Seals
O-rings and seals can degrade over time, leading to air leaks. Periodically inspect them and replace any that appear worn, cracked, or brittle. Check your manual for specific instructions on accessing and replacing these parts.
Store Properly
When not in use, store your flooring nailer in a clean, dry place. If it’s a pneumatic tool, disconnect it from the air supply and consider draining any residual air from the tool. Some users prefer to store it in its original case or a protective bag.
Professional Servicing
For major maintenance or if you notice consistent issues like air leaks, weak performance, or jamming, consider having your flooring nailer serviced by a qualified tool repair professional. They can perform more in-depth checks, repairs, and recalibrations.
Consistent maintenance isn’t just about keeping your tool working; it’s about ensuring safety and reliability on every job. For contractors, this means fewer headaches and more successful projects.