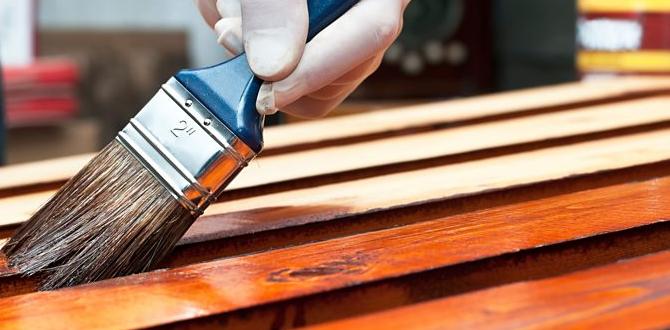
Pre-finished hardwood tools can help you get the job done right. These tools are special. They work with wood that already has a finish. This means you don’t have to wait for everything to dry. That’s a huge bonus! Can you picture your new floor sparkling in the sunlight? It feels satisfying to know it’s easier than you think.
In this article, we will explore the best pre-finished hardwood tools for your floor project. We’ll uncover tips and tricks that make your DIY journey smoother. Let’s get ready to dive into the exciting world of pre-finished hardwood and the tools you need. You’re just a step away from transforming your space!
Table of Contents
Pre-Finished Hardwood Tools: Essential Equipment For Flooring

Discovering Pre-finished Hardwood Tools
Pre-finished hardwood tools make woodworking easier and more enjoyable. These tools offer a smart way to save time, helping you skip the lengthy finishing process. Did you know that using these tools can give your projects a professional look? Imagine creating beautiful flooring or furniture with less effort! You’ll learn about different types of pre-finished tools and how they can enhance your woodworking skills. Get ready to explore and bring your ideas to life!
Benefits of Using Pre-Finished Hardwood Tools
Advantages of prefinished over unfinished hardwood tools. Impact on project efficiency and finish quality.
Using prefinished hardwood tools offers clear benefits. First, they save time. Materials are ready to use, cutting down project duration. Second, the finish quality is superior. These tools come coated with a fine finish that looks great and lasts longer. Lastly, working with prefinished tools reduces the need for messy clean-up after sanding and finishing. This means more time enjoying your finished work, and less time scrubbing tools!
What are the advantages of prefinished hardwood tools?
They save time and provide a better finish than unfinished options.
Benefits include:
- Quick setup
- High-quality finish
- Less mess
Top Brands of Pre-Finished Hardwood Tools
Review of leading manufacturers in the market. Comparison of product offerings and pricing.
Many brands offer great pre-finished hardwood tools. Some of the top ones include:
- Bona – Known for its high-quality finishes and professional-grade tools.
- Minwax – Offers user-friendly products at affordable prices.
- Varathane – Features a wide variety of finishes and colors.
- Rust-Oleum – Focuses on durability and ease of application.
These brands vary in product offerings and price points. Generally, Bona tools tend to be more expensive, while Minwax offers budget-friendly options. Each brand has its unique benefits, making it important to choose based on your specific needs.
What are popular brands of pre-finished hardwood tools?
Bona, Minwax, Varathane, and Rust-Oleum are popular brands. They offer quality products for different budgets.
Maintenance Tips for Pre-Finished Hardwood Tools
Best practices for tool care and longevity. Cleaning and storage recommendations.
Taking care of your pre-finished hardwood tools is as vital as feeding your houseplants—ignore them, and they’ll wilt! First, keep them clean. Use a damp cloth to wipe dust off after each use and avoid soaking them. For storage, keep them in a dry, cool spot. If you leave them out in the garage party, they might rust! Here’s a quick table for tips:
| Tip | Details |
|---|---|
| Clean Regularly | Wipe with a damp cloth after each use. |
| Store Properly | Keep in a dry, cool place. |
By following these practices, you can extend the life of your tools and keep them performing like a star in a blockbuster movie!
Common Mistakes to Avoid with Pre-Finished Hardwood Tools
Misuse of tools leading to damage. Choosing the wrong tools for specific projects.
Using pre-finished hardwood tools can be tricky. One common mistake is misusing tools, which can cause damage faster than a squirrel on a caffeine rush. Always use the right tool for your project. Choosing the wrong tool is like trying to bake a cake with a hammer—it just doesn’t work! Here’s a quick guide to avoid those mishaps:
| Common Mistake | What Happens | Avoid By |
|---|---|---|
| Misusing Tools | Damage to wood | Follow instructions |
| Wrong Tool Choice | Poor results | Know your tools |
By steering clear of these pitfalls, you’ll finish your project without a hitch. Plus, your hardwood will thank you with a big, shiny smile!
DIY Projects Using Pre-Finished Hardwood Tools
Project ideas that showcase versatility. Stepbystep guides for beginnerfriendly projects.
Looking to unleash your inner craftsman? With pre-finished hardwood tools, the options are endless! You can build a charming birdhouse, create a stylish shelf, or even make a cozy bench for your garden. Here’s a simple guide to get you started:
| Project | Steps |
|---|---|
| Birdhouse | 1. Cut wood pieces. 2. Assemble and nail. 3. Add decorations! |
| Shelf | 1. Measure space. 2. Cut wood. 3. Attach to wall. |
| Garden Bench | 1. Gather materials. 2. Build frame. 3. Sand and paint. |
These projects are perfect for beginners and can show off your amazing skills. Remember, it’s fun to play with wood, but don’t take any splinters home! Happy crafting!
Cost Considerations for Pre-Finished Hardwood Tools
Budgeting for purchasing highquality tools. Longterm value vs. initial investment.
Buying pre-finished hardwood tools can be exciting, but it’s important to think about costs. Setting a budget helps you track expenses. Tools may cost a bit more at first, but high-quality ones last longer. This means spending less over time. Think of it like this: buying a toy that breaks quickly versus one that lasts for years. Good tools are worth it! Consider these points:
- Quality tools last longer.
- Higher prices often mean better performance.
- Think about long-term savings.
What should I consider when budgeting for tools?
Start with your budget. It’s crucial to decide how much you can spend. Remember, quality tools are an investment in the future!
Conclusion
In summary, pre-finished hardwood tools save time and effort for your projects. They offer a beautiful and durable finish right out of the box. You can easily find these tools in stores or online. So, if you want to improve your woodworking skills, consider using pre-finished hardwood tools. Keep exploring and learning about woodworking for even better results!
FAQs
What Are The Essential Tools Needed For Installing Pre-Finished Hardwood Flooring?
To install pre-finished hardwood flooring, you need a few important tools. First, get a saw to cut the wood pieces to the right size. You’ll also need a hammer to help fit the pieces together. A tape measure is important for measuring the space and the wood. Finally, a level helps make sure everything is even and looks nice.
How Do I Properly Maintain And Care For Pre-Finished Hardwood Floors To Ensure Their Longevity?
To take care of your pre-finished hardwood floors, you should sweep or vacuum them regularly. This helps remove dirt and dust. Use a damp mop with special wood cleaner every month. Avoid using water or vinegar, as they can hurt the wood. And remember, always wear soft-soled shoes to protect the floor!
What Are The Differences Between Installing Pre-Finished Hardwood Flooring And Unfinished Hardwood Flooring?
When you install pre-finished hardwood flooring, it’s already stained and sealed. This means you can walk on it right away. Unfinished hardwood flooring needs to be sanded and finished after it’s installed. This can take more time and mess. You also need to wait longer before using a room with unfinished wood.
Are There Specific Adhesives Or Underlayments Recommended For Pre-Finished Hardwood Installations?
Yes, there are special glues and pads you should use for pre-finished hardwood floors. These help them stick well and stay strong. Look for adhesives that are made just for hardwood. It’s best to read the instructions to make sure you choose the right ones.
What Techniques Can Be Used To Repair Scratches Or Dents On Pre-Finished Hardwood Flooring?
You can fix scratches on pre-finished hardwood flooring using special markers that match the wood color. For deeper dents, try using a steam iron and a damp cloth. Place the cloth over the dent and gently heat it with the iron. The wood will swell back into shape. Always test your method in a small spot first!
{“@context”:”https://schema.org”,”@type”: “FAQPage”,”mainEntity”:[{“@type”: “Question”,”name”: “What Are The Essential Tools Needed For Installing Pre-Finished Hardwood Flooring? “,”acceptedAnswer”: {“@type”: “Answer”,”text”: “To install pre-finished hardwood flooring, you need a few important tools. First, get a saw to cut the wood pieces to the right size. You’ll also need a hammer to help fit the pieces together. A tape measure is important for measuring the space and the wood. Finally, a level helps make sure everything is even and looks nice.”}},{“@type”: “Question”,”name”: “How Do I Properly Maintain And Care For Pre-Finished Hardwood Floors To Ensure Their Longevity? “,”acceptedAnswer”: {“@type”: “Answer”,”text”: “To take care of your pre-finished hardwood floors, you should sweep or vacuum them regularly. This helps remove dirt and dust. Use a damp mop with special wood cleaner every month. Avoid using water or vinegar, as they can hurt the wood. And remember, always wear soft-soled shoes to protect the floor!”}},{“@type”: “Question”,”name”: “What Are The Differences Between Installing Pre-Finished Hardwood Flooring And Unfinished Hardwood Flooring? “,”acceptedAnswer”: {“@type”: “Answer”,”text”: “When you install pre-finished hardwood flooring, it’s already stained and sealed. This means you can walk on it right away. Unfinished hardwood flooring needs to be sanded and finished after it’s installed. This can take more time and mess. You also need to wait longer before using a room with unfinished wood.”}},{“@type”: “Question”,”name”: “Are There Specific Adhesives Or Underlayments Recommended For Pre-Finished Hardwood Installations? “,”acceptedAnswer”: {“@type”: “Answer”,”text”: “Yes, there are special glues and pads you should use for pre-finished hardwood floors. These help them stick well and stay strong. Look for adhesives that are made just for hardwood. It’s best to read the instructions to make sure you choose the right ones.”}},{“@type”: “Question”,”name”: “What Techniques Can Be Used To Repair Scratches Or Dents On Pre-Finished Hardwood Flooring? “,”acceptedAnswer”: {“@type”: “Answer”,”text”: “You can fix scratches on pre-finished hardwood flooring using special markers that match the wood color. For deeper dents, try using a steam iron and a damp cloth. Place the cloth over the dent and gently heat it with the iron. The wood will swell back into shape. Always test your method in a small spot first!”}}]}