Imagine stepping onto a beautifully finished floor in your home. The shine and warmth of pre-finished hardwood can transform any space. But before you lay those lovely planks, there’s an important step: subfloor prep.
Why is subfloor prep crucial? Think of it like building a sturdy foundation for a house. If the base isn’t solid, everything above it can fall apart. Preparing the subfloor helps ensure your hardwood stays beautiful and lasts a long time.
Did you know that a well-prepped subfloor can help reduce squeaky sounds? Nobody likes creaky floors! By taking time to prep, you create a quiet, peaceful home.
In this article, we’ll explore the best ways to prepare your subfloor for pre-finished hardwood. You’ll discover tips and tricks that make the job easier and more effective. Let’s dive in and get your floors ready!
Table of Contents
Pre-Finished Hardwood Subfloor Prep: Essential Steps And Tips

Pre-Finished Hardwood Subfloor Prep
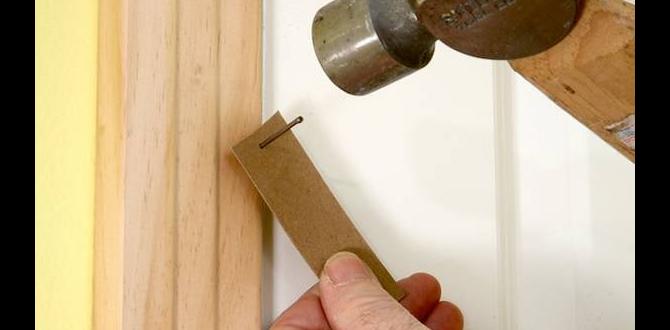
Preparing your subfloor for pre-finished hardwood is essential for a smooth installation. First, ensure the surface is clean and dry. Any old adhesive, dust, or debris can cause problems. It’s also smart to check for squeaks and fix them before laying the floor. Did you know that a well-prepped subfloor can extend the life of your hardwood? Think of it as laying a strong foundation for a house. Proper prep leads to a beautiful and lasting floor you’ll love.
Understanding Pre-Finished Hardwood
Definition and benefits of prefinished hardwood. Differences between prefinished and sitefinished hardwood.
Imagine having beautiful wood floors without the mess of sanding and staining! That’s the magic of prefinished hardwood. It’s hardwood that comes ready to install, straight out of the box. This saves time and hassle. Not to forget, less dust means fewer sneezes!
If you compare it with site-finished hardwood, you’ll find some key differences. Site-finished needs sanding and finishing after installation, while prefinished is all set. Here’s a quick look:
| Feature | Prefinished Hardwood | Site-Finished Hardwood |
|---|---|---|
| Installation Time | Quick and easy | Longer process |
| Mess | No mess | Lots of dust |
| Durability | Protected upfront | Needs extra care |
In short, prefinished hardwood makes life easier. You can enjoy your gorgeous floors faster and with fewer trips to the vacuum!
Importance of Subfloor Preparation
Role of subfloor in the durability of hardwood flooring. Common issues caused by inadequate subfloor prep.
Preparing the subfloor is key to keeping hardwood floors strong. A solid subfloor can make your hardwood last for years. If it’s not done right, problems can arise. Here are some common issues:
- Gaps or squeaks in the floor.
- Moisture damage causing warping.
- Uneven surfaces leading to instability.
These issues can hurt the look and feel of your floors. So, pay attention to subfloor prep for a better floor!
Why is subfloor prep important?
Proper subfloor preparation supports hardwood flooring, ensuring durability and beauty.
Common Subfloor Issues
- Moisture problems
- Unlevel surfaces
- Squeaking noises
Assessment of Existing Subfloor
Types of subfloors: plywood, OSB, concrete. Key checks: moisture levels, unevenness, and damage.
Knowing your existing subfloor is key for any project. There are three main types: plywood, OSB, and concrete. Each has unique traits. Check for moisture levels to avoid mold. Look for uneven areas, as they can cause problems later. Finally, inspect for any damage like cracks or holes. Make sure your floor is solid before adding anything on top!
- Plywood: Common and durable.
- OSB: Cost-effective option.
- Concrete: Strong but may need extra prep.
What should I check on my subfloor?
Always check moisture levels, unevenness, and damage before installing new flooring. This ensures a long-lasting and safe floor!
Tools and Materials Needed for Prep
Essential tools for subfloor preparation. Recommended materials for leveling and repair.
Preparing a subfloor can be fun! You need the right tools and materials. Essential tools include:
- Measuring tape
- Level
- Utility knife
- Floor scraper
- Drill
- Safety goggles
For leveling and repair, get these materials:
- Self-leveling compound
- Underlayment
- Wood glue
- Wood filler
Having the right tools helps keep the job smooth and fun. Let’s get ready for that beautiful floor!
What tools do I need for subfloor prep?
You will need tools like a measuring tape and a level to ensure accuracy. Utility knives and floor scrapers help remove old materials. Don’t forget safety goggles!
Step-by-Step Subfloor Preparation Process
Cleaning the subfloor. Repairing any damage and leveling the surface.
Ready to roll up those sleeves? First, it’s time to clean that subfloor! Sweep up dust and crumbs. You don’t want any surprise snacks under your new flooring! Next, check for any damage. Are there holes or cracks? If so, patch them up like a pro. Finally, let’s level that surface. Use a leveling compound if needed. A smooth subfloor is key for a shiny new hardwood floor!
| Step | Action |
|---|---|
| 1 | Clean the subfloor |
| 2 | Repair damages |
| 3 | Level the surface |
Moisture Control Measures
Importance of moisture management. Strategies for moisture prevention and control.
Managing moisture is vital for keeping your flooring safe. Too much moisture can cause problems like mold and damage to your hardwood. Simple steps can help prevent this. Regularly check for leaks and keep your home well-ventilated. Use a dehumidifier if needed. Here are some easy tips:
- Keep windows open for airflow.
- Fix leaky pipes quickly.
- Use moisture barriers in your subfloor.
- Control humidity with a dehumidifier.
Following these methods will protect your floors and improve your home’s air quality.
What are some ways to control moisture?
To control moisture, use strong fans and keep areas dry. Place moisture barriers under your subfloor to block water. Regular checks and proper ventilation will also help protect your home.
Acclimating Hardwood Flooring
Why acclimation is necessary. Steps to properly acclimate prefinished hardwood.
To keep hardwood floors from warping or cracking, they need to adjust to the room’s climate. Acclimation is important for stability. Here’s how to properly prepare your pre-finished hardwood:
- Place the boards in the room where they’ll be installed.
- Leave them for 3 to 7 days to adjust to temperature and humidity.
- Keep the boards in their packaging but opened on the ends.
- Check the moisture levels using a meter for best results.
Taking these steps helps to avoid future problems.
Why is Acclimation Necessary?
Acclimation prevents issues like gaps or bulges in the wood. It helps the wood adapt to the home’s environment.
Final Checks Before Installation
Lastminute inspections of subfloor. Ensuring compatibility with prefinished hardwood requirements.
Before installing your pre-finished hardwood, do some final checks on the subfloor. Look for any, gaps or rough spots. Make sure it feels solid and even. This is key for a successful installation. It should meet the needs of your new flooring.
- Check for moisture and dust.
- Ensure the surface is clean.
- Look for signs of damage.
Taking these steps will help you avoid problems later on. So, a little effort now means you’ll enjoy your beautiful floors more in the future!
What are the last-minute checks to perform?
You should check for cleanliness, levelness, and moisture. All these factors make sure your flooring fits just right.
Conclusion
In conclusion, prepping your pre-finished hardwood subfloor is essential for a smooth installation. We’ve learned to clean and level the surface. It’s important to let the wood acclimate to your home’s temperature and humidity. Now, you can confidently start your project! For more tips and details, check out further reading on subfloor installation. Happy flooring!
FAQs
What Are The Essential Steps For Preparing A Subfloor Before Installing Pre-Finished Hardwood Flooring?
To prepare a subfloor for pre-finished hardwood flooring, first, check for any loose or squeaky areas and fix them. Next, clean the subfloor well to get rid of dust and dirt. Then, make sure the subfloor is dry and level; you can use a level tool for this. Finally, lay down a moisture barrier if needed to keep water away. Now you’re ready to install your new floor!
How Do You Assess The Condition Of An Existing Subfloor For Compatibility With Pre-Finished Hardwood?
To check if a subfloor is good for pre-finished hardwood, start by looking for any damage. You want to ensure it’s flat and not too wet. Use a level to see if things are even. Also, make sure there are no large gaps or loose boards. If everything looks good, then you can use the hardwood!
What Tools And Materials Are Required For Subfloor Preparation When Dealing With Moisture Issues?
To prepare a subfloor for moisture issues, you need a few tools and materials. First, use a moisture meter to check for dampness. You also need a dehumidifier to help remove extra moisture from the air. For sealing, have moisture-resistant paint or sealant ready. Finally, you’ll want a foam barrier or special underlayment to keep moisture away from the flooring above.
Can You Install Pre-Finished Hardwood Over Different Types Of Subfloors, Such As Concrete Or Plywood, And What Are The Considerations?
Yes, you can install pre-finished hardwood on both concrete and plywood subfloors. If your subfloor is concrete, make sure it is dry and level. For plywood, check that it’s sturdy and clean. You may need special steps to prevent moisture problems. Always follow the guidelines for the specific type of flooring you choose.
How Important Is It To Level And Clean The Subfloor, And What Techniques Can Be Used To Ensure It Is Adequately Prepared?
It’s very important to level and clean the subfloor. A smooth, clean base helps your new floor look good and last longer. You can use a level to check for bumps or dips. If you find any, you can fill them with a special compound. Always sweep or vacuum to remove dust and dirt before starting.