Choosing between a pneumatic and a cordless nail gun is crucial for DIYers. Pneumatic nailers offer power and consistency, ideal for heavy-duty work, while cordless models provide unparalleled portability and ease of use for smaller tasks and on-the-go projects. This guide will help you understand the key differences to make the smartest choice for your needs.
Hey there, fellow DIY enthusiasts! Jack Shaffer here, your go-to guy for all things nailers and woodworking. I know how exciting it is to start a new project, whether it’s building a new deck, crafting a custom bookshelf, or finally putting up those baseboards. But before you dive in, there’s one big decision that can make your journey a whole lot smoother: choosing the right nail gun. You’ve probably seen them, maybe even heard them in action – those powerful tools that drive nails in a flash. But when you’re standing in the tool aisle, you’ll notice two main types: pneumatic and cordless. Which one is right for you? It’s a common question, and honestly, it can feel a bit overwhelming. Don’t worry, though! I’m here to break it all down in simple terms. We’ll explore what makes each type tick, their pros and cons, and what kind of projects they’re best suited for. By the end of this, you’ll feel confident in picking the perfect nailer to power up your next build. Let’s get started!
Table of Contents
Understanding Nail Gun Power Sources
At its core, a nail gun uses a fast-acting piston mechanism to drive a nail. The magic happens in how that piston is propelled. This is where our two main contenders, pneumatic and cordless, differ significantly. One relies on compressed air, and the other uses a battery. Understanding this fundamental difference is the first step to making an informed decision.
Pneumatic Nail Guns: The Power of Air
Pneumatic nail guns, often called air nailers, are the workhorses of the construction world. They harness the power of compressed air to drive nails. This air is typically supplied by an air compressor, a separate machine that stores pressurized air, which is then delivered to the nail gun through a hose. When you pull the trigger, a burst of air is released, pushing a piston that strikes the nail and drives it into the material. They’re known for their consistent power and relatively lighter weight in hand, as the heavy lifting is done by the compressor.
How Pneumatic Nail Guns Work:
- Air Compressor: This is the heart of the system. It draws in ambient air, compresses it, and stores it in a tank.
- Hose Connection: A flexible hose connects the compressor’s tank to the nail gun.
- Trigger Activation: When you pull the trigger, a valve opens, allowing a controlled amount of compressed air to flow into the nail gun’s cylinder.
- Piston Mechanism: The compressed air forces a piston down a chamber at high speed.
- Nail Driving: The piston strikes the head of the nail, driving it into your work material.
Pros of Pneumatic Nail Guns:
- Consistent Power: They deliver reliable, powerful nail driving for every shot, regardless of battery charge.
- Lightweight Tool: The nail gun itself is typically lighter than a cordless model because the motor and power source (compressor) are separate.
- Faster Firing Rate: Generally capable of firing nails more rapidly than most cordless tools.
- Durability & Longevity: Often built for heavy-duty, professional use and can last for many years with proper maintenance.
- Cost-Effective (for the tool): While the initial investment in a compressor might be high, individual pneumatic nail guns can be less expensive than their cordless counterparts.
Cons of Pneumatic Nail Guns:
- Requires an Air Compressor: You need a bulky and noisy air compressor, which limits portability.
- Hose Management: The air hose can get in the way, snag on objects, or limit your working range.
- Setup Time: You need to plug in the compressor, let it build pressure, and manage the hose, adding setup time to your project.
- Noise: Air compressors are notoriously loud.
- Maintenance: Air compressors require regular oil changes and draining of condensation.
Cordless Nail Guns: Freedom and Convenience
Cordless nail guns offer the ultimate freedom. They ditch the air compressor and hose entirely, relying on a rechargeable battery to power the nail-driving mechanism. There are a couple of common types of cordless nailers: those that use a small compressed air cylinder powered by a motor (often called pneumatic-hybrid or gas-powered, though battery-powered mechanisms are now far more common), and those that use a powerful motor to directly drive the nail or use a spring-loaded system charged by the motor. Modern battery-powered nailers are incredibly efficient and powerful, making them excellent choices for a wide range of DIY tasks.
How Cordless Nail Guns Work (Battery-Powered):
- Rechargeable Battery: A lithium-ion battery pack provides the power.
- Motor: An electric motor drives a mechanism. This can vary:
- Flywheel System: The motor spins a flywheel, and when the trigger is pulled, a clutch engages, releasing the flywheel’s energy to rapidly drive a piston.
- Direct Drive: Some models use an electromagnet to directly drive the piston.
- Pneumatic Hybrid (Less Common Now): Some older designs used a small onboard compressor powered by the battery to pressurize a tiny air cylinder, which then acted like a mini pneumatic nailer.
- Trigger Activation: Pulling the trigger engages the motor and the nail-driving mechanism.
Pros of Cordless Nail Guns:
- Ultimate Portability: No compressor, no hose means you can take them anywhere.
- Quick Setup: Just grab it and go! No waiting for pressure to build.
- Clean Operation: No air compressor means less noise and no oil or air leaks to worry about.
- Ease of Use: Simpler to operate, ideal for beginners.
- Precise Placement: Often offer good control for detailed work.
Cons of Cordless Nail Guns:
- Battery Dependence: You’re limited by battery life. If the battery dies, you stop working until it’s recharged.
- Heavier Tool: The battery and internal motor add weight to the tool itself.
- Potentially Slower Firing Rate: Some models might not keep up with the rapid-fire demands of certain professional tasks.
- Higher Upfront Cost: Often more expensive than comparable pneumatic guns, especially when factoring in extra batteries.
- Power Output: While powerful, some very heavy-duty tasks might still benefit from the consistent, raw power of a pneumatic system.
Key Differences at a Glance
Let’s break down the core differences in a way that’s easy to digest. This table highlights the most important factors when deciding between the two types of nail guns.
| Feature | Pneumatic Nail Gun | Cordless Nail Gun |
|---|---|---|
| Power Source | Compressed Air (via Air Compressor) | Rechargeable Battery |
| Portability | Limited by hose and compressor | Highly portable, no external power source needed |
| Setup Time | Longer (compressor, hose connection, pressurization) | Very fast (grab and go) |
| Tool Weight | Lighter | Heavier (due to battery and motor) |
| Continuous Power | Very consistent, high power | Consistent until battery depletes |
| Cost (Initial) | Moderate (nailer) to High (compressor + nailer) | Moderate to High (nailer with battery) |
| Noise Level | High (compressor is noisy) | Moderate (tool operation) |
| Maintenance | Compressor maintenance (oil, draining) | Battery charging, occasional tool cleaning |
| Best For | Heavy-duty construction, framing, large jobs, workshops | Trim work, DIY projects, mobility, quick repairs, remote locations |
Choosing the Right Nail Gun for Your Projects
Now for the big question: which one is the champion for your specific needs? It really depends on the type of work you plan to do. Think about your typical projects, your workspace, and how much you value portability and ease of use.
When to Choose a Pneumatic Nail Gun
- Framing and Sheathing: When you’re building the skeleton of a house or a large deck, the sheer power and consistent drive of a pneumatic nailer are hard to beat. These tools can drive large nails (like 3-inch or 3.5-inch framing nails) effortlessly, deep into tough lumber.
- Heavy-Duty Construction: For any project that involves structural building or working with dense hardwoods, a pneumatic nailer provides the necessary force.
- Workshop Focused: If your projects are primarily done in a dedicated workshop where a compressor can be permanently set up, the limitations of portability are not an issue. You can enjoy the benefits of lighter tools and consistent power.
- High Volume Nailing: For tasks that require driving hundreds or thousands of nails quickly, like installing siding or subflooring over large areas, pneumatic guns often offer a higher firing rate and don’t run out of “power” like a battery might.
- Budget-Conscious (Long-Term): While a compressor is a significant initial investment, individual pneumatic nailers are often less expensive than top-tier cordless models. If you plan to own your tools for a long time and do a lot of demanding work, pneumatic can be more cost-effective overall.
When to Choose a Cordless Nail Gun
- Trim and Molding: Installing baseboards, crown molding, window casings, or door frames is where cordless nailers truly shine. They provide the finesse needed for these detailed jobs without the hassle of a hose.
- Cabinetry and Furniture: For building cabinets or assembling furniture, the portability and precision of a cordless nailer offer great convenience. You can easily move around the workpiece without snagging a hose.
- DIY Home Renovation: Homeowners tackling various tasks like installing wainscoting, assembling a shed, or replacing fence pickets will appreciate the convenience.
- Remote or Awkward Locations: Working on a roof, in a crawl space, or on a project far from a power outlet? A cordless nailer is your best friend.
- Beginners: The simplicity of operation and lack of managing an air hose makes cordless nailers an excellent starting point for those new to nail guns.
- Small to Medium Projects: If your projects are generally smaller in scale and don’t require driving extremely large fasteners through the densest woods, a cordless nailer will serve you very well.
Types of Nailers Within Each Category
It’s important to remember that both pneumatic and cordless platforms come in various specialized types of nail guns. The fundamental choice is power source, but then you’ll select the nailer type based on the nail size and application.
Pneumatic Nailer Types:
- Framing Nailers: For structural lumber, typically use nails from 2 to 3.5 inches.
- Common Nailers: General-purpose, often used for heavier trim and framing.
- Finish Nailers: For attaching moldings and trim, use smaller, thinner nails (e.g., 15-gauge or 16-gauge).
- Brad Nailers: For very fine trim work and delicate projects, use even thinner brad nails (e.g., 18-gauge).
- Pin Nailers: Use tiny headless pins for invisible fastening, ideal for delicate decorative work.
- Roofing Nailers: Designed for speed and durability to install asphalt shingles.
- Flooring Nailers: Specialized tools for installing hardwood floorboards.
Cordless Nailer Types:
Cordless versions are available for most of the nailer types listed above, with the exception being the most heavy-duty framing nailers, which often still rely on pneumatic power for maximum force. Most cordless options include:
- Cordless Framing Nailers: Available, but might have limitations on nail size or depth of drive compared to pneumatic. Excellent for job sites without power.
- Cordless Finish Nailers: Very popular for trim work, cabinetry, and furniture making.
- Cordless Brad Nailers: Ideal for intricate trim, decorative elements, and light assembly.
- Cordless Pin Nailers: Perfect for fine woodworking and applications where the fastener needs to be completely hidden.
- Cordless Roofing Nailers: Newer to the cordless market, offering great portability for roof jobs.
Essential Accessories and Considerations
Regardless of which type of nail gun you choose, there are a few accessories and considerations that will enhance your experience and ensure safety.
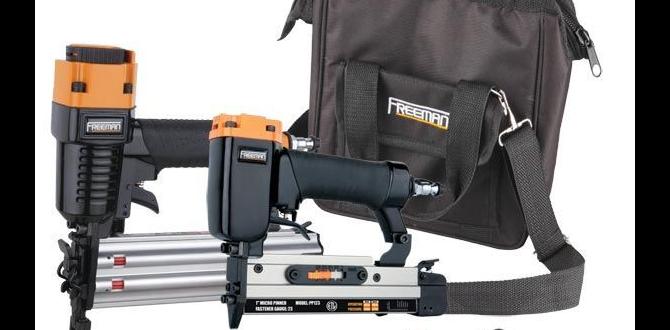
For Pneumatic Setups:
- Air Compressor: Choose one with enough CFM (cubic feet per minute) to power your nailer efficiently. Look for a tank size appropriate for your typical job duration. For DIYers, a 2-6 gallon tank is usually sufficient for trim and finish work, while framing might require larger.
- Air Hose: Opt for an oil-resistant hose of adequate length (e.g., 25-50 feet) to give you working room.
- Fittings and Couplers: Ensure you have the correct quick-connect fittings for both your compressor and nailer.
- Air Tool Oil: Some pneumatic tools require a few drops of specialized oil before each use to keep internal parts lubricated. Check your manual!
- Moisture Filter/Regulator: This unit attaches to the hose and ensures clean, correctly pressured air reaches your nailer. This is vital for tool longevity and consistent performance. Visit the OSHA construction safety guidelines for general workplace safety standards that apply to tool usage.
For Cordless Setups:
- Extra Batteries: If you plan on extended use, having a second battery fully charged is a lifesaver.
- Fast Charger: Some brands offer rapid chargers that can get your battery back up to a usable level in under an hour.
- Tool Bag or Case: To keep your nailer, batteries, charger, and some fasteners organized and protected.
Universal Considerations:
- Safety Glasses: Absolutely non-negotiable. Always wear safety glasses to protect your eyes from flying debris or accidental nail ricochets.
- Nails (Fasteners): Make sure you buy the correct type, size, and gauge of nails for your specific nail gun. Using the wrong nails can cause jams or damage the tool.
- Depth Adjustment: Most nailers have a built-in depth adjustment wheel or lever. Learn how to use this to set the nail depth so the head is flush with the surface, or slightly countersunk if needed.
- Workpiece Support: Ensure your material is stable and properly supported.
Safety First – Always!
No matter which nail gun you choose, safety is paramount. Nail guns are powerful tools, and used improperly, they can cause serious injury. Here are some key safety tips:
- Read the Manual: Your tool’s manual is your best friend. It contains specific operating and safety instructions for your model.
- Wear Safety Glasses: This cannot be stressed enough. Always wear ANSI Z87.1 rated safety glasses whenever operating or near a nail gun.
- Never Point at Yourself or Others: Treat every nail gun as if it were loaded and ready to fire. Keep the nose pointed away from people and yourself at all times.
- Disable When Not in Use: Disconnect from air supply (pneumatic) or remove the battery (cordless) when walking away, changing nails, or performing maintenance.
- Two-Stage Trigger: Understand your tool’s trigger mechanism. Most have a safety contact tip (the part that touches the wood) and a trigger. For safety, the contact tip must depress before the trigger is pulled. Some tools offer sequential (one nail per trigger pull) and contact (hold trigger, bump to fire) modes. Always use sequential mode unless you are experienced and the job requires contact firing