Have you ever wanted to create something beautiful that lasts a lifetime? A wood jewelry box can be that very treasure. Imagine crafting your own piece that stores special memories. Not only is it useful, but it can also become a family heirloom.
With our plans for a wood jewelry box, anyone can join the fun of building this stunning piece. Everyone loves a unique gift. A handmade box shows you really care. Plus, it can be a great weekend project with friends or family.
Did you know woodworking can be easy and enjoyable? Many think it takes years to learn, but that’s not true. With simple steps and a clear plan, you can turn beautiful wood into your very own jewelry box. Why not start this journey today? Your creativity is waiting to shine!
Table of Contents
Plans For Wood Jewelry Box: Create A Stunning Heirloom

Plans for Wood Jewelry Box: Create a Stunning Heirloom
Creating a wood jewelry box can be both fun and rewarding. These boxes not only organize jewelry but also add a personal touch to your room. Have you ever thought about crafting something special for your loved ones? Using simple materials, you can design a unique piece that tells a story. Imagine how your handmade box can become a cherished family heirloom. Start your journey today and make something beautiful that lasts!Materials Needed for Your Jewelry Box
List of essential materials (wood types, tools, and supplies). Recommendations for sourcing quality materials.To build your stunning jewelry box, you’ll need the right materials. Start with good-quality wood like cedar, oak, or pine. They not only look nice but also smell great! Let’s not forget tools: you’ll want a saw, some clamps, and sandpaper. Trust us, nobody likes splinters!
| Materials | Recommendations |
|---|---|
| Wood | Cedar, Oak, or Pine |
| Tools | Hand saw, Clamps, Sandpaper |
| Supplies | Wood glue, Varnish |
For sourcing, visit local hardware stores or check online. Websites like Amazon can be a treasure trove. And remember, if your wood doesn’t have character, it might need more than a smile for extra charm!
Designing Your Jewelry Box
Tips for sketching and visualizing designs. Considerations for size, shape, and compartments.Creating a design for your jewelry box can be exciting! Start by sketching ideas on paper. Think about how big or small you want it to be. A box that’s too large may take up too much space. Consider what shapes appeal to you, like a rectangle or a heart. Don’t forget to include compartments for different types of jewelry. This keeps everything organized!
- Draw simple shapes first.
- Use rulers for straight lines.
- Label each compartment’s purpose.
What should I consider when designing a jewelry box?
You need to think about size, shape, and compartments. This helps to fit your jewelry nicely. A well-planned design makes your box special!
Step-by-Step Construction Guide
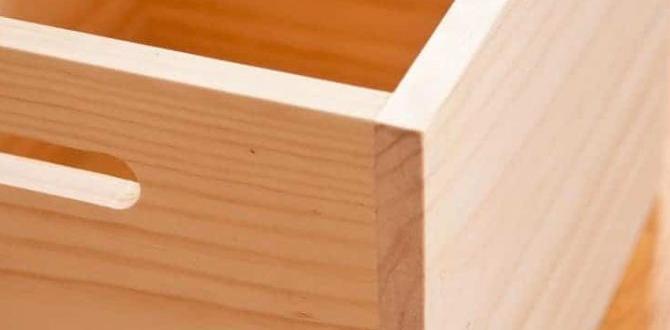
Detailed process of cutting and shaping wood pieces. Assembly techniques for a sturdy build.Start by measuring and marking your wood pieces carefully. Use a saw to cut them into the right shapes. Sand the edges to make them smooth. For a sturdy build, use wood glue and clamps to hold them together. Add screws for extra strength. Finally, check that everything fits well before finishing the surface.
What are the main steps in making a wood jewelry box?
To make a wood jewelry box, you need to:
- Measure and mark wood pieces.
- Cut the wood shapes accurately.
- Sand the edges for smoothness.
- Assemble using glue and screws.
- Finish with varnish or paint.
Finishing Touches for a Professional Look
Options for sanding and sealing wood. Techniques for applying stains or paints for aesthetics.To achieve that shiny, professional look, the right finish is key. Start with sanding. You can use a range of grits, moving from rough to fine. This makes the wood smooth, like a baby’s bottom! Next, sealing the wood prevents damage and gives it a polished feel. Choose between water-based or oil-based sealants. Both offer great protection but behave differently. For a splash of color, experiment with stains or paints. Always test a small area first. Your wood jewelry box will turn heads!
| Type | Properties |
|---|---|
| Water-Based Sealant | Dries fast, less odor |
| Oil-Based Sealant | Rich finish, takes longer to dry |
Adding Personalization Features
Ideas for engraving or inlay work. Suggestions for custom compartments or features.Adding special touches to your jewelry box makes it unique. Engraving names or special dates is a great way to start. It adds a personal touch that shines! You can also include fun inlays, like hearts or stars, to add some flair. Think about custom compartments too. These help organize your treasures. You can create spaces for rings, necklaces, or that elusive treasure you forgot you had! How about a spot for your secret snack? (Just kidding!)
| Personalization Ideas | Description |
|---|---|
| Engraving | Names, dates, or quotes. |
| Inlay Designs | Shapes like hearts or stars. |
| Custom Compartments | Space for rings, necklaces, and more! |
Maintenance and Care Tips
Best practices for cleaning and protecting the box. How to preserve the wood and finishes over time.To keep your wood jewelry box looking beautiful, follow these simple care tips. Dust the box gently with a soft cloth. Avoid using water, as it can harm the wood. To protect the finish, use a wood polish once in a while. Remember to keep it away from direct sunlight and heat. This helps preserve its natural shine and prevents cracking.
How do I clean and protect my wood jewelry box?
Use a soft cloth for dusting. Avoid water and keep it away from heat and sunlight.
Best Practices:
- Dust regularly with a soft cloth.
- Use wood polish to enhance the finish.
- Avoid water to prevent damage.
- Store away from direct sunlight.
Frequently Asked Questions
Common queries related to wood jewelry box construction. Solutions to typical issues faced during the process.Many people have questions about making wood jewelry boxes. Here are some common inquiries:
What kind of wood should I use?
Choose strong woods like oak or cedar. These types are great for holding jewelry and add beauty.
How can I prevent wood from splitting?
Always use proper tools and avoid over-tightening screws. Take your time, and make neat cuts.
Other common questions include:
- How do I finish the wood?
- What glue works best for joints?
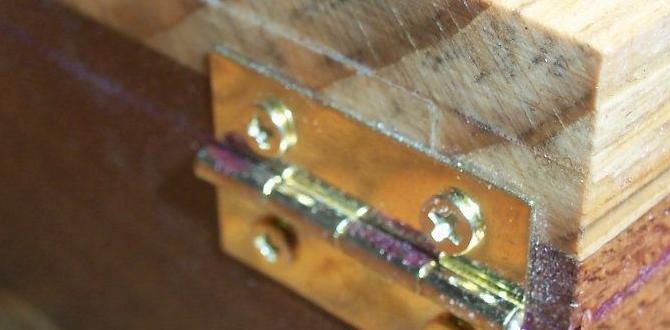
- Can I add a lock?
For finishing, use varnish or stain for a lovely shine. These tips will help you create a stunning heirloom.
Conclusion
In conclusion, creating a wood jewelry box can be a fun and rewarding project. You can choose beautiful wood, add personal touches, and craft a treasured heirloom. Plan your design carefully and gather your materials. Don’t hesitate to explore more resources or DIY guides to learn new techniques. Start your project today and enjoy making something special!FAQs
What Types Of Wood Are Best Suited For Crafting A Durable And Aesthetically Pleasing Jewelry Box?For a strong and pretty jewelry box, you can use oak, walnut, or cherry wood. Oak is tough and has a nice grain. Walnut is dark and shiny, which looks great. Cherry wood starts light but gets richer with time. These woods will help your jewelry box last and look wonderful!
What Design Elements Should Be Considered To Enhance The Functionality And Beauty Of The Jewelry Box?To make a jewelry box pretty and useful, we can use fun colors and cool shapes. Adding soft fabric inside helps keep jewelry safe. We can use small compartments for different pieces, so they don’t get tangled. A shiny finish or decoration makes the box look special. Lastly, a secure lid keeps everything safe inside.
How Can I Incorporate Personal Touches And Engravings Into The Jewelry Box Design To Make It A True Heirloom?To make your jewelry box special, you can add personal touches. Use your favorite colors or designs that you love. You can also engrave your initials or a short message on the box. Adding a tiny photo or a drawing inside can make it even more personal. This way, it becomes a special keepsake for you and your family.
What Joinery Techniques Are Ideal For Ensuring The Strength And Longevity Of The Wood Jewelry Box?To make a strong and lasting wood jewelry box, you can use several joinery techniques. One good method is the dovetail joint. It looks nice and holds the wood tightly together. Another is the box joint, which is easy to make and very sturdy. You can also try using screws or nails with glue for extra strength. These techniques help your jewelry box last a long time!
What Finishes Or Treatments Can Be Applied To Protect The Wood And Enhance Its Natural Beauty Over Time?To protect wood and make it look nice, you can use different finishes. You might apply varnish, which makes the wood shiny and waterproof. Stain adds color while showing the wood’s natural patterns. You can also use oil, which makes the wood look rich and deep. These treatments help keep the wood safe and beautiful for a long time!