To pick the best brad nailer for furniture, focus on gauge size (18-gauge is ideal for trim and molding), depth adjustment to avoid damaging delicate wood, and whether you prefer corded or cordless power for your workspace.
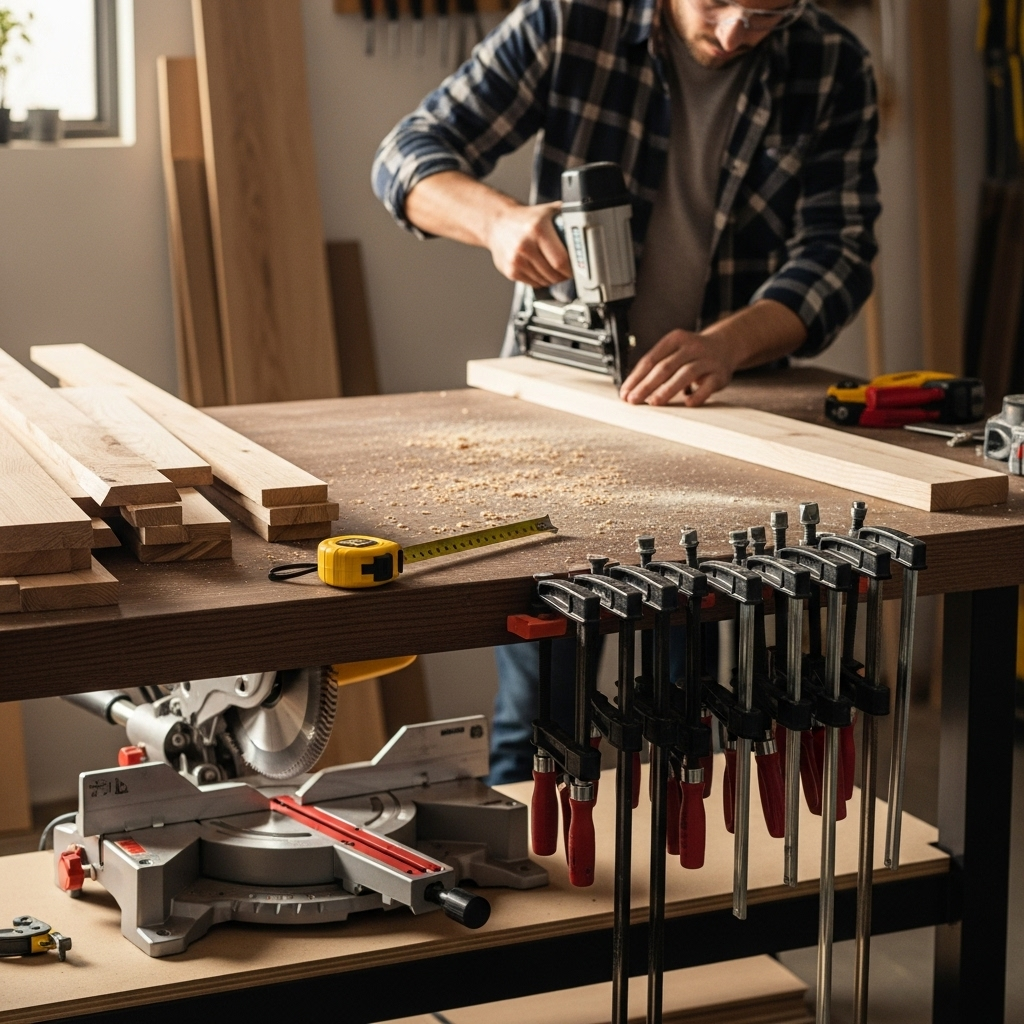
Building furniture is a journey of creation, and sometimes, the smallest details make the biggest difference. When it comes to attaching trim, adding decorative molding, or building those smooth, clean joints, a brad nailer can be your best friend. But with so many options out there, choosing the right one might feel a bit overwhelming. Don’t worry! I’m here to guide you through it, step-by-step, so you can find a tool that makes your projects shine and your woodworking dreams come true.
Table of Contents
Why a Brad Nailer is Your Furniture’s New Best Friend
Brad nailers are fantastic tools for woodworking, especially when you’re working on furniture projects. Unlike larger framing nailers that use thick nails, brad nailers fire thin, headless nails. This means they leave very small, almost invisible holes that are easy to fill and sand, giving your furniture a professional, seamless finish. Whether you’re adding a delicate baseboard to a custom-built cabinet or attaching intricate trim to a tabletop, a brad nailer offers precision and speed that will help you achieve stunning results without damaging your beautiful wood. Getting the right one makes all the difference.
Understanding Brad Nailer Basics
Before we dive into picking the perfect brad nailer for your furniture needs, let’s get familiar with the essential aspects of these handy tools. Think of this as your quick warm-up before the main event!
Gauge Size Matters: The Key to Discreet Fastening
The “gauge” of a brad nailer refers to the diameter of the nail it fires. The lower the gauge number, the thinner the nail. For furniture making, where clean finishes are paramount, you’ll typically want to focus on these:
18-Gauge Brad Nailers: This is arguably the most popular choice for furniture and delicate woodworking. The nails are thin enough to minimize wood splitting and leave very small holes, making them ideal for attaching molding, trim, paneling, and even assembling smaller wooden items. They offer a good balance of holding power and discreet fastening.
16-Gauge Brad Nailers: These fire slightly thicker nails than 18-gauge. While they offer a bit more holding power, the nail holes are more noticeable and might require more filling. They can be useful for slightly more robust trim work where a tiny bit more strength is needed, but for fine furniture, 18-gauge is usually preferred.
23-Gauge Pin Nailers: These are even thinner than 18-gauge brad nailers. They use headless pins, which make virtually invisible holes. Pin nailers are perfect for extremely delicate work or when you need to temporarily tack pieces in place before gluing, feathering, or other more permanent fastening methods. However, they offer very little holding power on their own.
For most furniture projects, especially if you’re just starting out or focusing on trim and visual details, an 18-gauge brad nailer is your go-to.
Power to the People: Corded vs. Cordless
How you power your nailer is a big decision, affecting your mobility and convenience.
Pneumatic (Air-Powered) Brad Nailers:
How they work: These connect to an air compressor via a hose. The compressor supplies the power to drive the nails.
Pros: Generally lighter and more affordable upfront than cordless models. They are known for their reliability and consistent power. Many professionals prefer them for their long-term durability and lower maintenance.
Cons: Requires an air compressor, which adds to the initial cost and takes up space. The air hose can be restrictive, limiting your range of motion and potentially snagging on things. You’ll also need to manage the air pressure.
Best for: Workbenches, dedicated workshops, or users who already own an air compressor and don’t need to move around much.
Cordless (Battery-Powered) Brad Nailers:
How they work: These have an integrated battery and motor system, meaning no air compressor or cords are needed. Many use a small gas cartridge in addition to the battery for added power, though “all-electric” models are becoming more common.
Pros: Ultimate freedom and portability! No hoses or cords to tangle with. Great for working in different locations, on ladders, or in tight spaces. Modern cordless models offer excellent performance.
Cons: Can be heavier and more expensive upfront due to the battery and motor technology. Battery life is a consideration – you might need spare batteries for extended work sessions. Some users find they have a slightly different “feel” or recoil compared to pneumatic models.
Best for: DIYers, hobbyists, and anyone who values mobility and doesn’t want the hassle of an air compressor or hose.
Electric (Corded) Brad Nailers:
How they work: These plug directly into a wall outlet.
Pros: Relatively affordable, lightweight, and require no batteries or compressors. They offer consistent power as long as they’re plugged in.
Cons: Tethered by a power cord, limiting mobility and range. The cord can be a tripping hazard and can get in the way.
Best for: Small projects in a workshop setting where you have easy access to power and don’t need to move around much. They are a good entry-level option.
Depth Adjustment: Precision is Key
One of the most crucial features for furniture making is depth adjustment. This allows you to control how deep the nail is driven into the wood.
Why it’s important: Softwoods can be dented or even split if the nail is driven too deep. Hardwoods might require a deeper drive for a secure hold, but again, you don’t want to “over-drive” and damage the surface. Precise depth control means your nail heads will sit flush with or slightly below the wood surface, ready for easy filling and a smooth finish.
Look for: Most brad nailers have a dial or slider near the nose of the tool that allows you to fine-tune the nail depth. Experimenting on scrap wood is always recommended to find the perfect setting for your specific material.
Other Features to Consider
Jam Clearing: Look for a tool that offers easy, tool-free jam clearing. When a nail jams – and it will happen sometimes – you want to be able to clear it quickly and get back to work without a huge hassle.
Nail Capacity: This tells you how many nails the magazine can hold. A higher capacity means less frequent reloading, which is great for longer projects.
Ergonomics and Weight: You’ll be holding this tool for extended periods. A comfortable grip, balanced weight, and manageable size will make a big difference in reducing fatigue.
Sequential vs. Contact Actuation:
Sequential firing: You must press the safety tip against the wood first, then pull the trigger to fire a nail. This offers the most control and is best for precision placement.
Contact firing (or bump firing): You hold the trigger down and then bump the nose of the gun against the wood to fire nails. This is faster but less precise.
Tool-free selector switch: Many modern nailers allow you to switch between these modes easily, giving you the best of both worlds. For furniture, sequential firing is often preferred for accuracy.
Step-by-Step: How to Pick Your Furniture Brad Nailer
Ready to make a decision? Let’s break down the process into manageable steps.
Step 1: Define Your Project Needs
Start by thinking about the types of furniture projects you’ll be tackling.
What kind of wood will you be working with? Softwoods (like pine) are more forgiving, while hardwoods (like oak or maple) require more care to avoid splitting or denting.
What kind of fine details are you aiming for? Are you doing delicate trim work, adding decorative elements, or assembling smaller, intricate pieces?
Where will you be working? Your home workshop, a remote location, or projects that require a lot of movement? This will influence your power choice.
Step 2: Choose Your Gauge
Based on your project definition, select the appropriate gauge.
For most fine furniture trim, molding, and delicate assembly: An 18-gauge brad nailer is your best bet. It offers a great balance of minimal damage and sufficient holding power.
For slightly more robust trim where a tiny bit more strength is needed, but still a clean finish is crucial: Consider a 16-gauge brad nailer. However, be mindful of the larger hole size.
For ultra-fine, almost invisible fastening or temporary tacking: A 23-gauge pin nailer is the way to go, but remember its limited holding power.
Recommendation for beginners focused on furniture: Start with an 18-gauge brad nailer.
Step 3: Decide on the Power Source
This is where portability and convenience come into play.
If you have a dedicated workshop with an air compressor: A pneumatic brad nailer can be a very reliable and potentially more affordable long-term investment.
If you need maximum mobility, work in various locations, or hate dealing with hoses: A cordless brad nailer is likely your ideal choice. Be prepared for a higher initial cost but enjoy the freedom it offers.
If you’re on a tight budget and mostly do smaller projects in one spot: A corded electric brad nailer can be a practical, no-fuss option.
Tip: Many DIYers find cordless convenience a game-changer, especially for furniture projects that might involve working in different rooms of a house.
Step 4: Prioritize Key Features
Once you know your general type and gauge, look for these essential features.
Excellent Depth Adjustment: This is non-negotiable for furniture. Make sure it’s easy to use and offers fine-tuning.
Tool-Free Jam Clearing: Save yourself frustration!
Comfortable Ergonomics: Try holding it if possible. A good weight balance and comfortable grip are vital.
Mode Selector (Sequential/Contact): The ability to switch between precise placement (sequential) and speed (contact) is a huge bonus. For furniture, prioritize sequential firing.
Nail Range: Ensure the nailer accepts the desired brad lengths for your projects (e.g., 1/2 inch to 2 inches for typical furniture trim).
Step 5: Read Reviews and Compare Brands
Once you’ve narrowed down your options, do your homework.
Look for reputable brands: Brands like DeWalt, Ryobi, Stanley Bostitch, Paslode, and Craftsman often offer quality tools across different price points.
Read user reviews: Pay attention to what other woodworkers and DIYers say about ease of use, reliability, and performance on furniture projects.
Compare prices: Find the best value for your budget. Remember that sometimes investing a little more in a quality tool can save you money and headaches in the long run.
Comparing Brad Nailer Options for Furniture
To help you visualize, here’s a comparison of common types and their suitability for furniture projects.
Brad Nailer Comparison Table
| Feature | 18-Gauge Brad Nailer | 16-Gauge Brad Nailer | 23-Gauge Pin Nailer |
| :—————- | :—————————————————— | :—————————————————— | :——————————————————- |
| Nail Diameter | Thin | Slightly thicker than 18-gauge | Very thin, often headless |
| Hole Size | Small, discreet | Noticeable, requires more filling | Almost invisible |
| Holding Power | Good for trim, molding, light assembly | Better for slightly heavier trim, faster assembly | Minimal – best for tacking, delicate trim |
| Wood Splitting| Low risk | Moderate risk | Very low risk |
| Ideal For | Most furniture trim, baseboards, crown molding, decorative elements, cabinet assembly | Slightly more robust trim, utility cabinets, framing non-structural wood pieces | Extremely delicate trim, intricate inlays, temporary tacking |
| Finish | Excellent, minimal filling required | Good, but may require more attention to filling | Superior, virtually invisible |
| Beginner Choice| Highly Recommended | Good, if slight increase in hole size is acceptable | Specialized, not a primary furniture fastening tool |
Pneumatic vs. Cordless vs. Electric Brad Nailers for Furniture
| Feature | Pneumatic Brad Nailer | Cordless Brad Nailer | Corded Electric Brad Nailer |
| :—————— | :—————————————————– | :—————————————————— | :——————————————————- |
| Mobility | Limited by hose | Excellent | Limited by cord |
| Power Source | Air Compressor | Battery (sometimes with gas cartridge) | Wall Outlet |
| Initial Cost | Moderate (if compressor owned); High (with compressor) | High | Low to Moderate |
| Operating Cost | Low (electricity for compressor) | Moderate (battery charging, gas cartridges if applicable) | Low (electricity) |
| Weight | Lighter nailer unit | Moderate to Heavy (includes battery) | Light to Moderate |
| Noise | Moderate (nailer) to High (compressor) | Moderate | Moderate |
| Ideal For | Workshop, continuous use, professional shops | Versatile, various locations, mobility needs | Small projects, tight spaces, budget-conscious DIYers |
| Considerations | Compressor noise, hose management | Battery life, recharge time, unit weight | Cord management, tripping hazard |
Top Features to Seek in a Furniture Brad Nailer
Let’s recap the features that will make your furniture projects a breeze.
When you’re scanning product descriptions and reviews, keep an eye out for these must-have features:
<ul>
Safety First! Using Your Brad Nailer Responsibly
No matter which brad nailer you choose, safety should always be your top priority. These tools are powerful and can cause serious injury if mishandled.
Here’s what you need to know:
<ol>
Frequently Asked Questions About Brad Nailers for Furniture
Here are