Quick Summary
To properly oil nail gun parts, use the manufacturer-recommended lubricant on moving components like O-rings and pistons after each use or as per your manual’s schedule. This simple maintenance prevents wear, ensures smooth operation, and extends your nail gun’s lifespan. Keep it clean, lubricated, and ready for your next project!
Hey there, DIYers and woodworkers! Jack Shaffer here, your go-to guy for all things nail guns. Ever feel like your trusty nail gun isn’t performing at its best? Maybe it’s a little sluggish, or worse, it jams more often than you’d like. Often, the culprit is something surprisingly simple: a lack of lubrication. It’s easy to overlook, but keeping those internal parts happy with a bit of oil can make a world of difference. Don’t worry, it’s not complicated at all! We’ll walk through exactly what you need to do to keep your nail gun running like a dream. By the end of this guide, you’ll be a pro at this essential maintenance task, ensuring your tool lasts longer and works better.
Table of Contents
Why Oiling Your Nail Gun Parts is Crucial
Think of your nail gun like a finely tuned engine. Just like a car needs oil to keep its moving parts from grinding each other to a halt, your nail gun relies on lubrication to function smoothly and efficiently. Without it, friction builds up. This friction can cause premature wear and tear on critical components, leading to:
- Reduced Performance: Your nail gun might not drive nails with the same power, leading to countersinking issues or even bent nails.
- Increased Jams: Dry, sticky parts are more likely to catch and cause frustrating jams, slowing down your work and potentially damaging the tool.
- Component Failure: Over time, excessive friction can cause O-rings to crack, pistons to seize, and other vital parts to fail, leading to expensive repairs. Even seemingly minor issues can escalate if left unaddressed.
- Shorter Lifespan: A neglected nail gun simply won’t last as long as one that receives regular, proper maintenance.
The good news is that most of today’s modern nail guns are designed to be quite durable. However, even the most robust tools benefit immensely from a little TLC. Regular oiling is one of the easiest and most effective ways to protect your investment and ensure your nailer is always ready when inspiration strikes for your next DIY project.
Understanding Your Nail Gun’s Lubrication Needs
Before we dive into the “how-to,” let’s touch upon what makes for good nail gun lubrication. This isn’t just about squirting any oil into your tool. Different types of nail guns and their components have specific needs.
Types of Nail Guns and Their Oiling Requirements
The type of nail gun you own plays a big role in how and where you’ll apply oil.
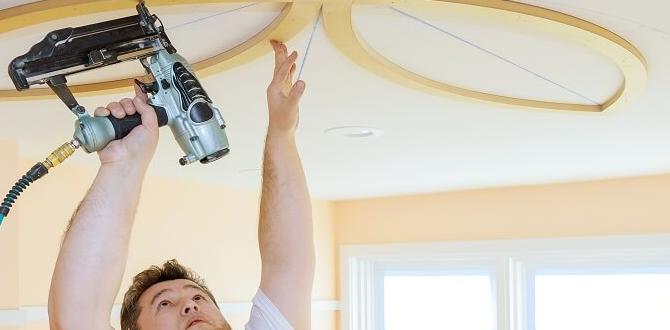
- Pneumatic (Air-Powered) Nail Guns: These are the most common. They rely on a constant supply of compressed air. The most critical lubrication point for air nailers is often the air exhaust port. A few drops of specialized pneumatic tool oil here before or after each use ensures air components like the piston and driver blade are lubricated as air passes through. Some models may have other specific lubrication points, so always check your manual.
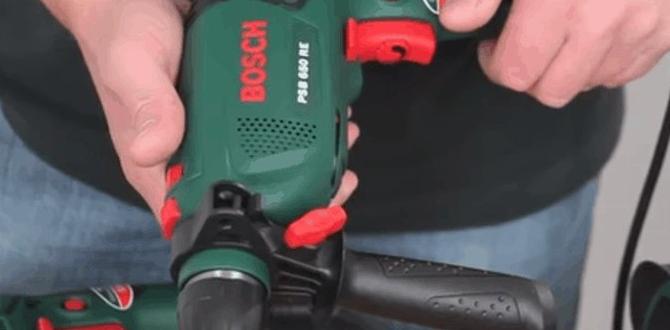
- Electric Nail Guns (Corded and Cordless): Electric nailers often have more enclosed mechanisms. They might rely on grease for some parts and oil for others, or sometimes they are “maintenance-free” in terms of user-applied oil for the main driving mechanism. However, their battery terminals (for cordless) and motor vents (for both) still need attention. Oiling isn’t typically applied to the driving mechanism itself for electric models in the same way as air nailers.
- Gas/Fuel Cell Nail Guns: These use a combination of a battery and a fuel cell. While they don’t require traditional oiling of the driving mechanism, they do have battery contacts that need to be kept clean, and the exhaust port might still benefit from a very light application of lubricant depending on the model. Their primary maintenance revolves around cleaning and battery care.
What Kind of Oil Should You Use?
This is where many beginners get confused. Using the wrong kind of oil can actually do more harm than good.
- Pneumatic Tool Oil: For air-powered nail guns, “pneumatic tool oil” is your best friend. It’s specifically formulated to lubricate the internal air-driven components and to atomize well within the air stream. It also helps prevent rust and corrosion. Popular brands include DeWalt, Stanley, and generic air tool oils.
- Light Machine Oil: In a pinch, a very light machine oil (like 3-in-One oil) can be used for external lubrication points or very basic pneumatic tool oiling if specifically recommended by the manufacturer. However, avoid WD-40 as a lubricant; it’s a water displacer and solvent, not a long-term lubricant, and can actually dry out seals over time.
- Grease: Some electric or cordless nail guns might specify a light grease for certain gears or mechanisms. This is less common for the driving components and more for rotational parts if present.
Pro Tip: Always consult your nail gun’s owner’s manual! It’s the ultimate authority on what type of lubricant to use and where to apply it. You can usually find these manuals online on the manufacturer’s website if you’ve lost the paper copy.
Essential Tools and Supplies
Before you start, gather your supplies. Having everything ready makes the process smooth and efficient. You likely already have most of these:
- Nail Gun Owner’s Manual: Your guide to specific lubrication points and recommended fluids.
- Pneumatic Tool Oil (if applicable): The correct type for your air nailer.
- Clean, Lint-Free Cloths: For wiping down the tool and any excess oil. Microfiber cloths work great.
- Cotton Swabs: Useful for reaching small internal areas or cleaning.
- Safety Glasses: Always protect your eyes, especially when working with tools.
- Gloves (Optional): To keep your hands clean.
For pneumatic nail guns, you might also need:
- Air Compressor: To operate the tool and blow out any debris if necessary.
- Air Tool Lubricator (Optional): For frequent use, an inline lubricator can automatically supply oil to the air line.
Step-by-Step Guide: How to Oil Nail Gun Parts (Pneumatic Focus)
This section will focus on pneumatic nail guns, as they are the most common type requiring regular user-applied lubrication. If you have an electric or gas model, refer to your manual for specific maintenance steps, which might involve cleaning contacts or checking battery levels rather than O-ring oiling.
Step 1: Disconnect the Air Supply (Pneumatic Only!)
Safety First! Before you do anything else, disconnect the air hose from your pneumatic nail gun. This is the most critical safety step. You absolutely do not want the nail gun to fire accidentally while you’re working on it. Ensure there is no residual air pressure in the line.
Step 2: Clean the Exterior and Air Exhaust Port
Take a clean, dry cloth and wipe down the entire exterior of your nail gun. Remove any sawdust, dirt, or debris. Pay special attention to the area around the air exhaust port. Sometimes, a burst of compressed air can help blow out any dust that’s accumulated in this area if you have your compressor handy, but ensure the tool is completely depressurized first.
Why this is important: You don’t want to introduce dirt or debris into the tool’s internal mechanisms when you start lubricating. A clean exterior is the first step to clean internals.
Step 3: Locate the Lubrication Point(s)
For most pneumatic nail guns, the primary lubrication point is the air exhaust port. This is usually a small opening on the side or rear of the nailer. As compressed air flows through the tool to drive the nail, some of the oil will be carried along to lubricate the piston, driver blade, and other internal moving parts.
Refer to your manual to confirm the exact location(s) and any other specific points recommended for your model. Some larger framing nailers might have additional lubrication requirements.
Step 4: Apply the Lubricant
Now for the actual oiling. This is where you apply the pneumatic tool oil.
For Pneumatic Nail Guns:
- Add a few drops: Place 2-4 drops of pneumatic tool oil directly into the air exhaust port. Don’t overdo it; too much oil can cause the tool to spit oil during operation.
- Work the Lubricant In: Reconnect the air hose. Fire the nail gun a few times (without any nails loaded, into a scrap piece of wood or a safe, clear area) to distribute the oil throughout the internal mechanism. You might see a small puff of oil vapor come out of the exhaust port – this is normal and indicates the oil is being distributed.
- Wipe Away Excess: Disconnect the air hose again. Wipe away any excess oil from the exhaust port or the tool’s exterior with a clean cloth.
Frequency of Oiling: The general rule of thumb for pneumatic nail guns is to lubricate them with a few drops of oil:
- At the start of each day’s use.
- At the end of each day’s use.
- Or after approximately 500-1000 shots, depending on the tool and manufacturer recommendations.
Check your manual for the manufacturer’s specific recommendations on frequency. Some tools are designed for less frequent oiling than others. For example, a popular resource for tool maintenance tips is often found on sites like Popular Mechanics, which often covers basic tool care.
Step 5: Check and Clean the Magazine
While not directly related to oiling internal parts, keeping the nail magazine clean is crucial for smooth operation. Remove any debris or old lubricant residue from the magazine track.
Why this matters: A dirty magazine can cause nails to misfeed, leading to jams. Some nail guns have removable magazines that are easier to clean thoroughly. Always ensure no oil or grease gets into the nail channel itself, as this can attract dust and debris.
Step 6: Inspect O-Rings and Seals (Advanced/Occasional)
This is a more involved step, typically done less frequently, perhaps once or twice a year, or if you suspect a leak. You may need to partially disassemble your nail gun. Many modern nail guns have O-rings and seals that can dry out or crack over time, especially if they aren’t getting enough lubrication or if the wrong type of oil was used previously. Refer to your manual for disassembly and reassembly instructions.
If you need to access internal O-rings, you will typically need to remove the nose piece or parts of the tool body. Once exposed, inspect them for cracks, tears, or signs of wear. If they look dry, you can apply a small amount of silicone-based O-ring grease (often recommended for high-pressure seals) or the manufacturer’s specified lubricant. Be careful not to use too much, and ensure you reassemble the tool correctly.
Step 7: Test Fire
Once all maintenance is complete, reconnect the air hose. Load a few nails and test fire your nail gun into a scrap piece of wood. Listen for any unusual noises and check that the nails are being driven properly. If everything sounds and feels smooth, you’ve done a great job!
Maintenance Schedule for Your Nail Gun
Consistency is key to extending your nail gun’s life and ensuring reliable performance. Here’s a sample maintenance schedule. Always adapt this based on your specific tool’s manual and how frequently you use it.
Daily/Before Each Use
- Pneumatic: Disconnect air, apply 2-4 drops of pneumatic tool oil to the air exhaust port, reconnect air, and fire a few times to distribute.
- All types: Visually inspect the tool for any damage. Clean exterior debris. Check nail magazine for dirt. Check air filter on compressor (for pneumatic).
Weekly (or After ~1000 Shots)
- Pneumatic: Repeat daily oiling if you’ve used the tool extensively.
- All types: More thorough exterior cleaning. Check for any loose screws or bolts. Ensure the exhaust port is clear. For cordless models, clean battery contacts.
Monthly (or As Needed)
- Pneumatic: Clean the air filter on your compressor. Inspect air hose for leaks or damage.
- All types: Check for excessive dust or debris buildup in air vents or around moving parts. Clean the magazine thoroughly.
Every 6-12 Months (or if issues arise)
- Pneumatic: Consider a more in-depth internal cleaning and lubrication, possibly involving partial disassembly to inspect and lubricate O-rings and seals. This is often when you might need a specific grease for certain seals.
- All types: Inspect driver blade for wear or damage. Check the nosepiece for debris. Heavy-duty users might need professional servicing.
Troubleshooting Common Oiling-Related Issues
Sometimes, even with regular oiling, you might encounter problems. Here’s how to troubleshoot common issues, especially those related to lubrication:
Nailer Seems Sluggish or Lacks Power
Possible Cause: Insufficient lubrication. The piston or driver might be sticking due to dry O-rings or internal parts.
Solution: Ensure you’re using the correct type of pneumatic oil. Apply the recommended number of drops and fire the tool a few times to distribute. Check your air compressor’s pressure; if it’s too low, the nailer won’t perform optimally. Also, check the air filter; a clogged filter restricts airflow.
Nail Gun Spitting Oil
Possible Cause: Over-oiling or a damaged seal.
Solution: You might have added too much oil. Disconnect the air, fire the tool several “dry” times (no nails) until the spitting stops. Wipe away any visible excess. If it continues, an internal seal or O-ring might be damaged, allowing oil to bypass where it should be. Consult your manual for seal inspection or consider professional service.
Nailer Jams Frequently
Possible Cause: Can be lubrication-related, but often caused by dirt or dry parts, or magazine issues.
Solution: Ensure the tool is properly lubricated as per the guide. Clean the nail magazine thoroughly. Check that you are using the correct type and size of nails for your gun. A worn driver blade or damaged internal components can also cause jams. If lubrication and magazine cleaning don’t help, the issue might be mechanical.
My Electric Nailer Isn’t Working Properly
Possible Cause: Electric nailers generally don’t require oiling of the driving mechanism. Issues are more likely related to power, battery failure, or jammed mechanisms due to debris.
Solution: For cordless, ensure the battery is fully charged and seated correctly. Clean battery contacts. For corded, check the power cord and outlet. Clean any debris from the nosepiece and magazine. If the motor sounds weak or it jams, consult your manual for specific electric nailer troubleshooting. These tools often have fewer user-serviceable parts for lubrication.
Resource Link: For more in-depth troubleshooting for pneumatic tools, resources like those from the Occupational Safety and Health Administration (OSHA) often provide safety guidelines and maintenance standards that indirectly touch upon ensuring tools are in good working order.
Frequently Asked Questions (FAQ)
Q1: How often should I oil my pneumatic nail gun?
A1: For most pneumatic nail guns, oiling is recommended every day before use, and/or at the end of each day’s use. Some manufacturers may suggest oiling after a certain number of shots, so always check your manual. Consistent oiling prevents wear and ensures smooth operation.
Q2: What kind of oil is best for my nail gun?
A2: For pneumatic (air-powered) nail guns, always use “pneumatic tool oil.” It’s specifically designed for the high-speed, air-driven components inside your tool. Avoid general-purpose lubricants or WD-40, as they aren’t suitable for long-term lubrication and can damage seals.
Q3: Where do I put the oil?
A3: For most pneumatic nail guns, you apply a few drops of oil directly into the air exhaust port. This allows the compressed air to carry the lubricant to the internal moving parts, like the piston and driver blade, as you use the tool.