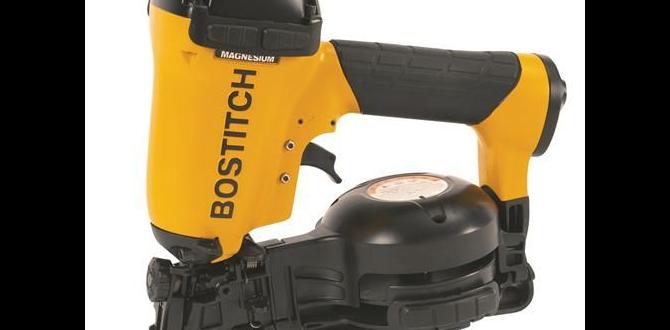
Have you ever picked up a tool that made your work so much easier? That’s what contractors experience with the NuMax framing nailer. It’s a game changer for anyone in construction. This tool helps you build strong frames quickly and effortlessly.
Setting up the NuMax framing nailer might seem tricky at first. But, once you know how, you’ll wonder how you managed without it. Imagine finishing your tasks faster and with better results. Sounds great, right?
In this article, we will guide you through the setup instructions for the NuMax framing nailer. You’ll learn simple steps that will have you nailing like a pro in no time. Whether you’re a seasoned contractor or a DIY enthusiast, understanding how to use this tool is key.
So, let’s dive into the world of the NuMax framing nailer. Soon, you’ll be ready to tackle your next project with confidence!
Table of Contents
Numax Framing Nailer For Contractors: Setup Instructions Guide

NuMax Framing Nailer for Contractors Setup Instructions
Setting up a NuMax framing nailer is simple and quick. First, ensure you have the right gas or compressor ready. Check the nail size according to your project needs. Did you know that using the correct nail can make your job sturdier and safer? Next, adjust the depth setting for precise nailing. Carefully read the user manual to avoid mistakes. Always wear safety goggles while working. With these steps, you’ll be ready to tackle your framing tasks like a pro!Safety Precautions Before Setup
Essential safety gear for using a nailer. Common hazards to avoid during setup.Before using a nailer, safety is key. Wearing protective gear helps keep you safe. Use these essentials:
- Safety goggles: Protect your eyes from flying debris.
- Ear protection: Shield your ears from loud sounds.
- Gloves: Guard your hands from sharp tools.
- Dust mask: Breathe easy and avoid dust.
Watch out for common hazards. Don’t point the nailer at people. Always keep it on a stable surface. Ensure there are no loose cords or debris around. Remember, safety first!
What are the essential safety tips for using a nailer?
Keep your workspace clean and organized. This helps prevent accidents and makes using the nailer easier. Always check your tools before starting.
Unboxing the NuMax Framing Nailer
What’s included in the packaging. Initial inspection checklist.Unboxing a new tool is always exciting! Inside the box of the NuMax framing nailer, you will find:
- The framing nailer itself
- A user manual
- Safety goggles
- Oil for maintenance
- Test nails
Once you take everything out, inspect the items carefully. Make sure:
- The nailer is free of damage
- There are no missing parts
- The safety goggles fit well
Following these steps ensures you are ready and safe to work!
What should I check after unboxing?
After unboxing, check the nailer for any damages, ensure all items are included, and review the user manual for safety tips.
Required Tools and Materials for Setup
Tools needed for assembly and adjustment. Recommended nails and fuel types.To set up your NuMax framing nailer, you’ll need some tools and materials. Gather essential tools for assembly and adjustment:
- Wrench
- Screwdriver
- Pliers
- Safety goggles
For the nails, using 16-gauge framing nails is recommended. Make sure to use fuel cells designed for your nailer to ensure proper function.
What nails and fuel types should I use?
Use 16-gauge nails for best results. Always choose fuel cells that match your nailer model. This keeps your tools working great.
Step-by-Step Setup Instructions
Preparing the tool for first use. Loading nails correctly.Before using your nailer, it’s important to set it up properly. First, check the user manual for safety tips. Ensure your workspace is clear and safe. Next, load the nails. Open the magazine and place the nails in the correct position. Close the magazine securely. Make sure the nails fit snugly inside. This will help the tool work well and keep you safe. Now you are ready to start nailing!
How do you load nails into a NuMax framing nailer?
To load nails, open the magazine, place the nails in the groove, and close it gently. This will help ensure smoother operation when you begin your project.
Adjusting Settings for Optimal Performance
Setting the depth adjustment. Selecting firing mode: single vs. bump fire.To get the best performance from your nailer, start by adjusting the depth. This lets you control how deep the nails go. Too deep can split wood; too shallow can create weak joints. Next, choose your firing mode. You can use:
- Single fire: Fire one nail at a time. This is great for precision.
- Bump fire: Hold the trigger down to fire nails quickly. This is useful for big jobs.
With these settings, you’ll work smarter and finish faster!
How do I adjust the depth on a NuMax framing nailer?
To adjust the depth, turn the depth adjustment knob. This changes how far the nails go into the material.
What firing modes are available on the NuMax framing nailer?
The nailer offers single fire and bump fire modes. Each mode helps with different tasks.
Maintenance Tips for Longevity
Regular cleaning and lubrication practices. Troubleshooting common issues.Keeping your NuMax framing nailer in top shape is easy with some fun maintenance tips! First, clean the tool regularly to get rid of dust and sticky residues. A quick wipe and some oil can make it purr like a kitten. If things start to go awry, check for common issues like misfires or jams—don’t worry, even tools have off days! Lastly, follow a simple cleaning schedule, and your nailer will thank you by working smoothly every time!
| Maintenance Task | Frequency |
|---|---|
| Clean the tool | After every use |
| Lubricate moving parts | Weekly |
| Check for jams | Whenever nailer misfires |
Best Practices for Contractors
Efficient nailing techniques. Tips for working in different environments.For efficient nailing, hold the nailer steady and aim slightly downward. This helps the nails sink in properly. Different environments can be tricky. In the cold, nails might get stubborn, so warm up your tool first. In hot weather, make sure to stay hydrated; the last thing you want is a nail gun and heatstroke! Here’s a table of tips to nail it right:
| Environment | Best Tips |
|---|---|
| Cold | Warm up the tool first. |
| Hot | Stay hydrated! |
| Rainy | Protect your gear and nails. |
Remember, it’s all about balance—both in your tool and your lemonade on a hot day!
FAQs About NuMax Framing Nailers
Addressing common questions from contractors. Clarifying warranty and service options.Contractors often have questions about using NuMax framing nailers. Here are some common ones:
- What is the warranty for NuMax framing nailers? Most models come with a one-year warranty. This covers any manufacturing defects.
- How can I get my nailer serviced? You can contact customer service for quick help. Parts may also be available online.
- Are there replacement parts? Yes, you can find many replacement parts easily.
Conclusion
In conclusion, using the NuMax framing nailer is easy with clear setup instructions. Remember to check the manual for safety tips and adjustments. Practice with spare wood to build your skills. You can also explore online videos for extra help. Now, you’re ready to tackle your next project confidently. Happy nailing!FAQs
What Are The Essential Tools And Materials Needed For Setting Up The Numax Framing Nailer For Contractors?To set up the NuMax framing nailer, you will need a few important tools. First, grab a compressor, which helps power the nailer. Next, have some framing nails ready to use. You should also get safety glasses to protect your eyes. Finally, keep a flat surface and a measuring tape nearby to help you work accurately.
How Do You Properly Load Nails Into The Numax Framing Nailer To Ensure Optimal Performance?To load nails into the NuMax framing nailer, first, make sure it’s unplugged or turned off. Open the magazine, which is where the nails go. Place the nails in, making sure they’re in the right direction, with the heads facing out. Close the magazine tightly. Now you’re ready to use the nailer!
What Safety Precautions Should Contractors Take When Setting Up And Using The Numax Framing Nailer?When using the NuMax framing nailer, you should always wear safety glasses to protect your eyes. Keep your hands away from the front of the nailer to avoid getting hurt. Make sure the nailer is pointed away from yourself and others when you pull the trigger. Lastly, read the instructions carefully before using it, so you know how it works safely.
How Can Contractors Adjust The Depth Of Drive On The Numax Framing Nailer For Different Projects?To adjust the depth of drive on the NuMax framing nailer, you can use a simple setting on the tool. First, find the depth adjustment knob or slider on the side. Turn it to raise or lower the nail depth. If you want nails to go in deeper, turn it down. For shallower nails, turn it up. This lets you match the nails to your project needs!
What Troubleshooting Steps Should Be Taken If The Numax Framing Nailer Is Experiencing Misfires Or Jamming During Setup?If your NuMax framing nailer is misfiring or jamming, here are some steps we can take. First, check if you have the right nails and they are loaded correctly. Next, make sure the tool is clean and free of dust. We should also check the air pressure if it’s an air-powered nailer. Finally, try resetting the tool by turning it off and on again.