Quick Summary: Regular nailer tool maintenance and care ensures your tools run smoothly, last longer, and perform reliably. Simple cleaning, lubrication, and proper storage prevent jams, extend lifespan, and guarantee safe, efficient operation for all your DIY projects.
Hey there, fellow DIYers and woodworking enthusiasts! Jack Shaffer here from Nailerguy. Ever had your nailer jam at the worst possible moment? It’s frustrating, right? Keeping your nailer in top shape doesn’t have to be complicated. With a little bit of regular attention, you can prevent those annoying hiccups and make sure your trusty nail gun is always ready to go. This guide will walk you through everything you need to know to keep your nailers purring like new. We’ll cover simple steps that make a huge difference. Let’s get your tools in their best condition!
Table of Contents
Why Nailer Tool Maintenance is Crucial
Think of your nail gun as a hardworking partner on your projects. Just like any tool, it needs a little TLC to perform its best. Neglecting maintenance can lead to a bunch of problems. You might experience inconsistent nail firing, increased jamming, or even damage to the tool itself. A well-maintained nailer is not only more reliable but also safer to use. It’s about getting more bang for your buck and ensuring your projects go off without a hitch.
Regular care helps your nailer:
- Fires Nails Consistently: No missed shots or nails driven too deep.
- Prevents Jams: Keeps the feeding mechanism smooth and clear.
- Extends Tool Life: Protects against wear and tear, making your investment last longer.
- Ensures Safety: A properly functioning tool is a safer tool.
- Boosts Efficiency: Saves you time and frustration on the job.
Getting Started: Essential Tools and Supplies
Before you dive into the maintenance routine, gather these essentials. You probably have most of them around your workshop already! Having them ready makes the process quick and easy.
What You’ll Need:
- Safety Glasses: Always protect your eyes, especially when working with compressed air or cleaning solvents.
- Gloves: Keeps your hands clean and protected from lubricants or grime.
- Clean, Lint-Free Cloths: For wiping down surfaces and removing debris.
- Nailer Lubricant: Specific oil designed for air-powered nailers. Check your manual for recommendations.
- Air Tool Oil (for pneumatic nailers): A few drops will help keep moving parts smooth.
- Wire Brush or Small Stiff Brush: For scrubbing away dirt and stubborn residue.
- Compressed Air Can or Air Compressor: To blow out dust and debris from internal parts.
- Screwdriver Set: Some nailers may require minor disassembly for cleaning.
- Owner’s Manual: Your best friend for specific instructions on your model.
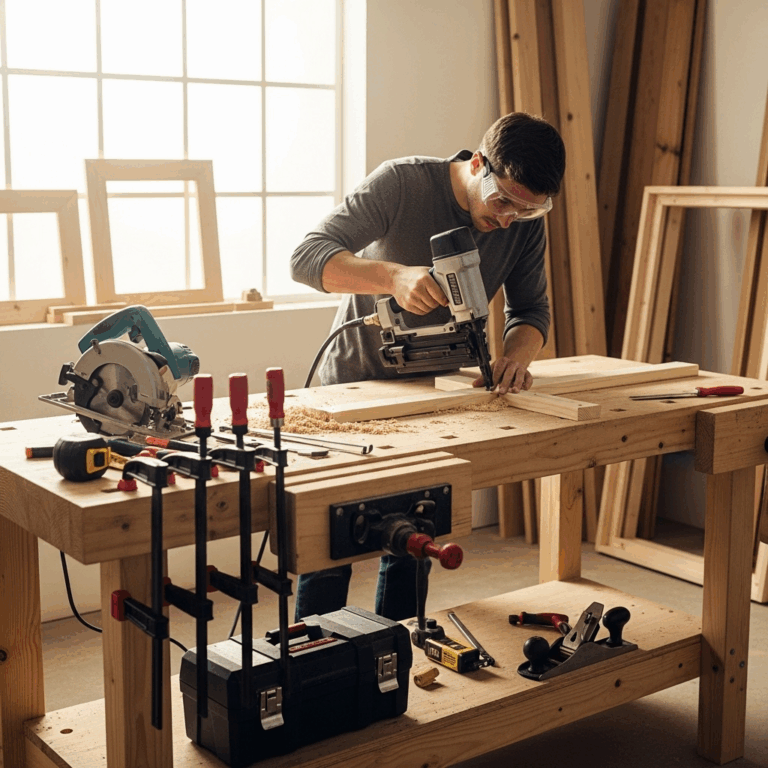
General Nailer Maintenance Steps (Applicable to Most Types)
These are the fundamental steps you should perform on a regular basis. They are designed to be straightforward and effective for most nail guns, whether they’re air-powered, electric, or cordless.
Step-by-Step Guide:
-
Disconnect the Power Source: This is the absolute first and most critical step for safety. For pneumatic nailers, disconnect the air hose. For electric or battery-powered nailers, unplug them or remove the battery. Never skip this step!
-
Inspect the Exterior: Give your nail gun a good look-over. Are there any obvious cracks, loose parts, or damage? Wipe down the body with a damp cloth to remove surface dirt and dust.
-
Clean the Air Inlet (Pneumatic Nailers): If you have a pneumatic (air-powered) nailer, disconnect the air hose. Use compressed air to blow out any dust or debris from the air coupler and inlet. This ensures a clean air supply to your tool.
-
Check and Clean the Magazine: The magazine is where the nails are held. Open it up and clear out any sawdust, debris, or bent nails. A clean magazine ensures smooth nail feeding. You can use a dry cloth or a small brush for this. For stubborn grime, a slightly damp cloth can work, but make sure it dries completely.
-
Clean the Nose/Tip: The part of the nailer that contacts the wood can get gummed up with debris. Carefully wipe it clean with a cloth. Sometimes, a bit of wood glue or sap can build up here. A gentle scrub with a brush might be needed. Ensure it’s completely dry before using.
-
Lubricate Moving Parts (Pneumatic Nailers): For air-powered nailers, proper lubrication is key. Add a few drops of air tool oil into the air inlet before connecting the air hose. Most manufacturers recommend 2-3 drops. Over-oiling can cause issues, so stick to the recommended amount and frequency. Refer to your manual for exact amounts and location.
-
Test Fire: Once cleaning and lubrication are done, and everything is dry, reconnect the power source. Fire a few nails into a scrap piece of wood. Listen for any unusual noises and check that nails are driven correctly. If everything sounds and feels normal, you’re good to go!
Specific Maintenance for Different Nailer Types
While general maintenance covers a lot, different nailer types have their own unique needs. Let’s dive into what’s specific for each kind.
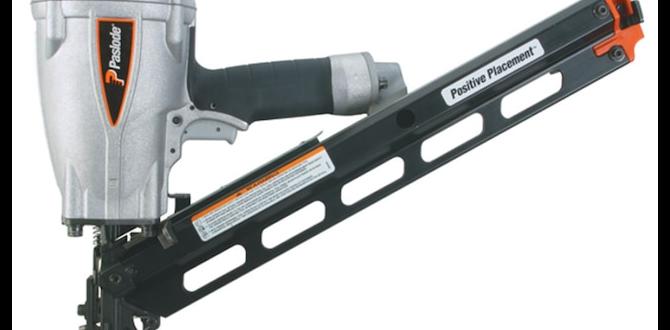
Pneumatic (Air-Powered) Nailers
These work by compressed air, making them powerful and relatively lightweight. Their maintenance focuses on the air system and internal seals.
Key Considerations:
- Air Quality: Use a clean, dry air supply. Water and contaminants in the air line can damage internal components and cause rust. Consider an air filter/water separator for your compressor. You can find great resources on proper compressor setup and maintenance from the U.S. Department of Energy.
- Oiling: As mentioned, regular oiling is vital. Too little oil causes increased wear; too much can lead to a “soggy” tool that leaks air.
- O-Rings and Seals: Over time, rubber O-rings and seals can dry out or crack, leading to air leaks and reduced power. If you notice leaks around the tool head or handle, these might need replacing. Consult your manual for part numbers and replacement instructions.
- Springs: The drive spring and return spring are crucial for proper operation. Ensure they are clean and free of obstruction. If a nailer seems sluggish, the springs might need inspection or replacement.
Electric Nailers (Corded)
These plug into a wall outlet and offer consistent power without the need for an air compressor. Their maintenance usually involves keeping the motor area clean and checking electrical components.
Key Considerations:
- Ventilation Slots: Electric nailers have vents to keep the motor cool. Regularly clear these out with compressed air or a soft brush to prevent overheating. Clogged vents can significantly shorten motor life.
- Cord Inspection: Always check the power cord for any fraying, cuts, or damage before each use. A damaged cord is a serious safety hazard.
- Internal Mechanism: While you typically don’t need to disassemble them as often as pneumatic tools, keeping the magazine and nose clean is still important. For deeper cleaning, refer to your manual.
Cordless (Battery-Powered) Nailers
These offer ultimate portability. They rely on batteries and often a small internal motor or gas cartridge system. Their maintenance is a mix of general care and battery management.
Key Considerations:
- Battery Care: Follow the manufacturer’s instructions for charging and storing batteries. Avoid extreme temperatures. Keep battery contacts clean and free of debris. A dirty contact can lead to poor power transfer.
- Motor Vents: Similar to corded electric models, keep the motor vents clear of dust and debris.
- Gas Canister Replacement (if applicable): For gas-powered cordless nailers, ensure the gas canister is properly installed and that the power source (fuel cell) is fresh. Refer to your manual for specific instructions on changing fuel cells.
- Drive Mechanism: These tools have internal mechanisms that drive nails. Keep the magazine and nose clean to ensure smooth operation. Some models may have specific lubrication points; check your manual.
Framing vs. Finishing Nailers: Do They Differ?
While the core maintenance principles remain the same, the frequency and focus might shift slightly based on the nailer’s purpose.
- Framing Nailers: These are workhorses, typically used for heavy-duty jobs. They get subjected to more dust, debris, and rigorous use. This means you might need to clean and lubricate them more frequently. Pay close attention to the magazine and air intake to ensure they’re free from construction site dirt. A Construction Safety Handbook from OSHA highlights the importance of tool readiness in preventing accidents on site.
- Finishing Nailers: These are used for more delicate work, like trim and molding. While they might not get as dirty as framing nailers, keeping their small parts clean and properly lubricated is essential for the precision they offer. Jamming in a finishing nailer can mar delicate surfaces, so a clean feed is paramount.
Troubleshooting Common Nailer Problems
Even with the best care, you might encounter issues. Here are some common problems and how to fix them:
Problem: Nailer Not Firing
- Possible Causes: No power (air or battery), safety tip not depressed, jammed mechanism, low air pressure (pneumatic).
- Solutions: Check power source, ensure safety tip is pressed firmly against the surface, check for jams (see below), ensure air pressure is within the recommended range. For battery tools, check battery charge and connection.
Problem: Nails Jamming
This is the most common frustration! Jamming usually happens due to debris, a bent nail, or improper feeding.
- Causes: Debris in the magazine, bent nails, worn-out driver blade, incorrect nail collation (angle or type).
- Solutions:
- Disconnect power.
- Carefully open the magazine and remove any bent or loaded nails.
- Use compressed air to blow out the magazine and feed path.
- Inspect the driver blade for any damage or obstruction. (Refer to manual for disassembly if needed).
- Ensure you are using the correct type, size, and collation angle of nails for your specific nailer model. Using the wrong nails is a frequent cause of jams.
Problem: Nails Driving Too Deep or Not Deep Enough
This often relates to air pressure or depth adjustment settings.
- Causes: Incorrect air pressure (pneumatic), depth adjustment setting is off, insufficient power (battery/electric).
- Solutions:
- Pneumatic: Adjust air pressure. More pressure generally drives nails deeper. Start lower and increase gradually. Refer to your tool’s manual for its operating pressure range.
- Pneumatic/Electric/Cordless: Check the depth adjustment setting. Most nailers have a dial or lever near the nose to control how deep the nail is driven. Adjust this setting.
- Battery/Electric: Ensure the battery is fully charged or the tool is properly connected to power. A weak battery or power source can lead to inconsistent driving depth.
Problem: Air Leaking from the Tool
This is usually a sign of worn seals or O-rings.
- Causes: Worn O-rings, loose fittings, damaged seals.
- Solutions: Disconnect air. Inspect all fittings and connections. If the leak is coming from the body of the tool, it’s likely internal seals or O-rings. Consult your manual for a parts diagram and consider replacing the affected seals. For pneumatic tools, a consistent light oiling can sometimes help temporarily seal minor leaks in O-rings, but replacement is the proper fix.
Lubrication vs. Cleaning: Understanding the Difference
It’s easy to mix up cleaning and lubricating, but they serve different purposes and often happen at different times.
Cleaning:
- Purpose: To remove dirt, dust, sawdust, debris, and old lubricant residues.
- What it fixes: Prevents jams, ensures smooth operation, stops build-up that can cause wear.
- When to do it: After each significant use, or when you notice dust/debris accumulation.
Lubrication:
- Purpose: To reduce friction between moving parts, prevent wear, and keep seals pliable.
- What it fixes: Smooths out operation, extends the life of internal components (like pistons, driver blades, O-rings), prevents parts from sticking.
- When to do it: Typically after cleaning, and with specific frequency for pneumatic tools (e.g., a few drops of air tool oil every day of use or as per manual).
It’s important to know that some tools, especially electric and cordless ones, may not require regular user lubrication. Over-lubricating can actually cause problems in these models. Always refer to your owner’s manual!
Storage Tips for Longevity
How you store your nailer when it’s not in use can significantly impact its lifespan and condition.
Best Practices for Storage:
- Clean Before Storing: Always give your nailer a quick clean and wipe-down before putting it away. This prevents dirt from hardening or corroding parts.
- Store in a Dry Place: Moisture is the enemy of tools. Avoid damp basements or humid garages. A dedicated tool bag or case can help protect it.
- Release Air Pressure (Pneumatic): For pneumatic nailers, disconnect the air hose and, if your model allows, release any residual pressure in the tool.
- Remove Battery (Cordless): For cordless tools, it’s generally recommended to remove the battery for long-term storage. Store the battery in a temperate environment, not directly on a concrete floor. Many battery manufacturers provide guidelines similar to those for lithium-ion batteries, which are often found on sites like Energy.gov.
- Keep it Protected: Store the nailer in its original case or a sturdy tool bag to prevent dust accumulation and protect it from accidental impacts.
Maintenance Schedule: A Quick Reference
To make things even easier, here’s a simple table outlining a typical maintenance schedule. Adjust this based on how heavily you use your tools and the environment they operate in.
| Maintenance Task | Frequency (Pneumatic) | Frequency (Electric/Cordless) |
|---|---|---|
| Exterior Wipe Down | After each use | After each use |
| Magazine Cleaning | After each use | After each use |
| Nose/Tip Cleaning | After each use | After each use |
| Lubrication (Air Inlet) | Daily (or every few hours of use) | N/A (Check manual) |
| Air Inlet Cleaning | Weekly or as needed | N/A |
| Ventilation Slot Clearing | N/A | Monthly or as needed |
| Full Internal Cleaning/Inspection | Every 100 hours of use (or annually) | Annually (or as needed) |
| Check O-rings/Seals | Annually or if experiencing leaks | Annually or if experiencing issues |
| Battery Contact Cleaning | N/A | As needed |
Remember, your owner’s manual is the ultimate guide for your specific nailer model. Some tools are designed to be virtually maintenance-free by the user, while others will benefit from more in-depth care.
When to Call a Professional or Replace Your Nailer
<