Quick Summary: Understanding nailer safety features is crucial for preventing injuries. Key elements include contact tips, sequential triggers, and safety glasses, ensuring you work confidently and securely on any woodworking project.
Hey there, project builders! Jack Shaffer here, your guide from Nailerguy. Tackling a new woodworking project is exciting, but we all know that with power tools comes the responsibility of using them safely. Nailers are fantastic for speeding up tasks, but if you’re new to them, you might wonder about all the different safety bits and bobs. What do they actually do? Which ones are important? It can feel a bit overwhelming at first, but don’t worry! We’re going to break down nailer safety features in a way that’s easy to understand. Knowing these can make a huge difference in keeping yourself, and others around you, safe and sound. Ready to learn how to use your nailer with total confidence?
Table of Contents
Why Nailer Safety Features Matter: More Than Just Rules
Nailers are powerful tools designed to drive fasteners quickly and efficiently. Think about it – they’re shooting metal nails into wood in a fraction of a second! Because of this power, safety features aren’t just suggestions; they’re essential guards against accidents. They’re built into the tool to protect you from unexpected nail discharges, ricochets, and other potential hazards. For anyone diving into DIY, home improvement, or serious woodworking, understanding these features is the very first step to a successful and injury-free build. It means you can focus on the creative side of things, knowing your tool is designed to help keep you secure.
The goal of these features is straightforward: prevent the nailer from firing unintentionally. This might happen if the nailer is dropped, bumps against something, or is handled without proper care. Modern nailers are engineered with multiple layers of protection, and by understanding what each part does, you can operate your tool with greater awareness and confidence. It’s about respecting the tool and using it as it was intended, which always leads to better results and fewer headaches.
The Core Nailer Safety Features Explained for Beginners
Let’s get down to the nitty-gritty. Every nailer, whether it’s electric, pneumatic, or cordless, will have some common safety features. Understanding them is like learning the basic rules of the road for your workshop. We’ll cover the most important ones you’ll encounter.
1. Sequential Trigger (Restricted Trigger) vs. Contact Trigger (Bump Fire)
This is probably the most significant safety feature you’ll find. Triggers on nailers come in two main modes: sequential and contact. Understanding the difference is critical for safe operation.
- Sequential Trigger: This is the safest mode. To fire a nail with a sequential trigger, you first need to press the trigger down, and then bump the contact tip against the work surface. This two-step process means the nailer will only fire one nail at a time. This is fantastic for precise placement, like when you’re working on trim or delicate projects where you need to control exactly where each nail goes. It significantly reduces the chance of accidental firing.
- Contact Trigger: Some nailers offer a “contact fire” or “bump fire” mode, often indicated by a symbol showing a nail head being touched by the tip. In this mode, the nailer can fire nails as fast as you can move the tip and pull the trigger. While this can be much faster for framing or subflooring where speed is key, it also carries a higher risk of accidental firing if the tool is bumped or the trigger is held down. Many modern nailers allow you to switch between these modes, and for beginners, sticking to sequential mode is highly recommended until you’re very comfortable with the tool.
Important Tip: Always check your nailer’s manual to understand its trigger mechanism and how to select the firing mode. For most everyday DIY tasks, sequential firing is your safest bet. Prioritize safety over speed when you’re starting out!
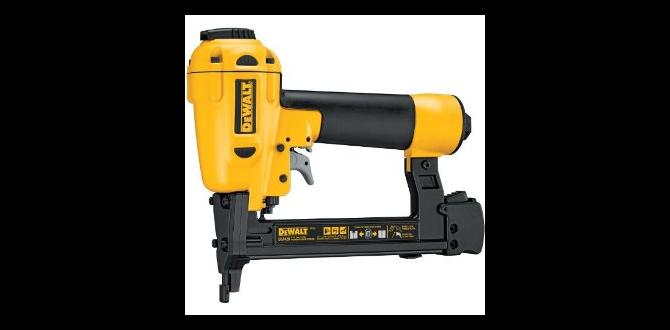
2. Contact Tip (Safety Tip or Nose)
You can’t miss this part – it’s the metal or plastic piece at the very end of the nailer’s barrel. This is often called the contact tip, safety tip, or nose.
- Its Function: The contact tip houses a spring-loaded mechanism that must be pressed down against the workpiece before the nailer will fire (especially in sequential mode). This is a physical safety interlock. It ensures that the nailer won’t shoot a nail into thin air or if it’s pointed at yourself or someone else.
- Keep it Clean and Clear: It’s vital that this tip is not obstructed by debris, paint, or glue. A clogged contact tip can interfere with the nailer’s operation. Also, never try to disable or bypass this feature – it’s there for a very good reason.
- Wear and Tear: Over time, the contact tip can wear down. If you notice it’s not pressing reliably or seems damaged, it might be time to look into replacement parts or a service.
3. Safety Glasses and Hearing Protection
While not a feature on the nailer itself, these are arguably the most critical safety accessories you’ll use with one. Your eyes and ears are irreplaceable!
- Eye Protection: Always wear ANSI Z87.1-certified safety glasses or a full-face shield. Flying debris, wood splinters, or even a stray nail fragment can cause severe eye injury. Ensure your glasses fit well and provide adequate coverage.
- Hearing Protection: Nailers, especially pneumatic ones, can be loud. Repeated exposure to loud noises without protection can lead to permanent hearing damage. Use earplugs or earmuffs whenever you’re operating a nailer, even for short periods.
Think of these items as non-negotiable gear. Treat them like your work gloves or safety boots – essential for every job. The Occupational Safety and Health Administration (OSHA) strongly recommends appropriate personal protective equipment (PPE) for all tool operations, and nailers are no exception.
4. Depth Adjustment
This feature controls how deep the nail is driven into the material. It’s not directly a “safety” feature in the sense of preventing accidental firing, but it plays a crucial role in preventing damage and accidents related to improper fastening.
- Why It’s Important: Driving a nail too deep can split the wood, damage the surface, or even create a dangerously sharp point sticking out the other side. Driving it too shallow means the fastener isn’t secure. Proper depth ensures your workpiece is assembled correctly and safely.
- How It Works: Most nailers have a dial or lever that allows you to adjust the depth. You’ll typically experiment on scrap wood to find the right setting for your material. Softer woods might require a shallower setting, while harder woods might need more power or a deeper setting.
- Impact on Safety: Ensuring nails are driven correctly prevents them from becoming a hazard later on. For instance, if you’re working with thin plywood, driving too deep could cause the nail to come through the other side, creating a sharp protrusion.
5. Magazine Latch/Release
The magazine is where you load the nails. It often has a latch or release mechanism.
- Purpose: This feature allows you to safely open the magazine to load or clear jams. Some design elements ensure the magazine cannot be opened accidentally during operation.
- Clearing Jams: When you need to clear a jammed nail, it’s always the first step to disengage the trigger and then release the magazine latch. Always ensure the tool is de-powered or disconnected from its air source before attempting any maintenance or jam clearing.
6. Exhaust Port (for Pneumatic Nailers)
If you’re using an air-powered nailer, you’ll notice an exhaust port. This is where the compressed air is released after each shot.
- Function: This port is designed to vent the air that drives the piston.
- Safety Aspect: While not a primary safety feature, be aware of where the exhaust is directed. It can blow dust and debris around. More importantly, some older or lower-end models might release a puff of air that could be hot. It’s good practice to keep the exhaust port pointed away from yourself and others.
Advanced Nailer Safety Features & Considerations
Beyond the absolute basics, some nailers offer features that enhance safety further, especially for specific tasks or professional use. It’s worth knowing about these as you advance in your woodworking journey.
1. Stall Prevention
This is a more advanced feature found on some electric and cordless nailers. It prevents the nailer from firing if it’s jammed or unable to drive a nail properly.
- How it Helps: If the motor or drive mechanism encounters too much resistance (like a jam or hitting a knot), the stall prevention feature will stop the tool from attempting to force the nail, preventing potential damage to the tool and reducing the risk of a nail fragment flying off.
- Benefit: This feature contributes to the longevity of the tool and adds another layer of security against unexpected tool behavior.
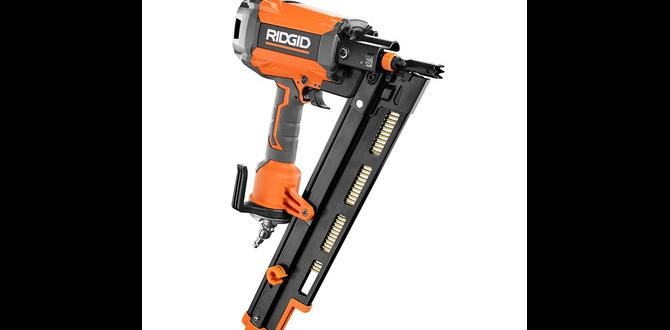
2. Over-Rotation Prevention
Some rotating nailer heads (common in framing nailers that drive larger nails) have features to prevent them from over-rotating. This ensures the drive mechanism is always in the correct position to fire safely and effectively.
3. Sequential / Contact Mode Lockout
High-end professional nailers might have a way to lock the tool into one specific trigger mode (usually sequential) to ensure maximum safety compliance on job sites where rapid fire isn’t necessary or permitted.
4. Belt Hooks and Integrated Lights
These might seem like creature comforts but can indirectly improve safety.
- Belt Hooks: A sturdy belt hook allows you to safely hang the nailer when moving around a job site or taking a break, preventing it from being accidentally dropped or kicked.
- Integrated LED Lights: Some nailers come with lights that illuminate the work area. This can be incredibly helpful when working in dimly lit spaces, improving visibility and thus aiding safe operation.
Nailer Type and Safety Differences
The type of nailer you use can also influence safety considerations. While the core safety features are similar, there are nuances.
| Nailer Type | Power Source | Key Safety Considerations |
|---|---|---|
| Pneumatic Nailers | Air Compressor |
|
| Corded Electric Nailers | AC Power |
|
| Battery-Powered (Cordless) Nailers | Lithium-Ion Battery |
|
| Fuel Cell Nailers (e.g., Paslode) | Fuel Cell + Battery |
|
No matter the power source, the principles of sequential firing, proper contact with the workpiece, and wearing your PPE remain paramount. Always refer to your specific tool’s user manual for detailed safety instructions pertinent to its design and operation.
Best Practices for Safe Nailer Operation
Knowing about the features is one thing, but consistently applying safe practices is what truly protects you. Think of these as your daily checklist for responsible nailer use.
- Read the Manual: I can’t stress this enough. Every nailer is a little different. Your manual is the ultimate guide to its specific safety features, operation, and maintenance.
- Inspect Your Nailer Before Use: Give your nailer a quick once-over. Check the contact tip, magazine, trigger, and any cords or hoses for damage. Make sure all safety mechanisms are functioning correctly.
- Always Wear PPE: Safety glasses/face shield and hearing protection are mandatory. Work gloves and sturdy footwear are also highly recommended.
- Understand Your Trigger Mode: Ensure your nailer is set to sequential mode until you are extremely proficient and the project absolutely demands contact fire. Never carry the nailer with your finger on the trigger.
- Secure Your Workpiece: Ensure the material you are nailing into is stable and won’t shift. Clamps can be your best friend here. A moving workpiece can lead to misfires or ricochets.
- Maintain a Safe Distance: Keep bystanders, especially children and pets, well clear of your work area. Be aware of where you are pointing the nailer at all times.
- Proper Grip and Stance: Use a firm grip and maintain a stable, balanced stance. This gives you better control over the tool and reduces the chance of accidental discharge.
- Clear Jams Safely: If a nail jams, immediately release the trigger, disconnect the power source (unplug, remove battery, or disconnect air hose), and then carefully clear the jam according to the manual’s instructions. Never try to force a nail through.
- Don’t Force It: If the nailer is struggling to drive a nail, don’t just keep firing. Check for jams, ensure proper depth settings, or verify you’re using the correct type and size of nail. Forcing it can damage the tool and be unsafe.
- Store Safely: When not in use, disconnect the power source, unload the magazine, and store your nailer in a safe, dry place, out of reach of children.
These practices might seem like a lot at first, but they quickly become second nature. The peace of mind that comes with working safely is well worth the effort.
Common Misconceptions About Nailer Safety
It’s easy to pick up bad habits or misunderstandings about tool safety. Let’s clear up a few common ones:
- “I’m only using it for a second, so I don’t need safety glasses.” False. Even a split-second operation can result in debris flying. Safety gear is always needed.
- “Contact fire is faster, so it’s better for all jobs.” False. While faster, it’s much riskier. Sequential fire offers control and safety, which is paramount for most DIY tasks.
- “If it’s not jamming, it’s safe.” False. Accidental firing can happen even when no jam occurs. Always treat every nailer as if it’s ready to fire.
- “I’ve been doing this for years without issues, so I don’t need to worry.” Complacency is dangerous. The risk is always there, and a single accident can have severe consequences.
- “The safety tip is just a guide; I can fire without full contact.” False. The safety tip is a critical interlock mechanism. Using it correctly is essential for the tool’s intended safety function.
Staying diligent and informed is key. Don’t let familiarity breed contempt when it comes to your safety!
FAQs About Nailer Safety Features
What’s the main difference between sequential and contact triggers, and which should I use?
The main difference is how many nails fire. Sequential triggers fire one nail per trigger pull after the contact tip touches the surface (two steps). Contact triggers fire a nail every time you pull the trigger and bump the tip against the work surface (this can be rapid fire). For beginners and most DIY projects, sequential trigger mode is much safer and recommended because it greatly reduces the chance of accidental firing.
Do I really need safety glasses with a nailer? They seem pretty safe.
Yes, absolutely! Safety glasses are non-negotiable. Flying wood splinters, bits of metal, or even debris can eject unexpectedly. They can cause serious eye injury. Always wear ANSI Z87.1-certified safety glasses or a full-face shield when operating any nailer.
What’s the safest way to clear a jammed nail?
First, always release the trigger. Then, disconnect the power source (unplug, remove battery, or detach the air hose). Once the power is disconnected, consult your nailer’s manual for specific instructions on how to safely open the magazine or nose to remove the jammed nail. Never try to force a jammed nail out with another nail or object without disconnecting power.