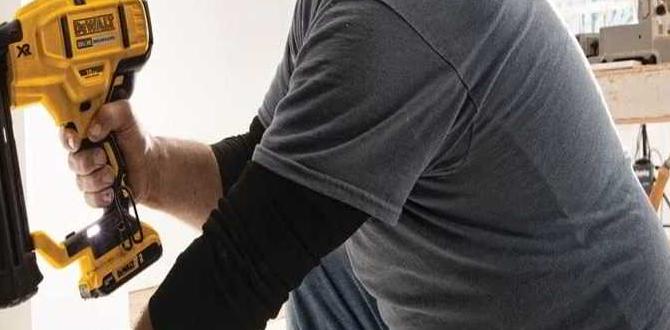
Nailer operational lubricants are crucial for keeping your nail gun firing smoothly, preventing jams, and extending its lifespan. Using the right oil, applied correctly and regularly, ensures optimal performance and saves you from costly repairs.
Hey there, fellow builders and DIY enthusiasts! Jack Shaffer here, your go-to guy for all things nailers. Ever get frustrated when your trusty nail gun decides to take a coffee break mid-project? It’s usually not the nailer’s fault; often, it’s simply craving a little lubrication. This guide is all about those essential nailer operational lubricants. We’ll demystify what they are, why they matter, and how to use them like a pro, even if you’re just starting. Get ready to keep your nailer happy and your projects moving forward without a hitch!
Table of Contents
Why Your Nailer Needs a Little Love: The Importance of Lubrication
Think of your nail gun like a well-tuned engine. It’s got moving parts that rub against each other every time you pull the trigger. Without proper lubrication, these parts can grind, wear down, and eventually cause your nailer to falter. This can lead to frustrating jams, reduced power, and even permanent damage. Regular lubrication isn’t just about keeping things running; it’s about protecting your investment and ensuring your nailer performs at its best, project after project.
Understanding Nailer Lubricants: What Are They and What Do They Do?
At its core, nailer operational lubricant is a type of oil specifically designed to reduce friction between the moving parts inside your nail gun. These parts, like the piston, driver blade, and O-rings, rely on a thin film of oil to glide smoothly.
Here’s what these lubricants do for your nailer:
Reduce Friction: This is their primary job. By coating metal parts, they create a slippery surface.
Prevent Wear and Tear: Less friction means less metal-on-metal contact, which significantly slows down wear.
Seal Components: Lubricants help maintain the integrity of rubber O-rings and seals, preventing air leaks.
Prevent Rust and Corrosion: Many lubricants contain rust inhibitors, protecting the internal metal components from moisture.
Improve Performance: A well-lubricated nailer operates more efficiently, delivering consistent power for every nail.
Cool Moving Parts: The constant motion generates heat. Lubrication helps dissipate this heat.
Different Types of Nailer Lubricants
You’ll mainly encounter two types of lubricants for nail guns:
1. Pneumatic Tool Oil: This is the most common type for air-powered nailers. It’s formulated to be compatible with the rubber seals found in pneumatic tools and is designed to withstand the pressures and temperatures inside them. It’s typically a light mineral oil.
2. Cordless/Electric Nailer Specific Lubricants: While some cordless and electric nailers may have sealed mechanisms that require little to no user lubrication, others might have specific needs. Always check your owner’s manual. Some might use a light grease or oil in a particular gear housing or motor area.
Crucial Note: Never use WD-40 or similar light-duty penetrating oils as your primary lubricant for pneumatic nailers. While great for cleaning and freeing rusted parts, they don’t provide the long-lasting lubrication needed for operational components and can actually dry out rubber seals over time.
When and How to Lubricate Your Nail Gun: A Step-by-Step Guide
The frequency of lubrication depends on how often and how intensely you use your nailer. A good rule of thumb for pneumatic nailers is to add a few drops of oil after every day of heavy use, or at least once a week for moderate use. For cordless or electric models, consult your manual as they often require less frequent, or no, routine lubrication.
Step 1: Gather Your Supplies
Before you start, make sure you have:
The Correct Lubricant: Pneumatic tool oil for air-powered nailers. Check your manual for specific recommendations for cordless or electric models.
A Clean Rag or Paper Towels: To wipe away excess oil and dust.
Your Nailer’s Owner’s Manual: Always your best friend for specific instructions.
Step 2: Disconnect the Power Source! (Safety First!)
This is paramount.
For Pneumatic Nailers: Disconnect the air hose.
For Cordless Nailers: Remove the battery.
For Corded Electric Nailers: Unplug the power cord.
Never skip this step. It’s incredibly dangerous to have a nailer powered up while you’re working on it.
Step 3: Locate the Oil Port
Most pneumatic nailers have a small oil port, often found near the air inlet fitting where the air hose connects. It might be a small screw cap or a simple hole covered by a spring-loaded valve. Again, check your manual if you’re having trouble finding it. Some high-end or industrial nailers might not have an external oil port and rely on internal grease or sealed mechanisms.
Step 4: Apply the Lubricant
For Pneumatic Nailers with an Oil Port:
Gently unscrew or uncap the oil port if necessary.
Using the oiler bottle, add the recommended amount of pneumatic tool oil. Typically, this is just 2-3 drops. It’s better to under-lubricate slightly than to over-lubricate, as too much oil can get blown into your workpiece or hoses.
Replace the cap or close the valve.
For Inline Oil Lubricators (Pneumatic): If you use an inline oiler attached to your air hose, you’ll fill that reservoir with pneumatic tool oil instead of oiling the gun directly. The oil is then automatically metered into the air stream. Refill this reservoir as needed, following the manufacturer’s instructions.
For Cordless/Electric Nailers: If your manual specifies areas for lubrication (e.g., gear housing), use the recommended type and amount of lubricant. This is often a specific grease or a different type of oil.
Step 5: Work the Lubricant In
Once you’ve added the oil, it’s time to help it spread.
For Pneumatic Nailers: Reconnect the air power (or insert the battery/plug in your electric nailer). Then, fire the nailer several times into a scrap piece of wood. This helps distribute the oil throughout the internal mechanisms.
For Cordless/Electric Nailers: If the manual specifies, you might just need to run the tool for a few seconds (obeying all safety precautions).
Step 6: Clean Up
Use a clean rag to wipe away any excess oil that might have squeezed out. Also, give the exterior of your nailer a quick wipe-down to remove dust and grime. A clean tool is a happy tool!
Common Pitfalls and How to Avoid Them
Even with the best intentions, beginners might run into a few snags. Here are some common mistakes and how to steer clear of them:
Using the Wrong Oil: As mentioned, WD-40 is not a substitute for proper pneumatic tool oil. Likewise, motor oil or other heavy-duty oils can damage seals and gum up the works. Stick to oils specifically labeled for pneumatic tools or recommended for your electric model.
Over-Lubricating: Too much oil can cause issues like oil blow-by that stains wood, or it can attract dust and debris, creating a sticky mess internally. A few drops are usually sufficient.
Under-Lubricating: Not oiling regularly enough is the most common cause of performance issues. If you notice sputtering, reduced nail depth, or jams, it’s often a sign your nailer needs oil.
Forgetting to Disconnect Power: This is a major safety hazard. Always double-check that your nailer is de-powered before you apply lubricant or perform any maintenance.
Neglecting Internal O-Rings and Seals: While routine external oiling is essential, O-rings and seals can degrade over time. If you experience persistent air leaks or reduced power after proper lubrication, these parts might need inspection or replacement. Many manuals will guide you on how to access and inspect these. For complex internal maintenance, consider professional service.
Maintaining Your Nailer Beyond Lubrication
Lubrication is a key part of nailer maintenance, but it’s not the only secret to a long-lasting tool. Think of it as part of a broader care routine.
Cleaning Your Nail Gun
Regular cleaning is just as important as lubrication. Dust, sawdust, and debris can get into the tool and interfere with its operation.
Exterior Cleaning: Use a dry cloth or a slightly damp one to wipe down the outside of your nailer.
Air Inlet: Keep the air inlet clean. For pneumatic nailers, make sure no debris gets into the fitting.
Magazine: Periodically clean out the nail magazine. Sawdust can build up here and cause feeding issues. A brush or compressed air can help.
Keeping Your Air Supply Clean and Dry (Pneumatic Only)
For pneumatic nailers, the quality of your compressed air directly impacts the tool’s health.
Water in the Air Line: Compressors can build up moisture. Water in your air can lead to rust inside the nailer and freeze in cold conditions. Always drain your air compressor tank regularly and consider using an air dryer or filter. You can find more information on maintaining air quality for tools from resources like the Occupational Safety and Health Administration (OSHA), which often covers pneumatic tool safety.
Clean Air Filters: If your nailer or air line uses filters, ensure they are clean and functioning correctly to remove oil and water from the air.
Storage
Store your nailer in a clean, dry place. Avoid extreme temperatures. For pneumatic nailers, it’s good practice to disconnect the air hose when not in use to prevent accidental discharge or leaks.
Nailer Maintenance Schedule: A Helpful Overview
To make things easy, here’s a general checklist. Remember to always refer to your nailer’s specific owner’s manual for the most accurate schedule and recommendations.
| Maintenance Task | Pneumatic Nailer Frequency | Cordless/Electric Nailer Frequency | Notes |
| :———————— | :———————————– | :——————————— | :—————————————————————————– |
| Lubricate | Few drops after heavy use/weekly | Per manual (often infrequent) | Use approved pneumatic tool oil. |
| External Cleaning | After each use or daily | After each use or daily | Wipe down with a dry cloth. |
| Magazine Cleaning | Weekly or as needed | Weekly or as needed | Remove sawdust and debris. |
| Check for Air Leaks | Daily (if air-powered) | N/A | Listen for hissing sounds. |
| Drain Air Compressor | Daily (for compressor tank) | N/A | Prevents moisture buildup. |
| Inspect O-rings/Seals | Occasionally, or if issues arise | Per manual, or if issues arise | Consult manual for access; may require professional help. |
| Clean Air Inlet/Filter| Regularly | As needed | Ensure clean air flow. |
| Deep Cleaning/Service | Every 6-12 months (heavy use) | Per manual | May involve internal cleaning; consider professional service if unsure. |
Understanding Lubrication for Different Nailer Types
While the principle of lubrication remains the same, the application and type can vary slightly between pneumatic, cordless, and electric nailers.
Pneumatic Nailers: These are the most common beneficiaries of routine external oiling. The oil is typically introduced through a port near the air inlet and circulates as air drives the piston.
Cordless (Battery-Powered) Nailers: Many cordless nailers have sealed internal mechanisms and may not require regular oiling from the user at all. They might have grease in gearboxes that lasts for the tool’s lifetime or requires very infrequent topping up per the manual. Always check your manual. Some manufacturers might specify a particular light oil for certain internal components, but this is less common than with pneumatic tools.
Corded Electric Nailers: Similar to cordless, their maintenance can vary. Some might have sealed motors and gearboxes. Others might have accessible lubrication points. For instance, some electric framing nailers might have a lubricant port for their drive mechanism. Again, the owner’s manual is your definitive guide.
A great resource for tool maintenance tips, including pneumatic tools, can often be found from reputable tool manufacturers’ support pages or through general construction industry best practices publications. For example, the Tooling.com website or similar industry resource sites often offer articles on tool care.
When to Call a Professional
While most lubrication and basic cleaning tasks are DIY-friendly, there are times when it’s best to seek professional help.
Persistent Jams: If your nailer jams frequently even after proper lubrication and cleaning.
Loss of Power: If the nail depth is inconsistent or significantly reduced.
Air Leaks: If you can’t find the source of an air leak in a pneumatic tool.
Unusual Noises: Grinding or squealing sounds that don’t go away after lubrication.
Unfamiliarity: If you’re uncomfortable disassembling any part of your nailer, or if the manual’s instructions are unclear.
A qualified tool repair specialist can diagnose and fix more complex issues, ensuring your nailer is safe and reliable.
Frequently Asked Questions about Nailer Operational Lubricants
Q1: How often should I lubricate my pneumatic nailer?
For pneumatic nailers, a good rule of thumb is to add 2-3 drops of pneumatic tool oil after every day of heavy use, or at least once a week for moderate use. Always check your owner’s manual for specific recommendations.
Q2: What kind of oil should I use for my nail gun?
For pneumatic nailers, use oil specifically labeled for pneumatic tools. For cordless or electric nailers, refer to your owner’s manual, as they might require a different type of oil or grease, or no user-applied lubrication at all.
Q3: Can I use WD-40 to lubricate my nail gun?
No. WD-40 is a water displacer and light lubricant, not suitable for the continuous high-pressure operation of a nail gun. It can actually dry out rubber seals over time and doesn’t provide the necessary long-term lubrication.
Q4: My nailer feels sluggish. Could it need lubrication?
Yes, a sluggish nailer is often a primary symptom of needing lubrication or a clean air supply. Ensure you’re using the correct oil and applying it regularly according to your manual’s instructions.
Q5: How do I lubricate a cordless nailer?
Most cordless nailers require very little to no user-applied lubrication. Check your owner’s manual carefully. If it specifies lubrication, it will detail where and what type of lubricant to use, which might be a specific grease or oil for a gearbox or motor housing.
Q6: What happens if I over-lubricate my nailer?
Over-lubricating can cause excess oil to blow out of the exhaust port, potentially staining your workpiece. Internally, too much oil can attract dust and debris, leading to a sticky buildup that can impede performance and eventually cause damage.
Q7: Do I need to lubricate the air hose connection?
No, you lubricate the internal mechanism of the nailer itself, usually through a dedicated oil port. The air hose connection is just where the compressed air enters the tool.
Conclusion: Keeping Your Nailer Firing Smoothly
Taking good care of your nail gun through regular lubrication and cleaning will pay dividends. It means fewer frustrating jams, more consistent results in your projects, and a longer lifespan for your tool. Think of it as a small investment of time that prevents bigger headaches and expenses down the road.
By following these simple steps and understanding why nailer operational lubricants are so important, you’re well on your way to becoming a confident and capable DIYer or woodworker. So grab that recommended oil, disconnect the power, and give your nailer the few drops of attention it deserves. Happy building, and may your nails always hit their mark!