Have you ever looked at your baseboards and thought they could use a makeover? Installing new baseboards can really change the look of a room. But, you might wonder how to do it properly. This is where a nailer for baseboard installation comes in handy.
Imagine finishing a room and seeing the perfect trim around the bottom. A nailer helps you do just that! It’s fast, easy, and can save you a lot of time. Did you know that using a nailer can make your project look professional? You can avoid using messy glue or unsightly nails by using this handy tool.
In this guide, we’ll show you how to choose the right nailer for baseboard installation. We’ll give you tips and steps to make the process smooth and successful. Are you ready to start your home improvement journey? Let’s dive in!
Table of Contents
Nailer For Baseboard Installation Guide: The Essential Tips

Nailer for Baseboard Installation Guide
Choosing the right nailer for baseboard installation can make your project smoother and faster. You’ll learn about different types of nailers, like pneumatic versus electric. This guide helps you understand nail size, power sources, and tips for accurate placement. Did you know that proper nail spacing can help prevent gaps? These insights will boost your confidence and skills. With the right tools, transforming your space can become an easy and enjoyable task!Benefits of Using a Nailer for Baseboard Installation
Efficiency and time savings compared to manual nailing. Improved aesthetic results and reduced damage to materials.Using a nailer for baseboard installation is a smart choice. It makes your work faster and saves you precious time. Here are some benefits:
- Efficiency: Nailing is quicker than doing it by hand.
- Better Appearance: Nailer creates clean and neat lines.
- Less Damage: It reduces dents and marks on materials.
Overall, using a nailer can improve your project, making it look professional and polished.
What are the main advantages of a nailer?
Using a nailer boosts speed, enhances the look of your work, and protects your materials!
Choosing the Right Nailer for Your Project
Factors to consider (power source, nail size, weight). Recommended nailers for beginners vs. professionals.Picking the right nailer matters a lot for your project. First, think about the power source. You can choose between electric, battery, or manual. Each one has its pros and cons. Next, consider the nail size. Some nailers work better with small nails, while others can handle bigger ones. Lastly, look at the weight of the nailer. A lighter one is easier to handle, especially for beginners.
For those just starting, a simple electric nailer is great. Professionals might prefer heavier-duty models for tougher jobs. Here are some suggestions:
- Beginners: Lightweight electric nailer
- Professionals: Heavy-duty pneumatic nailer
What nail size do I need for baseboards?
For baseboards, 18-gauge nails are popular. They are thin and won’t split the wood.
Choosing the right nailer can make your work easier. Keep these factors in mind. You’ll find the nailer that fits your needs best.
Preparing for Baseboard Installation
Tools and materials needed for the installation process. Stepbystep preparation guide (measuring, cutting, and fitting baseboards).Start your baseboard installation by gathering the right tools and materials. You will need a nail gun, measuring tape, saw, level, and safety glasses. Make sure you have enough baseboard pieces, caulk, and paint, too. Here’s how to prepare:
- Measure the walls carefully to get the correct length.
- Mark where to cut the baseboards at angles for corners.
- Cut the baseboards to the right lengths.
- Fit the pieces together to ensure they match.
With these steps, you are ready to install the baseboards!
What tools do you need to install baseboards?
You will need a nail gun, saw, measuring tape, and a level. Safety glasses help protect your eyes while you work.
Techniques for Using a Nailer in Baseboard Installation
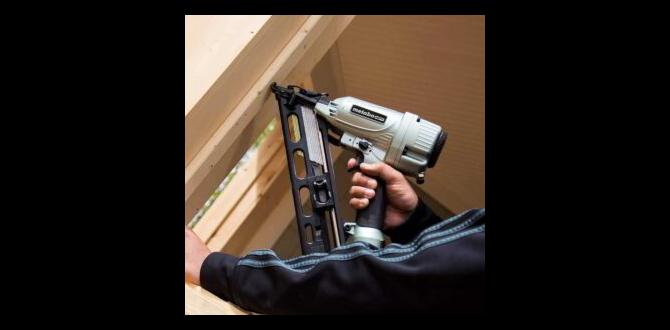
Proper nailing techniques to ensure secure installation. Common mistakes to avoid while using a nailer.Using a nailer for baseboard installation can be fun and efficient. First, hold the nailer at a 45-degree angle. This helps your nails go in deep, ensuring a strong hold. Watch out for common mistakes! Missing the board can cause gaps. Also, don’t overdo it—too many nails can split the wood. Use our handy guide below for reference:
| Technique | Tip |
|---|---|
| Angle it right | Hold at 45 degrees |
| Aim well | Hit the center of the board |
| Don’t over-nail | Too many nails can split wood |
Remember, using a nailer is like a game of darts—aim well, and score high!
Maintenance and Safety Tips for Nailers
Regular maintenance to prolong the life of your nailer. Safety precautions to take while using a nailer.To keep your nailer working well, regular maintenance is key. Clean it after each use to remove dust and debris. Check for any loose screws or parts. Lubricate moving parts with oil to help them run smoothly. Always inspect your nailer before starting a project to catch problems early.
Safety is equally important. Here are some tips:
- Wear safety glasses to protect your eyes.
- Keep hands clear of the nail exit.
- Never point the nailer at anyone, even if it’s not loaded.
- Disconnect the power when not in use.
What safety tips should I remember while using a nailer?
Always wear safety glasses, keep fingers clear of the nail path, and never point a nailer at anyone. Safety first!
Common Issues and Troubleshooting
Troubleshooting common problems (jams, misfires, etc.). Tips for resolving issues during baseboard installation.During baseboard installation, problems can happen. Common issues include jams and misfires. These can slow you down. Luckily, fixing them is often easy! Follow these tips:
- Check the nails. Ensure they are the right size and type.
- Clear any debris from the nailer.
- Lubricate moving parts to avoid sticking.
- Adjust the pressure settings for better performance.
These steps can help you troubleshoot quickly. Getting it right means a smooth finish and a happy workspace!
What should I do if my nailer jams?
If your nailer jams, turn it off and unplug it. Carefully remove the stuck nail. Check for any blockages and clean them out before restarting.
Alternative Methods for Baseboard Installation
Comparison of nailers to other fastening methods. Scenarios where manual or alternative methods may be preferable.Using a nailer is quick for baseboard installation, but other methods can work too. For example, manual nailing is handy when you need control or are in tight spots. It can make you feel like a carpenter ninja! On the other hand, adhesive can be a strong choice for uneven walls. It’s like glue for baseboards, but it won’t stick to your fingers—hopefully. Check out the table below for a quick comparison:
| Method | Pros | Cons |
|---|---|---|
| Nailer | Fast and efficient | Can be loud |
| Manual Nailing | More control | Time-consuming |
| Adhesive | No noise! | Limited to certain surfaces |
Choose what suits your project best. Remember, it’s all about making those baseboards happy!
Conclusion
In conclusion, using a nailer for baseboard installation makes the job easier and faster. Remember to choose the right nailer for your project. Practice your technique for clean results. Always measure carefully and wear safety gear. Now that you know the basics, why not try installing baseboards at home? Check out more guides for helpful tips!FAQs
What Type Of Nail Gun Is Best Suited For Installing Baseboards: A Finish Nailer, Brad Nailer, Or A Framing Nailer?The best nail gun for installing baseboards is a finish nailer. It uses small nails that hold strong but don’t make big holes. We can use this nailer for nice, clean work. A brad nailer is also good, but a finish nailer is better for baseboards. Framing nailers are too big and rough for this job.
How Do You Choose The Right Nail Size And Length For Baseboard Installation?To pick the right nail size for baseboards, start with the thickness of your baseboard. For regular baseboards, use nails that are about two inches long. This length goes deep enough to hold well. If your baseboard is thicker, you might need longer nails. Always make sure the nails are strong enough to support the baseboard!
What Are The Essential Safety Precautions To Take When Using A Nailer For Baseboard Installation?When using a nailer for baseboard installation, always wear safety goggles to protect your eyes. Keep your fingers away from the nail area to avoid getting hurt. Make sure the nailer is pointed away from you and others. Use the right nails for the job so the nailer works safely. Finally, always check that the nailer is turned off when not in use.
Can You Use A Nailer On Different Types Of Baseboard Materials, Such As Mdf, Hardwood, Or Pvc?Yes, you can use a nailer on different baseboard materials like MDF, hardwood, and PVC. A nailer helps you attach the baseboards easily. Just make sure you choose the right nails for each type. This will help you avoid damaging the materials. Enjoy your project!
What Techniques Can Help Ensure A Clean And Professional Finish When Using A Nailer For Baseboard Installation?To get a clean and nice look when using a nailer for baseboards, you should start by measuring carefully. Use a level to make sure the baseboard is straight. Then, hold the nailer close to the board when you shoot the nails. This way, you won’t leave big marks. Lastly, fill any small holes with putty for a smooth finish.