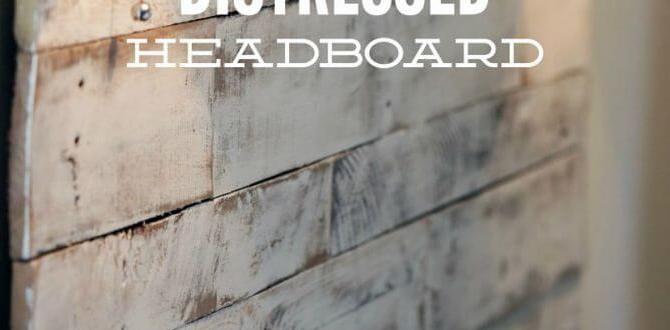
Have you ever tried installing baseboards by hand? It can be slow and tricky. But what if I told you there’s a better way? A nailer for baseboard installation makes this job easier and faster.
Imagine finishing your project in just half the time. A nail gun helps you secure baseboards quickly. It also gives your home a professional look. You won’t believe how much a little tool can change your work!
Did you know that using a nailer can prevent split wood? This means your baseboards will look perfect! With the right tool, you can mix fun and function.
In this article, we will explore the best nailers for baseboard installation. We’ll dive into their features and how they can help you. Ready to learn how to nail your next home project? Let’s go!
Table of Contents
Best Nailer For Baseboard Installation: A Complete Guide

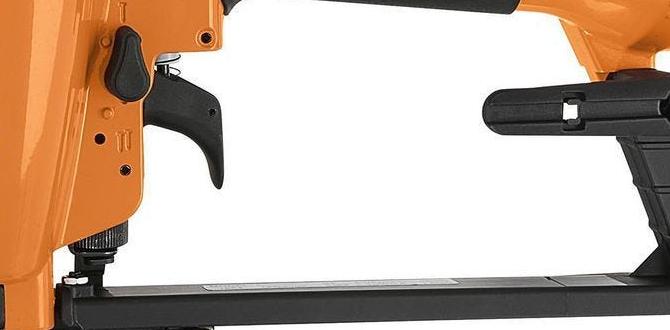
Nailer for Baseboard Installation
Choosing the right nailer can make baseboard installation a breeze. A good nailer provides speed and accuracy, letting you finish the job quickly. Did you know that pneumatic nailers deliver stronger blows than manual options? This means cleaner, neater results on your walls. Imagine tackling your baseboards in a single afternoon instead of over the weekend! Find the right tool, and you’ll enjoy a beautiful finish in no time. Happy renovating!Types of Nailers for Baseboard Installation
Pneumatic vs. Electric Nailers. Corded vs. Cordless Options.Choosing a nailer for baseboard installation can be fun! You can pick from two main types: pneumatic and electric. Pneumatic nailers need air compressors. They work fast and are powerful. Electric nailers are easier to use but might need charging or a plug.
Next, think about corded or cordless options:
- Corded nailers stay plugged in. They offer consistent power.
- Cordless nailers are portable but need batteries. They give you more freedom to move.
Choosing the Right Nailer
Factors to Consider: Power, Weight, and Size. Recommended Brands and Models.Choosing the right nailer can feel like trying to find a needle in a haystack, but fear not! Start by considering power, weight, and size to match your needs. A lightweight nailer means fewer arm workouts, while power helps drive those nails faster. Brands like Dewalt, Bostitch, and Ryobi have great options. Check out the table below for some top picks!
| Brand | Model | Weight | Power |
|---|---|---|---|
| Dewalt | DWP611 | 5.6 lbs | 20V |
| Bostitch | N62FNK-2 | 4.7 lbs | Electric |
| Ryobi | P320 | 5.1 lbs | 18V |
With the right choices, you’ll be nailing it in no time! And remember, the nailer shouldn’t be heavier than your lunch! Happy building!
Essential Features to Look For
Depth Adjustment Settings. Trigger Mechanisms: Sequential vs. Bump Fire.Choosing a nailer for baseboard installation can be simple if you know what to look for. First, look for depth adjustment settings. This lets you control how deep the nails go. It helps avoid damage. Next, consider the trigger mechanisms. There are two types: sequential and bump fire.
Sequential fires one nail at a time, giving more control. Bump fire shoots nails quickly, which can speed up your work. Both have their perks!
What are the types of trigger mechanisms?
The two types of trigger mechanisms for nailers are sequential and bump fire.
- Sequential: Fires one nail with each pull of the trigger.
- Bump fire: Fires nails rapidly by pushing the tool against the surface.
Finding the right nailer can make your baseboard job easy and fun. Happy installing!
Preparing for Baseboard Installation
Tools and Materials Needed. Measuring and Marking the Installation Area.Installing baseboards is fun and can make your room look amazing! First, gather your tools and materials. You need:
- Baseboards
- Nailer for baseboard installation
- Measuring tape
- Pencil
- Level
- Caulk and caulking gun
Next, measure and mark where the baseboards will go. Use your measuring tape to find accurate lengths. Mark clearly with a pencil. This step saves time later and helps avoid mistakes.
What tools do I need for baseboard installation?
You will need a nailer for baseboard installation, measuring tape, pencil, and level. These tools will help you get a perfect finish.
Step-by-Step Installation Process
Proper Nailer Setup. Nailing Techniques for Different Materials.Before starting, set up your nailer correctly. Begin by choosing the right nails for your baseboard material. Wood and MDF may need different types of nails. Use the following tips for nailing:
- Adjust air pressure for softer or harder materials.
- Hold the nailer straight to avoid bending nails.
- Space nails evenly along the baseboard for a neat look.
With the right setup and technique, your installation will look great!
What type of nails should I use?
Use finishing nails for wood and brad nails for lightweight materials like MDF.Tips for Nailing:
- Check the length of the nails for the thickness of your baseboard.
- Practice on scrap pieces first for better control.
Common Mistakes to Avoid
OverNailing or UnderNailing. Poor Alignment and Spacing Issues.Many mistakes can happen during baseboard installation. Here are some common ones to avoid:
- OverNailing or UnderNailing: Nailing too much can break the wood. Too few nails mean loose boards. Aim for a balance!
- Poor Alignment: If baseboards are not straight, it looks messy. Use a level to check for straight lines.
- Spacing Issues: Gaps between boards can be unattractive. Keep spacing even for a neat finish.
What should I avoid when using a nailer for baseboard installation?
Avoid using too many or too few nails, misaligning boards, and leaving uneven gaps. These mistakes can ruin the look of your project.
Maintenance Tips for Your Nailer
Cleaning and Lubrication. Troubleshooting Common Issues.To keep your nailer working well, clean it often. Wipe off dirt and dust from the outside. Lubricate moving parts regularly. Use oil to make them run smoothly. If your nailer jams, check for stuck nails. Pull them out carefully. Also, keep an eye on air pressure. Too low or too high can cause problems.
How do you clean and maintain a nailer?
Regular cleaning and maintenance are key. Clean the nozzle after each use and oil the movable parts every few uses. This keeps it running smoothly.
- Check for leaks in the air hose.
- Examine the safety features.
- Replace worn-out parts promptly.
Safety Precautions When Using a Nailer
Personal Protective Equipment (PPE). Safe Handling and Operation Tips.Before using a nailer, put on your Personal Protective Equipment (PPE). Safety goggles protect your eyes, while earmuffs keep your hearing safe from loud noises. Don’t forget gloves to keep your hands safe from sharp bits!
Handle your nailer carefully like it’s a tiny dragon. Always point it away from people and pets. Check for jams before you start. When loading nails, make sure your fingers are clear. If you follow these tips, you’ll nail it—pun intended!
| Safety Gear | Purpose |
|---|---|
| Safety Goggles | Protect eyes from flying debris |
| Earmuffs | Shield hearing from loud sounds |
| Gloves | Guard hands from cuts |
Conclusion
In conclusion, using a nailer for baseboard installation makes the job easier and faster. It creates strong, clean connections. Choose a nailer that fits your needs, whether it’s pneumatic or cordless. Practice safety while working. If you’re ready to start, gather your tools and try installing a baseboard in your own home. For more tips, keep reading!FAQs
Sure! Here Are Five Related Questions On The Topic Of Nailers For Baseboard Installation:Sure! When installing baseboards, using a nailer makes the job easier. A nailer shoots nails quickly into the wood. It helps you connect the baseboard to the wall without hammering. This saves time and makes everything look neat. If you choose the right nailer, you can finish your project faster!
Of course! Please provide the question you’d like me to answer, and I’ll be happy to help.
What Type Of Nailer Is Best Suited For Installing Baseboards: A Finish Nailer Or A Brad Nailer?A finish nailer is best for installing baseboards. It uses thicker nails that hold better. This means your baseboards stay in place. A brad nailer is good too, but its nails are thinner and may not hold as well. So, for strong and nice-looking baseboards, choose a finish nailer!
How Long Should The Nails Be For Securing Baseboards To The Wall With A Nailer?You should use nails that are about 1.5 to 2 inches long for securing baseboards. This length holds the baseboard tight against the wall. If the baseboard is thicker, you may need longer nails. Just make sure they are not too long to avoid hitting anything inside the wall.
What Are The Advantages Of Using A Pneumatic Nailer Versus A Cordless Nailer For Baseboard Installation?A pneumatic nailer uses air to drive nails, which makes it very powerful. It can drive nails quickly and deeply into the wood. This means you finish your work faster. A cordless nailer runs on batteries, which can run out, but the pneumatic one keeps going as long as you have air. Plus, the pneumatic nailer is usually lighter and easier to control.
Are There Specific Tips Or Techniques For Achieving A Seamless Finish When Using A Nailer For Baseboards?To get a smooth finish when using a nailer for baseboards, you should start by measuring carefully. Make sure the boards fit tightly against the wall and floor. Use a level to check that they are straight. When you nail them, aim for the edges and use the right amount of pressure. After nailing, fill any gaps or holes with putty, then sand them smooth for a clean look.
How Do You Ensure Proper Alignment And Spacing When Nailing Baseboards With A Nailer?To make sure baseboards look good, first, we measure and mark where they go on the wall. Then, we hold the baseboard in place and check that it’s straight. Use a nailer to put nails in at equal spaces. If we use a level, it helps keep everything even. Always step back to check how it looks before finishing!