Have you ever tried to use a nail gun, only to get uneven nails? It can be frustrating! Knowing how to adjust the depth of the nails makes a big difference.
In this guide, we will explore the best ways to set the nailer depth adjustment, specifically from Lowes. Many people don’t realize how easy this can be. With the right settings, your projects will look neater and last longer.
Did you know that adjusting the depth of your nails can prevent damage? This simple skill can save you time and money. Imagine finishing a big project without the stress of repairs!
Let’s dive into some tips and tricks that will help you master your nail gun. Soon, you’ll feel like a pro in no time!
Table of Contents
Nailer Depth Adjustment Guide Lowes: Essential Tips & Tricks

Nailer Depth Adjustment Guide Lowes
Understanding nailer depth adjustment is key for any DIY project. Proper depth ensures nails sit flush or slightly below the surface. This helps in achieving a clean finish. Have you ever struggled with uneven nails? Adjusting depth can solve that! Lowes offers detailed guides and tips for different nailers. Fun fact: different materials require different settings! Discover how a simple adjustment can improve your woodworking results significantly. Take your skills to the next level with the right tools and know-how!Understanding Nailer Depth Adjustment
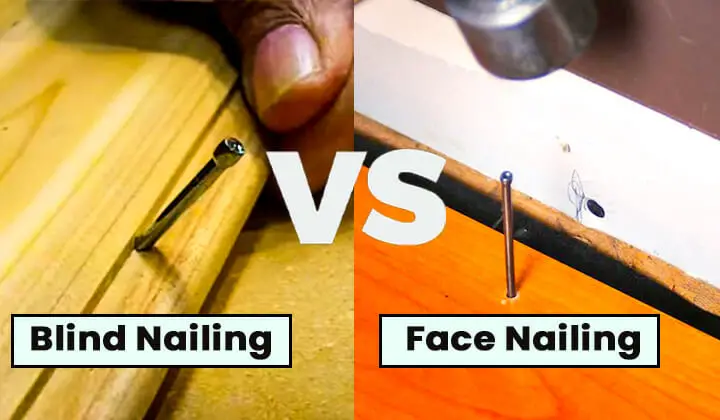
Explanation of depth adjustment and its importance in nailers.. Common issues caused by incorrect depth settings..Nailer depth adjustment is about how deep a nail goes into the material. It’s super important! If the depth is wrong, nails can stick out like they’re trying to wave at you. This could lead to damage. Imagine a nail sticking out of a beautiful piece of furniture. Yikes! Common issues from bad depth settings include nails being too deep or not deep enough. Both can ruin your work and make your tool feel really grumpy.
| Depth Setting Issues | Effects |
|---|---|
| Too Deep | Damages material, hard to pull out |
| Not Deep Enough | Nail sticks out, creates hazards |
Step-by-Step Guide to Adjusting Nailer Depth
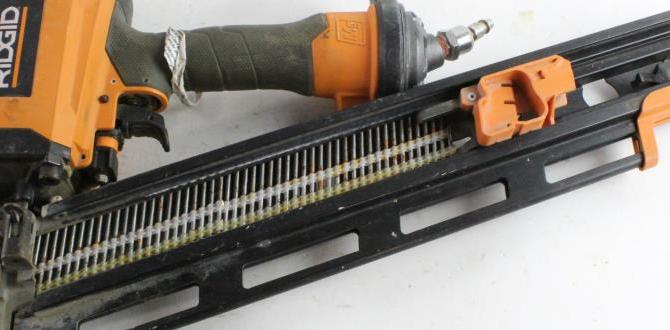
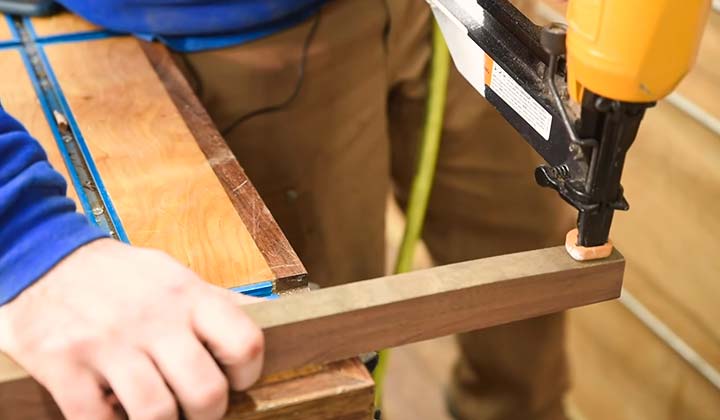
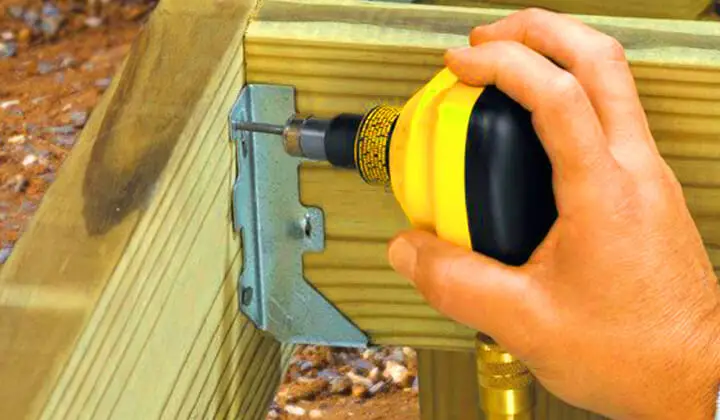
Detailed instructions for adjusting depth based on nailer type.. Visual aids or diagrams to illustrate the adjustment process..Adjusting the depth on your nailer is simple. First, check your nailer type. Some models have a dial, while others use a lever. Always wear safety gear. For dial adjustments, turn clockwise for deeper nails and counterclockwise for shallower ones. If you have a lever, pull it out, shift it, and release. Check the results on scrap wood before your big project. Remember, too deep means splinters; too shallow means loose nails. Keep it just right!
| Nailer Type | Depth Adjustment Method |
|---|---|
| Dial Nailer | Turn dial for desired depth. |
| Lever Nailer | Pull lever, adjust, and release! |
Tools and Accessories for Nailer Depth Adjustment
List of necessary tools for effective depth adjustment (screwdrivers, wrenches, etc.).. Optional accessories that can enhance the adjustment process..To adjust your nailer correctly, you need a few key tools. Here’s a list:
- Screwdrivers
- Wrenches
- Allen keys
Optional accessories can also help you. Consider using:
- Depth gauges
- Measurement tapes
- Safety goggles
These tools and accessories make depth adjustments easier and safer.
What tools are needed for nailer depth adjustment?
You will need items like screwdrivers and wrenches for effective adjustments. Accessories like depth gauges can make your work even more precise.
Best Practices for Nailer Depth Settings
Recommendations on optimal depth settings for different materials.. Tips for avoiding common mistakes during adjustments..Setting the right depth for your nailer is key to success. Each material needs a unique depth for the best results. Here are some tips:
- Plywood: Set the depth to 1/8 inch below the surface.
- Softwood: Aim for 1/4 inch below the surface.
- Hardwood: Use a depth that is 3/16 inch below the top.
To avoid mistakes, follow these simple steps:
- Always test on scrap wood first.
- Check and adjust the depth while working.
- Keep the nailer clean and well-maintained.
These tips help ensure precise and clean nailing.
What is the proper nailer depth for different materials?
The proper depth varies for each material. Remember to adjust according to the type you are using for the best result.
Troubleshooting Common Depth Adjustment Issues
Identifying signs of improper depth settings (nails too deep or not flush).. Solutions for resolving depthrelated problems during nail projects..Improper depth settings can lead to problems in your nail projects. If nails are too deep, they may damage materials. If they are not flush, they can stick out and look messy. Look for these signs:
- Nails are more than flush with the surface.
- Nails are stuck too deep inside the material.
To solve these issues, try the following:
- Adjust the depth setting on your nailer.
- Test on scrap wood before the final project.
Keep practicing to get it just right!
What are the signs of improper nail depth settings?
Look for nails either too deep or not flush with the surface. Checking your work regularly helps you catch these problems early.
Maintenance Tips for Nailers
Importance of regular maintenance for consistent depth adjustment.. Recommended maintenance practices and frequency..Regular maintenance is key for nailers to perform well. If you want consistent depth adjustments, keeping your tool in shape is vital. Neglect can lead to problems, causing uneven results. Follow these tips for best results:
- Clean your nailer after every use.
- Check and replace o-rings as needed.
- Lubricate moving parts every few months.
- Inspect for wear and tear regularly.
Doing this will help your nailer last longer and work better!
Why is maintenance important for nailers?
Regular maintenance ensures your nailer works smoothly and accurately. It helps maintain the right depth for nails, preventing misfires and wasted materials.
Where to Get Help and Support
Resources for further assistance (Lowes customer support, online forums).. Contact information for local Lowes tool experts..If you need help with your nailer, Lowes is here for you! Their customer support team is just a call away. You can also visit their website for tips and tricks. Online forums are full of friendly DIYers. They share advice and funny stories about their projects, which can be quite entertaining!
| Type of Help | Contact Info |
|---|---|
| Lowes Customer Support | 1-800-445-6937 |
| Local Lowes Tool Expert | Visit your nearest store |
Got more questions? Ask away! It’s better than guessing and hoping for the best. Remember, even the best builders started with a few mishaps.
Conclusion
In conclusion, understanding the nailer depth adjustment at Lowes helps you use tools effectively. You can set the depth to control how deep nails go. This is important for strong and clean projects. Remember to check the manual for specific tips. Now, go explore the tools at Lowes and practice your skills. Happy building!FAQs
How Do I Adjust The Depth Setting On A Nailer Purchased From Lowe’S?To adjust the depth setting on your nailer, find the adjustment knob or lever. It’s usually located near the front of the tool. Turn it to either increase or decrease how deep the nails go. Test it on a piece of scrap wood to make sure it’s just right. If you need help, you can always ask a store worker at Lowe’s.
What Are The Differences Between Depth Adjustments On Pneumatic And Electric Nailers?Pneumatic nailers use air to work. You adjust the depth by turning a knob. Electric nailers are powered by electricity. They usually have a simple button or dial for depth settings. Both help you control how deep the nail goes, but the way you change it is different.
Can I Find Replacement Parts For The Depth Adjustment Mechanism At Lowe’S?Yes, you can check for replacement parts at Lowe’s. They carry many tools and parts. You can ask a store worker for help. If they don’t have what you need, they might order it for you.
What Should I Do If My Nailer Is Not Driving Nails To The Correct Depth, Despite Adjustments?If your nailer isn’t working right, first check the air pressure. Make sure it’s set to the right level. Next, look at the nails you’re using; they should match your nailer’s size. If it’s still not working, clean the nailer to remove any dirt or jammed parts. If you still have trouble, ask an adult for help or call a repair expert.
Are There Specific Nail Sizes Or Materials That Require Certain Depth Settings On Nailers Available At Lowe’S?Yes, different nail sizes and materials need specific depth settings on nailers. For example, thicker nails go deeper into the wood. If you’re using lighter materials, you might need to set the depth shallower. Always check your nailer’s manual for the best settings for your project. This helps ensure your nails go in just right!