Have you ever tried to nail something, only to find the nail is either too deep or not deep enough? It’s frustrating, isn’t it? The right depth for nails is so important in building and crafting. But don’t worry! A nailer depth adjustment guide can help you fix that problem easily.
Imagine you’re working on a cool project. You want your nails to sit just right in the wood. Too deep, and they might split the wood. Not deep enough, and they won’t hold anything at all. Yikes!
Using the right depth setting can make a big difference. It helps your work look cleaner and last longer. A fun fact: did you know that adjusting the depth can also keep you safer while you work? Less chance of accidents means more time to enjoy your projects!
This guide will walk you through how to set your nailer’s depth. You’ll learn tips and tricks to make your nailing tasks much easier. So, let’s dive in and become a depth adjustment pro!
Table of Contents
Nailer Depth Adjustment Guide: Tips For Perfect Results

Nailer Depth Adjustment Guide
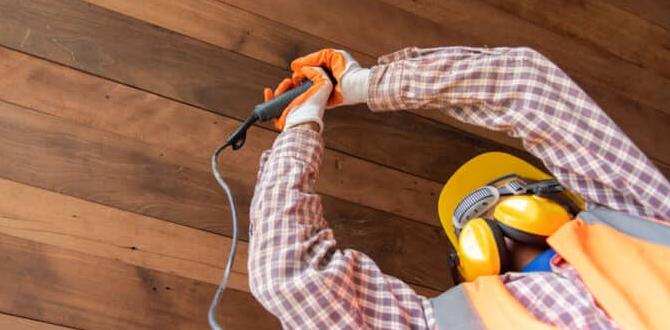
Adjusting the depth of a nailer is essential for perfect finishes. Have you ever faced uneven nails that stick out or sink too deep? A nailer depth adjustment guide helps you avoid these common issues. It provides simple steps to set the nail depth correctly for different materials. Did you know that wood density affects nail performance? Understanding this can lead to better results in your projects. Mastering depth adjustment not only improves your work but also boosts your confidence!Understanding Nail Gun Depth Adjustment
Explanation of what nailer depth adjustment is. Importance of accurate depth adjustment in various projects.Nailer depth adjustment is the way to control how deep a nail goes into a surface. This is important for many projects. If nails go in too deep, they can cause damage. If they don’t go deep enough, the materials may not hold together well. Good depth adjustment ensures strength and a polished look. Here’s why it matters:
- Prevents surface damage: Keeps surfaces smooth.
- Strong joints: Ensures materials stick together.
- Professional finish: Creates clean and neat results.
Why is nailer depth adjustment important?
It helps to avoid mistakes, ensure safety, and improve the quality of your work.Factors Affecting Nailer Depth
Impact of wood type on nail depth. Influence of nail size and length on depth settings.Different factors impact how deep your nails go into wood. First, the type of wood matters. Softwoods, like pine, are easy to nail into. Hardwoods, such as oak, are tougher and need deeper settings. Imagine trying to bury a stick in sand versus concrete!
Nail size and length also play a big role. A longer nail needs more depth to go in deep enough. If you use a tiny nail, it won’t go as deep. So, adjust your nailer settings wisely. Otherwise, your projects may turn into “nail fails.”
| Wood Type | Recommended Nail Depth |
|---|---|
| Softwood | Shallow |
| Hardwood | Deeper |
| Composite | Medium |
How to Adjust the Depth on Your Nailer
Stepbystep guide for manual adjustment. Tips for adjusting depth on different models of nail guns.Adjusting your nailer’s depth is like finding the perfect pancake flip—it takes a little practice! Start by setting your nail gun on a flat surface. Look for the depth adjustment dial or knob, usually on the front or side. Turn it to increase or decrease the depth. Test it out by firing a nail into scrap wood. Adjust as needed until your nails sit just right.
Different nail gun models can vary in depth adjustment methods. Use the table below to guide you:
| Model | Adjustment Method |
|---|---|
| Model A | Twist knob |
| Model B | Slide lever |
| Model C | Push button |
And remember, a well-adjusted nail is a happy nail! So don’t rush, take your time, and enjoy your nailing adventures!
Common Mistakes in Nailer Depth Adjustment
List of frequent errors made during adjustment. How to identify and correct these mistakes.Many people make mistakes while adjusting their nailers. These errors can lead to poor results. Here are some common mistakes to watch for:
- Not checking the surface material before adjusting.
- Setting the depth too deep or too shallow.
- Forgetting to test on scrap wood first.
- Ignoring the manufacturer’s instructions.
To fix these issues, always start by setting a proper depth for your project. Test on a piece of scrap wood and adjust as necessary. Keeping your nailer clean and well-maintained also helps.
Maintaining Your Nailer for Optimal Performance
Tips on regular maintenance practices. Importance of keeping depth adjustment settings intact.To keep your nailer in great shape, regular maintenance is key. Here are some helpful tips to follow:
- Clean the nailer after each use.
- Check and tighten screws and parts.
- Lubricate moving parts to ensure smooth operation.
- Inspect depth adjustment settings regularly.
Keeping the depth adjustment settings intact is very important. If they change, it can affect how deep the nails go. Proper settings lead to better results and safer use. Remember, a well-maintained nailer works more efficiently. It also lasts longer.
Why is maintenance important?
Regular maintenance keeps your nailer working well. It prevents breakage and enhances safety. A happy tool leads to happy projects!
Recommended Tools for Nailer Depth Adjustment
List of tools to assist in effective adjustment. Brief description of each recommended tool’s use.Adjusting nail depth is easy when you have the right tools! Here is a list of useful gadgets:
| Tool | Use |
|---|---|
| Depth Gauge | Helps measure how deep your nails go. It’s like measuring how deep a hole is, but way less messy! |
| Adjustable Wrench | This handy tool will help you change the depth settings on your nailer. It’s like a magic key for your tool! |
| Hex Key | Perfect for tightening or loosening screws. Think of it as your nailer’s best friend! |
With these tools, you’ll nail the perfect depth every time. No more guessing games!
Expert Tips for Perfect Nail Depth
Insider tips from professionals in the industry. Best practices for achieving consistent results with nailers.To achieve the right nail depth, listening to experts can really help. Here are some tips:
- Always test a few nails on scrap wood first.
- Adjust the depth based on the material you are working with.
- Keep an eye on your nailer settings; they may change with different projects.
- Regularly clean your nailer for best performance.
These practices help get consistent results. Pro advice can make projects smoother and more enjoyable!
How can I set the nail depth correctly?
To set the nail depth correctly, you should check the material type and adjust the nailer setting. Test it out on scrap pieces to get it just right.
Conclusion
In summary, a nailer depth adjustment guide helps you control how deep nails go. This keeps your projects neat and safe. Remember to adjust the depth for different materials. We encourage you to practice on scrap wood. This way, you’ll gain confidence. For more tips and tricks, check out additional resources on nailers. Happy nailing!FAQs
What Is The Purpose Of Adjusting The Depth On A Nailer, And How Does It Affect The Performance Of The Tool?Adjusting the depth on a nailer helps you control how deep the nails go into the wood. If the nail goes too deep, it can split the wood. If it’s not deep enough, the nail might stick out. By setting the right depth, you make sure the nails hold well and look nice. This makes your work cleaner and stronger.
How Do I Properly Adjust The Depth Setting On A Pneumatic Nailer Versus A Cordless Nailer?To adjust the depth on a pneumatic nailer, use the knob or dial on the tool. Turn it to change how deep the nails go. For a cordless nailer, you might need to press a button or turn a screw. Always test it on scrap wood first. This helps you get the right depth before you start your project.
What Are The Common Signs That Indicate The Depth Setting On My Nailer Needs Adjustment?If your nailer is not pushing nails in all the way, it needs adjustment. You might see nails sticking out or not going in deep enough. Sometimes, nails can go in too far and damage the wood. If you notice these problems, it’s time to change the depth setting.
Are There Specific Materials Or Applications That Require Different Depth Settings When Using A Nailer?Yes, different materials need different depth settings when using a nailer. For soft wood, we can set it shallower. Harder wood needs a deeper setting to drive the nail in. Thicker materials like plywood also need more depth. Always adjust the depth for the best result!
Can Incorrect Depth Adjustment Damage The Material Being Fastened, And If So, What Are The Potential Consequences?Yes, if the depth adjustment is wrong, it can hurt the material you’re fastening. For example, if you press too hard, you might create holes or cracks. This can make the material weaker or even break it. It’s important to check the depth so everything stays strong and safe.
{“@context”:”https://schema.org”,”@type”: “FAQPage”,”mainEntity”:[{“@type”: “Question”,”name”: “What Is The Purpose Of Adjusting The Depth On A Nailer, And How Does It Affect The Performance Of The Tool? “,”acceptedAnswer”: {“@type”: “Answer”,”text”: “Adjusting the depth on a nailer helps you control how deep the nails go into the wood. If the nail goes too deep, it can split the wood. If it’s not deep enough, the nail might stick out. By setting the right depth, you make sure the nails hold well and look nice. This makes your work cleaner and stronger.”}},{“@type”: “Question”,”name”: “How Do I Properly Adjust The Depth Setting On A Pneumatic Nailer Versus A Cordless Nailer? “,”acceptedAnswer”: {“@type”: “Answer”,”text”: “To adjust the depth on a pneumatic nailer, use the knob or dial on the tool. Turn it to change how deep the nails go. For a cordless nailer, you might need to press a button or turn a screw. Always test it on scrap wood first. This helps you get the right depth before you start your project.”}},{“@type”: “Question”,”name”: “What Are The Common Signs That Indicate The Depth Setting On My Nailer Needs Adjustment? “,”acceptedAnswer”: {“@type”: “Answer”,”text”: “If your nailer is not pushing nails in all the way, it needs adjustment. You might see nails sticking out or not going in deep enough. Sometimes, nails can go in too far and damage the wood. If you notice these problems, it’s time to change the depth setting.”}},{“@type”: “Question”,”name”: “Are There Specific Materials Or Applications That Require Different Depth Settings When Using A Nailer? “,”acceptedAnswer”: {“@type”: “Answer”,”text”: “Yes, different materials need different depth settings when using a nailer. For soft wood, we can set it shallower. Harder wood needs a deeper setting to drive the nail in. Thicker materials like plywood also need more depth. Always adjust the depth for the best result!”}},{“@type”: “Question”,”name”: “Can Incorrect Depth Adjustment Damage The Material Being Fastened, And If So, What Are The Potential Consequences? “,”acceptedAnswer”: {“@type”: “Answer”,”text”: “Yes, if the depth adjustment is wrong, it can hurt the material you’re fastening. For example, if you press too hard, you might create holes or cracks. This can make the material weaker or even break it. It’s important to check the depth so everything stays strong and safe.”}}]}