Choosing the right nailer is crucial for any woodworking project’s success. This guide breaks down nailer types, features, and applications to help beginners confidently select the perfect tool, ensuring efficient, frustration-free building and a professional finish every time.
Ever stared at a woodworking project, ready to nail it, only to be confused by a wall of nailer options? You’re not alone! From framing enormous decks to crafting delicate trim, the right nail gun can make all the difference. Without one, you might be reaching for a hammer, which can be slow, tiring, and less precise. This guide is here to clear up the confusion. We’ll walk you through the different types of nailers, what they’re best for, and how to pick the one that fits your DIY dreams and your toolbox.
Table of Contents
Understanding Nailer Types: Your Project’s Best Friend
Nailers aren’t one-size-fits-all. Each type is designed with specific tasks in mind, using different fasteners and power sources. Knowing these differences is the first step to making a smart purchase.
1. Framing Nailers: For the Big Stuff
When you need to build the skeleton of a house, a deck, or a sturdy workbench, a framing nailer is your go-to. These powerful tools are built for speed and brute force, driving large nails quickly to assemble framing lumber, subflooring, and roof trusses. They come in two main varieties based on their power source:
- Pneumatic Framing Nailers: These are the workhorses. They require an air compressor and air hose to operate. They’re powerful, reliable, and generally less expensive upfront than cordless options. However, managing the hose and compressor can be cumbersome, especially on large sites.
- Cordless Framing Nailers: These offer fantastic freedom of movement. They run on either gas cartridges (like a small propane bottle) and a battery, or purely on powerful lithium-ion batteries that also power a small internal fan to drive the nail. They are more expensive and can be heavier, but the lack of cords is a huge plus for mobility. Battery-powered models are becoming increasingly popular for their convenience and fewer emissions.
Common Uses: House framing, deck building, fence construction, assembling large furniture frames.
2. Finish Nailers: For Clean Lines and Trim
Finish nailers are designed for attaching molding, trim, baseboards, and other decorative wood pieces where a clean, professional look is essential. They use thinner, smaller nails that leave a much smaller hole than framing nailers, often requiring minimal filling before painting or staining.
- 15-Gauge Finish Nailers: These drive slightly thicker nails (called “finish nails”) with a small head. They offer good holding power while still being relatively easy to conceal. If you’re doing a lot of chair rail, crown molding, or window/door casings, a 15-gauge is a solid choice.
- 16-Gauge Finish Nailers: Slightly thinner than 15-gauge, these use “brad nails.” They are excellent for delicate trim work, smaller molding installations, and cabinetry. The holes are smaller, making them ideal for projects where the finish is paramount and you want minimal filling.
Common Uses: Installing baseboards, crown molding, window and door trim, chair rails, picture frames, paneling.
3. Brad Nailers: For the Finer Details
Brad nailers are the smallest and most delicate of the “finish” nailer family. They use very thin, headless or minimal-head nails (brads) that are almost invisible once driven. These are perfect for intricate projects, attaching small decorative pieces, or tasks where even a small nail head would be too noticeable.
Common Uses: Attaching thin decorative trim, crafting small boxes, assembling model projects, securing delicate woodworking joints, upholstery work.
4. Pin Nailers: The Disappearing Act
Pin nailers drive incredibly fine, headless pins (often 23-gauge). These are so small they essentially disappear into the wood. They offer very little holding power but are fantastic for tasks where you need to temporarily hold pieces together while glue dries, or for very delicate, trim-only applications where you don’t want any visible nail heads at all.
Common Uses: Holding delicate trim in place, jigs and fixtures, very fine detail work, temporary assembly prior to gluing.
5. Roofing Nailers: Built for the Peak
If your project involves shingles, then a roofing nailer is the specialized tool for the job. Designed to drive broad-headed roofing nails quickly and efficiently, these nailers are built for durability and speed in the harsh environment of a rooftop. They typically have a specific depth adjustment to ensure nails are driven correctly without damaging the shingles.
Common Uses: Attaching asphalt and fiberglass shingles to roof sheathing.
6. Siding Nailers: For Exterior Walls
Similar to roofing nailers but designed for different fastening needs, siding nailers are used to attach various types of siding materials, such as vinyl, fiber cement, or wood clapboards. They drive nails with specific head sizes to prevent pull-through and ensure a secure, weather-resistant installation.
Common Uses: Installing vinyl siding, fiber cement siding, wood clapboard siding.
7. Other Specialized Nailers
Beyond these common types, you’ll find nailers for specific tasks like:
- Flooring Nailers: Used to secure hardwood flooring planks. They often combine a nailer with a mallet mechanism.
- Cap Nailers: Drive nails with a plastic cap, ideal for securing insulation facings, felt underlayment, or house wrap to prevent moisture intrusion.
Powering Your Nailer: Air vs. Cordless (Battery & Gas)
The way a nailer is powered has a big impact on its performance, portability, and cost. Let’s break it down:
1. Pneumatic Nailers (Air-Powered)
These are the traditional champions. They rely on a compressor to provide compressed air, which is then delivered to the nailer via a hose. Power is consistent and the tools are often lighter and less expensive than their cordless counterparts.
- Pros:
- Consistent power delivery.
- Lighter tool weight (the compressor and hose are separate).
- Generally lower upfront tool cost.
- Lower maintenance compared to gas models.
- Cons:
- Requires an air compressor, adding to cost and workshop space.
- Hose can limit mobility and get in the way.
- Noise from the compressor.
- Setup and takedown time.
Important Note: When using pneumatic tools, always ensure your compressor delivers the right PSI (pounds per square inch) and CFM (cubic feet per minute) for your specific nailer. Check your nailer’s manual. For example, you might need an air regulator to fine-tune output. You can learn more about air compressor ratings at Energy.gov’s guidelines on compressors.
2. Cordless Nailers
Cordless nailers offer the ultimate in portability, eliminating the need for air hoses or power cords.
- Battery-Powered Nailers: These use rechargeable lithium-ion batteries. The battery powers a motor that drives a small fan, which in turn compresses air internally to fire the nail. They offer excellent convenience and are becoming more powerful and efficient.
- Gas-Powered (Impulse) Nailers: These use a small, disposable fuel cartridge (often propane or a specific fuel mix) and a battery. The battery ignites the fuel, creating a small explosion that drives the nail. They are very powerful and lightweight but require ongoing fuel cartridge purchases and can be sensitive to temperature.
- Pros of Cordless:
- Unmatched portability and freedom of movement.
- Quick setup—just grab and go.
- No hoses or cords to manage.
- Ideal for tight spaces and remote locations (like a rooftop).
- Cons of Cordless:
- Higher upfront cost for the tool and batteries.
- Battery life can be a limitation for long jobs; requires charging.
- Gas models require ongoing fuel cartridge purchases.
- Can be heavier than pneumatic nailers.
- Power output might not match top-tier pneumatic tools for certain heavy-duty tasks.
Key Features to Consider When Buying a Nailer
Beyond the type and power source, several features can make a nailer more user-friendly and effective. Here’s what to look for:
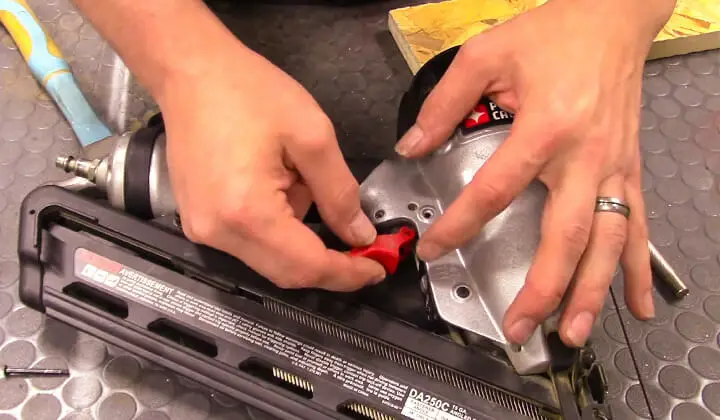
- Depth Adjustment: This is crucial! It allows you to control how deep the nail drives into the wood. You’ll want to sink nails just below the surface for trim so you can fill and paint, or flush for framing where you want them to hold securely. Look for tool-free depth adjustment wheels or levers.
- No-Mar Tip: A rubber or plastic tip on the nose of the nailer prevents marring or denting soft woods and finishes. Essential for finish and brad nailers.
- Sequential vs. Contact Actuation:
- Sequential Actuation: Requires you to press the safety contact tip against the wood first, then pull the trigger to fire a nail. This offers precise placement and is safer, preventing accidental nail firing.
- Contact Actuation (Rapid-Fire): Allows you to fire nails by simply squeezing the trigger while the tip is pressed against the wood. This is much faster but can lead to accidental nail-outs if you’re not careful. Many nailers offer a switch to toggle between these modes.
- Tool Weight and Ergonomics: You’ll be holding this tool, sometimes for extended periods. A comfortable grip, balanced weight distribution, and a tool that doesn’t feel too heavy will prevent fatigue.
- Nail Capacity: How many nails does the magazine hold? A higher capacity means fewer reloads during a project.
- Jam Clearing: No one likes dealing with jammed nails. Look for nailers with easy, tool-free jam clearing mechanisms.
- Adjustable Exhaust: For pneumatic nailers, an adjustable exhaust directs air away from your face and blows sawdust away from your work area.
- Rafter Hook: A handy feature for hanging your nailer on your belt or a ladder when not in use.
Nailer Comparison Chart: Quick Reference
To help you visualize the differences, here’s a handy chart. This provides a general overview, and specific model features can vary.
| Nailer Type | Common Nail Size | Power Source | Best For… | Pros | Cons | Typical Project Examples |
|---|---|---|---|---|---|---|
| Framing Nailer | 2″ to 3.5″ | Pneumatic, Battery, Gas | Structural framing, heavy-duty construction | Fast, powerful, good holding strength | Large; requires specific nails; pneumatic needs compressor/hose | House framing, decks, sheds, pergolas |
| Finish Nailer (15-ga) | 1.25″ to 2.5″ | Pneumatic, Battery | Interior trim, molding, cabinetry | Good hold, relatively small nail head, versatile | Requires filling for perfect finish; not for structural work | Baseboards, crown molding, door/window casings |
| Finish Nailer (16-ga) | 0.75″ to 2″ | Pneumatic, Battery | Subtle trim, smaller molding, furniture | Smaller nail head than 15-ga, easier to conceal | Less holding power than 15-ga; still needs filling | Picture frames, delicate trim, cabinet doors |
| Brad Nailer (18-ga) | 0.5″ to 1.25″ | Pneumatic, Battery | Small trim, delicate assemblies, craft projects | Very small, almost invisible nails, minimal hole | Very little holding power; primarily for glue assistance | Small decorative trim, craft boxes, model building |
| Pin Nailer (23-ga) | 0.5″ to 1″ | Pneumatic, Battery | Extremely delicate work, temporary hold | Virtually no visible nail head | Almost no holding power; only for tacking | Holding fine trim for glue, intricate inlays |
| Roofing Nailer | 0.75″ to 1.75″ (with wide heads) | Pneumatic, Battery | Shingle installation | Fast and efficient for roofing | Specialized tool; narrow application | Asphalt shingles, underlayment |
How to Choose the Right Nailer for Your Project
Now, let’s apply this knowledge to your specific needs. Think about the projects you’ll be doing most often.
Step-by-Step Selection Process:
- Identify Your Primary Projects: What do you build most? If it’s framing a shed, you need a framing nailer. If it’s installing baseboards, a finish nailer is your target. If you’re unsure, think about the biggest project you’d like to tackle in the next year.
- Consider Your Power Source Preference: Do you already have an air compressor? If so, pneumatic might be your most cost-effective route. If you value ultimate portability and don’t want to fuss with air lines, a cordless option is excellent. Battery-powered is generally the most popular cordless choice right now for DIYers.
- Decide on Nail Gauges: For trim work, 15-gauge offers more hold than 16-gauge. For extremely fine work where the nail must disappear, 18-gauge brad nailers or 23-gauge pin nailers are best. You might even find yourself needing more than one type over time!
- Set Your Budget: Nailers range from under $100 for basic pneumatic models to $300+ for high-end cordless versions. Factor in the cost of the tool, nails, and any accessories you might need (like air hoses, compressors, safety glasses).
- Read Reviews and Compare Models: Once you’ve narrowed down the type and features, look at reputable brands. Websites like ToolReviews.com (hypothetical but representative of review sites) or manufacturer sites will offer detailed specs and user feedback. Pay attention to how easy they are to load, their weight, and reliability.
- Don’t Forget Safety Gear: No matter which nailer you choose, safety glasses are non-negotiable. Hearing protection is also highly recommended, especially with pneumatic tools.
Safety First! Using Your Nailer Wisely
Nailers are powerful tools, and safety should always be your top priority. Treat them with respect, and always follow these guidelines:
- Always Wear Safety Glasses: This is the absolute most important rule. Flying nails and debris are serious hazards.
- Read the Manual: Every nailer is different. Familiarize yourself with your specific tool’s operation, maintenance, and safety warnings.
- Never Point at Yourself or Others: Treat the nailer as if it were loaded and ready to fire at all times.
- Keep Fingers Away from the Trigger and Nose: Make sure your finger is off the trigger when not actively nailing, and never place your hand in front of the firing nose.
- Engage Sequential Mode When Possible: For precise work and to prevent accidental firing.
- Disconnect Power When Not in Use: For pneumatic nailers, disconnect the air hose. For battery-powered nailers, remove the battery.
- Be Aware of Your Surroundings: Ensure no one is behind the work surface where a nail could pass through.
- Regular Maintenance: Keep your nailer clean and lubricated according to the manufacturer’s instructions. Check nails regularly to ensure they are the correct type and size for your tool.
Following these safety tips will help ensure your woodworking journey is both successful and accident-free. You can find more comprehensive safety information from organizations like the Occupational Safety and Health Administration (OSHA).
Frequently Asked Questions About Nailers
Q1: Which type of nailer do I need for installing baseboards?
For baseboards, you