Unlock speed and efficiency with a nailer’s bump fire mode! This feature lets you rapidly drive nails by simply depressing the trigger and bumping the nose against your material. It’s a game-changer for quick framing, trim work, and fencing, significantly speeding up your projects. This guide walks you from understanding how it works to using it safely and effectively, making your DIY tasks smoother and faster.
Hey DIYers and woodworking enthusiasts! Jack Shaffer here from Nailerguy. Ever felt like your nailing projects take forever? You know, those times when you’re attaching trim, building a fence, or framing a wall, and you wish you could just… go faster?
Well, there’s a handy feature on many nail guns that can help: the “bump fire” mode. It’s like giving your nailer a superpower for speed! But like any tool, it’s important to know how to use it right, and most importantly, safely.
Don’t worry if you’ve never heard of it or feel a little unsure. I’m here to break down exactly what bump fire mode is, how it works, and how you can use it to make your projects faster and easier. We’ll cover everything from choosing the right nailer to keeping yourself safe on the job. Ready to speed up your nailing game?
Table of Contents
What Exactly Is Bump Fire Mode on a Nailer?
So, you’ve seen ads or heard folks talk about “bump firing” a nail gun. What does it actually mean? Simply put, bump fire mode (sometimes called “contact trip” or “slam fire”) allows you to fire multiple nails in quick succession without releasing the trigger between each nail.
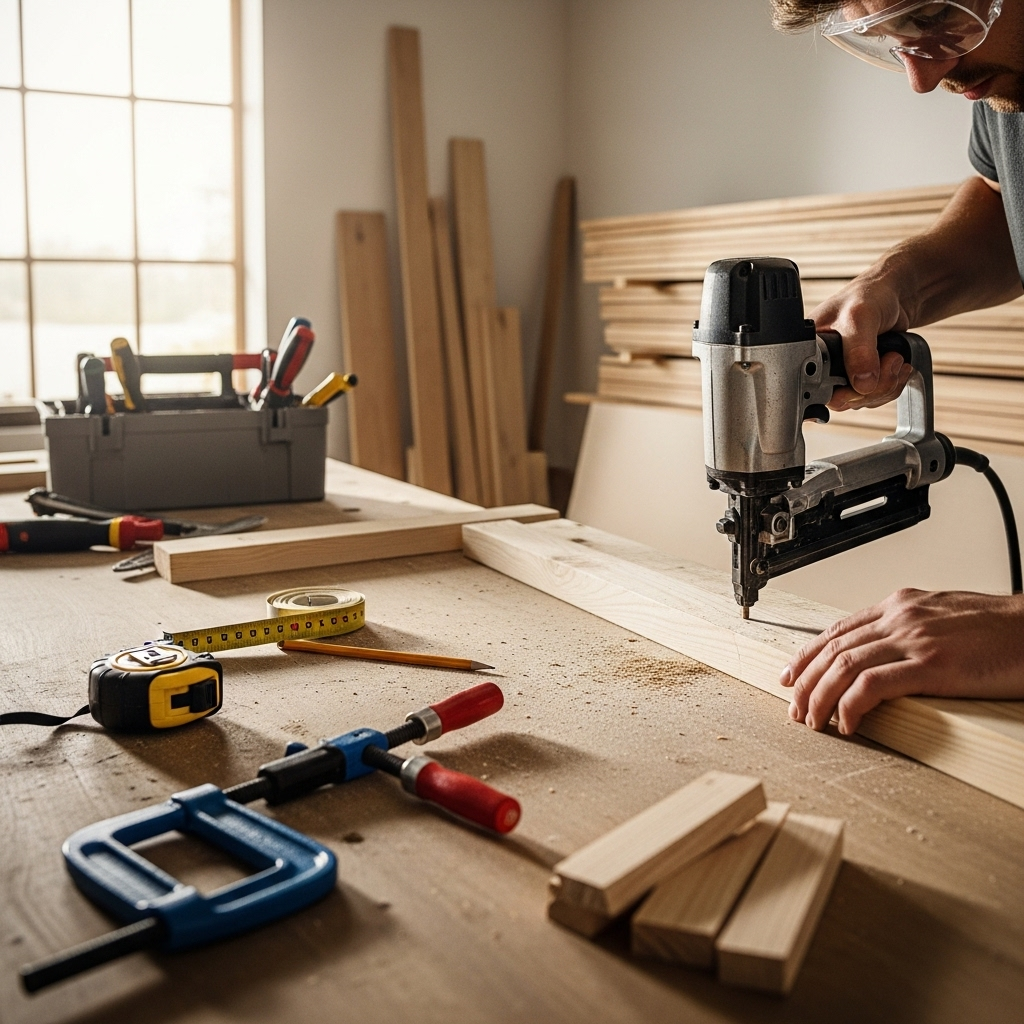
Instead of the typical “press trigger, fire nail, release trigger, press trigger again” cycle, with bump fire, you hold the trigger down and “bump” the nose of the nailer against the wood. Each bump fires a nail. This is what makes it incredibly fast for jobs where you need to place many nails quickly.
How Does Bump Fire Work? The Mechanics Explained
Understanding the basic mechanics can demystify this feature and help you use it with confidence. Most pneumatic nailers have two main components that work together for firing:
- The Trigger Mechanism: This is what you press with your finger. It usually controls the airflow that drives the piston.
- The Safety Contact Trip (or Nosepiece): This is the part that touches your workpiece. It has a mechanism (often a plunger) that, when depressed, allows the nailer to fire.
In a standard “sequential trip” mode, you have to activate both the trigger and the safety contact trip to fire a single nail. You pull the trigger, then press the nose to the wood, and pop, one nail. To fire again, you repeat the whole sequence.
In bump fire mode, the nailer is set up so that holding the trigger down allows the safety contact trip to actuate the firing mechanism every time it’s depressed. So, you hold the trigger, bump the nose – nail fires. Bump the nose again – another nail fires, and so on, as long as the trigger is held and the nose is bumped.
This is different from “full sequential” mode, where you must press the contact trip first, then the trigger, for each nail. It’s also different from “full auto” mode (rare on most construction nailers, more common on industrial staplers), which would fire nails continuously as long as the trigger is held and the contact trip is depressed without needing to re-bump for each nail.
When to Use Bump Fire Mode: The Sweet Spots
Bump fire mode is a real workhorse for specific tasks. It’s all about speed and efficiency when you’re placing many fasteners close together. Here are some prime examples:
- Framing: Attaching studs, joists, headers, and other structural components. You’ll be placing nails rapidly to build wall frames quickly.
- Sheathing: Nailing plywood or OSB to wall studs and roof rafters. Bump fire lets you cover large areas with nails in a fraction of the time.
- Fencing: Attaching picket boards or rails to fence posts. You’ll be hammering many boards in a row, and speed is key.
- Roofing: While often done with specialized roofing nailers, some framing nailers with bump fire can be used for nailing roof decking.
- Subflooring: Securing plywood or OSB subfloor to floor joists.
- Temporary Construction: Quickly assembling temporary bracing or forms.
Essentially, any job where you need to drive a nail, then immediately drive another one very close to it, is a prime candidate for bump fire mode. It reduces hand fatigue and significantly cuts down project time.
Choosing the Right Nailer for Bump Fire
Not all nailers come with bump fire mode, and of those that do, some are better suited for it than others. When you’re looking for a nailer with this capability, here are a few things to consider:
Types of Nailers with Bump Fire Capability
Bump fire is most common on:
- Framing Nailers: These are powerful nailers designed for structural work, hitting the sweet spot for bump fire efficiency.
- Sheathing Nailers: Similar to framing nailers, often with slightly different magazine angles.
- Some Brad and Finish Nailers: While less common, some higher-end models offer this feature for very fast trim work. However, for delicate trim, sequential fire is often preferred to prevent accidental nail placement.
Paslode, DeWalt, Bostitch, Metabo HPT (formerly Hitachi), and Senco are just a few of the reputable brands that offer nailers with selectable trigger functions, including bump fire.
Key Features to Look For
- Selectable Trigger: This is the most crucial feature. It means the nailer allows you to switch between sequential and bump fire modes. This gives you versatility. You can use sequential for precision and bump fire for speed.
- Weight and Balance: If you’re using the nailer for extended periods, especially overhead or at awkward angles, a well-balanced and lightweight nailer will be much easier to handle in bump fire mode.
- Power and Nail Capacity: Ensure the nailer has enough power for the nails you’ll be driving and the materials you’ll be working with. For framing, you’ll need a robust nailer.
- Air Consumption (for Pneumatic): If you’re using an air-powered nailer, consider its air consumption. If it gulps air, you’ll need a compressor that can keep up, especially when firing rapidly in bump mode.
- Battery Life (for Cordless): For cordless models, battery life is paramount. Bump firing uses more air (quickly from the internal pump or canister) or power, so a strong battery is essential.
- Depth Adjustment: A tool-free depth adjustment is very helpful. This lets you quickly dial in the perfect nail depth without needing extra tools, which is great when you’re working at speed.
Pneumatic vs. Cordless vs. Gas-Powered
Bump fire mode is available across different power sources:
- Pneumatic Nailers: These run on compressed air from a compressor. They are typically powerful, reliable, and often the most cost-effective for heavy-duty work. Bump fire is very common and efficient here.
- Cordless (Battery-Powered) Nailers: These offer portability and convenience, with no hoses or gas cartridges. They use internal batteries and sometimes compressed air canisters or internal pumps to drive nails. Some models excel at bump fire, others might have slightly slower recovery times between nails compared to a robust pneumatic setup.
- Gas-Powered Nailers: These use a combination of a fuel cell (like propane) and a battery. They are also very portable. Their performance in bump fire mode can vary by model.
For pure speed and sustained use in bump fire mode, a powerful pneumatic framing nailer connected to a capable compressor is often the top performer. However, modern cordless options are closing the gap rapidly.
How to Use Bump Fire Mode Safely: Your Step-by-Step Guide
This is the most critical part. Bump fire mode is incredibly efficient, but it requires careful attention to safety. Because you can fire nails so quickly, you MUST be diligent to prevent accidental discharge and injury. Always remember: Your safety is the top priority.
Important Safety Precautions Before You Start
Before you even flip the power switch or connect the air hose:
- Read Your Nailer’s Manual: Every nailer is slightly different. Your manual will detail how to switch modes, any specific safety features, and recommended use. Don’t skip this!
- Wear Safety Glasses: Always, always, always wear safety glasses or goggles. Flying debris or ricocheting nails are serious hazards. Look for ANSI Z87.1 compliance.
- Wear Hearing Protection: Nail guns are loud. Prolonged exposure can damage your hearing. Earplugs or earmuffs are essential.
- Wear Sturdy Work Boots: Protect your feet from dropped tools or accidental nail impacts.
- Consider Gloves: Good work gloves can prevent splinters and offer a better grip.
- Inspect Your Tool: Check for any damage, loose parts, or leaks (air or otherwise).
- Clear Your Work Area: Ensure no one else is in the path of your nailing. Keep pets and bystanders away.
Step-by-Step Guide to Using Bump Fire Mode
Here’s how to get started safely:
- Ensure the Nailer is Set to Bump Fire Mode: Locate the trigger lockout or mode selector switch on your nailer. Consult your manual if you’re unsure how to switch it. Make sure it’s firmly in the “bump fire” or “contact trip” position.
- Connect Power (Air or Battery):
- Pneumatic: Connect your air hose to the nailer and your air compressor. Ensure the compressor is turned on and the pressure is set to the manufacturer’s recommended range (usually between 70-120 PSI, check your manual!).
- Cordless: Insert a fully charged battery.
- Gas: Ensure a fuel cell is properly inserted.
- Load Nails: Open the magazine and load the correct type and size of nails for your nailer and project. Do not overfill. Close and secure the magazine.
- Crucial Step: Engage the Safety Lock/Trigger Lock: Many nailers have a feature that prevents accidental firing when not in use. Ensure this is engaged if your tool has one. With the nailer pointed away from yourself and others, disengage this lock if necessary.
- Position the Nailer: Place the nose of the nailer firmly against the material where you want to drive a nail. The safety contact trip needs to be pressed against the surface.
- Begin Firing:
- Hold the trigger DOWN. Do not let go of the trigger.
- Gently bump the nose of the nailer against the workpiece. A nail will fire.
- Immediately bump the nose again. A second nail will fire.
- Continue bumping the nose while keeping the trigger held down to drive nails rapidly.
- When to Stop Firing:
- When you’ve placed the required nails for that spot.
- Stop bumping the nose.
- Release the trigger. This is vital! Always release the trigger when you finish a sequence of nailing or when you pause.
- Reposition and Repeat: Place the nailer in the new location, ensure the trigger is held down, and start bumping again.
- When Finished or Moving:
- ALWAYS release the trigger.
- If using a pneumatic nailer, disconnect the air hose.
- If using a cordless nailer, remove the battery or engage any safety lock.
- Point the nailer in a safe direction (away from people, fragile objects).
- Store the nailer safely.
Common Mistakes to Avoid with Bump Fire
- Holding the trigger down constantly, even when moving: This is a recipe for disaster. Always release the trigger when you aren’t actively firing.
- Not releasing the trigger after a nailing sequence: Again, a very common and dangerous mistake when you get used to the speed.
- Bumping the nose without the trigger being held: This won’t fire a nail, but it can cause wear and tear.
- Using bump fire for precise placement: For critical trim work where every nail placement needs to be perfect, sequential fire is usually better.
- Not wearing proper safety gear: No exceptions here.
- Using the wrong nails or the wrong setting: Ensure your nails are appropriate for the nailer and material.
Understanding Nailer Modes: Bump Fire vs. Sequential Fire
To truly master your nailer, it’s essential to understand the different firing modes available. Bump fire is just one of them, and knowing when to use each is key to efficient and safe woodworking.
Sequential Fire Mode (Standard/Contact Trip)
This is the default or often primary mode on many nailers. Here’s how it works:
- Press the nose of the nailer against the material.
- Pull the trigger.
- One nail is fired.
To fire another nail, you must release the trigger and then repeat the process: press the nose, pull the trigger.
Pros of Sequential Fire:
- Precision: Allows for exact placement of each nail. Ideal for finish work, trim, and any situation where a misplaced nail would be visible or problematic.
- Safety: Generally considered safer as it requires two distinct actions for each nail, reducing the chance of accidental firing.
- Control: You have complete control over when each nail is driven.
Cons of Sequential Fire:
- Speed: Much slower for projects requiring many nails.
- Fatigue: The repeated trigger release and re-press can cause finger fatigue over long periods.
Bump Fire Mode (Contact Trip)
As we’ve discussed, in this mode:
- Hold the trigger down.
- Bump the nose against the material.
- A nail fires.
- Bump again while holding the trigger.
- Another nail fires.
Pros of Bump Fire:
- Speed: Dramatically faster for placing multiple nails in quick succession.
- Efficiency: Great for framing, sheathing, and fencing.
- Reduced Fatigue: Holding the trigger down is often less tiring than repeatedly pressing and releasing it.
Cons of Bump Fire:
- Less Precision: Can be harder to place each nail exactly where you want it, increasing the risk of errors.
- Higher Safety Risk: Requires extra caution due to the potential for rapid, repeated firing.
- Material Damage: Can potentially over-drive nails or damage softer woods if not careful.
What About “Full Auto” Mode?
It’s worth noting that some industrial staplers or specialized nailers might have a “full auto” mode. In this mode, nails fire continuously as long as the trigger is depressed and the contact trip is held against the material. You don’t need to bump for each nail. These are less common for general construction and DIY framing nailers.
For most DIYers and woodworkers, the choice is between sequential and bump fire modes, and having a “selectable trigger” feature that allows you to switch between them is incredibly valuable.
Maintaining Your Nailer for Optimal Performance
To ensure your nailer with bump fire mode continues to perform reliably and safely, a little maintenance goes a long way. Treat your tools well, and they’ll serve you for years.
Regular Maintenance Checklist
- Lubrication: This is crucial for pneumatic nailers. Add a few drops of specialized pneumatic tool oil into the air inlet before each use or as per your manual’s instructions. This keeps internal seals and O-rings healthy and ensures smooth operation.
- Cleaning the Magazine: Keep the nail magazine clean and free of debris. Sawdust, wood chips, or old lubricant can cause nails to jam or feed improperly. Wipe it down regularly with a clean cloth.
- Inspect the Nosepiece/Contact Trip: Ensure the safety contact trip moves freely and isn’t damaged. This is critical for both sequential and bump fire operation. If it’s stuck or damaged, the nailer could malfunction.