Quick Summary:
Don’t let a finicky nail gun halt your DIY project! Most common nail gun issues, from jamming to inconsistent firing, can be fixed quickly at home with simple maintenance, cleaning, and power checks. This guide offers proven, beginner-friendly solutions to get your nailer back to work fast.
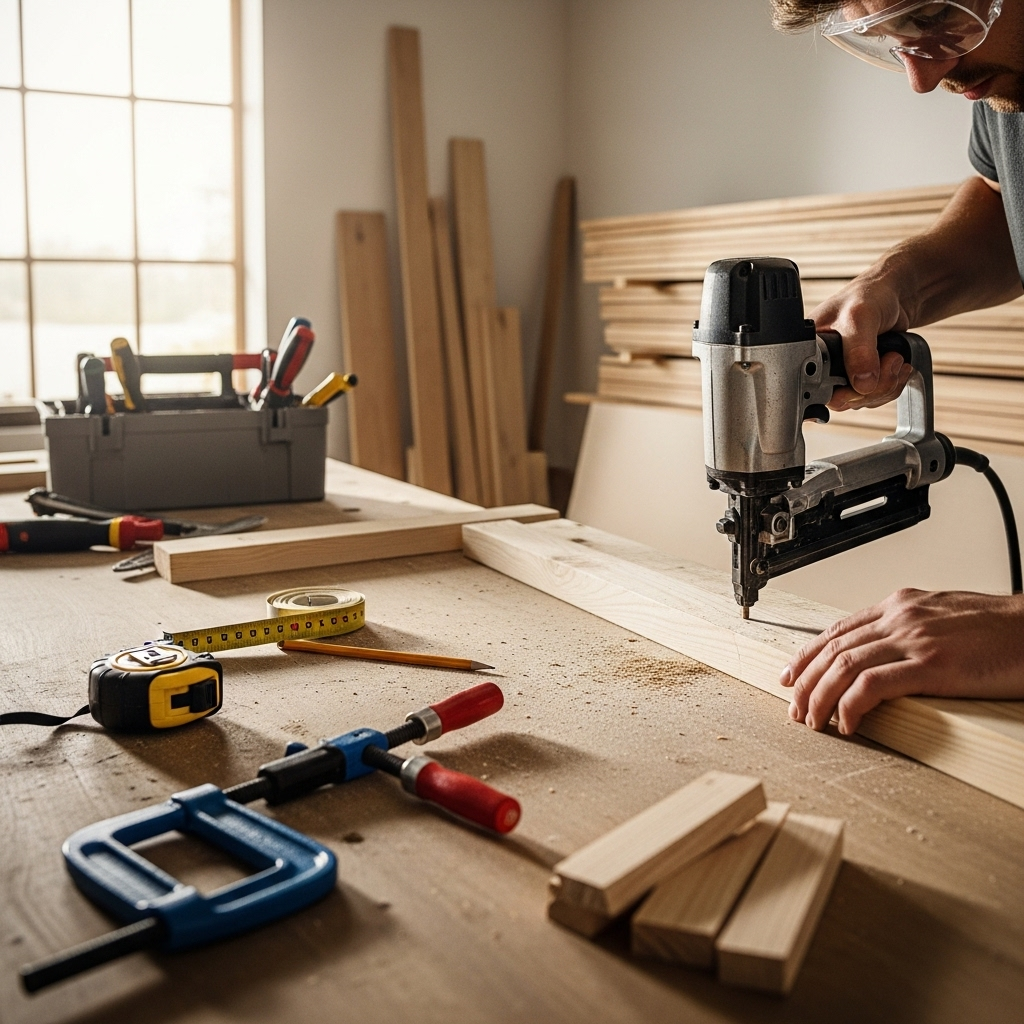
Hey there, DIY enthusiasts! Jack Shaffer here, your go-to guy for all things nail guns. You’re pumped to start that renovation or build that dream project, and your nail gun is ready to go. Then, suddenly, it jams, doesn’t fire, or something else feels… off. It’s frustrating, right? But don’t worry! Most nail gun problems aren’t huge breakdowns. They’re usually minor hiccups that you can easily fix yourself with a few simple steps. This guide is packed with proven tips to get your nailer firing perfectly again, no matter the brand. We’ll cover common issues and their simple solutions. Get ready to tackle these snags like a pro!
Table of Contents
Common Nail Gun Problems and How to Solve Them
It’s a common scene: you’re mid-project, the wood is prepped, and your nail gun just… stops cooperating. This can happen for a variety of reasons, from a simple lack of air to a jammed firing pin. The good news is that most of these issues are quite straightforward to diagnose and fix. Think of your nail gun like any other tool; it needs a little TLC now and then to perform at its best. We’ll break down the most frequent offenders and walk you through easy, at-home remedies. Let’s get your nailer back in action!
1. The Nail Gun Won’t Fire at All
This is probably the most disheartening problem. You pull the trigger, and nothing happens. It’s like the gun is on strike! Before you declare it broken, let’s check the basics. This could be an easy fix, so stay calm and follow these steps.
Power Source Check (Air, Battery, or Corded):
- For Pneumatic Nailers:
- Ensure the air compressor is on and has reached adequate pressure. Most nail guns need between 70-120 PSI, so check your tool’s manual for the exact requirement.
- Verify the air hose is securely connected to both the compressor and the nail gun. Check for any kinks or leaks in the hose. A leaky hose can drastically reduce air pressure.
- Make sure the air regulator on your compressor is set correctly.
- For Cordless (Battery-Powered) Nailers:
- Is the battery fully charged? A low battery is a common culprit. Try a fresh or fully charged battery.
- Is the battery properly seated in its compartment? Ensure it clicks into place securely.
- Check the battery contacts. Sometimes they can get dirty or corroded, hindering power flow. A gentle clean with a pencil eraser or a dry cloth might help.
- For Corded Electric Nailers:
- Is it plugged into a working outlet? Test the outlet with another device.
- Is the power cord damaged? Inspect it closely for any cuts or fraying.
- Ensure any extension cord being used is rated for the tool’s power draw and is in good condition.
Safety Engagements: Most nail guns have safety mechanisms to prevent accidental firing. One common one is the contact trip or nose contact. You typically need to press the tip of the nailer firmly against the material you’re working on before pulling the trigger. Ensure you’re doing this correctly. Some guns also have a trigger safety lock—make sure it’s disengaged.
Jams (We’ll cover this more in detail later): Sometimes, a jam can prevent firing. Even if you don’t see a jammed nail, it could be a minor obstruction preventing the firing pin mechanism from engaging.
2. The Nail Gun Jams Frequently
A jammed nail gun is like a squeaky wheel – it’s annoying and can stop your progress. Frequent jams often point to a few common issues. The good news is that most jams can be cleared and prevented with proper maintenance.
Causes and Solutions:
- Incorrect Nail Size or Type:
- Problem: Using nails that are too long, too short, too thick, or too thin for your specific nail gun model can cause jams. Nails that aren’t collated at the correct angle for your gun can also cause issues.
- Solution: Always refer to your nail gun’s manual for the recommended nail size, type (e.g., brad, finish, framing), and collation angle. Using the right fasteners is crucial for smooth operation. You can find detailed specifications on fastener compatibility in tool manuals, often available online from the manufacturer’s website. For example, DeWalt’s official site or Bosch’s support pages often have downloadable manuals.
- Worn O-rings or Seals:
- Problem: Over time, rubber O-rings and seals that create air pressure can wear out. This can lead to inconsistent air delivery, causing nails to not drive fully or get jammed halfway.
- Solution: Inspect the O-rings where the air hose connects and around moving parts. If they look cracked, flattened, or damaged, they need replacing. You can usually buy a replacement kit for your specific nailer model.
- Dirt or Debris in the Magazine:
- Problem: The magazine is where the nails are stored. If it’s dirty, nails can bind up.
- Solution: Clean the magazine regularly. Use a dry cloth to wipe away any sawdust or debris. If there’s stubborn grime, a slightly damp cloth can be used, but ensure it’s completely dry before loading nails.
- Improper Loading:
- Problem: Loading nails loosely or at an angle can cause them to misfeed.
- Solution: Always ensure nails are loaded snugly and straight in the magazine. Most magazines have a spring-loaded follower; make sure it’s pushing the nails forward evenly.
- Low Air Pressure:
- Problem: As mentioned before, insufficient air can cause nails to not drive fully, leading to jams.
- Solution: Ensure your air compressor is set to the recommended PSI for your nail gun.
Clearing a Jam:
- Disconnect Power: First and foremost, disconnect the air hose (pneumatic) or remove the battery (cordless). Safety first!
- Identify the Jam: Look into the magazine and the firing port to see if you can spot the misfed nail.
- Use Pliers: For most jams, you can gently grip the protruding part of the nail with needle-nose pliers and pull it straight out.
- Clear the Path: If the full nail isn’t visible, you might need to carefully open up the nose of the nail gun, if your model allows, to access and remove the obstruction. Consult your manual for disassembly instructions. Some guns have tool-free jam release mechanisms.
- Test After Clearing: Once the jam is cleared, reconnect power and test fire into scrap wood to ensure it’s working correctly before resuming your project.
3. Nails Don’t Drive Fully into the Material
You’re getting nails, but they’re sticking out halfway. This is frustrating because it leaves your work looking less than professional and might require extra finishing steps. Let’s figure out why this is happening.
Common Culprits and Fixes:
- Low Air Pressure:
- Problem: This is the most frequent reason. If there isn’t enough air pressure behind the nail, it won’t have the force to drive all the way in.
- Solution: Increase the air pressure from your compressor. Check your nail gun’s manual for the optimal PSI range. A good starting point is often 90 PSI, but adjust as needed. Don’t exceed the maximum PSI listed for your tool.
- Incorrect Depth Setting:
- Problem: Many nail guns have an adjustable depth setting. If it’s set too shallow, the nail won’t be driven deep enough.
- Solution: Locate the depth adjustment wheel or lever on your nail gun. For most tools, turning it one way drives nails deeper, and the other way drives them shallower. Experiment by turning it slightly until the nails are driven to your satisfaction. Make small adjustments.
- Obstructions in Front of the Nail:
- Problem: Sometimes, the nail is hitting something hard within the material, like a knot in the wood or even a previous nail.
- Solution: This requires careful inspection of your workpiece. If it’s a knot, you might need to reposition and drive the nail slightly away from it. If you’re hitting metal (like a joist hanger), you’ll need to choose a different spot or potentially use a different type of fastener.
- Worn Driver Blade/Nailer Piston:
- Problem: The driver blade (or piston in some models) strikes the nail. If this part is worn down or damaged, it won’t deliver the full impact.
- Solution: This is a more advanced repair and might indicate it’s time for professional servicing or even replacement of the tool if it’s old. Inspect the tip of the driver blade for any visible damage or excessive wear. Refer to your manual for how to access this part, though it’s often part of internal maintenance.
- Battery Power (Cordless Models):
- Problem: A weak battery might not deliver enough power to drive the nail home.
- Solution: Try a fully charged or a new battery.
Tip: Always test your depth setting on scrap material of the same thickness and type as your project material. This helps you dial in the perfect setting before working on your actual piece.
4. The Nail Gun Leaks Air
You hear that tell-tale hiss, and it’s not just the sound of progress! An air leak can waste compressed air, reduce your nail gun’s power, and be incredibly annoying. Thankfully, most leaks are fixable.
Where Leaks Typically Occur and How to Fix Them:
- At the Air Hose Connection:
- Problem: The quick-connect fitting on the air hose or the fitting on the nail gun itself might be loose or the O-ring inside might be damaged.
- Solution: Ensure the air hose fitting is securely screwed into the nail gun’s air inlet. If it has a quick-connect coupler, make sure it’s fully engaged. Inspect the O-ring on the male end of the hose fitting; if it’s cracked or missing, replace it. You can buy these small O-rings at any hardware store.
- From the Nailer’s Exhaust Port:
- Problem: Most pneumatic nailers vent air after each shot. If you hear air hissing constantly, even when not firing, it could indicate an internal seal issue.
- Solution: This often points to a problem with the internal O-rings or seals around the piston or air valve. It might be a sign that your nailer needs internal servicing. For beginner-friendly fixes, ensure the exhaust port isn’t blocked by anything. If the hissing is constant and loud, it’s likely an internal seal issue. Refer to your manual for internal maintenance or consider professional help.
- From Other Joints or Casings:
- Problem: Cracks in the tool’s housing or loose seams can also allow air to escape.
- Solution: Inspect the entire body of the nail gun and the magazine area for any visible cracks or gaps. Loose screws can sometimes be tightened to seal minor gaps. If there’s a significant crack, it might be time for a repair or replacement.
Troubleshooting Tip: To pinpoint leaks, disconnect the air supply, and try spraying soapy water on suspect areas. Bubbles will indicate where the air is escaping.
5. Nails Are Firing Out of Sequence or Driving Sideways
This is less common but can be a significant issue, especially if safety is a concern. Nails firing erratically or sideways can damage your workpiece and, in rare cases, pose a safety risk.
Reasons and Remedies:
- Damaged or Worn Driver Blade:
- Problem: The driver blade is the part that strikes the nail. If it’s bent, chipped, or worn, it can misguide the nail.
- Solution: Inspect the driver blade for damage. If you see any obvious defects, it will need replacing. This is an internal repair, so consult your manual or a professional.
- Misalignment of the Magazine or Nose:
- Problem: If the magazine or the nose of the nailer is slightly misaligned, the nails won’t be fed straight into the firing chamber.
- Solution: Check for any visible shifts or damage to the nose assembly or magazine. Ensure the magazine is properly seated and secured. Sometimes, screws holding these parts together can loosen.
- Incorrect Nail Collation:
- Problem: Nails that aren’t angled correctly relative to each other in the strip (collation) can cause feeding issues.
- Solution: Ensure you are using the correct type and brand of nails recommended for your gun. Using the wrong collation angle is a prime cause of sideways firing.
- Safety Mechanism Issues:
- Problem: If the contact trip mechanism (the part you press against the wood) is damaged or not engaging properly, it can lead to unexpected firing.
- Solution: Inspect the contact trip. Ensure it moves freely and isn’t obstructed. If it appears bent or damaged, it may need repair or replacement.
Important Note: If you suspect the driver blade is damaged or the tool is firing erratically, prioritize safety. Disconnect the power source immediately and consider having the tool professionally inspected. For a guide on safe nail gun operation, OSHA offers excellent resources on their website, including safety practices and training requirements for tool users: OSHA – Power Tools.
6. The Nail Gun Makes a Weak or “Spitting” Sound
Instead of a sharp “bang” or “thwack,” your nail gun sounds weak, like it’s spitting out air and not driving the nail with its usual force. This is often related to air supply issues.
Troubleshooting Steps:
- Check Air Pressure:
- Problem: As has been a theme, low air pressure is often the cause.
- Solution: Ensure your compressor is set to the correct PSI. If you’re using a long air hose, you might experience a slight pressure drop. Try a shorter hose or a hose with a larger diameter, if possible.
- Inspect Air Filter and Lubrication (Pneumatic):
- Problem: A clogged air filter can restrict airflow. Additionally, lack of proper lubrication can cause internal parts to bind, leading to reduced power.
- Solution: Check your air compressor’s filter and clean or replace it as needed. If your nailer requires oil, ensure you’re using the correct type (usually specific pneumatic tool oil) and supplying it regularly. Add a few drops directly into the air inlet before use. Follow the manufacturer’s recommendations on oiling.
- Damaged O-rings/Seals:
- Problem: Leaky O-rings or seals, as mentioned in the air leak section, can reduce the amount of air that actually propels the nail.
- Solution: Inspect and replace any worn O-rings or seals.
- Internal Mechanism Issues:
- Problem: Dirt or wear inside the tool’s mechanism can impede the piston’s movement.
- Solution: Internal cleaning or servicing might be necessary. Regular maintenance, as outlined in your tool’s manual, is the best preventative measure.
Smart Maintenance Tip: Many pneumatic tools benefit from an inline air filter/water separator connected directly to the nail gun or hose. This helps keep dust and moisture out of your tool, prolonging its life and improving performance.
Essential Nail Gun Maintenance for Prevention
The best fix is often prevention! Spending a little time on regular maintenance can save you a lot of headaches and ensure your nail gun performs reliably when you need it most. Here’s what you should be doing:
Regular Cleaning Schedule
- After Each Use: Wipe down the exterior of your nail gun with a clean, dry cloth to remove dust and debris. Pay special attention to the magazine and the nose area.
- Monthly (or as needed):
- Clean the magazine thoroughly. Remove any stuck-on sawdust or glue residue.
- Check and clean the air inlet and exhaust port.
- Inspect the driver blade for any debris.