Quick Summary: Having trouble with your nail gun? Don’t worry! These genius troubleshooting tips will help you quickly fix common nail gun issues like jams, no-fires, and inconsistent drives, getting you back to your project smoothly and safely. Master your nailer with these simple solutions.
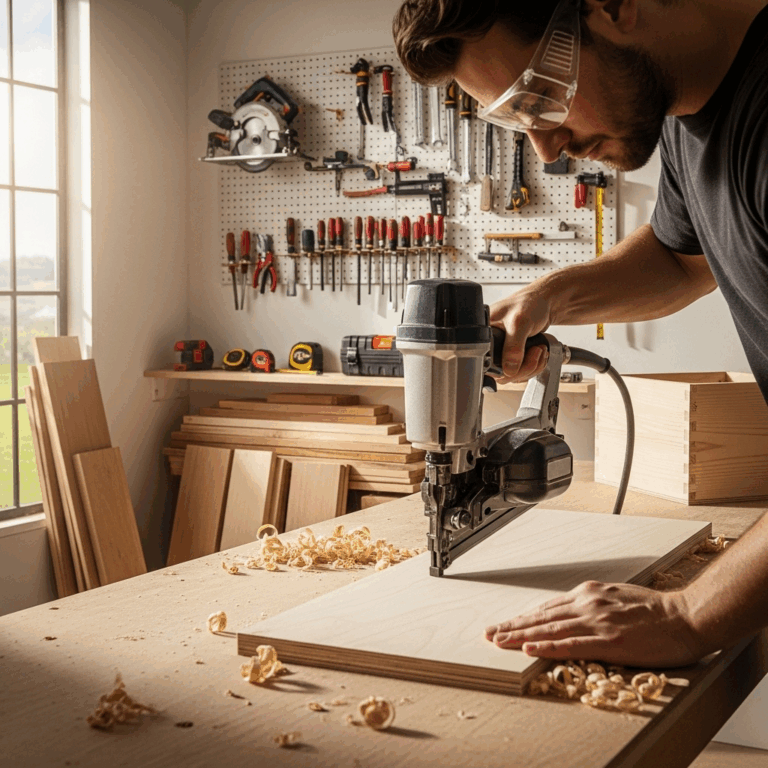
Nail guns are amazing tools for woodworking and DIY projects. They speed up jobs and make things like framing and trim work much easier. But sometimes, they just don’t work right. A nail gun jam or a missed nail can be super frustrating when you’re in the middle of building something.
When your nailer acts up, it’s easy to feel annoyed. You might think the tool is broken, or maybe you did something wrong. But most of the time, these problems have simple fixes. You don’t always need a professional or a brand-new tool.
This guide is here to help. We’ll walk through the most common nail gun problems. For each issue, we’ll offer clear, easy steps to get your nail gun working like new again. We’ll cover everything from simple things you can check yourself to more involved tips. Let’s get your nailer back on track so you can finish your projects with confidence!
Table of Contents
Common Nail Gun Problems and Their Genius Solutions
Nail guns are generally reliable, but like any tool, they can sometimes present challenges. Understanding the common issues and their fixes can save you a lot of time and frustration. Let’s dive into the most frequent problems and how to solve them.
1. The Nail Gun Isn’t Firing (No-Fire Issues)
This is perhaps the most common and annoying problem. You pull the trigger, and nothing happens. Before you panic, try these simple checks:
- Check the Air Supply (Pneumatic Nailers): Is the air hose securely connected? Is the compressor turned on and at the right pressure? Many nailers have safety features that prevent firing if the air pressure is too low. Consult your nail gun’s manual for the recommended PSI (pounds per square inch).
- Is the Safety Tip Engaged? Most nail guns won’t fire unless the safety tip (the part that touches the wood) is pressed firmly against the surface. Ensure it’s making good contact. Sometimes bumping the tip a bit can reseat a sticky mechanism.
- Check the Trigger Lockout: Many nailers have a trigger safety lock. Make sure it’s not engaged. If you’re using sequential firing mode (where you have to press the tip first, then the trigger), ensure you’re following the correct sequence.
- Examine the Driver Blade: A bent or damaged driver blade can prevent the nail gun from firing. Visually inspect the tip of the tool.
- Low Battery (Cordless Nailers): For battery-powered nailers, a low battery is the most obvious culprit. Make sure the battery is fully charged and properly seated.
- Check Internal Safety Mechanisms: Some nailers have internal safety triggers or solenoids that might be stuck. This requires a bit more investigation, often involving disassembling a small part of the tool (refer to your manual for specific instructions).
Step-by-Step: Troubleshooting a No-Fire Nail Gun
- Verify Air Connection/Battery Charge: First, ensure your air hose is firmly attached and the compressor is on, supplying adequate pressure, or that your cordless nailer’s battery is fully charged.
- Press the Safety Tip Firmly: Place the nose of the nail gun against a piece of scrap wood and press down firmly. Listen for any clicks or sounds that indicate it’s ready to fire.
- Check Fire Mode: Most nailers have a switch for sequential (contact) or bump fire. Ensure it’s set to your intended mode and that you’re using the correct technique for that mode.
- Inspect the Driver Blade: Look into the nose of the gun where the nail comes out. Can you see the metal driver blade? Does it look straight and undamaged?
- Clear Jams (See Next Section): If none of the above work, a jam might be the underlying cause, even if you don’t see it immediately.
2. Nail Gun Jams: Clearing and Preventing Future Issues
Nail jams are incredibly common, especially with certain types of nails or when using the tool incorrectly. Here’s how to handle them.
What Causes Nail Jams?
- Incorrect Nail Size: Using nails that are too long, too short, or the wrong collation angle (the angle at which the nails are held together) is a primary cause of jams. Always use the size and type of nails recommended by the manufacturer for your specific nail gun.
- Overloading the Magazine: Cramming too many nails into the magazine can bend them and cause jams. Load nails only up to the indicated fill line.
- Dry Firing: Firing the nail gun repeatedly without a nail present can damage the driver blade or internal mechanisms, leading to future jams.
- Striking Irregular Surfaces: Trying to nail into knots in wood, very hard surfaces, or at an angle can cause nails to bend and jam.
- Dirt and Debris: Accumulation of sawdust and debris inside the nail gun can impede smooth operation and cause jams.
How to Safely Clear a Nail Jam
Safety First! Always disconnect the air supply (for pneumatic tools) or remove the battery (for cordless tools) before attempting to clear a jam.
- Disconnect Power: Unplug the air hose or remove the battery pack. This is the most crucial step for safety.
- Open the Magazine:** Most nail guns have a latch or mechanism to open the magazine or the nose of the tool. Consult your manual if you’re unsure.
- Inspect for Jammed Nails: Look inside the magazine and at the ejection port. You’ll usually see the bent nail.
- Remove the Jammed Nail:
- With Pliers: For nails sticking out, use needle-nose pliers to gently pull them straight out.
- With a Screwdriver/Punch: For nails lodged deeper, you might need to carefully use a small flathead screwdriver or a punch to dislodge them. Be gentle to avoid damaging the tool.
- Shake Gently: Sometimes, a gentle shake while the magazine is open can help dislodge a loose nail.
- Check the Driver Blade: After removing the jammed nail, check that the driver blade is straight and moves freely by pressing the safety tip manually.
- Close and Reconnect: Once clear, close the magazine, reconnect the air supply or battery, and test fire on a scrap piece of wood.
3. Nails Not Driving All the Way (Under-Driving)
This happens when the nail goes into the material but doesn’t sink flush with the surface, leaving it sticking out.
- Low Air Pressure (Pneumatic Nailers): This is the most frequent cause. The nail gun doesn’t have enough force to drive the nail fully. Increase the air pressure to the manufacturer’s recommended setting (check your manual). A good rule of thumb is around 90-110 PSI, but always verify for your specific tool.
- Incorrect Nail Size: If the nails are too short for the material thickness, they won’t drive fully. Ensure your nails are appropriate for the job.
- Hard Material: Trying to drive nails into very dense hardwoods or concrete can cause under-driving. You might need a more powerful nailer, higher air pressure, or a different fastening method for extremely hard materials.
- Driver Blade Issue: A slightly bent or damaged driver blade might not be striking the nail head squarely, leading to inconsistent driving.
- Depth Adjustment Setting: Many nail guns have an adjustable depth setting. This allows you to control how deep the nail is driven. Make sure this setting isn’t too shallow. Experiment with it on scrap material.
- Dirty or Worn O-rings: Internal O-rings and seals can wear out or get dirty, causing air leaks and reducing the tool’s power. If other solutions fail, this might be the cause.
Adjusting Depth on Your Nail Gun
Most modern nail guns feature an adjustable depth-of-drive mechanism. This is usually a knob or lever located near the nose of the tool.
- Identify the Adjustment: Look for a wheel, dial, or sliding lever, often with “+” and “-” markings or a numerical scale.
- Increase Depth: To drive nails deeper, adjust the setting towards deeper sinking (often marked with “-,” “down,” or higher numbers).
- Decrease Depth: To drive nails shallower, adjust towards less sinking (often marked with “+,” “up,” or lower numbers).
- Test and Refine: Always test your settings on scrap material identical to your project wood. Make small adjustments and re-test until you achieve the desired result.
4. Nails Bending or Curving
When nails consistently bend or curve instead of driving straight, it’s a sign of a problem.
- Improper Nail Collation: Nails are held together in strips or coils by glue, wire, or plastic. If the collation angle is wrong for your nailer (e.g., using a 30-degree nail in a 20-degree nailer), the nail won’t seat correctly and can bend. Always verify the collation angle of your nails matches your tool’s specification. You can often find this information on the tool itself or in its manual.
- Striking Knots or Very Hard Spots: As mentioned before, hitting dense areas in wood can force a nail to bend. Try to avoid these spots if possible.
- Low Air Pressure: Insufficient power can cause lighter nails to buckle. Ensure adequate air pressure.
- Bent Driver Blade: A driver blade that is even slightly bent won’t strike the nail head squarely, causing the nail to go in crooked and bend.
- Worn Magazine or Nose Assembly: If the magazine or the part of the tool that guides the nail is worn or damaged, it can misalign the nail as it’s fired.
Nail Collation Angles Explained
Nail collation refers to how the nails are assembled into a strip. The most common types are:
| Collation Type | Angle | Description |
|---|---|---|
| Wire Weld | Very slight angle or straight | Nails are welded together with thin wire. Often used in framing. |
| Plastic Collated | Various angles (e.g., 15°, 20°, 21°, 25°, 30°, 34°) | Nails are held together by plastic strips. The angle indicates how the nails are offset from each other. |
| Paper Collated | Various angles (e.g., 20°, 22°, 28°, 30°, 34°) | Nails are held together by paper strips. The angle varies significantly. |
Key Takeaway: The angle of your nail gun’s firing mechanism must match the collation angle of the nails. Using the wrong angle can lead to jams, bent nails, and tool damage.
5. Air Leaks and Hissing Sounds
Hearing a constant hiss of air when the tool isn’t firing is a sign of a leak. This reduces power and can signal a problem.
- Loose Hose Connection: The simplest fix! Ensure the air hose is securely connected to both the compressor and the nail gun’s coupler. Listen for hissing at the connection point.
- Damaged O-rings or Seals: Over time, rubber O-rings and seals within the tool can degrade, crack, or wear out, causing air to escape. This is common in high-use tools.
- Cracked Housing or Cylinder: Less common, but a cracked tool body or air cylinder can also lead to leaks.
- Problem with the Trigger Valve: The trigger assembly has seals and valves that can fail, leading to leaks.
Fixing Minor Air Leaks
For small leaks at connections, try:
- Tightening Hose Fittings: Ensure all threaded connections are snug.
- Using Thread Sealant Tape (PTFE Tape): If connections are still leaking, unscrew them, wrap pipe thread sealant tape around the threads, and retighten.
- Checking Couplers: Ensure the quick-connect coupler on the hose and the fitting on the nail gun are clean and free from debris. Sometimes replacing a worn coupler can solve the problem.
For internal leaks (like worn O-rings), you’ll likely need to disassemble the tool. Resources like Sawinery’s repair guides or the manufacturer’s service manual can provide detailed instructions. If you’re not comfortable with internal disassembly, consider taking it to a tool repair shop.
6. Inconsistent Nail Depth (Sometimes Drives Too Deep, Sometimes Not Enough)
This is frustrating because the depth changes without you adjusting the tool.
- Fluctuating Air Pressure: If your compressor’s regulator isn’t set correctly or is malfunctioning, the air pressure can vary, causing inconsistent driving depth. Ensure your compressor is providing a steady PSI. The U.S. Occupational Safety and Health Administration (OSHA) provides guidance on safe workplace pressures, which is good to be aware of for any tool use: OSHA – Air Receivers and Compressors.
- Internal Air Leaks/Malfunctions: As mentioned in the air leak section, internal issues can lead to inconsistent power delivery.
- Driver Blade Not Fully Retracting: If the driver blade doesn’t fully retract after each shot, it might not have a full “stroke” on the next nail, leading to varied depths.
- Sequential vs. Bump Fire Issues: If you’re expecting consistent depth with bump fire when the gun can’t keep up, or if the sequential trigger isn’t reset properly, depth can vary.
- Debris in the Chamber: Sawdust or small metal shavings can obstruct the driver blade’s path, affecting its stroke.
Troubleshooting Inconsistent Depth
- Check Compressor Regulator: Ensure the pressure is set to the recommended level and remains steady when the trigger is pulled.
- Inspect for Air Leaks: Listen carefully for any hissing sounds.
- Clean the Tool: Perform a basic cleaning of the nose and magazine area. If comfortable, follow your manual for internal cleaning.
- Test Drive Blade Movement: With the air disconnected/battery removed, press the safety tip. Does the driver blade move smoothly and retract fully?
- Try Different Nails: Occasionally, a slight variation in nail manufacturing can cause inconsistent performance. Try a different brand or batch of nails.
7. The Nail Gun Won’t Load Nails Correctly
This can happen if the nails aren’t feeding smoothly into the chamber.
- Incorrect Nail Type/Size: Double-check that you’re using the exact size, type, and collation angle of nails specified for your tool.
- Damaged Magazine Track: The track that guides the nails can get bent or damaged, preventing smooth feeding.
- Debris in the Magazine: Sawdust or small debris can block the path of the nails. Clear out the magazine thoroughly.
- Spring Tension: The spring mechanism that pushes the nails forward can become weak, jammed, or damaged.
- Nose Assembly Issues: If the nose assembly where the nails are ejected is damaged or misaligned, it can interfere with nail loading.
Loading Nails Like a Pro
To ensure nails load correctly:
- Clear the Magazine: Always ensure the magazine is empty and clean before loading new nails.
- Fan Out Nails (Plastic Collated): For plastic collated nails, sometimes you need to gently “fan” them out slightly so they align properly.
- Push Down Firmly: When loading a strip of nails, push them down firmly and ensure the magazine cover closes securely.
- Check Magazine Alignment: Make sure the magazine slides and locks back into place correctly without forcing it.
General Maintenance Tips for Nail Gun Longevity
Preventative maintenance is key to avoiding many of these