Nail gun safety is paramount for preventing injuries. Essential gear includes safety glasses, hearing protection, and proper footwear. Always understand your nail gun’s firing modes, keep fingers away from the trigger and nose, and never disable safety features. Regular maintenance and correct nail selection are also key to safe operation.
Hey DIYers and fellow woodworkers! Jack Shaffer here, your go-to guy for all things nailers and sawdust. Ever get that rush of excitement starting a new woodworking project? I know I do! But with powerful tools like nail guns, that excitement needs to come hand-in-hand with something even more important: safety.
It’s easy to get caught up in the speed and efficiency a nail gun offers, but a moment of carelessness can lead to a painful mishap. We’ve all heard those stories, and maybe even know someone who’s had a close call. The good news? It doesn’t have to be you!
This guide is all about making sure your woodworking adventures are as safe as they are productive. I’m going to walk you through the absolute must-knows of nail gun safety, breaking it down into simple, actionable steps. No jargon, just practical advice to keep you and your fingers intact!
Ready to become a nail gun safety pro? Let’s dive in and get those projects built the right way!
Table of Contents
The Power and the Peril: Understanding Your Nail Gun
Nail guns are incredible tools. They can drive nails into wood much faster and with more force than a hammer. This makes projects like framing a wall, building a deck, or even assembling furniture go by in a flash. But this power means they need to be treated with respect.
Think of your nail gun like a powerful helper. It’s there to make your work easier, but you’re in charge. Understanding how it works is the first step to using it safely. Every nail gun has a trigger, a safety contact tip (that’s the part that touches the wood), and a power source (either air from a compressor or a battery).
The biggest dangers come from accidental firing. This can happen if the trigger is accidentally pressed while the safety tip isn’t making contact with a surface, or if the gun is dropped. That’s why understanding the different firing modes and how to control them is so crucial.
Essential Gear: Your Nail Gun Safety Uniform
Just like any skilled trade, wearing the right protective gear is non-negotiable when operating a nail gun. This isn’t just about following rules; it’s about protecting yourself from common injuries. Let’s go over what you absolutely need:
1. Eye Protection: Your First Line of Defense
This is the most critical piece of safety equipment. Nails can ricochet, wood splinters can fly, and debris can be ejected at high speeds. Standard eyeglasses aren’t enough. You need safety glasses or goggles that meet specific safety standards, like those from the Occupational Safety and Health Administration (OSHA).
- Look for ANSI Z87.1 certification on the eyewear.
- Ensure they fit snugly and comfortably over your eyes.
- Consider full-face shields for extra protection, especially when working overhead or with harder materials.
- Keep them clean so your vision is always clear.
2. Hearing Protection: Saving Your Senses
Nail guns can be loud! Repeated exposure to loud noises can lead to temporary or permanent hearing loss. It’s not just about comfort during use; it’s about long-term health.
- Earplugs: These are small, insertable devices that fit into the ear canal. They are often lightweight and easy to carry.
- Earmuffs: These cover the entire ear and generally offer a higher level of noise reduction. They can be more comfortable for longer periods for some users.
- Choose protection with a Noise Reduction Rating (NRR) of 20 decibels or higher.
3. Foot Protection: Sturdy and Supportive
Working with heavy tools and materials means your feet are also at risk. Dropping a nail gun or having materials fall on your feet can be serious.
- Always wear sturdy work boots.
- Steel-toe or composite-toe boots offer the best protection against impacts.
- Ensure they have good ankle support for stability on potentially uneven workshop floors.
- Non-slip soles are a must to prevent falls.
4. Gloves: For Grip and Minor Protection
While not always mandatory for the actual firing of nails, gloves can provide a better grip on the tool and protect your hands from splinters, minor abrasions, and the vibration of the tool.
- Opt for gloves that offer both a good grip and some padding.
- Avoid loose-fitting gloves that could get caught in moving parts of the tool.
Understanding Nail Gun Firing Modes
Most modern nail guns offer different firing modes. Knowing which mode to use and when is fundamental to safe operation. It’s usually controlled by a switch or selector on the tool itself.
Here’s a breakdown of the common modes:
- Sequential Trigger (or “Contact Trip”): This is the safest mode and is recommended for most general woodworking. To fire a nail, you must perform two actions in sequence: first, press the safety contact tip (the nose of the nailer) against the workpiece, and second, pull the trigger. This prevents accidental firing.
- Full Sequential Trigger: This is an even more advanced sequential mode. You must press the contact tip against the wood first, then pull the trigger to fire each nail. To fire the next nail, you release the trigger, then re-press the contact tip and pull the trigger again. This is the most controlled firing method.
- Instant Trigger (or “Nailer Lock” / “Bump Fire”): In this mode, as long as the safety contact tip is held against the workpiece, the tool will fire a nail every time you pull the trigger. If you hold the trigger down and “bump” the contact tip against the wood, it will fire repeatedly. This is faster but significantly more dangerous due to the high risk of accidental firing. It’s best avoided unless you are experienced and working on specific applications like framing where speed is critical.
Pro Tip: Always start with the sequential trigger mode. It’s the safest way to get used to your nail gun and prevent unintended nail discharge.
Best Practices for Safe Nail Gun Operation
Beyond the gear and understanding modes, there are daily habits and practices that make a huge difference in workshop safety. These are the proven essentials that every nail gun user should follow.
1. Read the Manual!
I know, it sounds boring, but the manufacturer’s manual is your best friend. It contains specific instructions for your model, including safety features, maintenance, and operational tips. Every nail gun is a little different, and the manual is tailored to yours.
2. Treat it Like a Firearm (Sort Of)
While a nail gun isn’t a firearm, you should adopt a similar mental discipline. Never point it at anyone, not even as a joke. Keep your fingers away from the trigger when you’re not actively driving a nail. Always assume it’s loaded and ready to fire.
3. Keep Fingers Away From Trigger and Nose
This is a golden rule. Your finger should only be on the trigger when you intend to drive a nail. Keep your finger off the trigger when you are:
- Picking up the tool
- Carrying the tool
- Adjusting the workpiece
- Clearing a jam
- Making repairs
- Pointing it in the general direction of your foot (we’ve all been guilty of this one, but stop it now!)
Similarly, keep your fingers away from the nose piece. Accidentally pressing it against a surface and having the trigger pulled can result in a nail going where you least expect it.
4. Never Disable Safety Features
Some people think they can “improve” a nail gun by disabling the safety contact tip or otherwise bypassing safety mechanisms. This is incredibly dangerous and is a leading cause of accidents. The safety features are there for a reason – to prevent injuries.
5. Use the Right Nail for the Job
Nail guns are designed to use specific types and sizes of nails (or staples). Using the wrong kind can cause jams, damage the tool, or lead to misfires. Always check your tool’s manual or specifications for the correct fasteners.
| Nail Gun Type | Common Nail Sizes/Types | Material Compatibility |
|---|---|---|
| Framing Nailer | 3-1/2 inch, 2-1/4 inch (common sizes); Full round head or clipped head | Softwoods, hardwoods, engineered lumber |
| Finish Nailer | 1-1/4 inch to 2-1/2 inch; 15-gauge or 16-gauge (e.g., 15GA or 16GA brad nails) | Hardwoods, softwoods, plywood (for trim, molding, cabinetry) |
| Brad Nailer | 3/4 inch to 1-1/2 inch; 18-gauge (e.g., 18GA brad nails) | Thin woods, delicate trim, crafts, tacking small pieces |
| Stapler | Wide range of crown widths and lengths (e.g., 1/4 inch to 9/16 inch crown) | Upholstery, sheathing, fencing, light framing |
6. Proper Tool Handling
Always hold the nail gun with both hands, if possible, especially when in use. This gives you better control and stability. Never carry the nail gun by the hose or cord. When moving around the workshop or job site, engage the trigger safety or, if applicable, turn off the tool and disconnect the air hose or battery.
7. Secure Your Workpiece
Make sure the material you are nailing into is stable and won’t move when the nail is driven. Use clamps or other holding devices if necessary. An unstable workpiece can cause the nail to deflect, leading to difficult-to-remove pins or even ricochets.
8. Be Aware of Your Surroundings
Always survey the area around you before firing. Ensure there are no other people within the potential path of a nail. If you’re working on a job site, be mindful of electrical wiring or plumbing that might be behind the surface you’re nailing into. A small mistake here can cause major damage.
9. Clear Jams Safely
Nail jams happen. When they do, turn off the tool, disconnect the power source (air hose or battery), and then carefully remove the faulty nail. Never use your fingers to dislodge a nail if there’s a chance the tool could still fire. Use pliers or a specialized nail puller if needed.
10. Regular Maintenance
Keep your nail gun clean and well-maintained. Check for any loose parts, damaged seals, or worn components. Refer to your manual for lubrication and maintenance schedules. A well-maintained tool is a safer tool.
For more detailed safety guidelines, the Common Ground Minnesota C-Tech program offers excellent resources for woodworkers.
Pneumatic vs. Cordless: Safety Considerations by Type
The two most common types of nail guns for DIYers are pneumatic (air-powered) and cordless (battery-powered). While the core safety principles remain the same, there are a few nuances to consider for each type.
Pneumatic Nail Guns
These are powered by an air compressor via a hose. They are powerful and reliable but require managing the air system.
- Air Hose Safety: Ensure the air hose is in good condition, free of leaks or damage. Store hoses neatly to avoid tripping hazards. Always disconnect the hose from the compressor when not in use or when performing maintenance.
- Air Pressure: Never exceed the recommended air pressure for your nail gun. Over-pressurizing can cause the tool to malfunction or even burst. Adjust pressure according to your tool’s specifications, usually found in the manual. A good starting point for many applications is 70-100 PSI, but always verify.
- Compressor Safety: Ensure your air compressor is properly grounded and maintained according to its manual. Be aware of where the exhaust is directed.
Cordless Nail Guns
These are powered by rechargeable batteries, offering great portability and convenience. However, battery management and tool electronics have their own considerations.
- Battery Handling: Follow the manufacturer’s instructions for charging and storing batteries. Keep batteries clean and dry. Dispose of old batteries properly as they can contain hazardous materials.
- Tool Power: Even without an air hose, these tools pack a punch. The same trigger control and contact tip awareness applies.
- Electronics: Be careful not to expose cordless nail guns to excessive moisture or extreme temperatures, which can damage the internal electronics.
Common Nail Gun Injuries and How to Avoid Them
Knowledge is power, especially when it comes to preventing injuries. Understanding how accidents happen is half the battle.
1. Accidental Discharge to the Hand or Foot
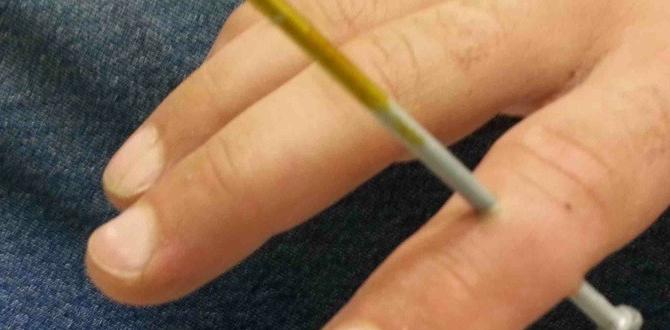
This is the most common injury. It often happens when the trigger is accidentally pulled while the tool is near the body, or during “bump fire” mode mistakes.
Prevention: Strict adherence to trigger discipline (finger off trigger until ready to fire) and using sequential fire modes are key. Always keep hands and feet away from the nail path.
2. Nail Ricochet
Nails can bounce off hard surfaces, knots in wood, or hit metal fasteners inside salvaged materials.
Prevention: Always wear your safety glasses. Be aware of what you are nailing into. If you hit something unexpectedly hard, stop and investigate. Avoid nailing into metal.
3. Missing the Workpiece
This happens when the nailer slips or the user misjudges the placement.
Prevention: Secure your workpiece properly. Ensure a stable grip on the nail gun. Use sequential firing mode to prevent accidental firing when your aim isn’t perfect.
4. Nail Going Through the Workpiece
This is more common with thinner materials or when using longer nails. The nail might emerge on the other side, potentially hitting skin.
Prevention: Use the correct nail length and gauge for the material. Ensure the workpiece is backed by something solid if possible, or use a sacrificial backing board. Be mindful of the backside of your work.
5. Tool Malfunction Leading to Injury
This could be a jam leading to an unsafe clearing attempt, or a dropped tool.
Prevention: Regular maintenance is crucial. Safely clear jams by disconnecting power first. Always handle the tool with care and use proper carrying techniques.
The National Institute for Occupational Safety and Health (NIOSH) provides extensive resources on power tool safety, including nail guns, and emphasizes the importance of training and personal protective equipment.
Nail Gun Safety Checklist: Before You Start
Before you even pick up your nail gun for a project, run through this quick checklist. It’s a great habit to form!
- Personal Protective Equipment (PPE): Are my safety glasses on and securely fitted? Is my hearing protection in place? Are my work boots on?
- Tool Check: Is the nail gun clean and in good working order? Are the safety mechanisms functioning correctly? (e.g., contact tip depression, trigger function)
- Fastener Check: Am I using the correct type and size of nails/staples for the tool and the material?
- Power Source: (Pneumatic) Is the air hose connected securely? Is the air pressure set correctly? (Cordless) Is the battery charged and properly seated?
- Work Area: Is the workpiece secure? Is the surrounding area clear of obstructions and other people? Are there any hidden hazards (electrical, plumbing)?
- Firing Mode: Is the nail gun set to the safest mode (usually sequential) for the task?
Frequently Asked Questions About Nail Gun Safety
Q1: What is the most important piece of nail gun safety gear?
A: Without a doubt, it’s eye protection. Nails can ricochet, and wood can splinter, so high-quality safety glasses or goggles rated ANSI Z87.1 are absolutely essential to prevent serious eye injuries.


